Due to Zbrush site being down for maintenance I looked at some of the Zbrush mini tutorials found online.
This is what I ended up with just using the tips from the tutorials.


I struggle getting the defined detail in this 3D sculpting programs so I decided to just use blender to create the character as I already know how to use that program.
I used this image as a reference so my model was to the right scale and porportions.
At the end of stage one this is how my model looked.

For stage 2 I decided to remesh all the main body parts together and I think I’ll leave the fins as a separate piece for now. I am just slightly concerned that I am adding too much detail too soon but I’m just trying to focus on rough shapes. I am trying to plan ahead and think about how I will go about repotologising this and what detail can be done with texturing
Before I began doing detail work I wanted to look into more resources to see any helpful tips to speed up my workflow.
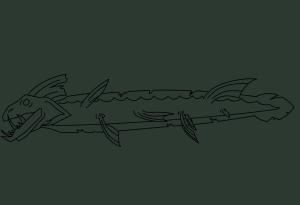
This is how the eel look at the end of stage 2/3


I am really happy with how it looked but then when it came to retopology I was really struggling and had to restart it a few times. The lecturer helped me and recommended I screenshot the model and physically draw where I want the loops to be.

This ended up looking much better and this is how it ended up looking. It allowed me to see where each part will join together and will make UV mapping later on much easier.


I feel like it has lost some of the edge and looks like it is smiling rather than baring its teeth. This is something I’ll look into fixing for creating the multi res sculpt.
Then for the multi res sculpting I went about creating a few brushes to add texture. I wanted to look into more tutorials about how to go about creating custom brushes for blender and this is what I found helpful.
Here are some of the brushes I made.


I also downloaded these images online to use as brushes


Here is how they looked when I tested them out initially.


I need to play about with the settings a little more to get something that will look right on the model. I don’t think I will use them all but some may be good to use as stencils or in small areas for extra texture
Then for sculpting I wanted to focus on smaller details I could use as a normal map to help with texturing. I want to put most of my attention to the head as it will be the main focus and using the flatten tool to try to keep edges sharp


