Author Archives: mcculloch-m

Assignment 4 – Organic Modelling

For this assignment, you are required to model/sculpt, texture, and present via Sketchfab, a Cute Character of your choice, without exceeding 40000 Polygons in your scene.

For this assignment, I had a couple ideas come to mind, such as a cat themed character, a “dust bunny” or a seahorse-type character but after some planning I decided I wanted to make a cute astronaut character, much like these ones;
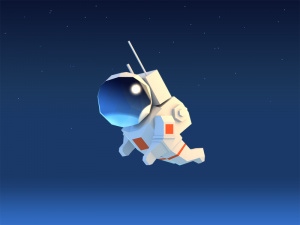
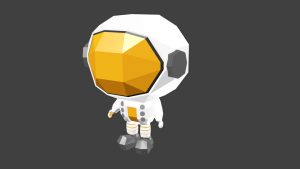
Another big inspiration behind this idea was my favourite video game, animal crossing;

After I’d decided the type of model I wanted to make for this assignment, I needed to do some research and find some tutorials I could follow along the way. Apart from looking up Maya/Blender tips on google, I used this video for reference quite a lot when creating my model;


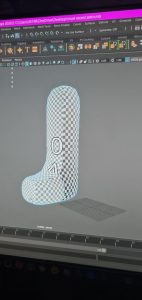
I had initially ran into some problems, e.g. I was struggling to get the poly count below 40,000 and there were some problems with the UV maps as well, such as this one,
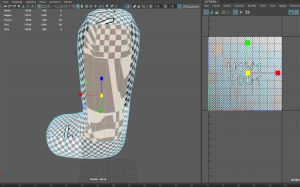
Because originally the mesh was for two leg models rather than one, so I ran into some problems with it when I was trying to organise the UVs. however this was easy fixed, I just removed the faces that were making things awkward and used the “fill hole” option in Maya to fill in the gap. once I put all the edges back in where they needed to be using the multi-cut tool, I was able to move and reshape the leg to make it look back to normal while also fixing the UV maps.
I was able to bring the poly count down by changing some of the shapes from awkwardly sculpted ones in blender, when I brought my model from blender to Maya some of the shapes and UVs got a bit messed up. Both hands had way too many edges and faces for just a simple sphere so I deleted it and added spheres in using Maya.

This was how it looked before painting.

I felt like my astronaut didn’t really have any personality or anything that really differentiates from any other astronaut model so I decided too add just a small flower to the helmet.
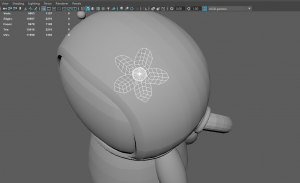
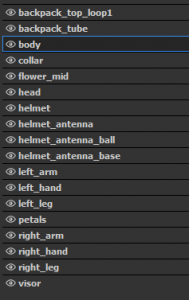
As you can see from the list above the is a material named “head”, that’s because I had planned to add a head with an ‘animal crossing’-type face behind the visor, and I wanted to make the visor see-though but unfortunately I didn’t leave myself enough time to research how to do this properly. So my astronaut does have a head, we just cant see it;
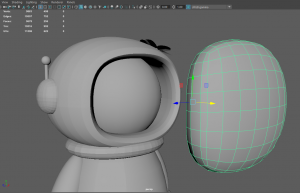
After the model was complete I had to export my model into Adobe Substance Painter to apply textures and bring the little character to life. I regret not pre-planning this or doing any concept art as it took some time looking through and decide what colours and materials looked best on the astronaut. I wanted to go for something cool/cute looking but nothing too crazy, because usually astronaut suits are just plain and simple. I liked the look of the ‘plastic stripes’ texture so that’s what I used over the majority of the model. Here’s how the model looked after painting;
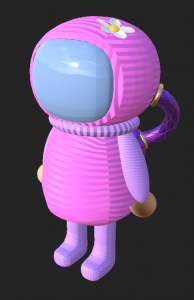
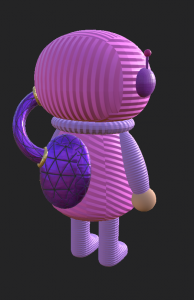
I’m pleased with the way my model turned out but looking back on this assignment I wish I had of dedicated more time and this has really helped me learn the importance of pre-planning/pre-production.

Here is the finished model; https://sketchfab.com/3d-models/2e3ff04ec3894fe8bf1a3e0c513c654a


Assignment 3 -15-30 second Animated short (Theme – Adventure)

In teams of 4, create an animated short based on the theme of ‘Adventure’.

1. Pre-production

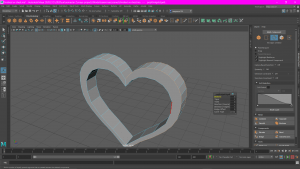
For our project, my group decided on the idea of using a cloud as our main character and we wanted to create of story of adventure based around clouds. The first thing we needed was a plan.
After a lot of discussion and debate over the discord chat, this was the final narrative we decided to work with;

A little cloud trying to find his shape:

  • The cloud notices some interestingly shaped clouds in the distance.
  • Excited, he attempts to copy the shapes, but can’t get it right.
  • Disheartened  he is upset and gives up.
  • During his little emotional outburst, he is unaware of some withered flower that are below him.
  • The flowers are grateful for his little rainy spell,  upon looking down our little cloud sees his reflection in the puddle he created.
  • The flowers rejoicing and thanking him, the cloud smiles and realising he is perfect how he is with the help of the flowers.

We had each created a storyboard to put the narrative into perspective, here’s mine;

After we had got the narrative sorted, we needed to choose what we wanted our cloud to look like. We wanted to go for a low-poly type look, just to keep everything simple, yet cute-looking.

When researching more into our cloud themed idea, I found that there are 3 different types of clouds, high, mid and low level clouds. This was useful for deciphering which cloud type would be best to use and we decided to use some of the low-level clouds. 

I had also turned to YouTube for a few cloud modelling tutorials, such as this one to see which methods would be best when modelling and designing the clouds for our final 30 second animation.


Here are some simple designs I had created to help figure out which clouds would be best to use, and referring back to the different types of clouds, I had decided to base my ideas of two different looking cloud shapes and thought these two would be perfect.

I had also volunteered to design a couple of backgrounds for our animation;

Here is our groups final 2D animatic of an example of how we wanted out final 3D animation to turn out, created by one of my group members.

2. Production Progress

To make things easier we split the narrative of our animation up into 4 sections;

  1. Cloud sees other clouds, looks at himself and gets an idea. 
  2. He attempts to reshape himself to look like the others. 
  3. He gets upset that he cant and floats down towards the ground.
  4. He noticed his reflection which cheers him up, then he floats back up to re-join the other clouds. (My part)

After the models were created and the backgrounds were done, all that was left to do was animate and render. For my part, I wanted to make the cloud down at the reflection of himself, then look at himself (from left to right) and then realise that he actually looks fine. However, the only was I could communicate these feelings/thoughts to the audience was through moving either the eyes or the arms, as we didn’t have dialogue or narration. This was the first attempt;

And here are parts 1, 3 and 4 put together;


3. Finished Animation 

After a lot of editing, tweaking and rendering (and figuring out how to work the camera), this is how my part of the final animation looked along with the finished animation;


Assignment 2 – Animation Studies

Using the Monty Rig or Ultimate Walker Rig, create 2 short animations:

  1. One should be a study in weight of motion / body mechanics of the character – An action the involves the whole body moving – for example jumping.
  2. The 2nd animation should be a study in conveying emotion / personality of character – For example scared / happy.

Motion/Body Mechanics (Ballet Spin/Leap)

For my final motion/body mechanics animation, I wanted to animate a ballet dance move/leap. I wanted to do this as I’m interested in how ballet dancers move so gracefully, so I thought why not study it and use it for this assignment.

Research

  • 12 principles of animation

To familiarise myself with the 12 principles of animation, I read through this website; https://www.creativebloq.com/advice/understand-the-12-principles-of-animation  which was really informative and useful. I kept it open while I was working so I could reference back to it. I found myself constantly referring back to principle number 6 as it really applies to what I hope to achieve in my body mechanics animation study,

  • Achieving weight in animation

To help me better understand the physics behind how a ballerina spins on her toes, I used YouTube as a reference and found this video: https://www.youtube.com/watch?v=l5VgOdgptRg

I’m so glad I found this video as it was so so helpful to me when I was animating the character doing the same spin, I didn’t follow it exactly, for example, the ballerina kicking her leg out for momentum wasn’t necessary, as I wasn’t making my character spin for very long.

To animate the leap I used this video; https://www.youtube.com/watch?v=9AI5VPQK7_I this was also a very good video as I was able to study the flow of a ballerina and I was really paying attention to what they were doing with their feet/ankles as I want my animation to be as accurate as possible and the positioning of their feet is a big part of ballet.

  • Thumbnails/animatic

I created this short animatic GIF to help visualise what I wanted to Create in Maya. (click image to play GIF)


Animating

For animating this, I looked back at some of the lecture tutorial videos from last semester on keyframes and movements.

Initially, I decided to use the Ultimate Walker Rig, however after a few attempts at animating with this rig, I couldn’t seem to get it right, this is as far as I got;

ultimate walker attempt

After a few tries with the ultimate walker rig, I had to switch to the monty rig.

As this animation would be 24fps (frames per second), I decided to use a keyframe every 4 frames. Once I moved my characters to where I wanted it to end up in each of the key frames, Maya did the rest for me and filled in the in-between frames, although I did have to adjust correct a good portion of it.

Final Animation and SyncSketch Link

body mech playblast

https://syncsketch.com/pro/#/project/148081/reviews


Emotion/Personality Study (Jump scare)

Research

A lot of the research for this animation was the same material as I used in the previous animation such as the 12 principles of animation and the keyframe studies, but for the physics side of things, I was able to just act the movements out myself to better understand how to create them.

  • Thumbnail/animatic

Here is another animatic I made to show what I wanted this animation to look like. (click image to play GIF)

Animating

Much like my research, I used the same animating techniques as I talked about in the last animation, having a key frame every 4 frames and moving the character appropriately.

Sound

For the sound I used a YouTube to WAV converter and just imported the sound through Maya.

Final Animation and SyncSketch Link

monty rig playblast

https://syncsketch.com/pro/#/project/148081/reviews

Assignment 1- Introduction to 3D Modelling

Model, UV unwrap, texture and real-time render one of the following:

  • Windmill
  • Mantel Clock
  • Treasure chest & treasure
  • Sword & shield
  • Sci-Fi door
  • Old Well
  • Magic Witch / Wizard Staff

This assignment will encourage you to design and practice the following skills:

  1. Using referencing images or creating your own concept from references
  2. 3D Modelling Techniques
  3. UV unwrapping
  4. Basic materials & textures
  5. Real-time rendering in Sketchfab

1.  References and Concept Art

  • Chest

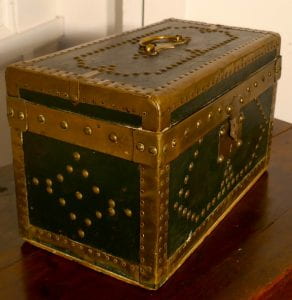
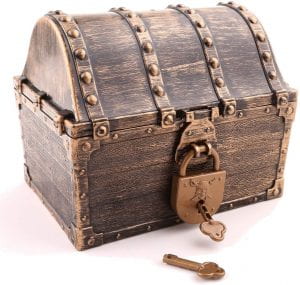
I’d decided to go for the chest design as I thought overall it would be the easiest, and it had definitely been the only idea that stuck out and interested me most.  However, at this point, I hadn’t really thought about any themes and I was just planning on creating a standard, stereotypical treasure chest. so I gathered some reference images and began planning.

Initially, I thought I should go with a flat topped chest as it would be much easier for me when it came to modelling and texturing it.

But after some thought and research I though Id be better off doing a different shape as it would be more challenging for me and it would look more aesthetically pleasing for me to take on a more complicated shape.  So, after some searching, I’d found a shape I liked

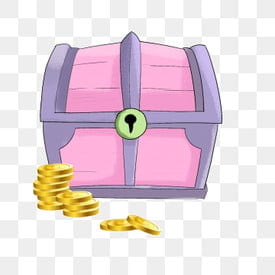
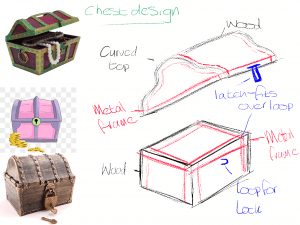
I then began to create some concept art of my own that I could use and refer to when modelling rather than basing all of my model off of the images, but half way through, when deciding on what colour I wanted it, I had an idea on what theme I wanted to do. Firstly, I’d decided that I wanted to make my chest pink, however, this colour wouldn’t make sense for if this was a chest for your typical pirate, so I thought it’d be a really good idea to base my chest off of a mermaid/under the sea theme.

I’d found some images of pink mermaid chests and used them for ideas to add to my concept art. This is the final sketch of what I want to achieve in my model.

  • Extra details

As if have chosen to design a treasure chest and treasure, I had to plan what kind of treasure I wanted to fill my chest with, so I made a list with some ideas;

  • Coins.
  • Lock.
  • Key.
  • Hairbrush.*
  • Hand mirror.*
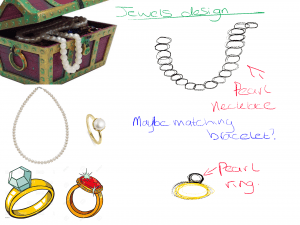
  • Jewels and Jewellery.

*(I had to discard these ideas due to time restrictions/the difficulty of them)


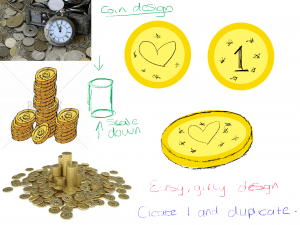
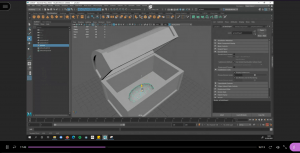
When designing the coins I realized that I was going to be making it difficult for myself if I have to fill the entire chest with coins and other small objects, so I was planning on just creating a false bottom in the chest.

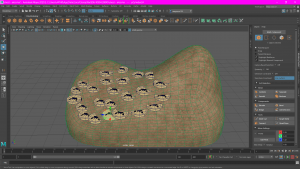
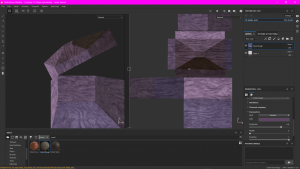
After my 1 to 1 tutorial with Michael on the 3rd of March, he was able to provide lots of tips and tricks, but he had a great suggestion that was much better than doing a false bottom. He suggested that I made what he referred to as a “blob” for the bottom of the chest that would later be textured and painted to look like a big pile of coins. I really liked this idea and it meant that now I wouldn’t have to duplicate and place hundreds of little coins.


2. Modelling

  • Chest

Before I started modelling, I made sure I had the recording of my tutorial with Michael handy so I could follow along with his advice while model my chest.

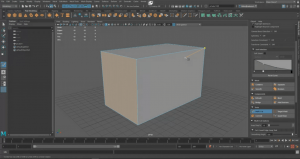
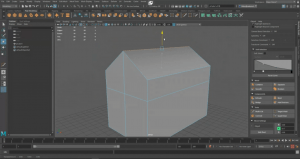
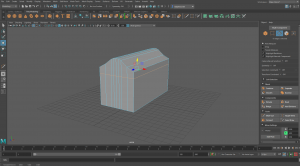
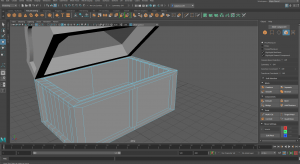
I started off my model with a basic cube and scaled it to the size I wanted the whole chest to be, top and bottom.

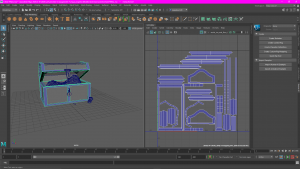
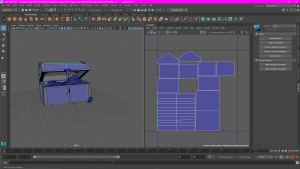
After I finished modelling, my lecturer helped me out with getting it ready for uv mapping etc.

  • Chest “loop” 

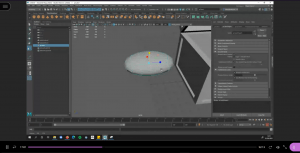
For the loop on the front of the chest I used the doughnut shape in Maya, scaled it down in size and then cut the shape in half. I then placed this on the front of the bottom part of the chest model.

  • Chest “latch”

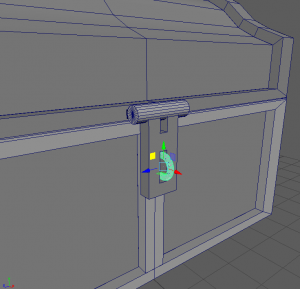
For this, I used two separate shapes. I started with a cylinder and a cube and scaled them down to fit nicely.

After I’d achieved the shape and size I wanted, I created a hole in the latch for the loop of the chest to fit into, in order to lock the chest.

Here is the finished latch model.

  • Lock

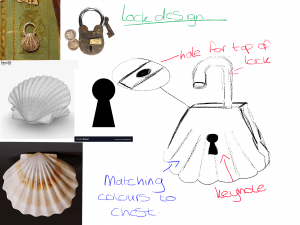
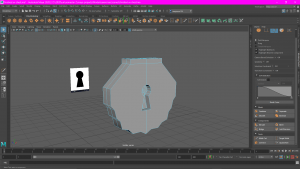
When modelling the lock I also used two separate shapes. I started with the same shape as I did for the chest loop and used the same method to achieve the shape, only this time i use the extrude tool to pull down either end of the loop to make it look more the the top of a padlock.

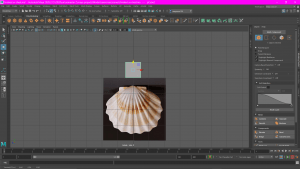
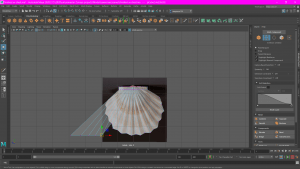
Then, for the bottom part of the lock, I used some more of Micheal’s advice from our 1 to 1 advice talk. He suggested for any complicated shapes, like the shell shape I’m using for my lock, that I started off with a large block and then use the multi-cut too cut out the shape I wanted. For this, I decided to use a reference image of a shell behind my model and follow the shape of  that.

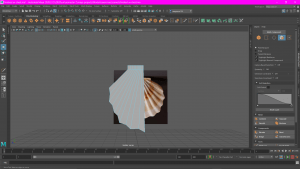
Before I got to cutting the shape, I decided to scale out the vertices on the top to create a trapezium-like shape. The I used the multi-cut tool to create lines where the bumps on the shell were going to be.

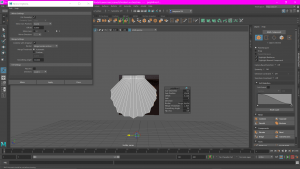
This is how it looked when I finished cutting it.

As I was only working off of one side on the model, I had to ensure that the other side looked the same, so I used the multi-cut tool again to cut the model in half. After this, I deleted the other side of the model and simply mirrored what I was left with.

I think I found the lock the hardest to model overall.

  • Key

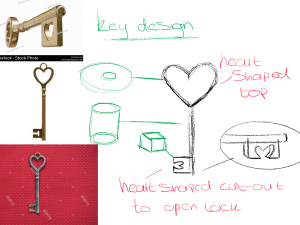
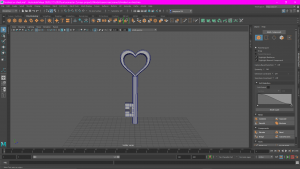
For the key I used two different cube shapes, cut into shape,  and a cylinder shape.  This model was also quite difficult but I  really enjoyed the challenge.

  • Sand “blob”

  • Coins

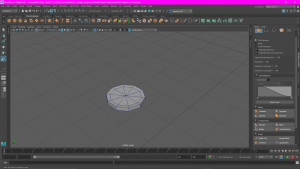
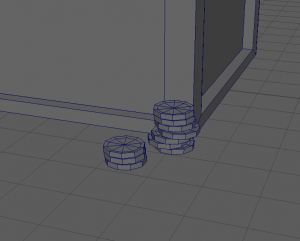
For the coins, I only had to model one, then I cloned it lots of times and placed them all around the sand blob, and some in front of the chest on the ground.

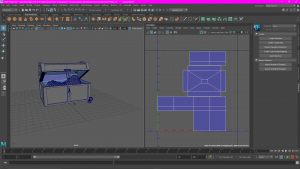
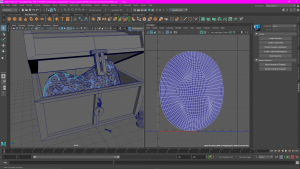
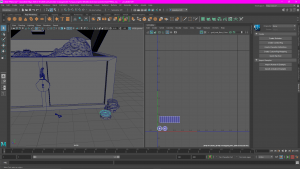
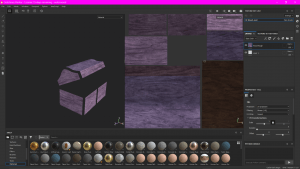
3. UV mapping

  • Chest

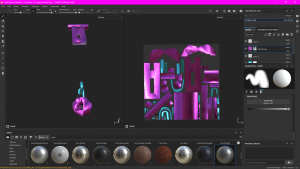
  • Loop, latch and lock

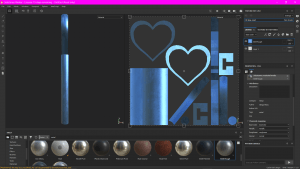
  • Key

  • Sand

  • Coins

4. Basic materials & textures

  • Chest

  • Loop, Latch and Lock

  • Key

  • Sand

  • Coins

5. Real-time rendering in Sketchfab

I used this YouTube tutorial for uploading my model to Sketchfab:


 Reflection

I really enjoyed this assignment, it was really challenging but I learned so much from it. Unfortunately, I wasn’t able to achieve what I wanted overall in the final outcome but that was due to me underestimating the amount of time it would take. The biggest lesson I learned from this was the amount of time and commitment that goes into modelling/animation and I am definitely going to dedicate more of my time into working on my other assignments.

I’m still not 100% confident with UV mapping but I’m happy that I can now at least say I know what I’m doing! It was very helpful and reassuring that I was able to ask Alec for assistance with my mapping. I had also received some advice from a few classmates to help better my model.

Week 13 – Semester 1 Portfolio.

Week 1-6: Forest Themed World

world theme thumbnails (week 2, task 1)

world theme thumbnails (week 2, task 1)

world theme character design, mushroom boy (week 3, task 2)

world theme character design, candle man (week 3, task 2)

world theme character design, flower people (week 3, task 2)

world theme environment design (week 3, task 2)

world theme thumbnails

larger thumbnail study (week 3, task 1)

colour and emotion study (week 4, task 2)

colour scheme study (week 4, task 1)

colour scheme study (week 4, task 1)

character design (week 5, task 1&2)

character design (week 5, task 1&2)

character design (week 5, task 1&2)

character design (week 5, task 1&2)

character design (week 5, task 2)

Form & Shape (Week 1)


Perspective Study (Week 2, Task 1)
Bouncing Ball Study & Experiment (Week 7, Task 1)

Flour Sack Animation (Week 8, Task 2)


Week 7-13: Constellation World

storyboard 1 (week 7, task 4)

storyboard 2 (week 8, task 1)

character design (week 8, task 1)

character design (week 8, task 1)

character design (week 8, task 1)

animatic part 1 draft 1

background design (week 10)

background design (week 10)

background design (week 10)

 Final Part One
Final Group Animatic

https://www.youtube.com/watch?v=y67JUbKgLok&feature=youtu.be&ab_channel=illbedarnd


Week 12 – Presentation & Assignment Preparations.

TASK 1
Create a group presentation on the development of our final animatic including an edit of the group’s animations licked together, what you’ve learned from working on your animations over the last few weeks, and areas where you might want to add or edit before the final submissions.

For this task I had a lot of preparation to do.

Firstly, I had to gather each piece of work I have done towards our world theme, which was not fun considering how disorganized my computer is 🙁 and format it all into a PowerPoint.

After this I had to write a script that corresponded to the work I had included (image 1).

Next, I had to record myself talking through the animation and send it to Alisa to very kindly edit together for the group.

After creating my part this presentation and seeing all of my work together in one place, I started to feel nervous that there wasn’t as much work as anyone else in my group and from this I knew I had to work really hard for the final portfolio submission.

I’m really glad we were given the task of presenting our work for feedback as I feel that I would be so much more under prepared for the final deadline (week 13). However, getting to see examples of the amount in other students’ work really showed me that I needed to push myself further this week in order to really show off what I’ve learned this semester.

Here is a link to our final week 12 presentation: https://docs.google.com/presentation/d/1wApQLDQl5if3mI5tuQKWaf82xNYm_ljEprWj1XPanAg/edit#slide=id.g656d74726939f69d_0


Week 11 – One to One Feedback Tutorials & Animating 2D Effects.

One to One Feedback Tutorials

There wasn’t really that much discussed during my one to one tutorial with my lecturer as I think everything is going to plan at the minute and I don’t really have any concerns about my course.

Animating 2D effects.

After watching the videos provided on Blackboard I can now say I have a much better understanding of animating 2D effects. They was a lot of advice and animating tips given in this videos so I’ll certainly be referring back to it as often as I can but for now I’m going to work on applying the skills I’ve learned into the animated clouds within my part of the animation to have it ready for our presentation next week.

(I just wanted to mention that the lack of physical work this week was because I was working on getting everything together and ready for next weeks presentaion.)

Week 10 – Reflective Blog & Peer Review & Animating Animals.

Reflective Blog & Peer Review

Unfortunately my Internet was down during class this week and I missed the peer reviews on our blogs.however I will aim to catch up on this with the members of my group or lecturers.

Animating Animals

After watching the examples on Blackboard and reading pages 327-332 of Richards Williams Animators Survival Kit, I now feel I have an excellent understand of how to animate animals. It was very interesting to learn how animating animals can be done through the bouncing ball animation skill I learned in week 7. Unfortunately, I’m not animating any animals in my part of the animatic and since the deadline is 2 weeks from now, I needed to focus on my world design animatic. I really hope to come back to this and try animating some animals when I have the time.

What I did do this week, however, was work on some background designs towards our animatic.

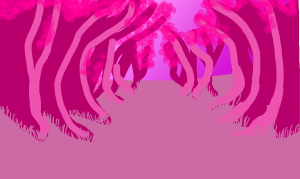
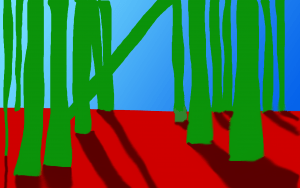
Image 1 and image 2 are both backgrounds I have created using Adobe Photoshop. the reason i had chosen these designs is simply because this is what were agreed on as a group. We aimed to have a background in which the centaur character appears through the clouds and we wanted another to be mountainous. An example of the colour palette I used can be found below the backgrounds as part of the image. I had also tried to use a colour palette (image 3) created by Alisa and used by the majority of the group.

This image is of the background I have design for my part (part 1) of our animatic. I plan to brighten it when it comes to animating it.

Week 9 – Animatics & Secondary Actions.

TASK 1
Discuss and take on advice and feedback on your storyboards. Make necessary changes if needed to your storyboards.

From today’s feedback on my story board (week 8, task 1) I didn’t feel there were any necessary changes needed. My storyboard suitably explains what we wanted to achieve in our animatic.

TASK 2
Create an animatic for your part of the linked animation. Each group to have a combined animatic edit from each team member that links each group member’s animatic together.

This is the first draft of part one of our animatic. I created this in Adobe Photoshop and, to be honest, I’ve achieve exactly what I had planned to do based on discussions with my group. I had planned to create a 5-8 second sequence showing a starry night sky (with constellations of course) with a fade through the clouds into part 2, Alisa’s part. (the map shown at the end is Alisa’s map design.)

I learned from this that communication is key when it comes to creating a group animation. We were all able to keep each other up to date through the channels made on discord for our group. These four channels are “general” for when anyone needs to communicate with the whole group, and then there channels “2-3-4”, “4-5-6” and “6-1-2” and i know that each group member found these channels very useful for communication.

Week 8 – Story boarding & Animating with Forms.

TASK 1
Create storyboards for your chain / linked animation with your teams and work on final designs for characters/creatures to help with design consistency.

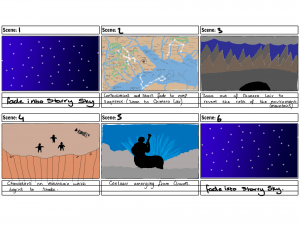
Image 1 shows the our original storyboard (shown in week 7, task 4) and image 2 is the updated version. As you can see, the only differences are scene 1 and scene 6, that’s because we have decided to begin with a fade into a starry night sky for scene 1 and scene 6 would be the same. We came across a slight problem after this decision however. We realized that there would be no point in two people (me and Fionnuala) animating the same scene twice so Fionnuala came up with a plan to use one of character designs (Auriga the goat) to each the map at the need of the animatic, that way there will be a light difference in scene 1 and scene 6 while still in keeping with the plot. (This was decided after the creation of the story board which is why the goat isn’t included.)

As well as the storyboard, we had to work on final character designs for our 30 second animatic. To be honest, character designs and drawing are probably my weakest point when it come to animation pre-production but since it has to be done I gave it my best shot.

I tried to relate each of my characters to a constellations, as that is the theme of our world. Image 1 is a character i had designed based on the star sign Taurus. I decided to use Taurus not only because it is my star sign, also because it represents stubbornness and determination, which is very suiting for our plot. this is represented by the necklace she is wearing.

Image 2 is a character design based off the constellation Orion, however, I struggled to incorporate constellations into his character design. This was one of the main character my group and I had initially agreed on.

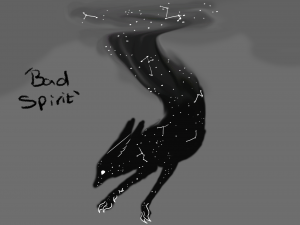
Image 3 is a design idea for the ‘bad spirits’. My idea behind these characters is that they are controlled by our antagonist, the centaur, and do everything they can by coming from the clouds and setting our protagonists off course.

I created each of these images through Adobe Photoshop and to be honest the only one I’m happy with is image 3 of the ‘bad spirits’. I don’t think I’ve really spent enough time practicing character drawing and at the minute I’m finding it quite difficult, especially when drawing people, but that’s only a good reason for improvement! I’m going to try and dedicate more of my spare time to this so I will be able to create better, more detailed, characters.


TASK 2
Animate a flour sack character – Plan out an action, for example, jumping/falling/emotion – whatever takes your fancy.

This week’s homework was to study the way a flour sack would behave when moved around and to make it into a short animation. I decided to make my ‘flour sack’ jump in from the side then wave. I used Adobe Photoshop to create this but I do wish I used Adobe Animate instead. This would have meant that I wouldn’t have had to draw the flour sack over and over again for each frame, however I’ll know this for next time.

I watched each of the videos provided on Blackboard in order to create my final animated flour sack and I’m happy with the way it turned out, although I probably could have included more details such as colour or shadows.

When presenting this animation to my lecturer, he said he liked the way I’ve made it look like the flour sack gets closer to us after the second jump, which, to be honest, was a complete accident. But, now I can remember this in the future if I ever need to animate something similar to this movement.