✨ Design stages ✨
The first thing on my agenda for this assignment was deciding what exactly I wanted to make.
After looking over the assignment brief, I was really torn between making a sci-fi door, a wizard staff, or a sword and shield. I knew that a lot of my friends were making wizard staffs so I ultimately decided not to go with that, and when I was trying to generate some rough ideas I could only come up with one or two rough things off the top of my head for a door.
Therefore, I wound up going with a sword and a shield for my project!
In order to help me brainstorm some more solid concepts, I created a Pinterest board and started compiling anything I thought could translate into a cool sword design, I wanted to try make something rather unorthodox, so I included things like ribbon batons, bubble wands, LED lights, et cetera.

From there, I took a few of my favourite ideas and began sketching them into actual swords just to see how they’d look! I used a sheet of real life sword shapes to help me get a silhouette, and from there I added the fun unique themes like plants and bubbles. (Also a lava lamp sword just for funsies.)
I then had to chose my favourite from the bunch, I was really torn between the candy rapier and the honeycome sword, but I thought the honey theme would be really cute and unique in the end, I really liked the honey dipper as a hilt and thought it’d be a fun challenge to model.
From there, I made some cleaned up references that I could use as a base to model from!
⚝──⭒─⭑─⭒─⭑─ 💫 ─⭑─⭒─⭑─⭒──⚝
✨ Modelling the sword ✨
As it turns out, the honey dipper was probably the easiest part of the model, as it was really similar to how I made my vase a few weeks back, all it took was a cylinder and some edge loops!

Working from the bottom, I thought I’d try and tackle the honey next.
I really had no idea how to approach this, my first thought was to just make a cube, cut it up and extract out the shapes to make something similar to the dripping silhouette, then switch my view and try to shape those again to make it look round.
I really don’t know what I was trying to do, as I wound up making a bunch of really oddly shaped ngons that were causing corners to clip weirdly out of my shape. I think I was planning to use the cut tool to make them into polygons again? I don’t know, it was a bit of a disaster so I scrapped them and tried a different approach.

I looked up some videos to try and figure out how other people modelled honey, I found these two videos on youtube:
They helped me understand roughly the sort of shape and consistency I wanted my honey to look like, however, I still didn’t fully understand the process as they were really sped up and cropped most of the tools out of it. Looking back on these, I realise a lot of it was done using the sculpt tool, however when I was modelling the honey drops I didn’t really know how those tools worked, so I avoided them for the most part.
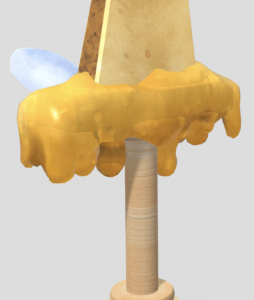
This didn’t stop me though! I figured I just needed a good base to work from, so I shifted from cubes to spheres, and began manipulating the faces and vertices similarly to how the videos did to create heavy gloopy honey drops.

It was a little time consuming, but the final result turned out really nice!

I continued to work like this, using spheres and manipulating the faces to create the rest of the honey drops.

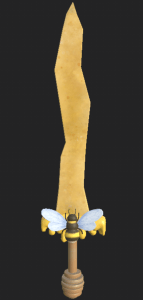
I took a break from the honey and finished off the sword itself and worked on the bee, for the sword I just cut up a cube and shaped it to match my sketch, same with the bee but instead I used a sphere!

Bee close up!

⚝──⭒─⭑─⭒─⭑─ 💫 ─⭑─⭒─⭑─⭒──⚝
✨ Modelling the shield ✨
By this point, the honey was taking ages and what kind of putting me off, I felt like there was definitely a better way to be doing it, which I asked about during my one-to-one with Michael O’Callaghan. During our talk, he showed me how to use the quad draw tool to create those weird organic shapes as a base, and then how to use the sculpt tools to make them nice and smooth.
I used these techniques to create the honey on my shield! (I also went back and used it to make the honey on the hilt of my sword but I forgot to take pictures, agh!)
I started with a hexagon, extruded the top face a few times to make the divets in the middle, and copy and pasted it twice! Easy peasy.

Next I used the quad draw tool, starting with a base shape that I turned into a live object.

Then I maked all the points I wanted, filled the shape with polygons and extruded it to make it a 3d shape, it looked really messy at first but it was much less hassle than my original method.

I was a bit concerned about the honey that was intersecting the honeycomb part of the shield, so I began looking up if there was a way for me to get rid of the parts that were clipping inside. I found this video to be the most helpful!
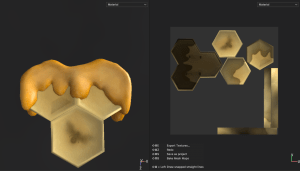
Though, when I used the difference tool, it did do what I wanted but it left me with a bunch of ngons where it cut away the shape, seen below.

I tried to fix them myself but again after fiddling with it for quite a while I decided it wasn’t really worth it and undid the difference tool.
Moving on I began to shape and sculpt the honey, it’s a little hard to see but I wanted to make it look like it was dipping down into the divets in the honey comb, which I tihnk I did quite well! I also tried to get that pulling look on the edges of the drips to really make it look heavy and viscous.

The finished honey!

Next was just adding a few straps on to the back, which I made with some cubes that I bevelled, really simple! I added a bit of a twist to them to make them look like gravity was pulling them, or that they were bent from being shaped around an arm. Just a bit more of a realism kind of thing!

One bigger for the arm to fit through, and one smaller to hold the shield in place!

⚝──⭒─⭑─⭒─⭑─ 💫 ─⭑─⭒─⭑─⭒──⚝
✨ UV Mapping ✨
Now it was time to move on to UV mapping, I did the sword all in one day and the shield in the next, so I didn’t take many pictures as I was trying to get through it as fast as possible.
I started with the bee and I thought it’d be the trickiest, and in a way I felt like I was right, as the auto generated UVs looked like this and sufficiendly daunted me.

I followed Alec’s tutorials from prior weeks and created a planar map that I cut up myself, at first I made all of my UVs really square, and for the most part I felt that it looked fine, but I went back and unwrapped the bee’s body to make the grid more even. The rest of the UVs I was really happy with, though!
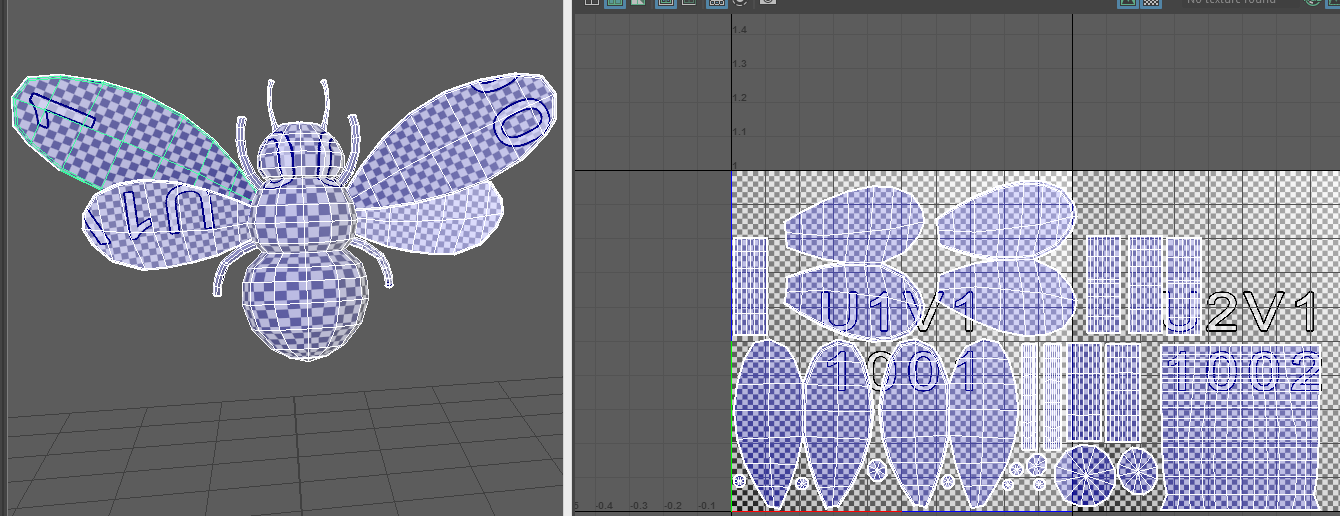
I unwrapped the honey drops similarly to Alec’s tutorial on unwrapping an arm, which did the trick as best as it could! The rest of the model was relatively simple from there on.

The shield was also really simple to unwrap, although Alec helped me with it during a one-on-one tutorial as I wasn’t sure how to approach the honey on the top of it. It was less complicated than I thought it’d be so I’m definitely more confident going forward.

⚝──⭒─⭑─⭒─⭑─ 💫 ─⭑─⭒─⭑─⭒──⚝
✨ Texturing ✨
Last but not least was the texturing stage, I was really looking forward to this! However, I found out that my Huion tablet wasn’t compatible with the Mac I was borrowing without uninstalling the Wacom drivers on there, so I had to texture everything by mouse. It was a little tricky, but after the first while I got into the swing of it and it got a little easier for me.
For each part of the model I worked from a reference, the honeycomb part of the sword was definitely the trickiest part as none of the smart materials really matched the texture I needed, so I painted it on myself with a bunch of layers and different brush tools!
Overall I think this is the part I’m most proud of, it looks great I’m really happy with the result.
Totally forgetting to take pictures once again, I used the same process for all of the sword, I used a smart material for the hilt and handle, but the rest was all painted! When I got to the bee, I finally figured out how to make textures look rough and bumpy, which I used as best I could to make it look fuzzy.
Same process for the shield! I found that actual honeycomb from inside a beehive is actually a lot paler than I first thought, and it’s the honey itself that makes it look yellow and golden, just something I found interesting!
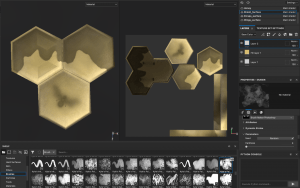
I painted the honey the same way I did the sword, making it more saturated where the honey was most dense, and adding some darker and lighter speckles to emulate bubbles
The finished shield!
I forgot to take pictures of the rendering process on Sketchfab, but it was mostly just messing and tweaking until I felt things looked nice, I used refractive opacity for the honey on both models which did the trick perfectly! I was very pleased to see the bubbles turned out just how I wanted them to.
⚝──⭒─⭑─⭒─⭑─ 💫 ─⭑─⭒─⭑─⭒──⚝
✨ Finished model & Evaluation
Overall, this modeling assignment was definitely a huge learning experience for me. I was truthfully really daunted by this assignment, I felt that it was a huge step up from modelling simple vases and tables. I was also worried my final product wouldn’t meet my own standards, but I was actually pleasantly surprised with the end result!
Looking back over the entire process, I can already see there are things I’d do differently now, which shows that I’m learning and developing my skills which I’m really happy about.
I think my favourite parts of the assignment was the texturing stage, it was finicky but it was awesome seeing the model come to life with colour. The only parts I disliked was modelling the honey and the more tedious parts of it, as I knew I was working harder rather than smarter.
If we were in physical classes rather than learning by ourselves I would’ve felt less out of my depth and would’ve had help more readily available to stop myself from burning out on really tricky parts. Though, I know that can’t exactly be helped so I’m not that upset about it. My model turned out really great and that’s all I could ask for!
