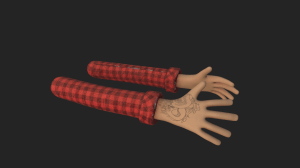
Texture Hand:
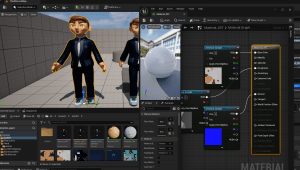
After doing the modelling part and also sorting out a few problems along the way I started doing my favourite part of bringing the hand to life by adding texture and a more vivid colour to the hand, my idea was to use a classic style for the builder’s outfit using a very flashy plaid shirt with the hands in a light skin tone and to give an additional difference a tattoo on the direct hand of a dragon!
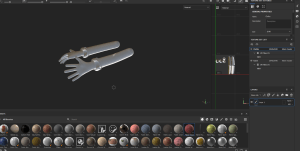
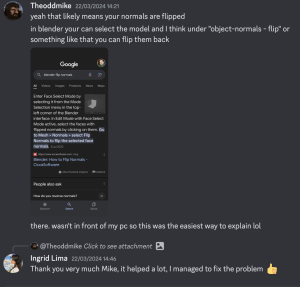
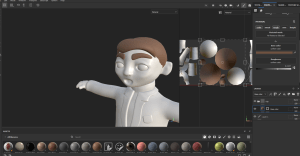
Then, when it came to exporting the hand from Blender to Substance Painter, I had a small problem where I couldn’t understand what was happening to the shape of the hand in the texture. But in order to solve it and help myself, I had to ask Mike for help where he gave me a very quick guide to what was going on so I could solve it and start my adventure in textures.


To give you more of an idea, I used different colours of shirt to test which would look best and I liked the orange the best, I tried to show it to my group but no one said anything so, to avoid being too late, I chose the colour I was going to use.


Final:

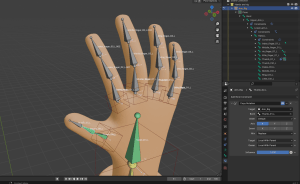
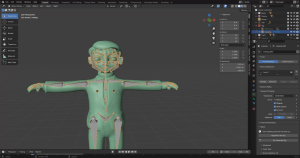
Rig & Animation:
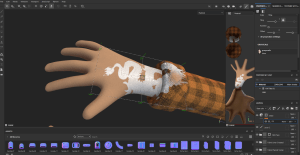
After long hours working on the hand sculpture, I took the first steps to start making the hands. I had a lot of difficulty at first, as it was one of the most complicated steps for me. My biggest difficulty was working with the (Weight Paint) part, where the character’s hands and fingers didn’t work very well, so I had to ask for help to solve the problem and get the fingers to move properly.
Help:
After a long process of understanding how to work with the hands, I got Rachel’s help where she explained to me exactly what I could change and improve in my hand animation, especially in the fingers, which were a big problem, and she told me to change the way I rigged the fingers, which would make a big difference to the movement of the fingers.


After Rachel’s help, I started the whole process all over again from the top of the hand to solve exactly the problems that were in the 3D fingers. I confess that with this new help it was very quick to do and I managed to get the result I wanted!
My biggest difficulty at the moment was only with the fingers when it came to closing my hand and holding things, but in order not to waste too much time I tried to make the movements more robotic so that they looked like they were in a game.
Movement ideas
https://www.artstation.com/artwork/zA5mvD
Test movement:
I confess that it wasn’t perfect because it was my first time making a human hand and also because the animation is very complicated, but I was happy with the result!
Real Estate Agent:
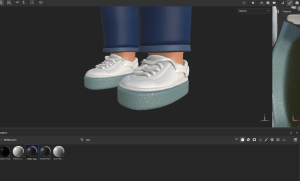
To make the estate agent in the texture part I started by stopping the UV mapping part and then preparing the suit textures by adding more realistic stripes, trainers giving the character a more modern look and for the jumper I wanted a more modern look so that the character looked serious but at the same time modern for the character.


As ideas for visualisation I used different images that were a great help visually.

Process:
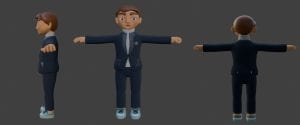
Throughout the process of making the Real Estate Agent texture I didn’t have too many problems, I managed to have a great file transfer and I had a lot of fun putting textures on the doll.
Final:


Design:

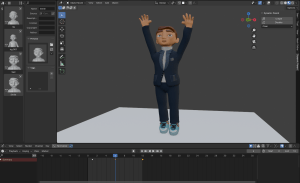
Animation:
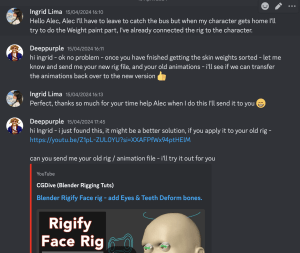
To do the animation part I unfortunately had a lot of delays, my biggest difficulty was doing the squirrel part where it was showing a lot of errors in the face part in particular. With this problem I had a lot of trouble importing it into the Unreal Engine and when I put it in (play) the character’s eye didn’t animate along with the body, so I had to ask one of my tutors for some help and in a few minutes he managed to show me and teach me correctly where I had gone wrong with the skeleton of the animation.


After long hours of trying to solve and make some animations, I managed to solve the problem of importing the character into Unreal Engine so that I could also make the different animations that I had in mind to make, talking to my group they didn’t have many ideas of what animations to make so I wanted to make simple movements of game characters such as breathing, surprised and walking. My idea was to make these three simple animations to use in the game because my games group made it clear that it would only be a few times that the real estate agent would be seen in the game’s stages.


One part I was very happy to learn from this week was to be able to use the ‘Game Rig Tool’. I didn’t have much knowledge of this function in Blender, so I was able to use it and learn by watching some class tutorials which were very helpful, so I was able to save more time that was lost in the process of animating the character.

Animations: