
Now that the Mothman was finish, it was time to finish up his props.
So I started on making sure to place my books together so that I was happy with the size of them before I unwrapped (and to check the models so that I wouldn’t have the issues I had with my models sculpt.
I wanted to add some stitches on the books, but unfortunately while following along with the tutorial, mine didn’t work out that well, even after trying a couple attempts so I had to leave this out.

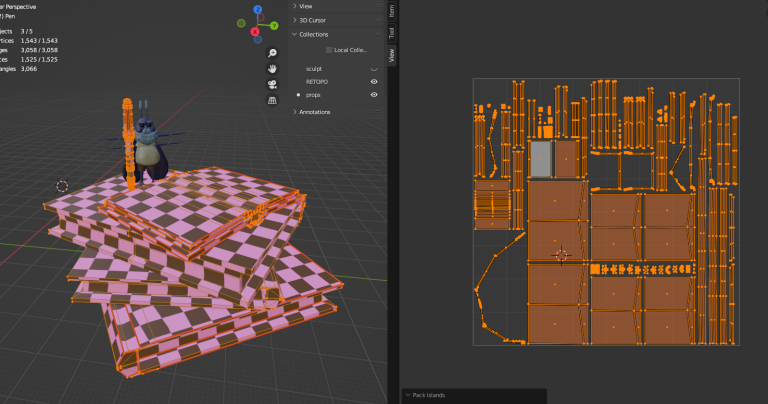
I went ahead and started unwrapping my pen, following the seams until I got nice equal squares. I found that I like to turn my checker amount quite high to keep track of how they are projected over the model.


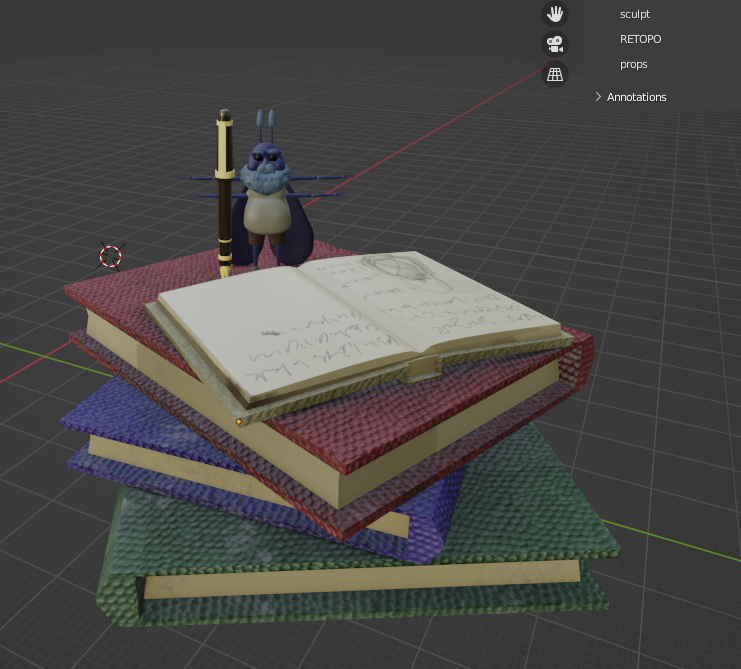
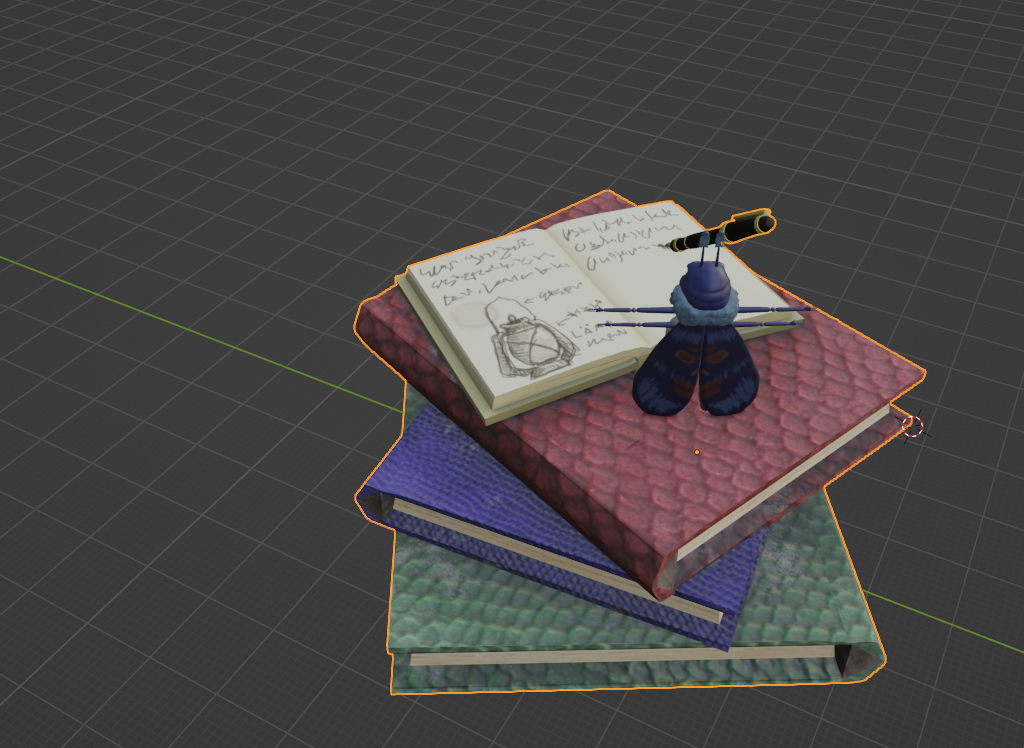
Then I went ahead and sized the books correctly. I decided to stack them on top of each other, but reduced the amount so that they didn’t take away from the Mothman himself. I also went ahead and sized the open book ontop of these. I went and asked opinions on the sizing of the open book, since it felt a bit off to me and others thought it would look nicer with the open book being a bit bigger.
 I did struggle a bit with marking seams on these books, I think I chose a weird amount of bevelling so I was hard to cut seams for me. I did manage to sort out the majority of these into nice equal checkers, but there is a bit f warping around the Boolean cuts I made and where I left a triangle.


I was going to organise my UVs myself but I wanted to try using the pack island feature that Blender has. You can see where I started to organise the pen and straighten some UVs, but this ended up being useless as I let the programme figure out where to place them. This looked fine, but I wasn’t overly happy and I found out that I had missed some n-gons.


I then also wanted to use the multi-res to sculpt in some page lines and things, but since my objects were hard sculpted this didn’t work so well. I decided to just add what I could in SP.
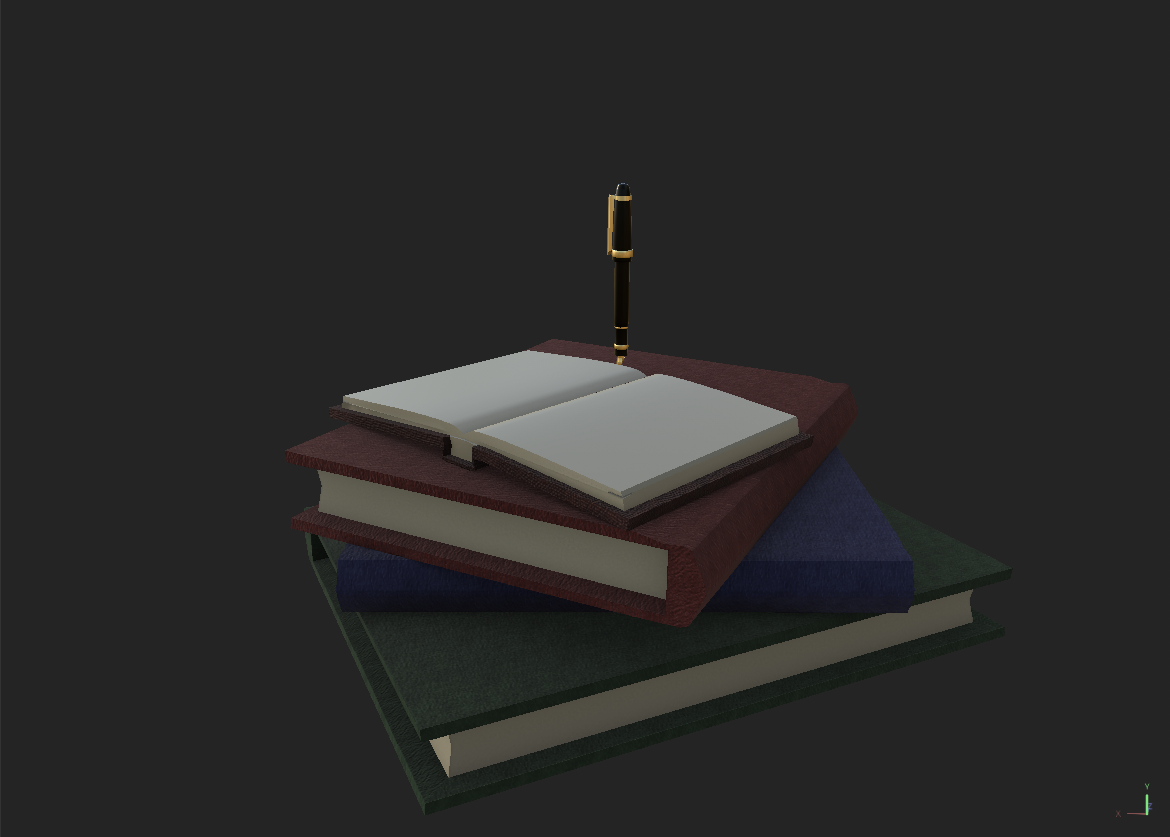
I then went and took this into Substance Painter, adding leather texture and things to my props. There were some issues with this I found out, some areas had overlapped, and it wasn’t looking how I wanted exactly. I did use this as a plan for what I wanted my books to look like in future, having some dust on them for added affect.

I decided to take a break from the props to practice my posing. I knew I wasn’t going to be able to use a more human skeleton so I wanted to make sure to work out my issues using a copy file before I posed for real. The first problem I ran into was my symmetrise wasn’t mirroring correctly because my model wasn’t positioned on the right axis. So for this practice I just extruded the bones out individually. I had two sets of arms, so I decided the waist point was a good way to branch out a second clavicle, built the head bones up to the antennae and was able to bring out bones to the wings.

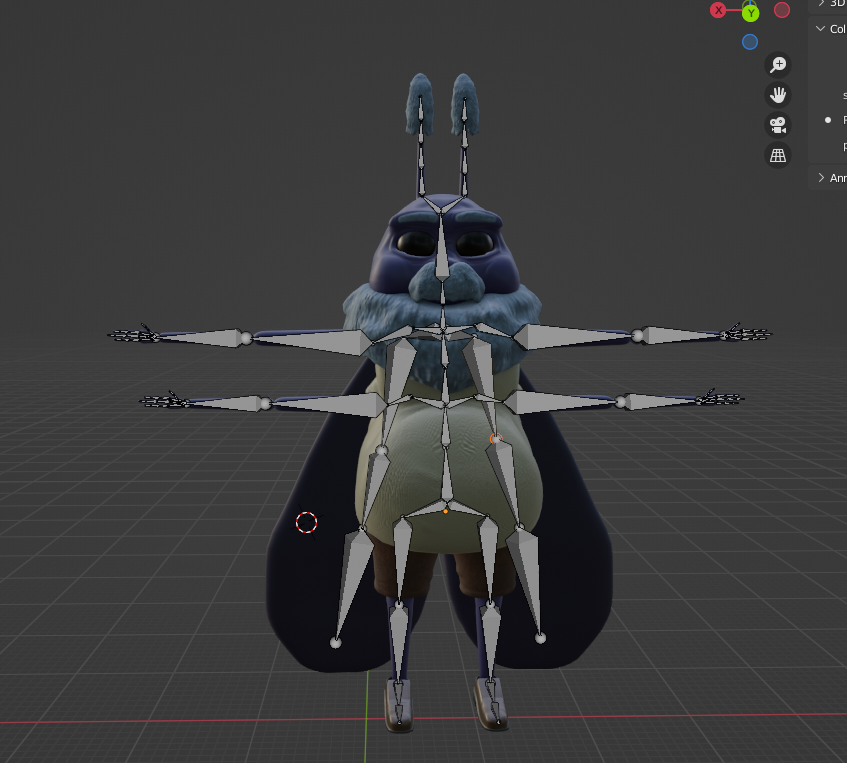
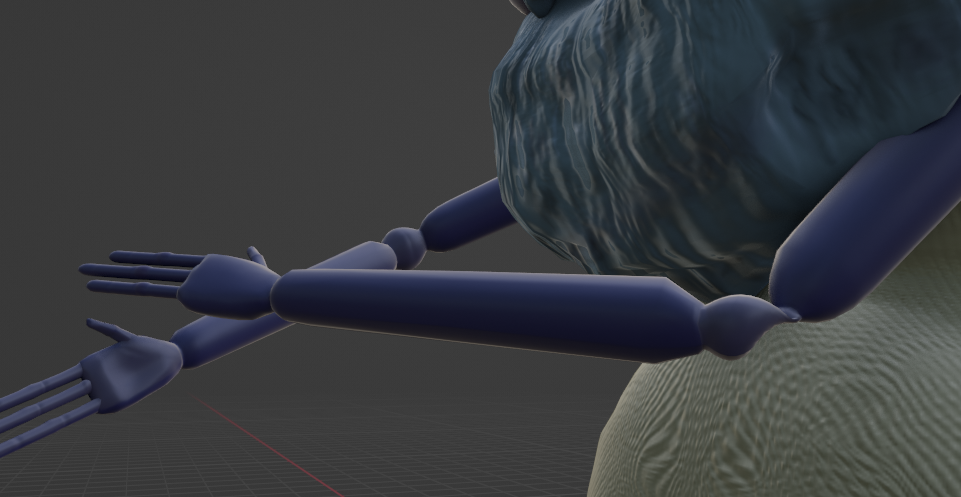
I definitely needed more bones in the arms because they pinched harshly on my elbow areas, this might also be my design’s flaw with these small thin arms and bulbous elbow points that don’t seem to translate exactly as I wanted.

You can see here that I wasn’t using my volume, centre snapping as I lost a thumb when I applied my armature with automatic weights.
I ended my practice with some facial expression, using the grab tool I just manoeuvred the face a bit and got some nice smooth adjustment.
I went and resorted my prop UVs by separating them out, unwrapping and then joining and placing them in the UV map. There is an overlap here, that I fixed before continuing on with the texturing.

This time instead of normal leather like I did previously, I used this lizard skin to get a more monstrous look that I thought might work better for the Hotel Transylvania world. I did have an issue with this one spot, where I use a Boolean cut, I couldn’t figure out a fix for this so I went and jsut used it to my advantage and painted some more discolouration to the pages.


I also went ahead and painted some writing in the book to give the impression that the Mothman was actually writing something with his pen in the pose. I also baked these here and added my ambient occlusion as a soft light layer.

I also really liked the dust effect I had previous and wanted to try use this again.
I brought these into blender, took a step back and realised that I wasn’t entirely happy with this pass on my textures, so I opened my SP file back up and went back to adding more details and changes.
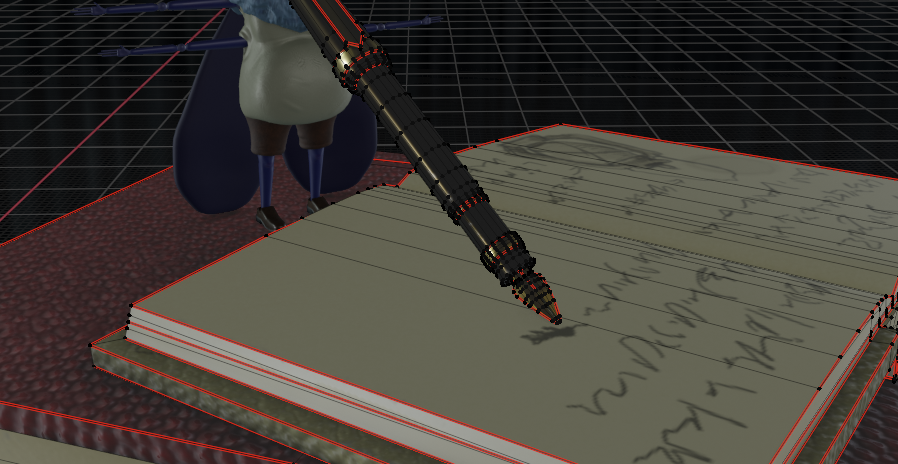
The first thing I did was add some ink to my pen.

I then went and looked up some references of old books and realised that the leather texture doesn’t carry over into the sides, where the texture also ended up not laying correctly. So I changed these areas of the spine to a wooden texture and darkened it to fit. I also looked online for some paper texture, saved it as a PNG and brought it in as a texture and applied these to my closed books. Some of these textures didn’t lie exactly the way I wanted so I had to adjust the tiling on each to fit better and make this less noticeable.

I then went ahead and added a baked light effect. I adjusted this to add some nice lighting and shadows to my piece, but toned them down a bit since I would be adding another light effect to the statue in Sketchfab. I paired this baked light with two layers I painted both light and shadow on. I applied a blur effect to these layers and changed the blending mode and opacity, these combined together gave me some nice environmental tone.


I was trying hard to make this into something that would fit in the Hotel Transylvania movies, but I couldn’t seem to quite hit what I was lookign for. I increased the size of the scales on my books to reduce the noise of them and tested applying my base colour map with different filters to achieve something but since I didn’t know exactly how to fix my problem with the texture, I couldn’t tell what I needed to do.

I went ahead and exported these new texture maps and hooked them up in blender. The dust doesn’t read too well here, and the texturing on the books is still bothering me, but I can always come back to this before the deadline and make some minor adjustments to fix this.
With the textures sorted for now, I went ahead and wanted to pose my Mothman.

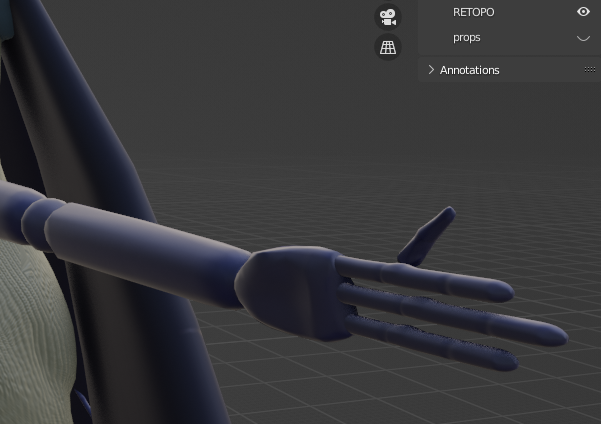
I went and rotated my model to fit the guidelines so my symmetrise would work, and started adding my bones. This time I added and extra bone in the arm and made sure to use my volume centre snapping on so when I applied the armature it would pick up all my fingers.

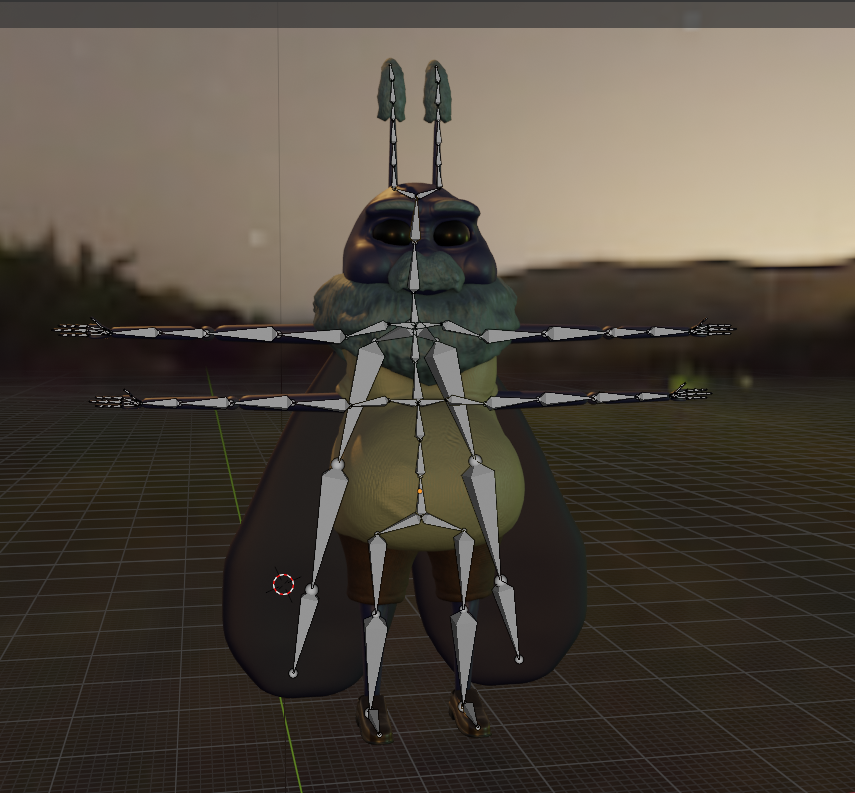
With the armature applied to the model using the automatic weights I went ahead and started posing. You can see here I did still have some warped deforms on my models but I can try fix these using some basic sculpting tools.


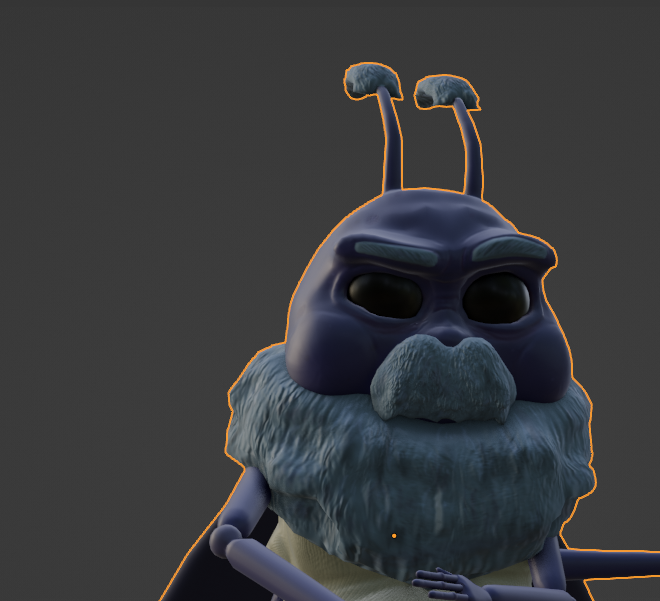
I ended up resizing the moth slightly larger and changed the pose a bit from my sketch to fit better. I think this came out ok, I’m really proud that I managed to get this much done. I may go back and have one last pass on the textures so that they come out a bit better, but as it is I think this is a fine attempt at making a statue, and I had a lot of fun despite a couple moments of frustration that I had. You can see that the UVs do have some errors but there will always be areas that I can improve on for my future work.

