Now that my sculpting was done, it was time to begin the retopo process. This is something I was quite nervous about since I have a lot of complicated shapes in my model so before I started I decided to watch a couple tutorials to pick up some tricks and learn to break up the process into manageable pieces.
I really found the last video from FlippedNormals the most helpful to plan out my approach to retopology. I took some screenshots from this, as they place their essential loops around the body first and I wanted to take notes of these as I didn’t know where these loops should be placed as this is my first model. I then watched how they approached bridges these together with quads and how they made use of extrusions and the smoothing tool as well as adding loop cuts. I am aware that this is a different software but the ideas and approach that they take can still transfer over to Blender and how I will tackle this stage of 3D modelling.
Here I looked at the loops around the face, those around the shoulder, arms, waist and crotch. As well as noting how they ended up connecting these together and why the loops where placed in this way to avoid pinching of the model once it was used for animation/posing.


I made another not of how they made a loop around this extended toe, and while i didn’t get to see how they ended up finishing this part I can assume they extended the loop out and around this area, this is something that got me to think about the neck fluff and antennae of my own model.
RETOPOLOGY OF MOTHMAN
Day 1
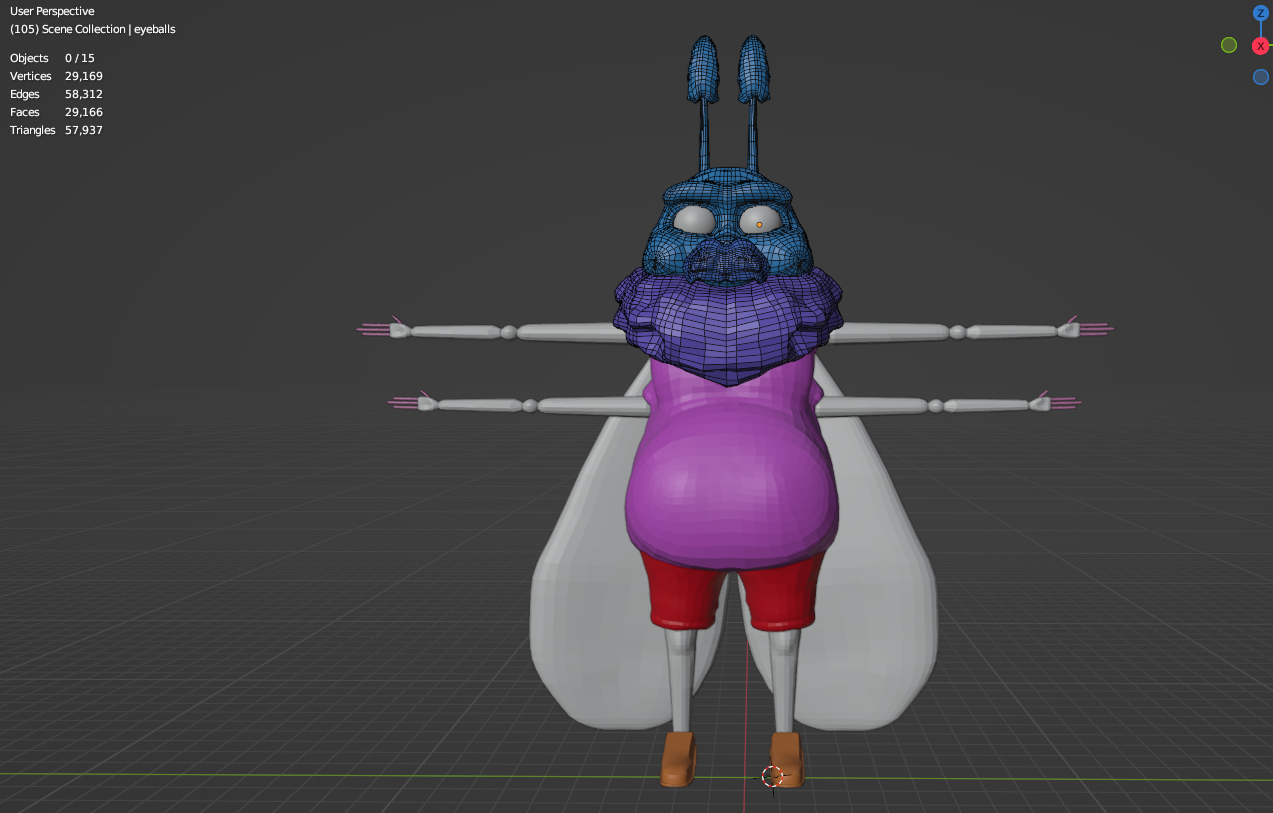
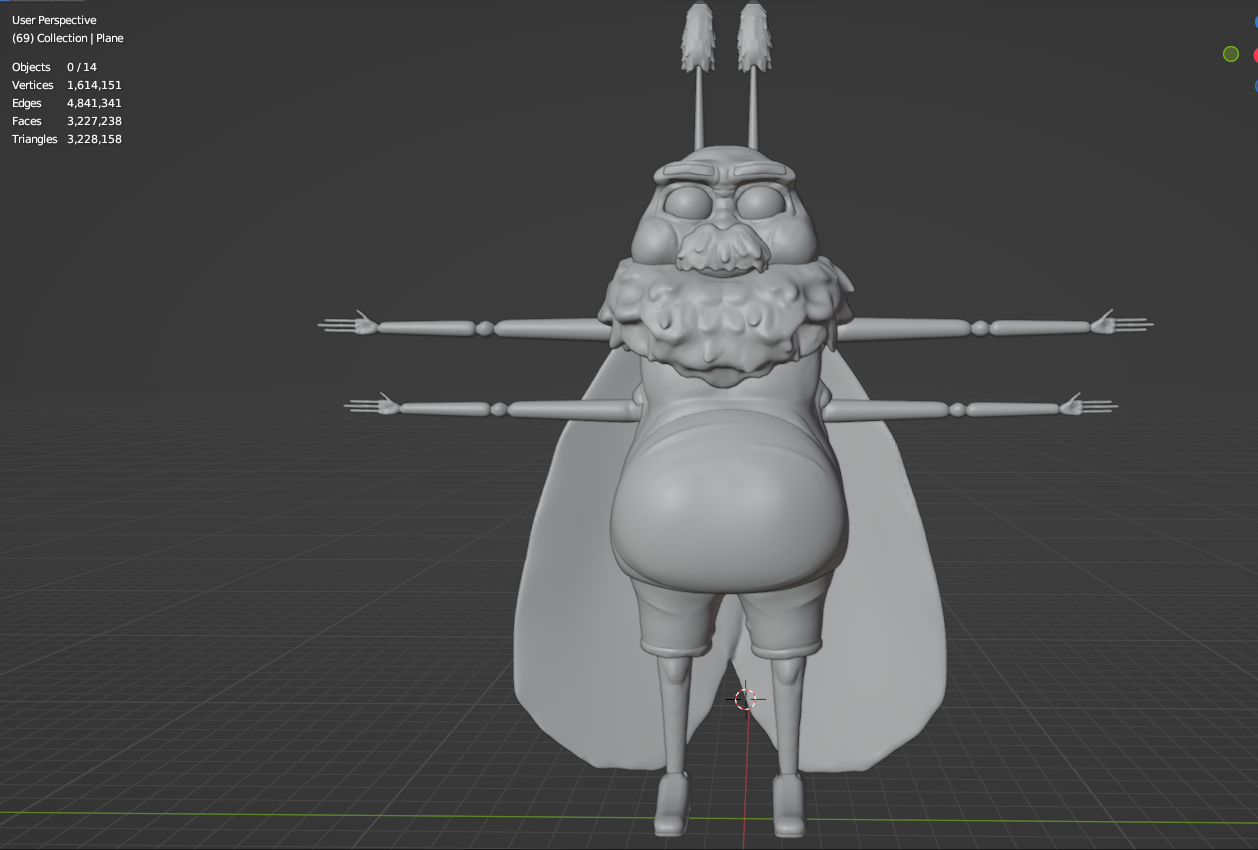
Before I started the retopo process, I wanted to see the polygon count of my model’s sculpt to compare (like a before and after to see how much this cut down the count). To do this I went into viewport settings and enabled statistics and took a screenshot, I was quite shocked to see how large this number was. I went to check on the assignment rules, to see the allowed polygon count, which is 50,000 Polygons and currently I am a lot over this so I’m hoping this will go down dramatically once I finish my retopo process.
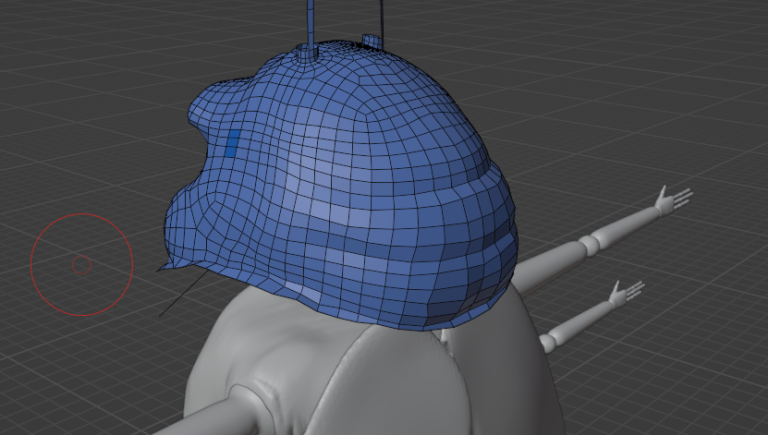
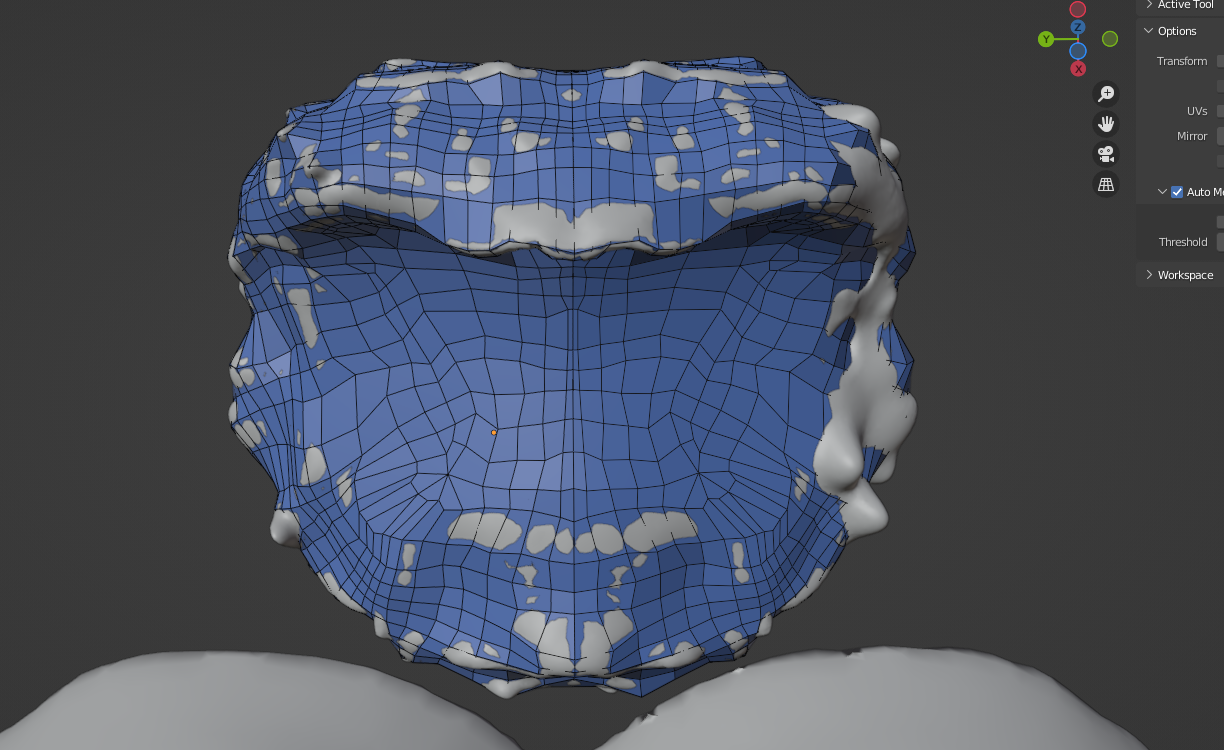
The first thing I worked on were the loops on the face. Starting with the eyes, then around the browbone and brows, the mouth and nose and then the jaw as well as defining the ‘mask’ area and around the antennae would go. I found as I was doing this i realised that this retopology process wouldn’t be easy for me, as a lot of the references that I had been watching were for more anthropomorphic and humanised characters and my character has a very tightly packed face and no mouth or neck, instead these areas are covered with fur and hair areas.
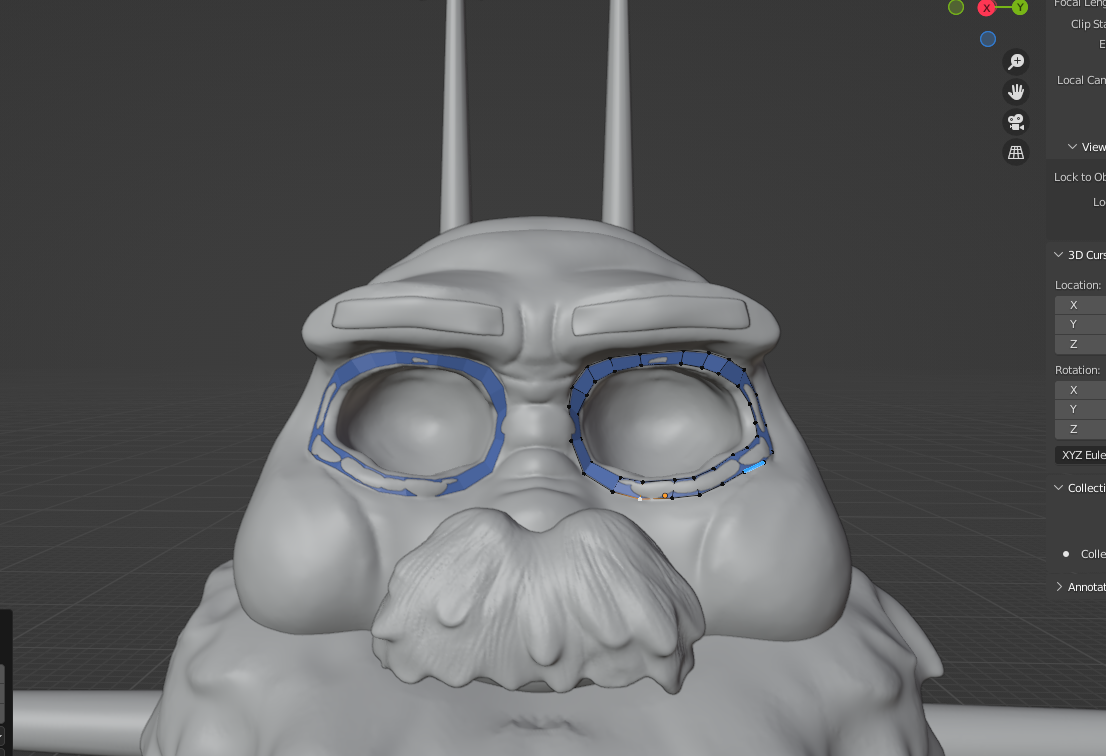
So, I decided to leave the front muzzle area clear for now until I was sure how to approach these areas, working on filling the rest of the face. At this stage I was also not sure how to approach the eyebrows as I ended up making another loop around the eyes that hooked onto the top flat face of the brow. I found myself questioning a lot of my decisions at this stage since this area is so new and different to me, I found myself quite frazzled and was getting quite frustrated with this. As I was builing my polygons I would routinely head into the sculpt menu to smooth out wide portions of my quads to get them to relax and be more consistent in size/shape.


It was at this stage that I realised I should bring the jaw line higher, since the neck fur covers a portion of the head that I haven’t sculpted. When it comes to incorporating the neck fur in this sculpt I knew I needed some type of neck to pose my character with so I started thinking of different ways to approach this. I ended off todays work with building out the edges and connecting the majority of my loops together in the face.


I tried looking up different tutorials that could help me, but unfortunately I couldn’t find any that seemed to fix my queries on this day, I did watch this video (https://www.youtube.com/watch?v=DB0rEIqjycs) that mentioned when it comes to things like fur you can retopo them separately and then work to join this to the main mesh, this is probably how I will end up approaching this but I will continue to ask and seek resources to find an answer on this.
Day 2
On this day I was unfortunately suffering from a depressive episode, so I wasn’t able to work for the majority of the day. However, I did find myself stressing over my retopo and thinking through how to approach my neck fluff and moustache, since these were the big issues points I needed to overcome. For this I decided to delete a couple of my jawline faces and readjust their heights so that I could sculpt them down to my neck fluff area, meaning I joined together the head and the neck fluff sculpts. I understand that this means I may have issues when it comes to my posing, but I don’t actually want to pose my Mothman in an extreme way when it comes to the neck, but to air on the side of caution I would just continue the jaw loops down and around my neck area so if they did need to move these will hopefully allow them to.

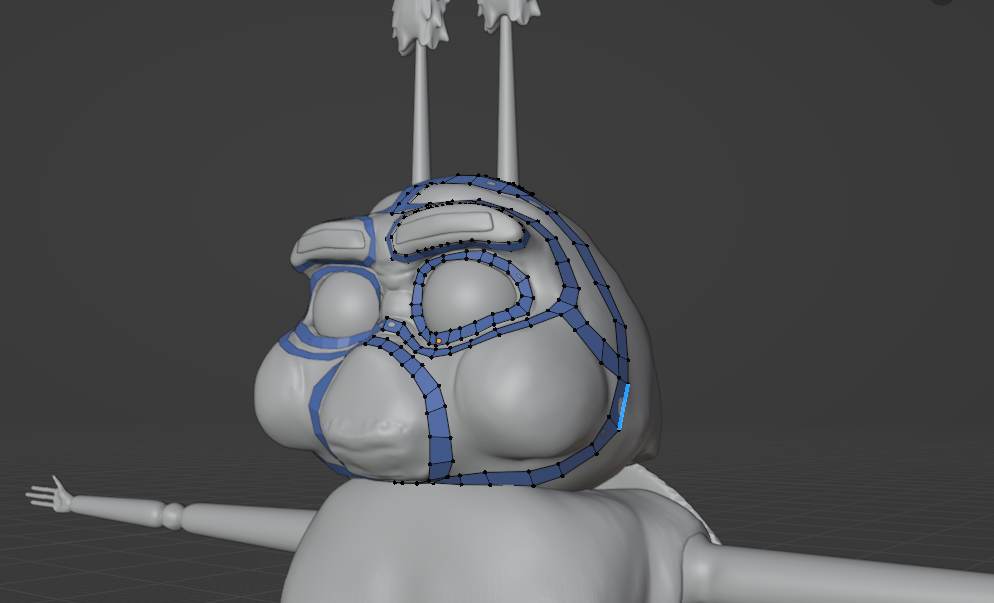
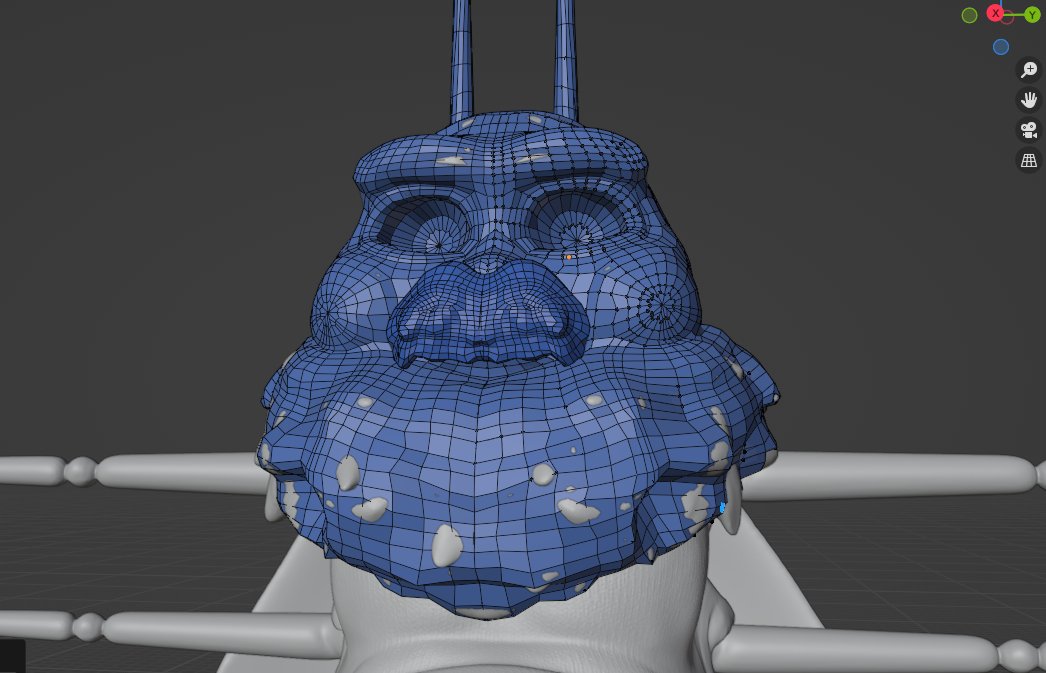
I also worked on closing off the back of the head in this session. I went around the creases on the back of the head to start, and worked on slightly simplifying as I built my way from the top of the head to the bottom. You can also see how I ended up moving the jaw line to the crease between my head and fluff and then made another loop around to start on this portion. Routinely I would make sure to check on my quads and made use of the smoothing sculpt brush or the smooth edges tool to even out my quads.


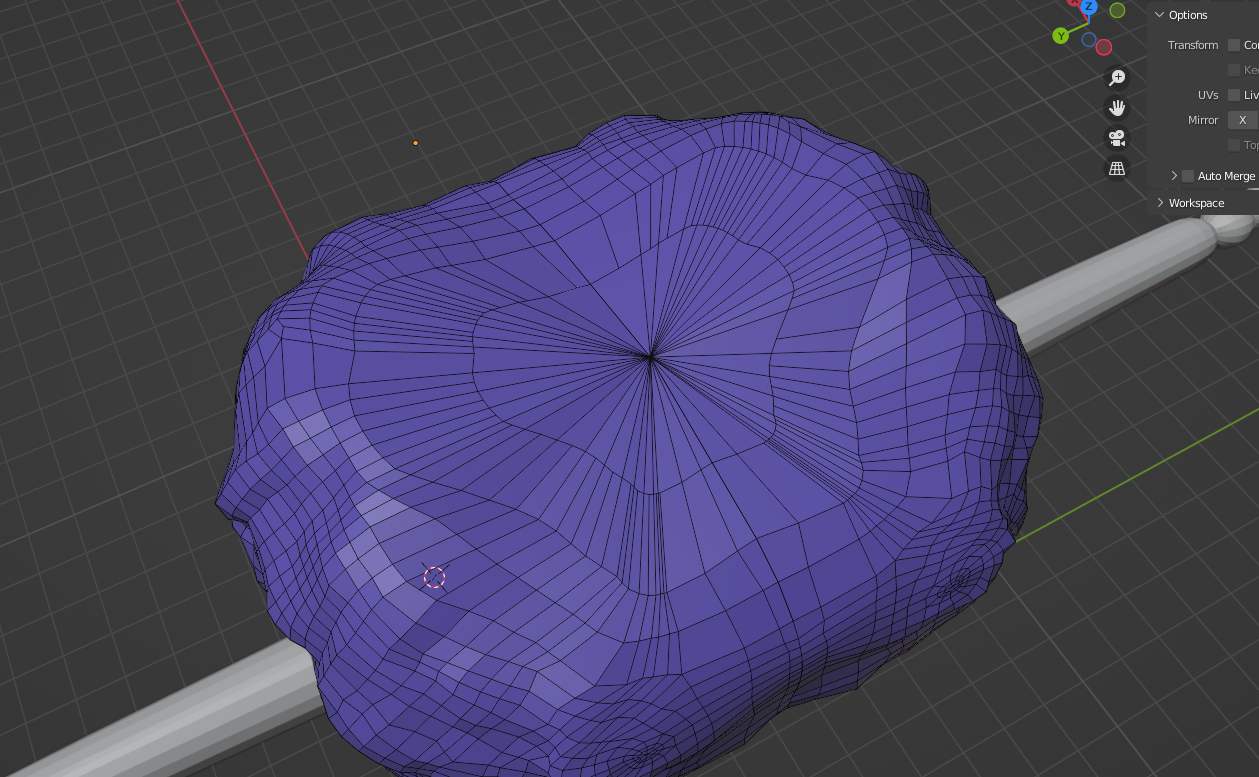
For the above I had to construct each quad individually with the poly build tool, as when I tried to extrude and resize it just wasn’t behaving well (as seen in the screenshot below) so it was easier to build the antennae this way. I may go back to this later and add some more loops where I intend the bend to be in posing, but this can be adjusted later once the rest of the body is done.

The moustache I then decided to construct separate from my main model, I wish I had made my quads equal where I intended to join this section to the face but this is something I can keep in mind for future models. I think looking back on this process so far I had made my sculpt a bit too complicated with detail so I ended up battling with the idea that I would lose a lot of my detail from my sculpt (detail I realise now should’ve probably waited until I was done my retopo stage). Anyway, created a new plane and added the same modifiers but focussed them on my moustache object. I started building from around the edge and focussed on the right hand side, deciding to lose my asymmetrical detail in favour of adding it back at a later stage using masks. I then just extruded and scaled inward, adjusted the verts slightly until it was closed off and then worked on building from the back of the sculpt. I didn’t end up joining it this session but I will in my next one. I found that using the Xray mode helped to better differentiate my verts from the model as I worked too.


Then I just went ahead and worked on the neckfluff, taking it methodically and just building around the whole mass. In this area too I can tell I will miss a lot of my detail but I redefine this after the retopo is done and I am still impressed that I could get the bumpiness of the silhouette from just quads. With this I got the top portion of the model almost done and I am quite proud of this.

Day 3
This day was quite a busy one for me and retopology.
I started the day off by finishing connecting up my antennae, I approached this the same way I have done the rest, extruding out the quads and then working to build around the shape and not worrying about any finer detail I lose. I ended up deciding to have more topology in the front since this is where the bumpy detail needs to be picked up, versus the smoother back.


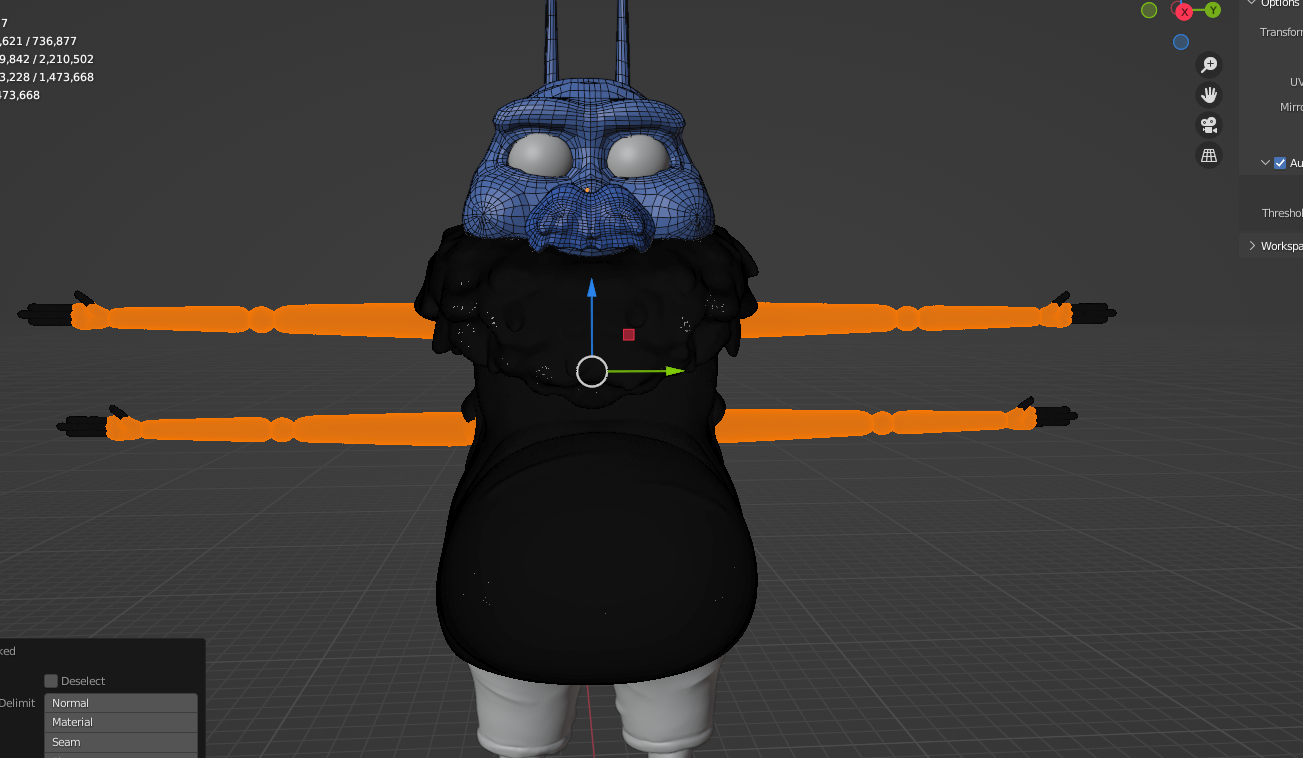
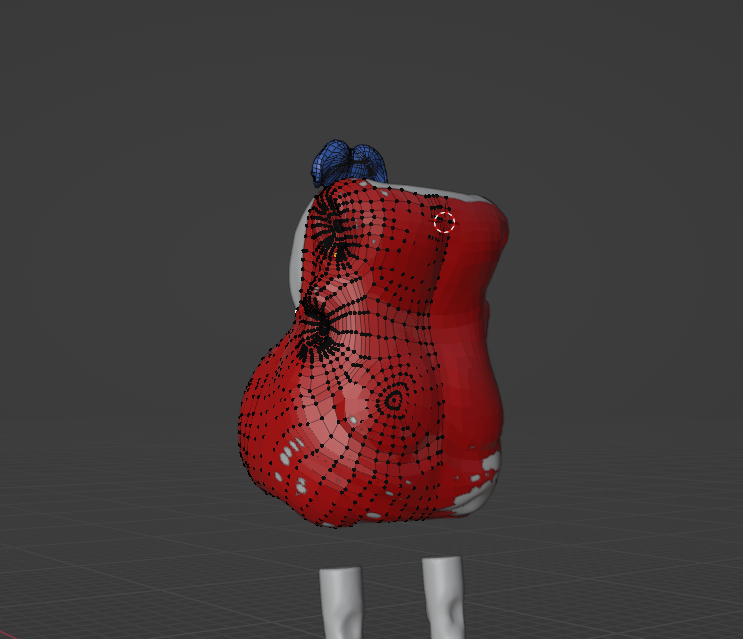
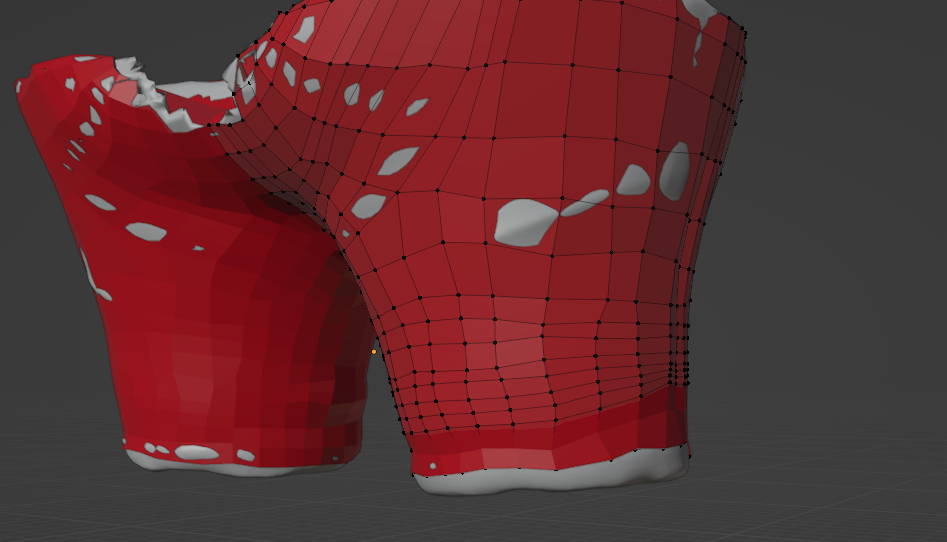
Then I went ahead and worked on trying to bring my topology down to the body portion, so I connected up my torso and arms to my body and started working. I started by making a loop around the pectorals and started to work on figuring out how to approach the arms, since my neck fluff ended up covering a part of the shoulder and this would limit the movability of the joint when posing.


You can see here I had a lot of issue trying to make the loops around the socket, since the cloth overhangs the shoulder and the neck fluff overhangs the cloth, but I just went through with this not minding the struggles I had along the way.


I had also went and filled in the pecs and because it was connected to the fluff, I had a bit of issue trying to match up my numbers of quads and it ended with this really messy topology on the chest which I just detested.

I then decided to send in an image of how my retopo was going and thankfully I got some much needed guidance. At first, I was worried that I was going to have to redo all my work and that I wouldn’t be able to separate my sculpt into pieces again- but this all worked out fine once I knuckled down and just tried to get what I needed done. I had actually felt quite silly that I was overcomplicating the process this whole time, trying to learn that keeping things simpler in approach and design is better in the long run.


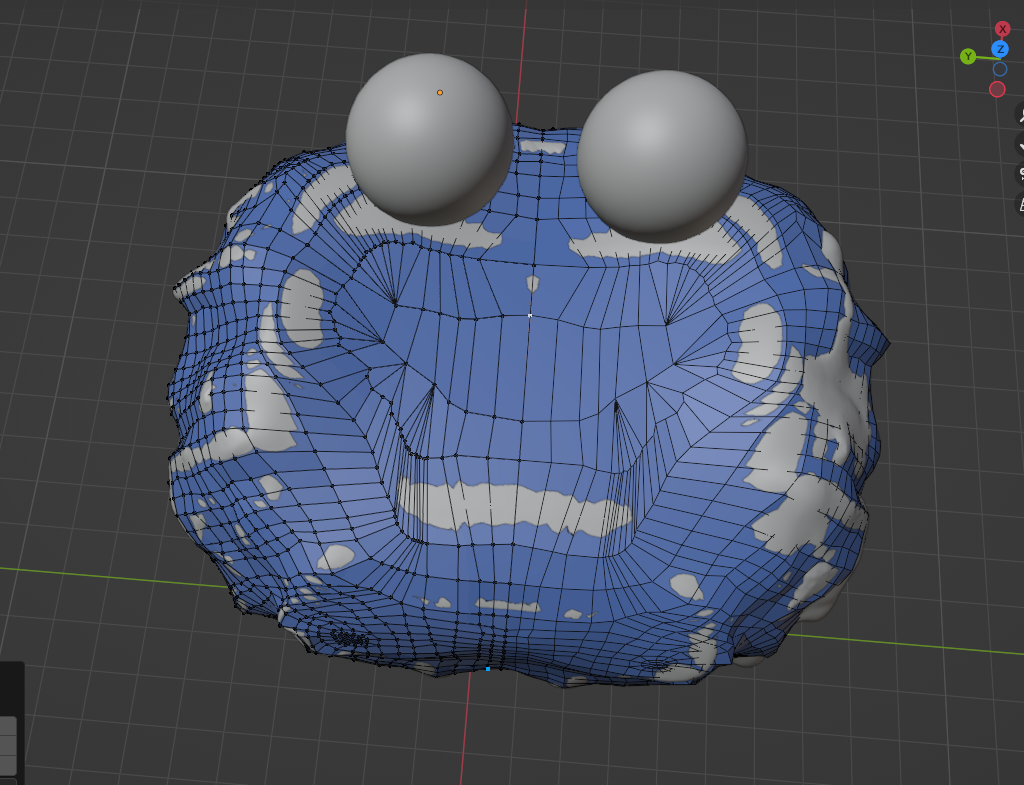
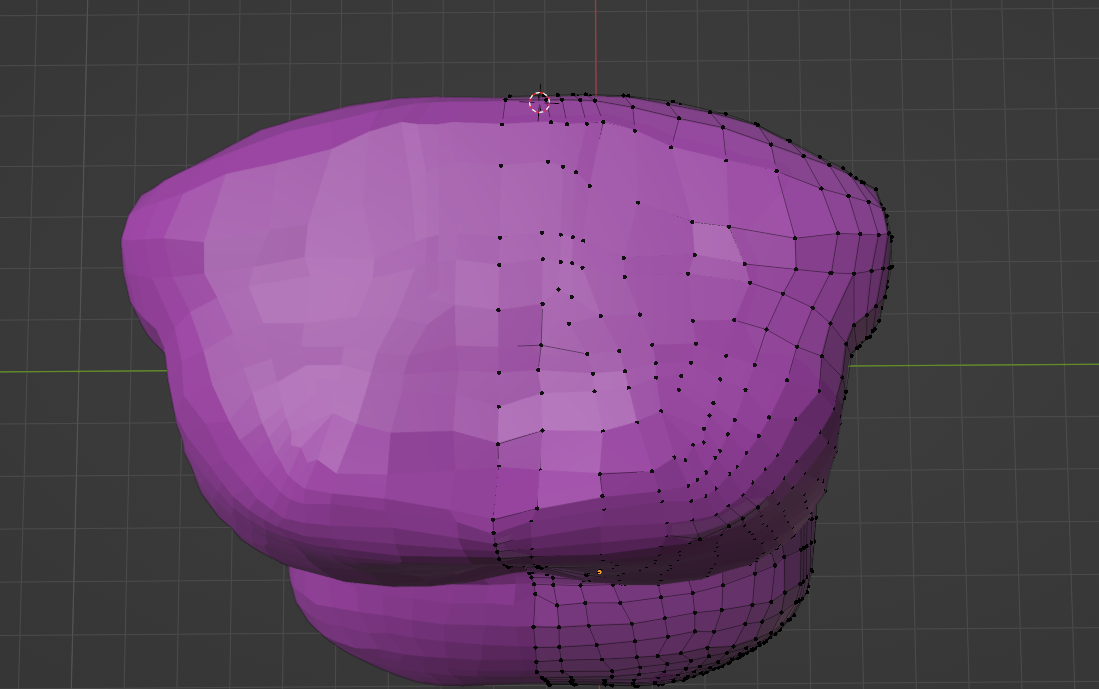
So with this in mind- I went ahead and separated all my different parts of the body that had been causing me issues. I closed off the head, starting with the muzzle. I had found I had some issues with my antennae, since I had some extra loops I had added and didn’t realise they had auto merged until afterwards, and then upon separating my meshes I hadn’t grabbed all my verts and edges so I also had to go clean up any areas that this had messed up. I had then finished the bottom of my head by continuing along this like Lego man connector I had made when sculpting, this I can close off later when I know where other objects start and end so it fits between them.


When separating my model I just clicked L over the body part and thankfully Blender was able to still differentiate where the initial object before merging started and stopped so separating this was super simple.
I then went and closed off the moustache, decreasing my topology where you won’t be able to see it and where it won’t need to pinch with posing later on.

I also did this on the neck fur to save a bit of topology where I know it wouldn’t need to move.

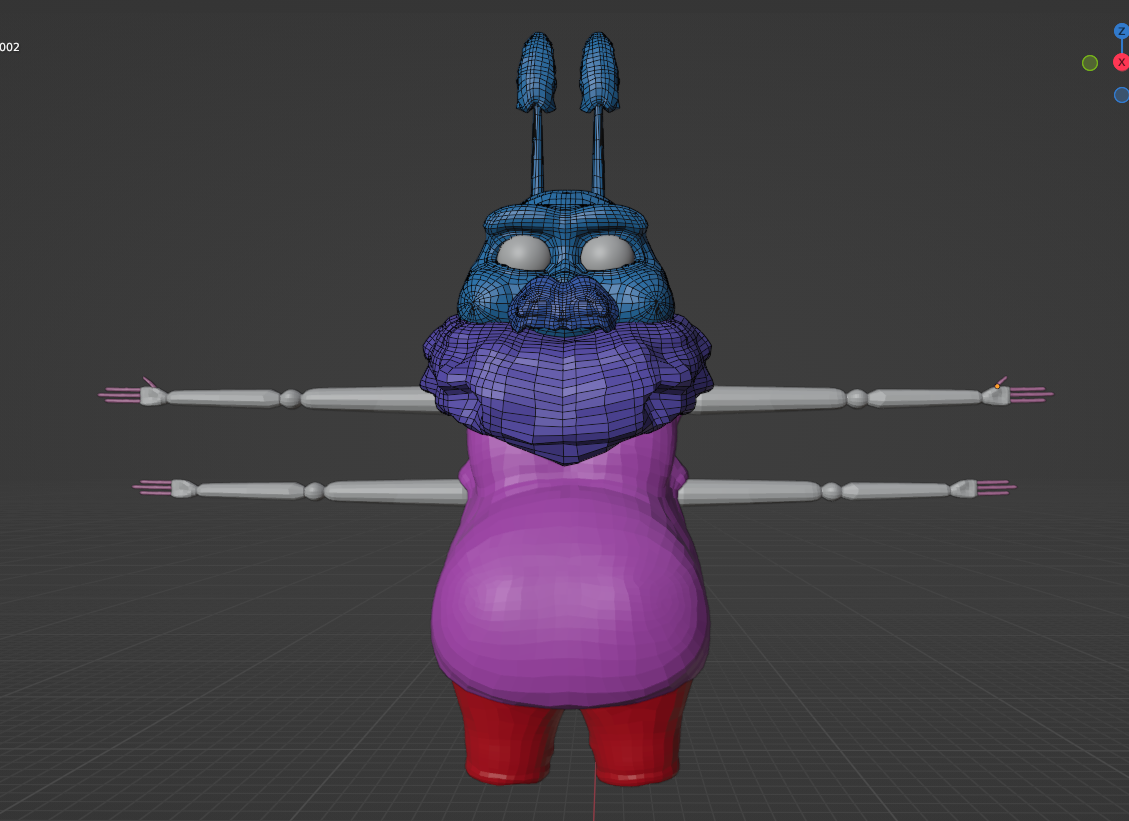
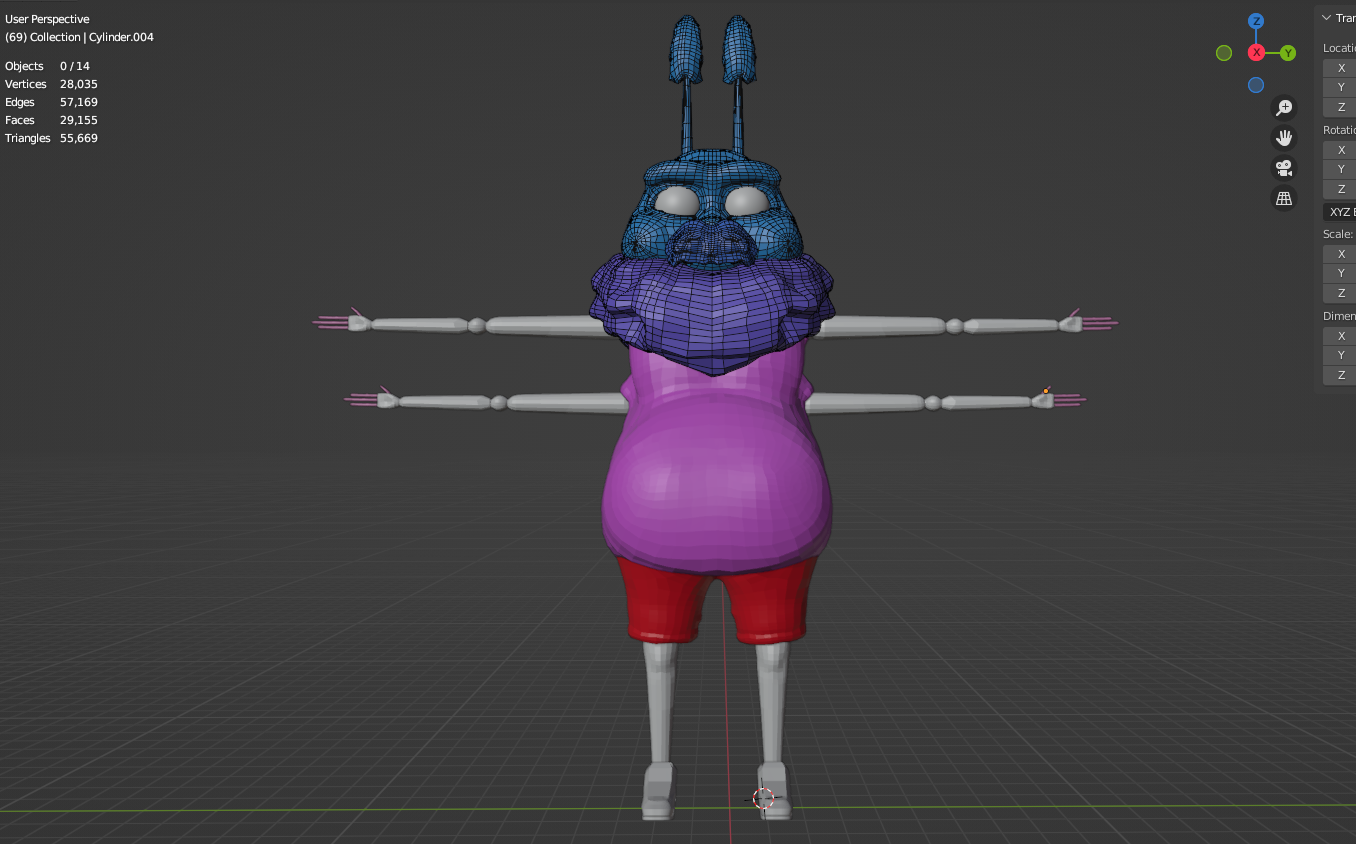
This was the redo of the topology now separated, and he was looking much nicer than before!

This was a lot easier to do, since I had done this before I was slowly but surely getting the hang of things, I actually found making this a lot easier than before since I wasn’t fighting against any awkward nooks and crannies and trying to find where my loops could sit. With this, I basically went and deleted any topology I had on the body and started again. This time it was much easier getting loops into the sleeve holes and to build around the pectorals. I methodically built up the back area first using the fat on the back to map where the loops would follow and then built around these accordingly.


The end of Day three had my model looking like this, I am actually a lot happy approaching the model this way and I will get a lot better results when posing the model afterwards.

Day 4
To start this session of retopo off, I finished off the torso, there is a bit of messy topography on the front, but I had nice loops around the sleeves and finished off the top similarly.


Then I went ahead and worked on the shorts. I started to build this up by roughly following the FlippedNormals screenshots I took, around the crotch and one line from the middle. Then I decided to follow the natural curve of the bottom since their might be some stretching in this area too.
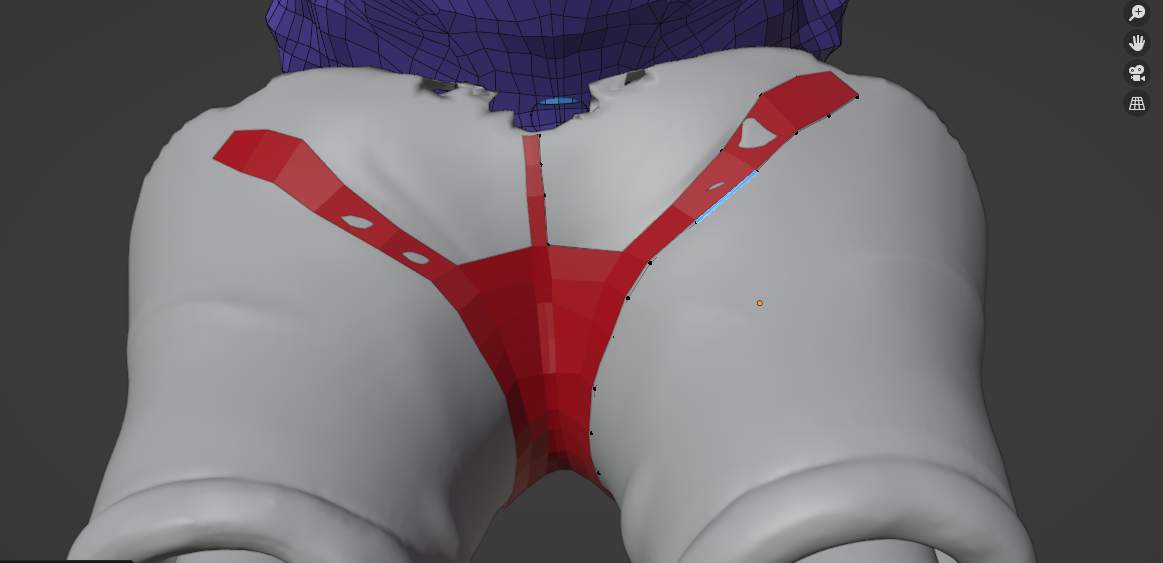

I then just followed the loops around and joined them with a pole or two and continued the loops down the leg, when doing this I’m not sure how I managed but my clean closed off loops turned into more of a spiral, and I’m not sure what consequence this may have in posing but I hope it is minimal. I also closed off the top here as well- from my sculpt how it separated from the main body was a bit awkward in the front so I may have to adjust this, but it is covered by the torso anyway.


I was actually quite happy as I thought it started looking pretty good !


I then started getting really panicked when I looked at the polygon count and the max, because I didn’t know if the Multires modifier affect the count once used. That meant I panicked and went back to my neck fluff and moustache and looked to remove some edges and have less polygons in the back of the object. I’m not sure if this was the right thing to do but I did it and can always go back to fix it, but the count was something that had started to stress me out.


With that sudden panic over, I went ahead and started on the arms. For this I actually went and made my joints with spheres and the arms with cylinders. To get this to work I had to turn snapping off but use the modifiers as normal, and this meant that my nice ball like joints could be made with balls , with removed faces to connect them up. I then deleted about have the edges, so it was 16 faces around and then connected the primitives together with some loops. Using primitives really quickened up my work time. I then added some loops to ensure they would bend nicely before moving onto the hand.


When making the hand I wanted loops around the fingers so that they could move nicely, but since the fingers were so close together this didn’t end up working out and I just separated these from the hand and modelled them separately again. I actually liek how the arm looks, It is a bit blocky but once this is shaded smooth it will look good.
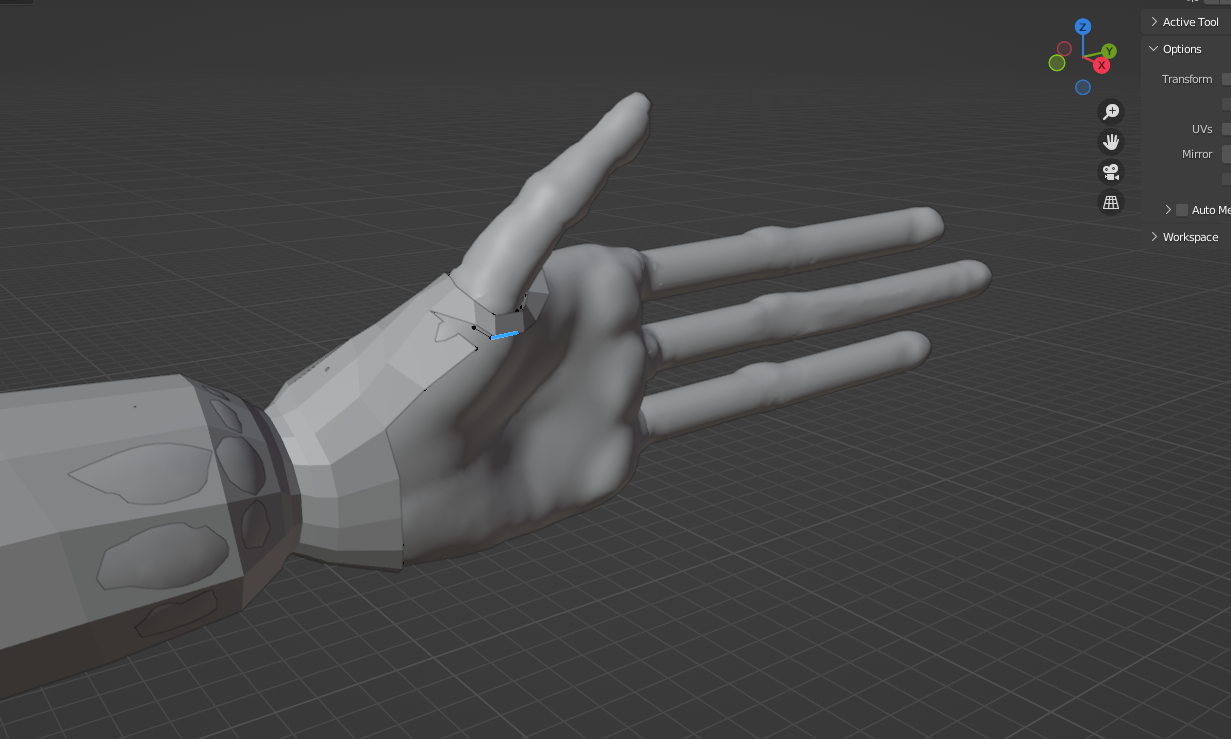

Working on the fingers I used the exact same approach, using just a cylinder primitive I made one finger and added some loops around where I wanted the finger to bend (just in the middle to get that awkward bug hand look in posing). I then just cloned this finger and sized it to fit the other fingers and joined these together. Then I made the thumb the exact same way.


This was a good portion of work to get done, I was very proud, and I thought I was going to stop here but I actually couldn’t because I was actually having a nice relaxing time making my polygons. So, I continued on with my model.
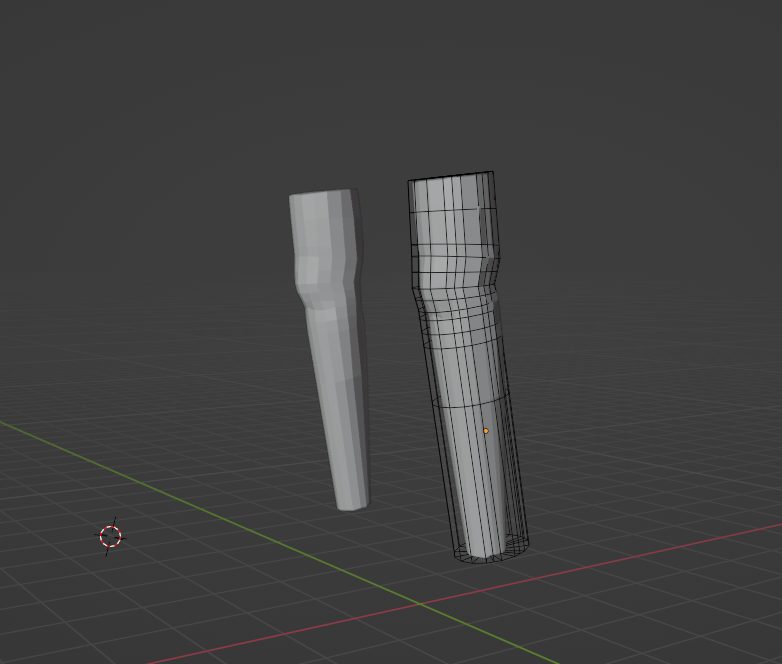
Using a cylinder with some minor editing with loops, scale and rotation, I had made the leg in the same way as I did the arms. Making sure that where I wanted the knee to bend had the extra loops to support it.
Then I had actually finished the retopology for today. I wanted to just move my shoes over to my retopologised model but it appears that I went into sculpt mode and smoothed it over slightly, so I will just remodel these again using Hard surface (this annoyed me but it isn’t something that will take me ages to do). The hope is that tomorrow I will finish my topology and then get them checked over on Wednesday before I start to unwrap them ( and hoping that I won’t have to go back and fix too much).

Day 5
This was my last day of retopo, I was very excited to get it done. I started with remaking my shoes, I actually like how they turned out better this time but they are slightly askew. I thankfully typed up how I made this in my sculpting post so I was able to follow along from this.


I went and took a look at the wings next. I released here that It would make more sense to make these separately so that I could pose them individually if needed, and since I wasn’t able to separate these in the sculpt I just went ahead and remade them with a similar start. I used a cube primitive I subdivided and extruded this out the form the wings shape, using x-ray mode to follow the turnaround drawing and matching the silhouette up. Then when I was happy with the shape I thinned it out, because it was looking a bit thick and I went in with the proportional edit tool to tweak it a bit more. I added some bevels and then moved my origin to the top of the wing to rotate it a bit more and that was it finished.


With that my retopology was done! I am going to get it checked out before I move on with unwrapping in case I need to make any changes or edits to them mesh, since I am a bit scared of the polygon count ( but it is nice to see how much it has decreased, from 3,200,000 to just 30,000, I am amazed). I will definately need to do a lot more practice to improve in this, and practice with more open models that I can retopo at once but I actually enjoyed a lot of this process.