
Character Design
Concept design
Mood Boards 1
When starting this project I started by immediately making mood boards from images of a creatures that I liked and the environment they may be found in. Mood board 1 was created with the idea of water creature that is able to navigate on land and water. However, it is still able to travel long distance without water across the desert in hopes to find a new river. I also like having it set in some kind of African river environment so the creature is a Travelling creature that needs to move across long Stretch of land when its river runs out dry. I quickly didn’t know how practical this creature would work as and decided to make a new creature.

Mood Board 2
This idea was from the idea of if there was a new ice again but with the creature we have now, How would they look or evolve into. I looked into particularly North American animals because of their aesthetic looks. I really like this idea and I thought it be interesting to look at the woolly mammoth and other creatures from the Ice Age and how their evolved into modern day animals However, in this story timeline a second Ice Age comes again so they would need to re-evolve back into their great ancestral genes.

Mood Boards 3
Another idea that I came up with in creating mood board 3 was inspired by the class example paper about a forest guardian who blends into trees. I like this idea and the Big Foot style that I based this mood board around it. Initially I wanted to make creature or human who roams around the forest. However, I liked an idea of a monster story that its hit by lighting bolt and it becomes alive. Grabbing objects of its environment to create a Functioning body. Having a inspired Elements from a Frankenstein theme style. 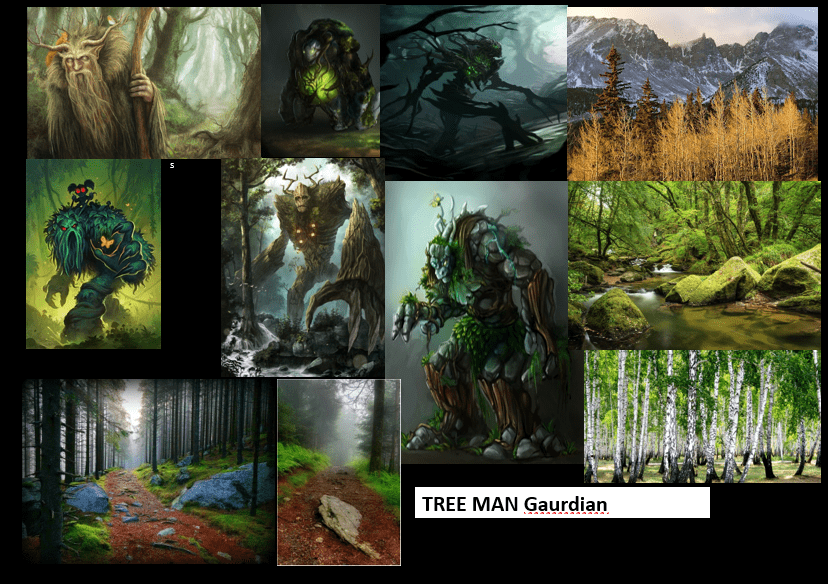

Script from Mood board 3

Mood board 3 script named, Tree Axe Man. It is a horror set fantasy genre. Basically its styled as a medieval folktale story giving the classical warning to kids to not go too deep into the woods or the monster will get you but It also a tale for the lumber jacks who cut trees to not leave their axes behind in the deep woods because they might bring the tree stump to life and might wait for you to return to “thank you” for bring it monstrous existence to life due to your laziness.
Concept Sketches
Sketches that I drew Inspired from the script of the Tree Axe-man

sketch of all the body shapes I was thinking of when i did quick drawing.

Sketch Idea of Tools that i could put on a strong heavy forrest monster

Big Rocky Troll / golem sketch

A sketch i liked a lot as “Wood Troll” with the idea of the axe in the stomach.

Creepy sketch of a watching Tree man.

Monster sketch of a monster that can bend a lot like tree veins

An small skecth that i was not sure at first was me expermenting with the Rocky Troll / golem idea i had early on but evolving it and mixing with a wooden tree monster “Tree Big Foot” and complaining the two to make a “Frankenstein of the Forrest” I really liked this idea and later went on the follow this idea

Sketch of Tree Axe Man
Extra Sketch mention

Extra idea I thought was good at that time but I didn’t want to make was the Spider Axe Stump.
Exploring the Frankenstein of the Forrest idea of the Tree-Axe Man


How the “Tree-axe man” function


Stages of hiding or ambushing

Prairie Dog Refence

Inspired in video of how the prairie dog shoves the dirt forwards place itself its stomach on the floor where the next step it starts pushing the dirt behide him so it get even dug into its hole. At 0:39 at the near end of the video the prairie dog put its head into the ground for some resone in maybe to somehow to push more dirt. However, I liked it and used that in for the Tree-Axe man way of it hiding its head part.
Concept Art of the Tree Axe Man face

I drew up 14 faces. I initially drew light shapes of squares and circles to get me to experiment with head proportion and rough shape that i wouldn’t have drawn. I was quickly drawn to the ideas of the head shape 3 that would set off a chain of experimented head details. When i had to decide to pick one it came down to head 13, 3 or even head 2 but I later sketched a moss that hanged over the head of 11 and 13 (12 and 14) and decided to pick 14

My Final concept design sketch of Tree Axe Man Full body

Colour palette testing

3D Creation of the Character
Blocking character in Zbrush

Initially i started on Zbrush what was a very new software to me. I spent weeks learning Zbrush and experimenting with the software tools.
I really like how in Zbrush I could see the Black and white view of front and side of the Tree-Axe man in the top corner of the scene when working. It helped me to look at my sketches books i drew of Tree-axe Man that I had placed beside my computer when I worked. See the silhouettes helped to make it look more and more of the rough shape of the sketches.
Silhouettes


Retopology
Quickly went though making my Retopology in Blender and importing it in Zbrush.


Zbrush sculpting

I had a go in making my model in Zbrush before changing to blender. i learnt to use the sculpting tools to great a lot of details around the end to give the look similar to my sketches

I learnt how to use the Chisel 3D tool and how to custom make brushes to add later onto my character.


(stone crack refence i used to)
Sadly I lost my progress of making these cracks on the Chisel brush. When i did use it i still had problems where made a custom brush that made cracks but the plane surface would lift up a tiny bit extruding outwards the body instead of imprinting the custom crack onto the mesh. That was what i was working on before I lost the file.
I Later switched back to Blender anyways. using Blender sculpting and substance painter to complete my characters details surface textures because I found it more stable to use.
Axe Of T.A.M (Tree Axe Man)
Mood board
I went and looks at a mix of Axes. I first went and look at very fantasy prestigious looking axes like i had written in the script. I like the look with loads of cracks. But I also liked the Viking simplistic but yet beautiful looking axes with noritic symbols. I Liked the big battle Axe look with the two sided edge with one bigger than the other. With these image refences i went and made my Axe.


Originally I planned to come back to the axe and add in the refences symbols and ruins i looked at but I realised that most of it would not be seen in the glowing of the axe and the axe being located at the back it even less likely to be seen. I also didn’t know if emissive light effect that i had added in substance would get complicated if I had add in new stuff on top of it.

T.A.M – Proportion Updated


After getting feedback from my lectures I realised that my character was badly off the proportion of my sketches and wasn’t showing the heaviness of the character. So I started Scaling up the proportion of T.A.M and adding more weight to the upper body.
Later on i would continue improving this weight look in the posing process and I would later fixe the legs Proportion too by stretching it out more.
Hands updated

I also changed the Claws back into Hands, going back and following the my final concept design.
UV Unwrapping

I used UDIM titles for making my character UV Maps and had everything on 2048px. I made at the very final render 23 titles in UDIM for T.A.M.
Sculpting in Blender


Veins for Alpha cards


I experimented on making Alpha cards on my character and made them mostly around the shoulder and chin. I tried this to experiment on this to add more of a moss Forrest veins

Substance Painter

 I initially planned to make T.A.M legs out of wood textures but changed because the legs did not contrast well with the overall body. The stone turned out to be better because it kept the constant flow down of the rock texture.
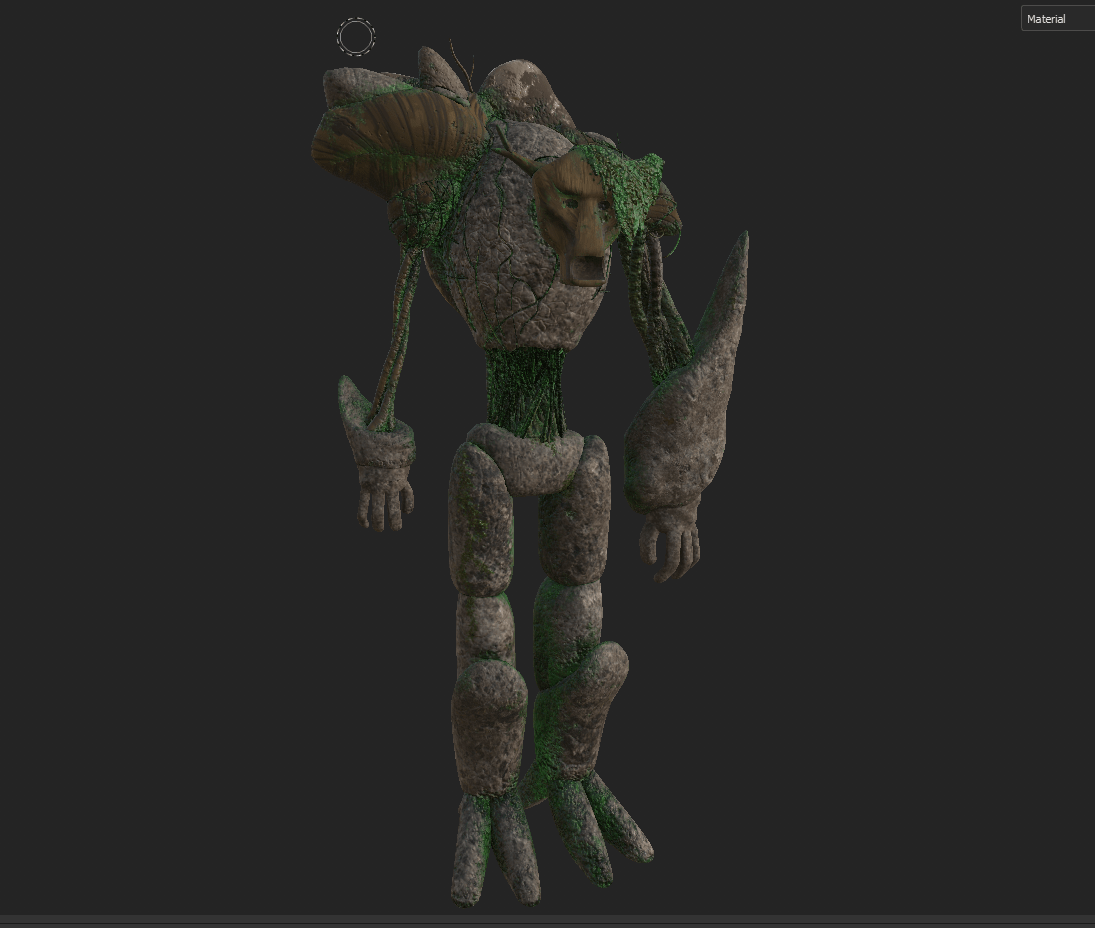

I also had the constraint repetitions of Veins and moss everywhere on the body that connected everything together.


I put a lot of details on my tree stump, even going and add the tree stump rings.

My UDIM Tiles being used in substance
Character Pose and Central of gravity
Pose idea
Inspired by the famous Patterson film that captured the iconic big foot picture. I really like this picture because of how “Big Foot” posed and looks at the camera like it was caught out in the opening. I plan to replicate a similar look but with more of a walk of a top heavy weighted character.

Rig of T.A.M


I made many attempts, retry and changes of my pose before reaching my final image.
Body Posing Structure – Refence

Using the famous example of the Statue of David made by Michelangelo. This statue is masterful display of many thing but I used it to see the hips and shoulder rotation aliment when the body leans to one side. I also looked at the legs positioning and how each leg acts to stabilise the body.

I followed a short an animation video that help explained simply how to easily find your centre of gravity in a character.

In this picture I clearly draw out lines to help locate the central of gravity in my character by looking at the mass of my character. When I roughly found the area I marked it in a green X. I did this to check if my character pose was not too leaning off central because of gravity and weight he would realistically fall over if he was. Due to his heavy weights mass he is in a constant hunched over when walking and puts most of his weight on one of his foot when he walks step by step and in this movement he is putting his weight on the left foot (circled in yellow).
Notes


Updated 3D Silhouette

The Silhouette of T.A.M and his body shape language posed.
Unreal Engine Scene
Before working in unreal engine i planed and sketch how my environment will look like. Originally in my script i planned to have my characters standing in a big Forrest opening with lots of tree stumps and plants however, I wasn’t every happy on that idea of landscape setting. I felt that it would turn out more as a field on the outer edge of the Forrest than the heart of the dark Forrest plus i felt like there would be too wide of ground and very little option to play with lighting 
New Environment inspiration
I looked though the internet on Forrest photos and i got inspired by these photos and i practically liked how the light sprung out of the trees. I started to base my new environment landscape to be along a path in a Forrest but have a patch of tree opening where the monster stands, being seen caught out of his hiding.


Planed Notes
I thought about the direction of the path, the direction of the light and even story tell objects in the environment that would tell a story. e.g. the tree stumps and old tree trunk along the path. the tree trunks along the path is to show that the characters when walking the path had accidentally knock down trees over when walking. The Tree stumps are probably made by the Tree monster creator the lumpier jack who owned the magical Axe that powers the monster to life.


Birds Eye View of T.A.M Forrest

A clear view of the Forrest environment

The Path going thought my scene and the tree clearing (circled in yellow)

Camera and lighting, plus the location of T.A.M

First Render of the path (Day light) originally I planned to see T.A.M in the daylight but would later change that to get more of his glowing Axe and Eyes. I also want to keep it scary by leaning of the typical deep dark wood feeling mentioned in my script.

First time bring T.A.M in Unreal engine 5 setting.

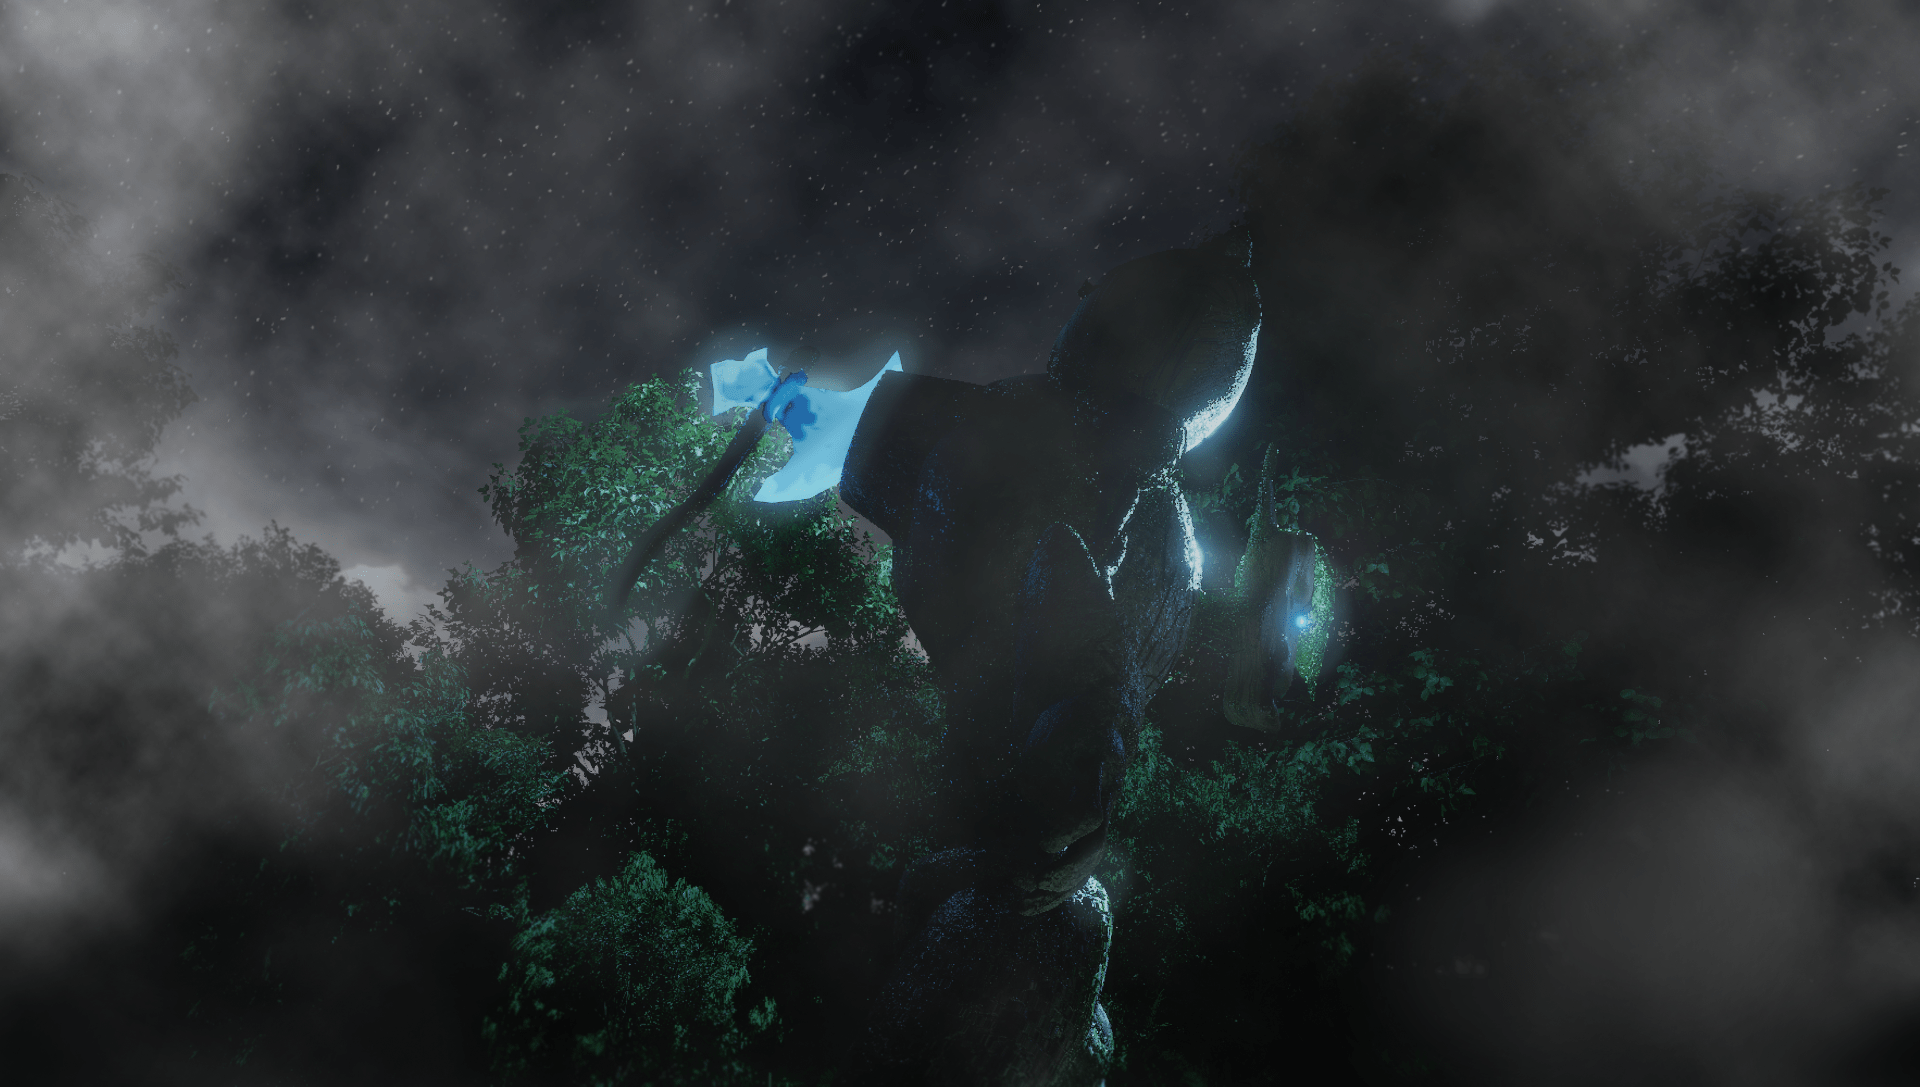
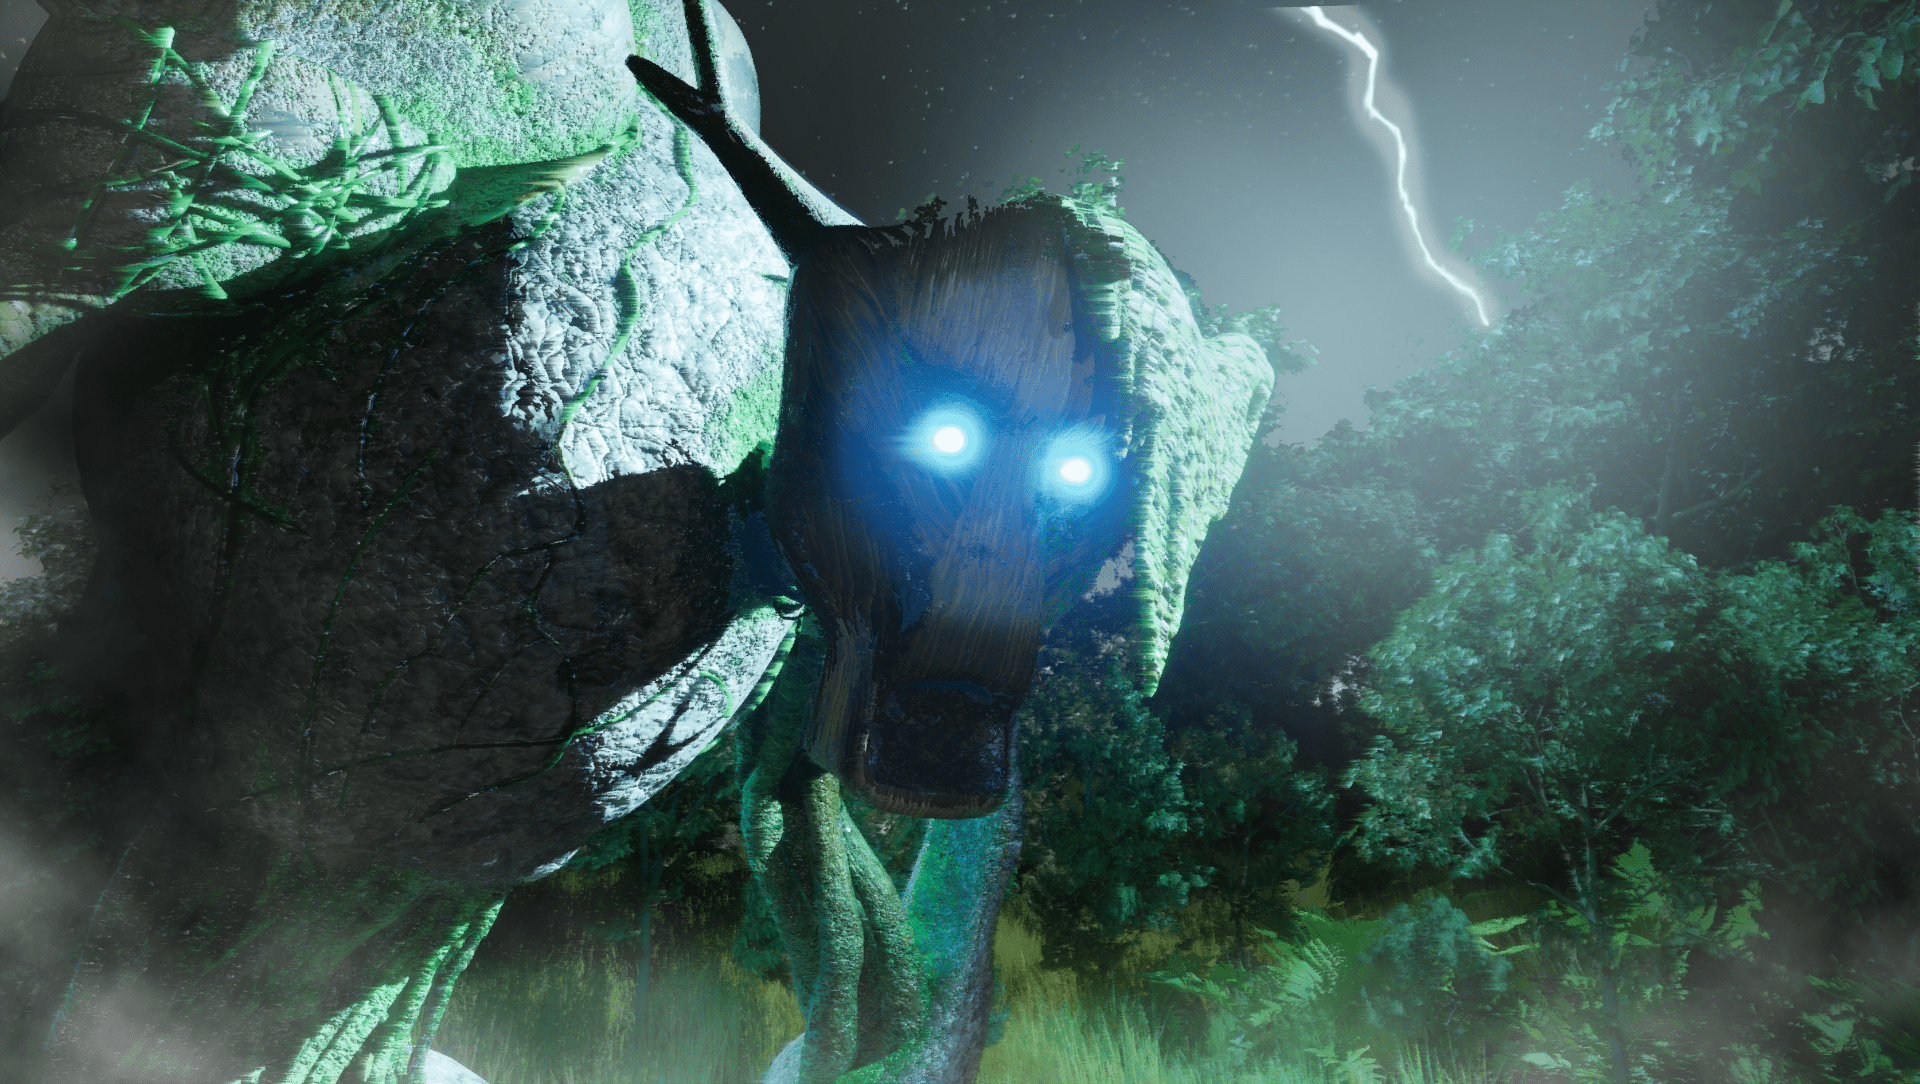
Final Render : (added Photoshop)
Render 001 (long shot)
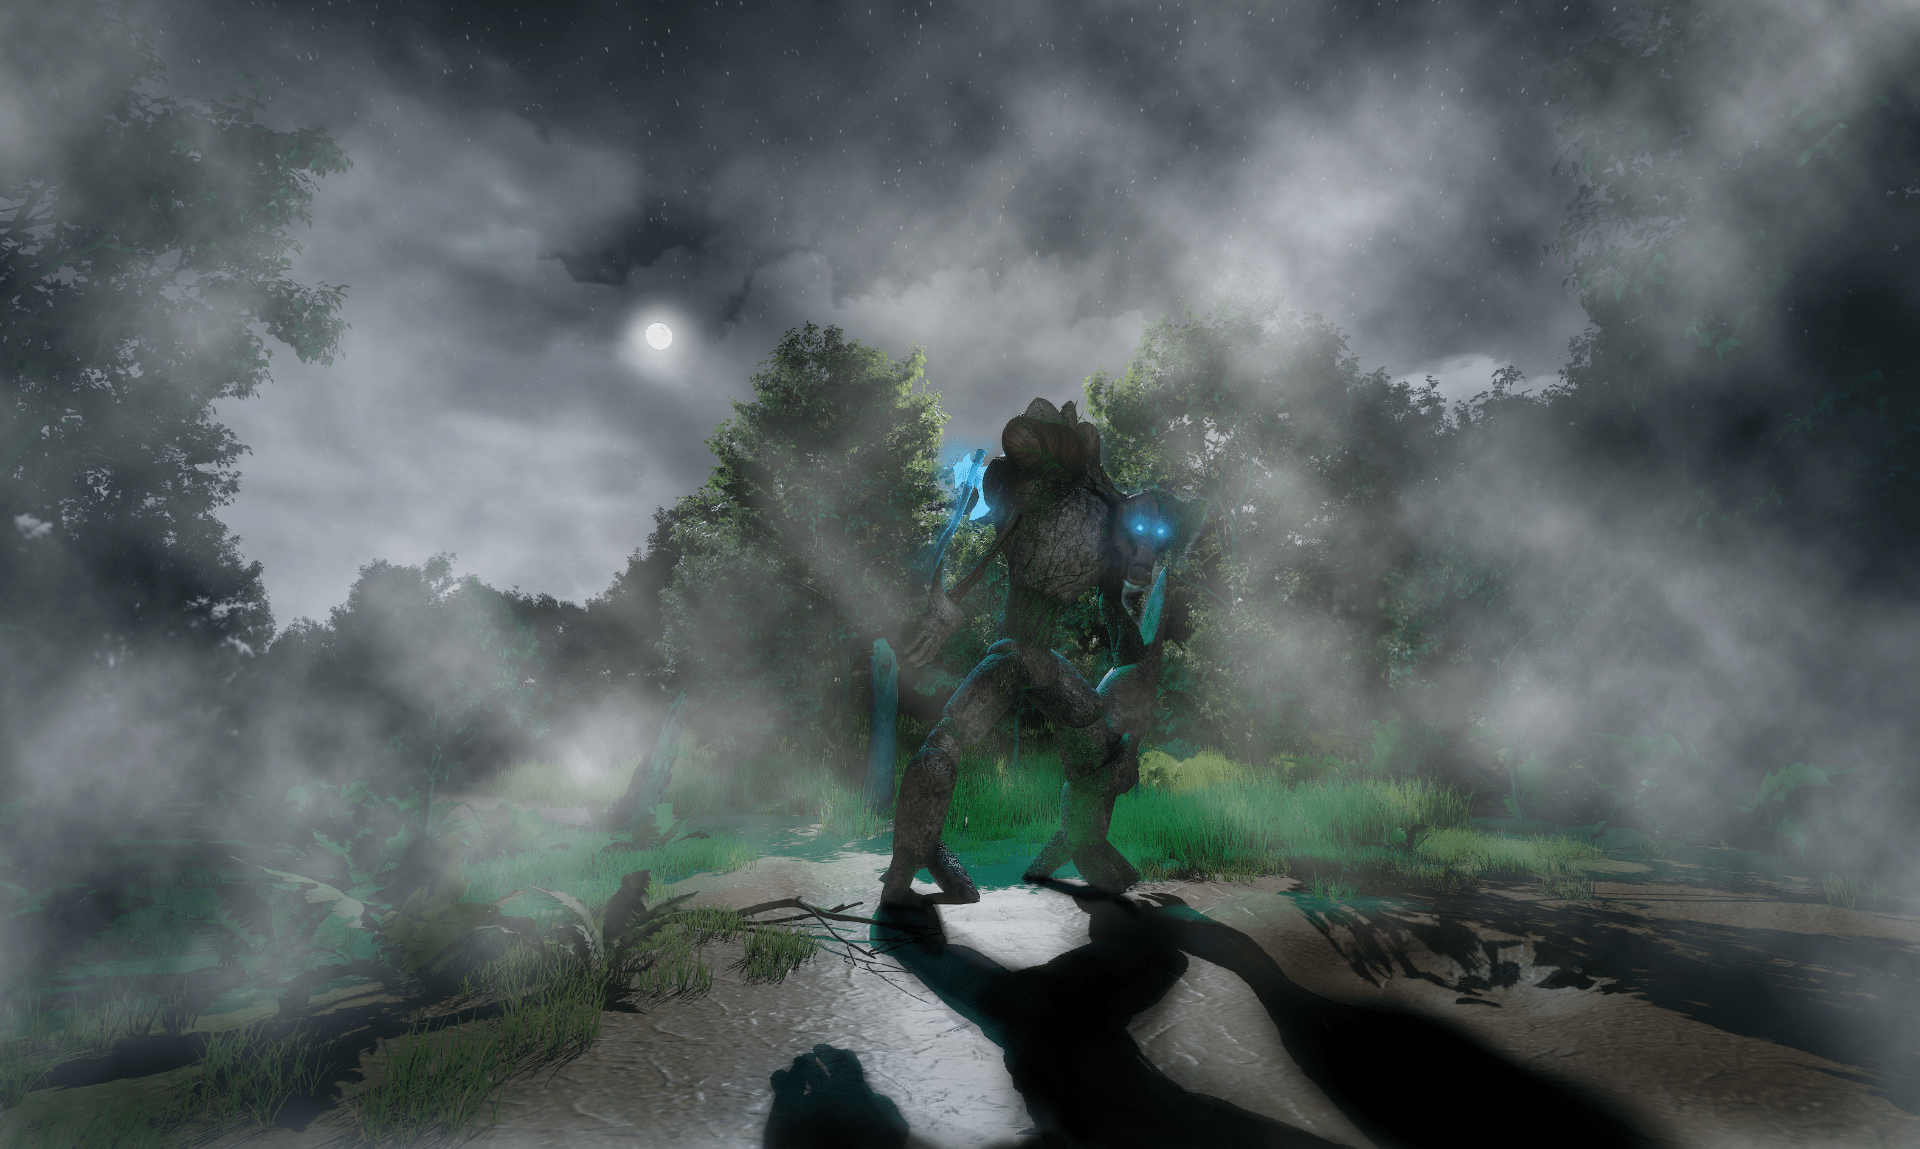
Render 002 (medium shot)
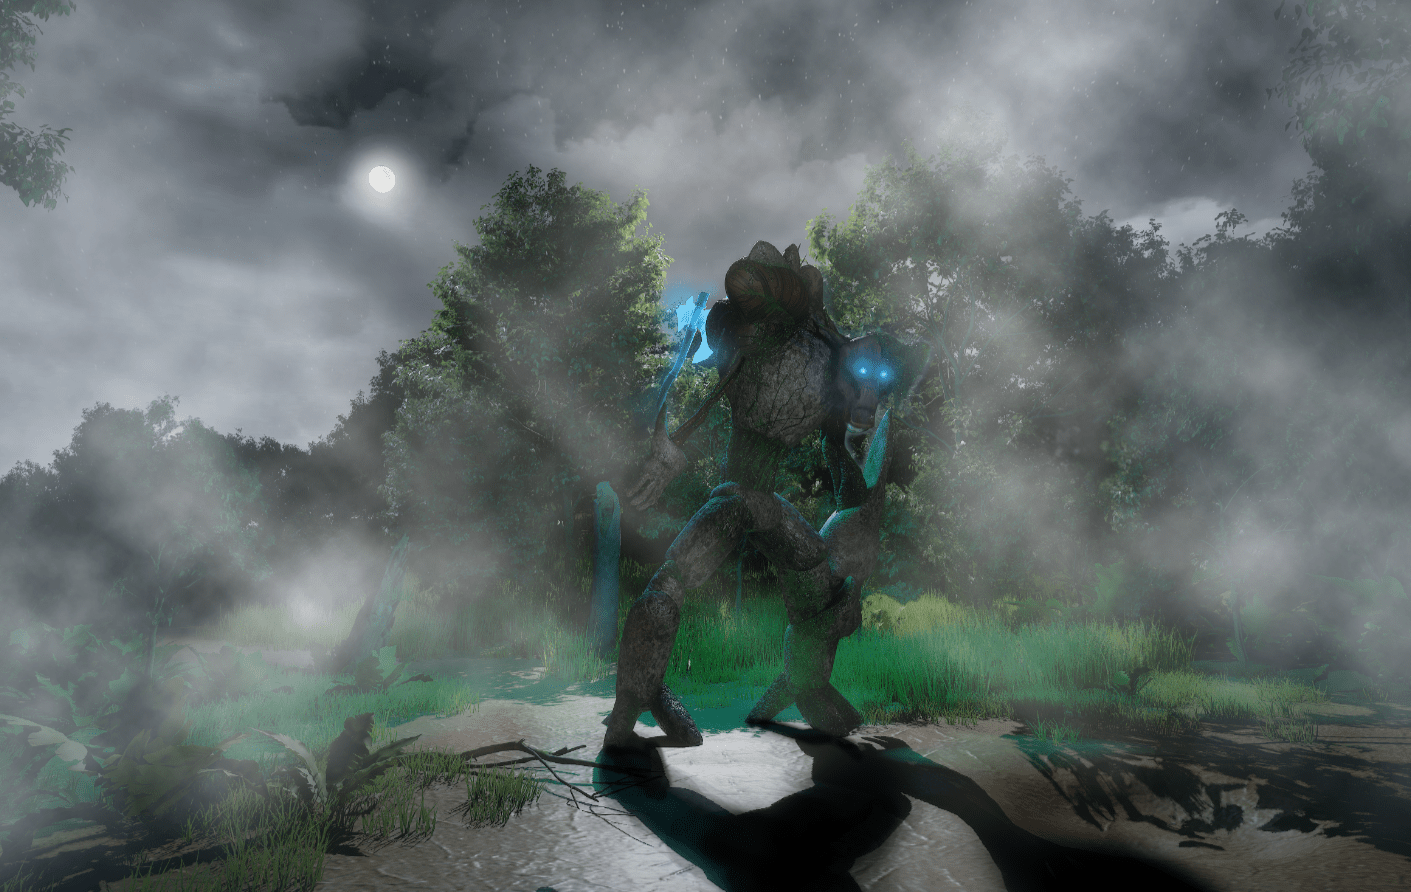
Render 003 (side view)
 Render 004 (Close up)
Link to my Sketchfab: https://skfb.ly/oOXsE
Bibliography
Making Veins in Blender (objectforge.blogspot.com)
Waterproof Anti-Leakage Agent (youtube.com)
How To Create A Low Poly Axe In Blender: Easy Step-by-Step Tutorial (youtube.com)
bibliography
Prairie dog (wingedmammal.com)