Initial Concept Development
My first sketch was somewhat incomplete, as I initially struggled to determine what form would best suit a marine creature. At first, I considered placing it in shallow waters near the coast rather than in the deep ocean. I must admit that I had already been captivated by aquatic creatures, which made creating something that lives underwater feel like an excellent and somewhat familiar choice. In my initial sketches, I wanted to incorporate skeletal elements, and transparency was already in consideration, though I hadn’t yet found the main silhouette. My initial idea was to combine fish with worm or other organism details to create a hybrid that would resemble some mysterious creature.
First sketches and concepts
Later, while deriving from the main silhouettes I liked, I decided to create something similar to a combination of octopus and squid. This led to the development of both the story and reasoning behind why certain elements were so appealing. I particularly liked the curved forms and the concept of bubbles growing from the organism, which I naturally decided would become eyes. You can see some influence from “Subnautica,” the though primarily just in having an octopus-like protagonist with multiple eyes like “Crabsquid” by Fox3D (https://sketchfab.com/3d-models/crabsquid-8ac29bdaef8247378127907dfc614341).
Final sketch and fist sketch of creature
Research Phase
Creature Anatomy
My creature primarily consists of a hybrid between octopus and squid, with the key difference being that it has only four legs protected by armor similar to that found on crustaceans. This is an invertebrate found deep in the untouched Mariana Trench. In my narrative, humans have recently discovered ways to explore the deepest ocean locations, including the Mariana Trench. However, the ocean has become even more dangerous, as submarines are actively hunted by an ancient invertebrate perfectly adapted to hunting curious prey.
Due to the immense ocean pressure, its body consists of a watery, organic gas bubble surrounded by jellyfish-like eyes that primarily serve to confuse prey. While these eyes function as visual organs, they’re mainly used as decoys.
Environmental Research
I began studying more aquatic animals, focusing on how the main parts of this creature would be transparent. Considering that the creature lives deep underwater near volcanic vents, it would use luminescent elements to attract prey. The most fascinating aspect is that given how unexplored the ocean remains, such an organism could potentially exist.
PureRef creature research
Visual Systems
Eyes: Octopi and other invertebrates have slightly different eye structures.
Source: Their eyes are primarily designed to detect blue light and nothing more, so they don’t need excellent vision, just enough to spot prey. Most deep-sea animals lack color vision, having a single blue-sensitive visual pigment because: 1) as you go deeper in the ocean, all colors disappear except blue, and 2) most bioluminescence is blue.
Source: Light organs, or photophores, function like headlights. When the eyes turn inward to focus directly ahead, the light organs provide sufficient illumination for the squid to see its prey in darkness. But there are some species that actually can see color
Therefore, it would be theoretically possible to develop mimicry eyes that imitate multiple different animals simultaneously. These structures could serve dual purposes: functioning as lures to attract prey while also operating as rudimentary visual organs. Although such eyes would likely have poor vision compared to typical eyes, an organism could potentially possess multiple sets of these specialized mimicry eyes, each serving different functions or mimicking different species.
cephalopods eye graph
Beak: The main weapon of this lost lineage creature is its large beak, which opens with hinges and is incredibly hard. Squid beaks are known to be remarkably strong and durable—perfect for my cephalopod, which could slice through a metal submarine hull. The Humboldt squid’s beak, for instance, is two inches long and incredibly hard, stiff, and tough, making it harder to deform than virtually all known metals and polymers.
Colossal squid Beak
Bioluminescence and Skin Texture: Squid texture differs from octopi, which can change skin texture. Squids change skin color more through their chromatophores, and their skin is somewhat rubber-like in texture.
Source: Bioluminescence is common among squid. It is estimated that two-thirds of all squid genera include bioluminescent species. Light organs, or photophores, can be found nearly anywhere on the body of a squid. The most common places are the eye (ocular photophores), mantle, head and arms, internal organs (visceral photophores), funnel, and tentacles.
Bioluminescence is a fascinating feature found in squids and various fish species. These organisms primarily use it for communication and luring prey, but it also serves as a mechanism for blending into their environment.
Source: Squids exhibit different types of bioluminescence, which typically functions through specialized cells in their skin. However, bioluminescent animals aren’t limited to squids—many deep-sea creatures possess this ability, including comb jellies (which, despite their name, are not actually jellyfish).
Comb jellies acquire their bioluminescence from consuming crustaceans that contain the chemical coelenterazine. While their bioluminescent effect is similar to that of other organisms, it appears more delicate and can produce a rainbow-like appearance. It’s worth noting that this rainbow effect may be enhanced or more visible when viewed through a camera lens rather than with the naked eye.
Comb jelly and firefly squid bioluminescence
Narrative Background
This creature represents a lost lineage among cephalopods—a prehistoric Jurassic-era species. Evolving in the Mariana Trench, this lineage hid in deep cave systems. Over time, its outer shell fell away, leaving only the prehistoric beak and crab-like segmented armor protecting the creature’s tentacles. Living where light rarely penetrates, its body became transparent, with luminescent spots developing around the skin to attract prey like lures.
Its main ability is changing the color patterns of its transparent body, camouflaging among rocky environments and underwater volcanic smoke. Initially, this creature preyed on whales and other large animals, but human research submarines with their gleaming metal began attracting this predator.
The predator inhabits the Hadal zone near Challenger Deep. Its first human encounter occurred on January 23, 1960, when Jacques Piccard and Don Walsh descended in the submarine Trieste into the Mariana Trench. What’s rarely mentioned is that something very large pursued them. Since then, several expeditions with sufficient technology to reach the Mariana Trench have searched for this lost species. It lurks in the obscure, dark valleys, consuming whatever it can catch.
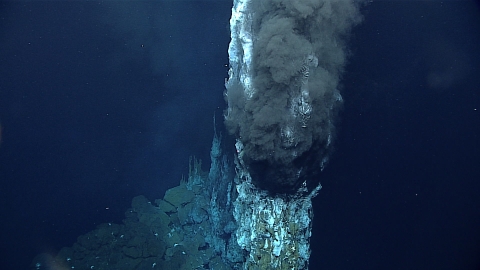
Mariana trench environment: hydrothermal vents
Sources:
http://earthlife.net/squid-anatomy/
https://oceanexplorer.noaa.gov/expedition-feature/19biolum-background-vision/
https://tonmo.com/articles/beautiful-bioluminescence-in-cephalopods.89/
https://www.tepapa.govt.nz/discover-collections/read-watch-play/colossal-squid/life-and-habits-colossal-squid/bioluminescence ;
https://www.aquarium.co.za/news/everything-you-need-to-know-about-giant-squids
https://www.nationalgeographic.com/science/article/a-squids-beak-is-a-marvel-of-biological-engineering
https://neal.fun/deep-sea/
3D Modeling Process
Initial Blocking
The most challenging part is always the beginning, finding the main forms for this creature. Using my sketch, I marked out simple primary geometric shapes. Since this was an unusual form, I couldn’t use the precise anatomy examples provided by our professor, but I took the fundamental basis and built from scientific diagrams, also drawing from other natural forms and selecting what appealed to me.
Geometric forms drawn sketch
The most difficult aspect was creating proper mesh topology, as the initial form was quite organic. While symmetry made it easier to add good topology, I used advice from topology guide blogs, primarily to understand proper loop cut placement.
Creature blocking and new topology in Blender
Detailing and Refinement
Since the character was built with symmetrical geometry, the next challenge was deforming the geometry to better match my character sketch. I used the warp tool to deform the main joint forms, and with move tools, I re-positioned eyes and growths.
I then created the first details for the armor. Since I had to significantly deform the geometry, I grouped both the armor and creature anatomy together. I modeled the armor after crab shells with sharp protrusions—it seemed appropriate that a creature consisting mainly of soft tissue would need special protection from attackers.
I created custom brushes for sucker shapes with alpha channels, and similarly for the eyes. All details were referenced from real-world examples. The most challenging aspects were the asymmetrical details, as I had to modify the eyes slightly. I designed the eyes to be easier to texture later.
Sucker and eye made brush in ZBrush with Alpha channel
My main focus was on the overall silhouette, ensuring it was easily readable. This meant removing some details and adding others to make the form more streamlined and expressive.
creature sculpted design in ZBrush
Texturing Process
The challenge I faced was creating transparent material that wouldn’t look like glass but rather like organic skin of a marine creature, as seen in glass squids and similar species. My main goal was to show this as organic material.
I used multiple layers to achieve this effect, primarily following the materials shown in class and tutorials on properly adding transparency. I added surface defects to show the creature’s age and wear.
For the eyes, I used emissive properties, while coloring the pupils with transparency effects. Since various colors can be seen through squid skin with spots visible on top, I wanted to combine this with bioluminescence as seen in firefly squids.
The idea was to create small spots across the entire surface. Since squid skin changes texture, I added slight height to some spots. It seemed appropriate that the spots would be scattered across the skin without much order, imitating krill or countless eyes rather than a uniform pattern, to further confuse prey.
For the legs, I chose a reddish-brown color reminiscent of crab legs, though not too bright since such colors have little significance at these depths. I added light effects to make the spikes appear sharper, while also wanting the armor to create balance, so I made them opaque.
Substance painters textured creature and details
Environment Development in Unreal Engine
I created everything in Unreal Engine, inspired by the Mariana Trench and other deep-sea photographs. I noticed that as water reaches deeper levels, colors begin to fade and merge together. I applied this theory to create the underwater atmosphere.
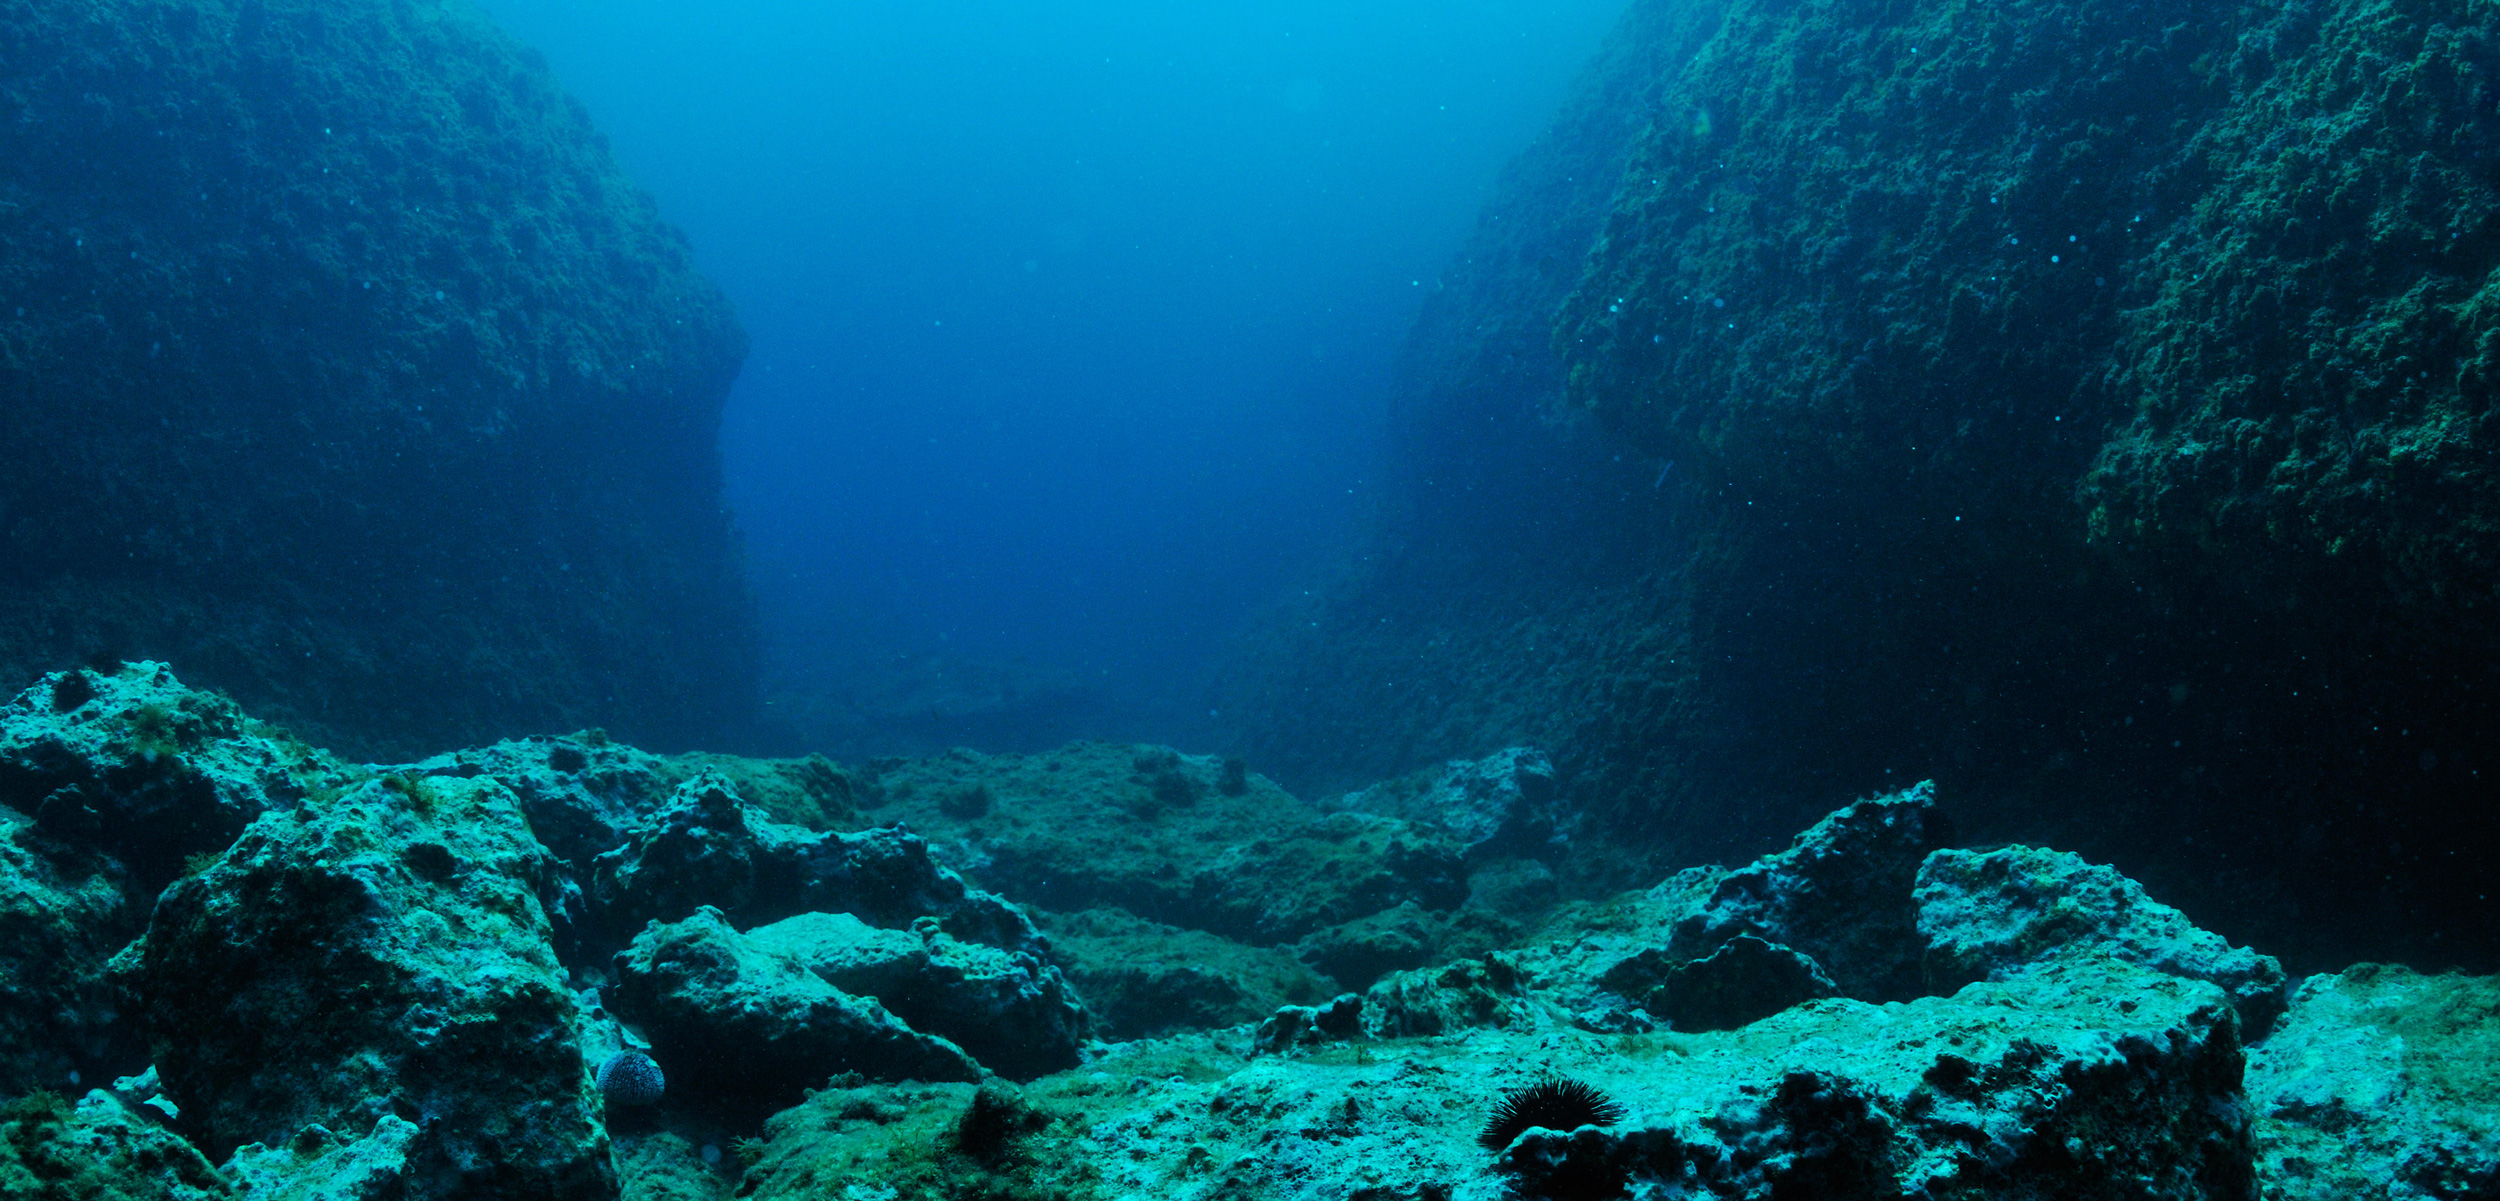
Deep see environment
I used principles from tutorials “Uncover the secret to creating Underwater lighting in UE5” by Karim abou shousha ( https://youtu.be/xgQLe7iASO0?si=W9l0pXzhIvPqN1dd )
on properly showing light and simulating lens effects very deep underwater. I primarily took general principles to follow when creating underwater environments. Also took some inspiration from this creator: “Unreal Engine Deep Sea Test (Made by someone with barely any experience)” by manshoety ( https://youtu.be/N8-yaSFZHm4?si=pbwln3EisuDLnb8G )
While I wanted my creature to be more visible, I reduced camera bloom and post-process values. I didn’t want to obscure the assets from the Deep Elder Caves environment pack by Oleksandr Sychov. ( https://www.fab.com/listings/1c5fb915-5e6e-483d-bfaa-d6813c130b47 ) I mainly used rocks and mushrooms to create the surroundings, accomplishing the rest with planes and textures.
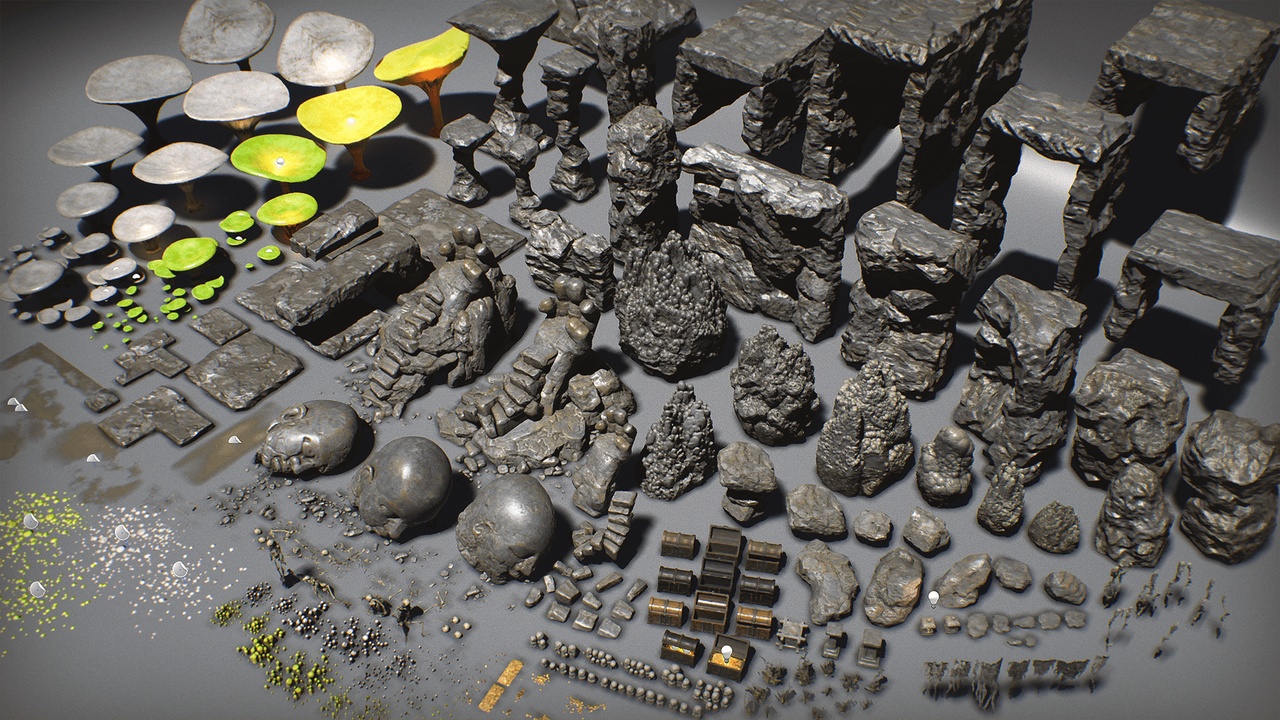
Deep Elder Caves environment and asset pack by Oleksandr Sychov.
Technical Challenges
Import Issues: I encountered a major problem importing proper translucency from baked Substance Painter files, resulting in incorrect glitches and Z-fighting. I had to recreate the mesh with separate armor and body parts, baking at both standard and very high resolutions. Then I separately applied the created textures from Substance Painter to each part, adding multiply and mixing translucent texture with the main base color.
Posing: For posing, I imported the creature into Blender and used the sculpting pose tool to adjust leg movement. I wanted to avoid complex rigging or techniques that would consume time, so I used a simpler method.
Final Product
I added subtle lighting and effects like smoke to simulate underwater thermal vents, and added particles slightly visible in the camera. I also used available dust and smoke clouds from the Elder Cave environment to create a more realistic setting reminiscent of the deep ocean floor.
The final product turned out well, in my opinion. I used post-process values to add subtle camera effects, making it appear as though the creature is deep underwater. I increased the emission amount for the skin spots and eyes.
Process Reflection
Throughout this process, I learned numerous new techniques—creating textures in Substance Painter, properly retopologizing characters, using loop cuts, and creating topology that’s both clean and functional for animation or games.
I also explored particle systems that I’ll use in my thesis project. These particles helped create visible underwater particulates.
For future projects, I would:
- Use ZBrush’s topology tools or start with mirror modifiers for better topology
- Better plan detail placement and topology requirements
- Export everything separately to avoid texture errors
- Choose simpler forms initially, though I’m personally satisfied with the final outcome
This module taught me extensive use of Substance Painter and Blender’s sculpting tools. I learned to understand good topology and create custom tools and brushes. I became familiar with ZBrush, though the navigation system takes adjustment when using multiple programs. I also better understand how Unreal Engine handles textures and meshes.
The class assignments were interesting. I completed all initially, but each week became more challenging as time progressed and I focused more on character creation.
Overall, I gained substantial knowledge from these lectures, making me much more confident in modeling complex forms, knowing I can always create new geometry on top of them. The final result differs somewhat from the initial sketch, but I’d say it became even more interesting.
Screenshot in Unreal engine 5 of sea creature


