Portfolio Wireframes
I have previously looked at some portfolio research, what makes a good one and I also got inspiration from researching a range of different artists and designers. Taking my project further I have created a range of paper and digital wireframes to prepare for the design of my very own portfolio website, but first I wanted to do some deeper research into wire framing and learn and understand why it is so important?
Wireframe research
Different types of wireframes-
- Basic wireframes. Also known as low-fidelity renderings, these are very simple page, usually in black-and-white and done using paper and pen.
- Annotated wireframes- Also on paper these type of wireframes include annotations which are brief notes, and they are typically on the side or bottom of a wireframe, these annotations can describe the items included on the wireframe.
- User flow wireframes- User flow wireframes can be static views of a fully interactive wireframe, but they could include a slideshow or a collection of wireframes in series to show a primary user flow or set of user flows (they are usually done digitally).
- Interactive high definition wireframes- This variation of wireframes can only be done in presentation and graphic design, or wireframing and prototyping software digitally.

The benefits of wireframes:
- Wireframes bring clarity to your projects.
- They can make it easier for you to communicate your ideas.
- Wireframes can also help deliver the core message of your website more effectively.
- They can show a clear picture of the elements, suggesting possible sizes.
- Wireframing results in a more fluid creative process.
- They help define their project goals and what their primary focus should be.
- They are good for feedback.
What to avoid in wireframes?
- Too much detail – this may add confusion at the beginning of a project, I can always add more detail later!
- Colour and design – working in grey scale helps you on the primary FOCUS of the Wireframing process and that process is to figure out the layout. I need to start with simple low fidelity sketches.
- Wireframing every single page– Do what’s necessary to move the project forward as you figure out the layout, this saves the designer time.
My portfolio wireframes
Paper Wireframes
I have begun my wireframing journey for my portfolio with paper first and I have sketched out some quick wireframes, I have sketched very small boxes which allowed me to come up with a wide range of different ideas quickly and efficiently. this quick exercise got my brain thinking quickly about all of the possible outcomes and layouts that my portfolio could take, I found this beneficial as this gave me a large number of outcomes to chose from.

I repeated the process with the layouts I preferred but added more detail in these wireframes:

Digital Wireframes
I still wasn’t sure which layout I wanted to go for, for my portfolio website, and the next step was digital wireframes so I took to Figma to do some digital wireframe to see if that would give me a better idea of what that each layout would look like on the web. I have decided to do a wide range digitally as I felt this would aid my choice and ensure that I chose the best layout as I could see what they would look like on screen.
Image first
the wireframes below show image first under the navigation, this would be the first thing the user would see.

Text first
The opposite of that would be text first and not have a hero image which I have displayed in the wireframe below. I have continued to experiment with text and image placement with the below wireframes, this was beneficial to get a feel for the digital layout and which combinations looked better on the screen.


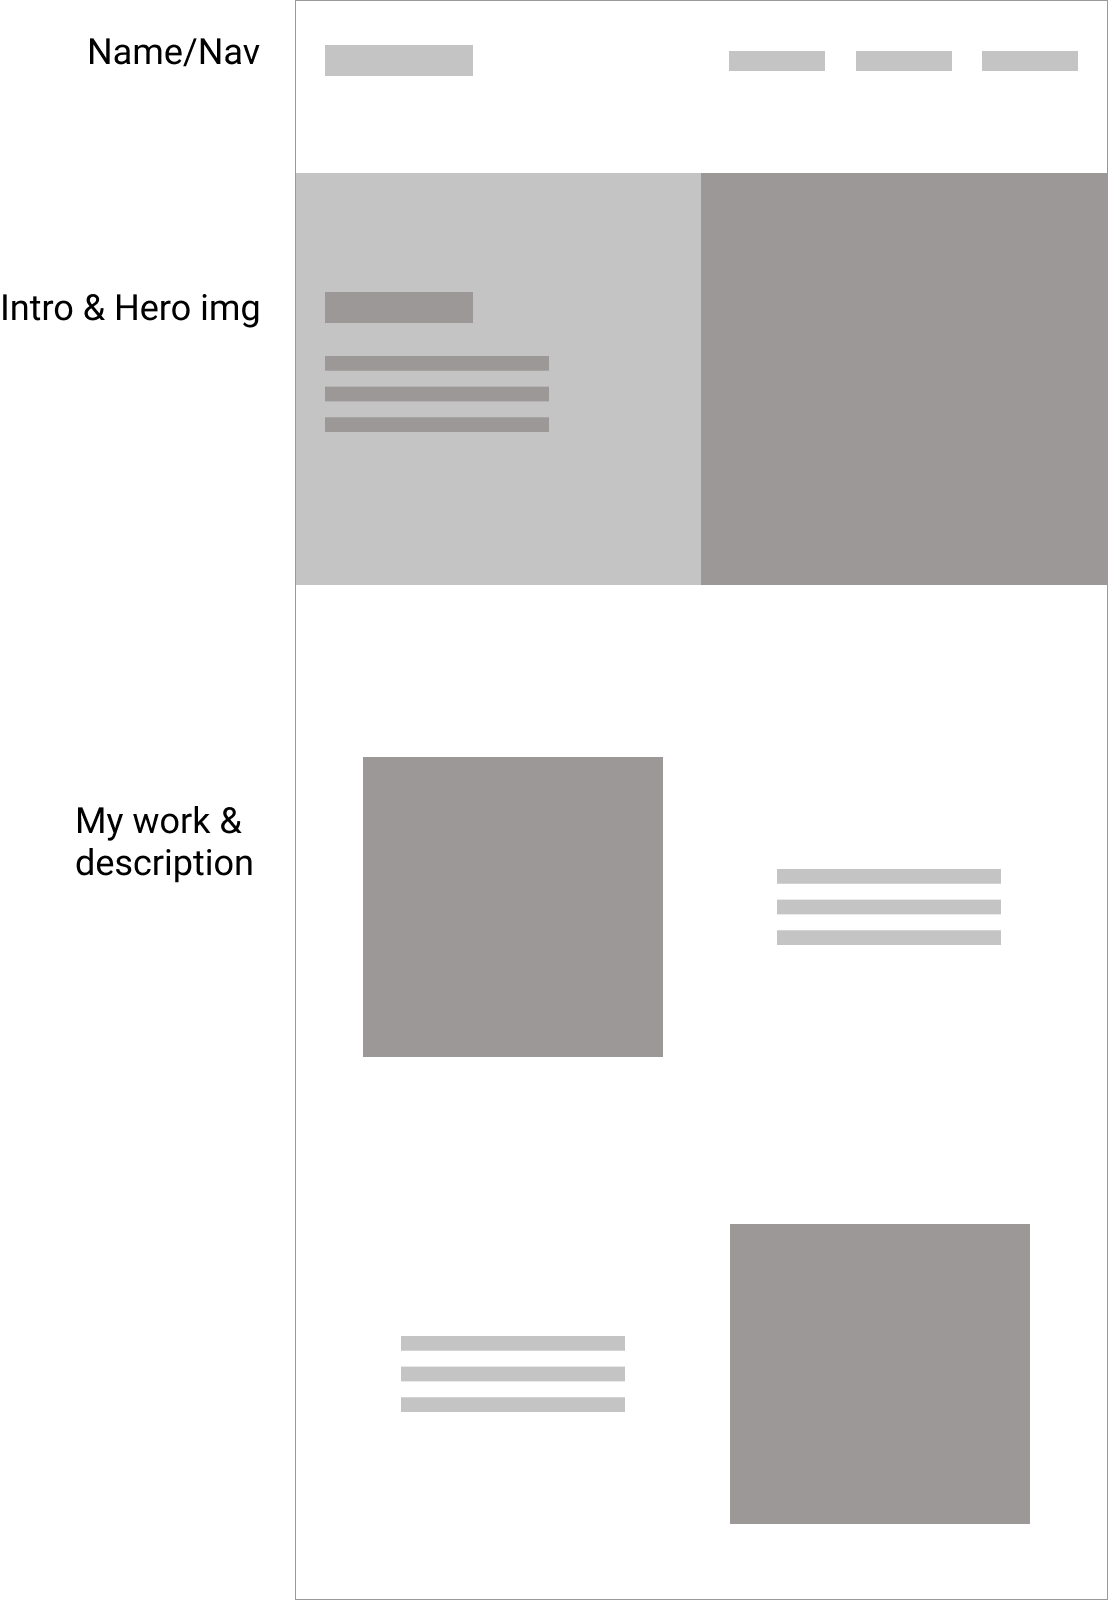
The wireframe below explores the idea of combining a hero image on one side and my wordmark/ text on the other side. I actually wasn’t sure of this idea but when I see the digital wireframes I think this could be a promising idea and layout.
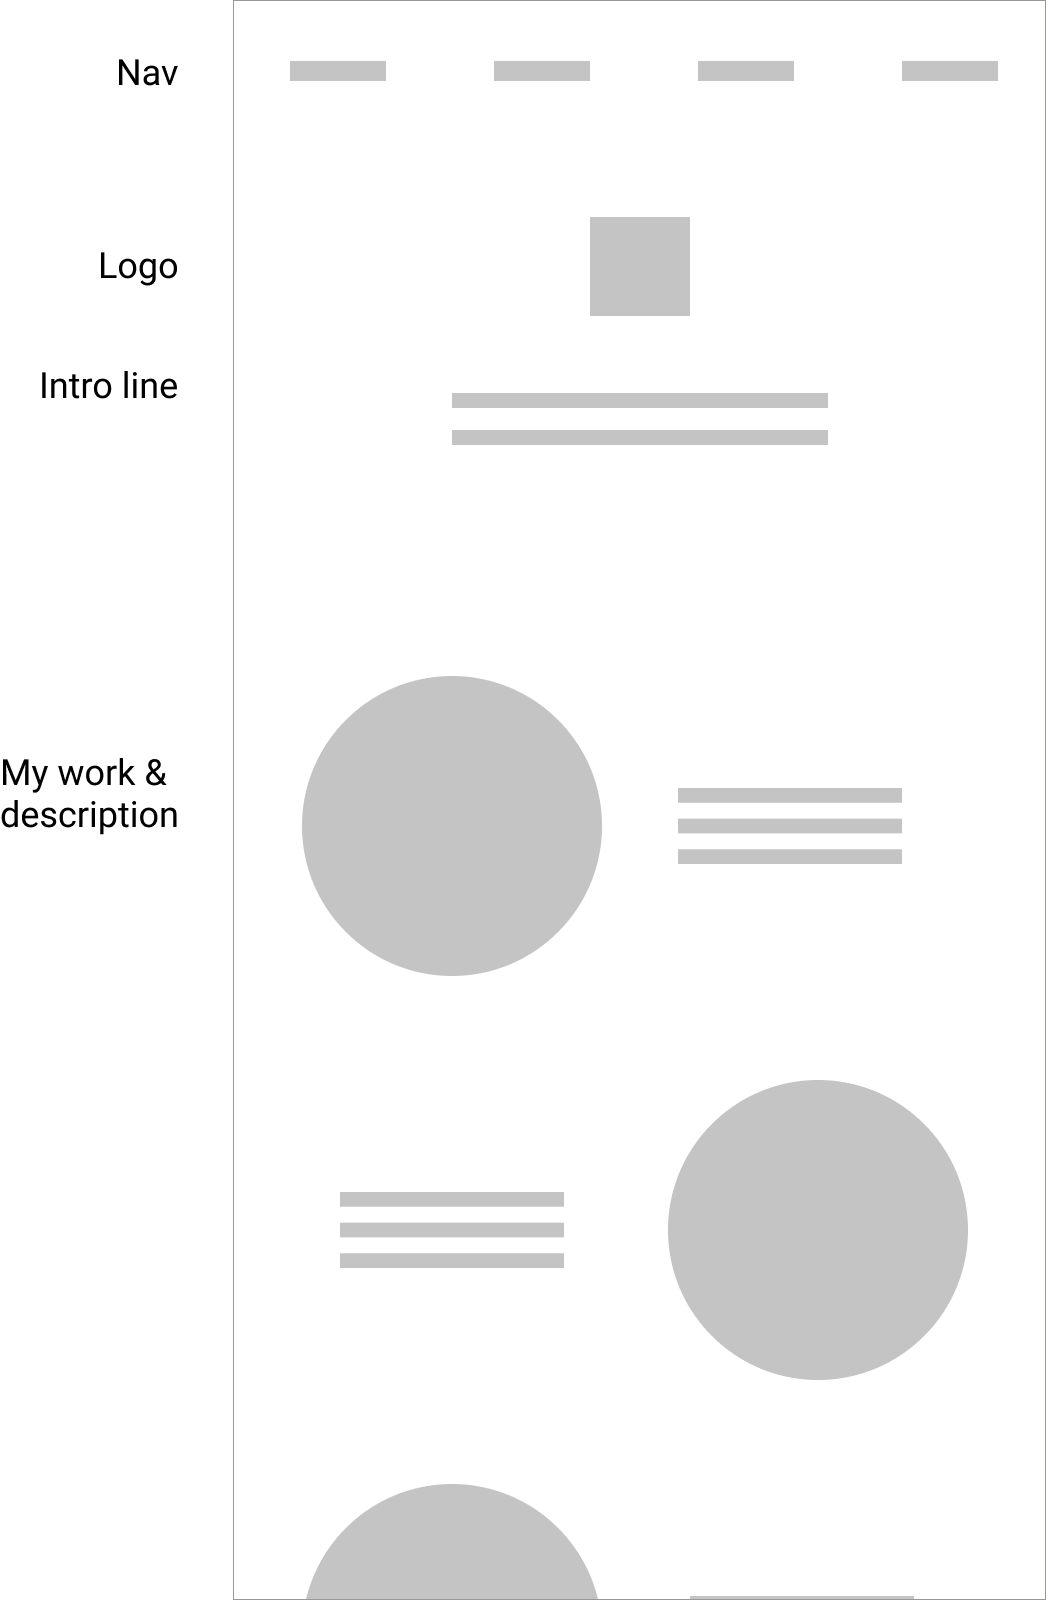
Exploring circles
With the wireframes below I played around with circle images of my work instead of squares, but after exploring this idea I prefer the square images instead.

Hover over feature
Another option for my home page is that I could go with a square grid and opt for a hover feature, when you hover over an image of my work text would appear with the name and description of what it is, this would make my portfolio more interactive.

My preferred layout design for my portfolio-

I think that I will go for this layout as it is simple and uncomplicated. With this layout I like the text first, with a short statement of who I am and what I do, I would like my name at the top left or my logo and then the nav towards the right hand side. For displaying my work I like the image + a small description with the possibility to read more with a link. I will further develop this wireframe further with more detail and information.
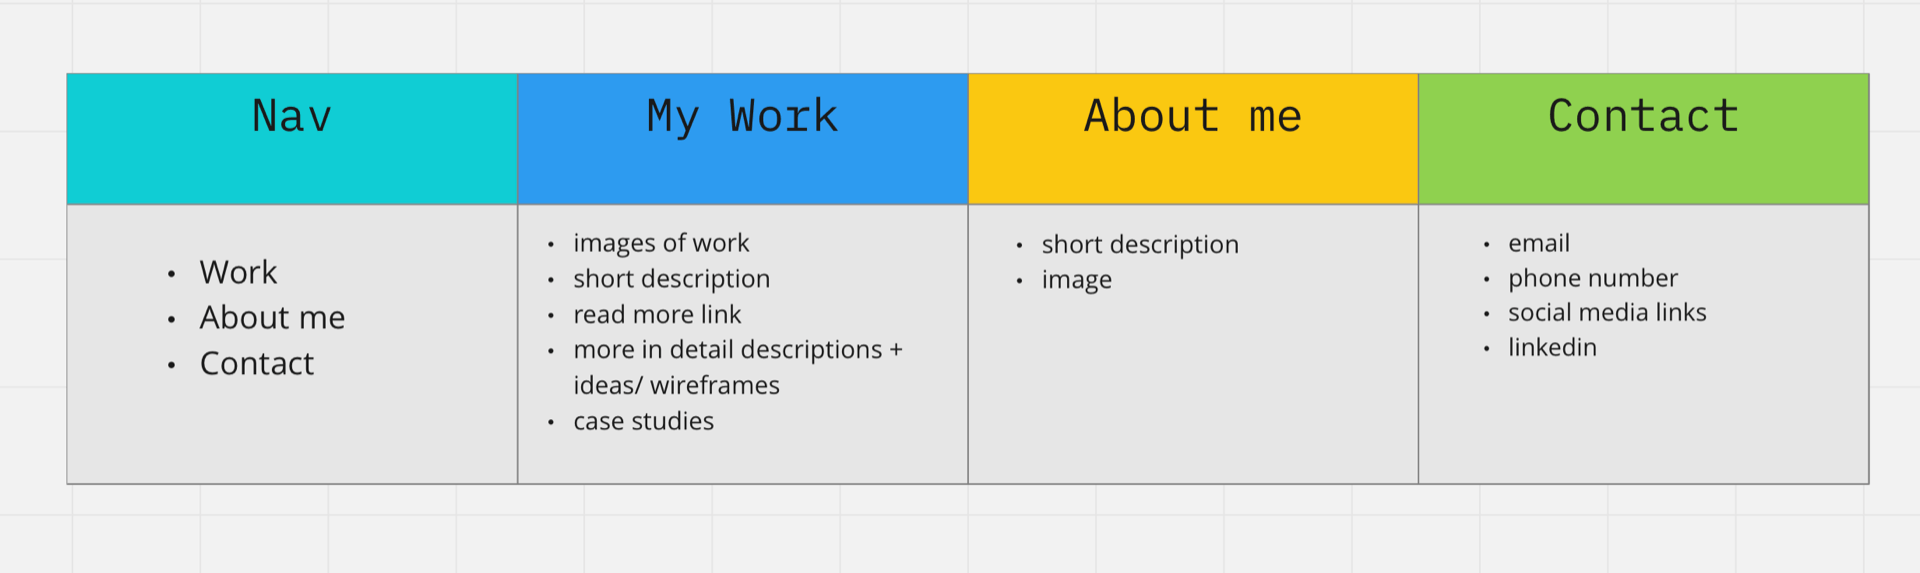
Content planning
I have laid out the content that I want to include in my portfolio in a content planning table below, this has helped me become more organised and make final decision s on what I need to include and this table ensure that I include the most important information within my portfolio.
Final layout wireframes
More detailed paper wireframes-
After deciding what layout I wanted I took to paper again and began to draw up a more detailed sketch, see below.

A more detailed digital wireframe
Taking my more detailed paper wireframe I decided to do some more digital wireframes with more info and annotations about what I want to include into my portfolio, highlighting what I want to include on each individual page for my portfolio.
Home page

Portfolio pages
Portfolio page home page

Below shows a wireframe of what I want each of my individual project pages to look like.

About Me page

Contact Me page

What did I gain from this?
I found it very useful to do some research on wireframing at the beginning of this task and the benefits of doing different wireframes, I have learned about the many pros to wireframing and how it is a very important step in design. I think that completing a number of digital and paper wireframes in the beginning when I wasn’t too sure on the layout I wanted helped clarify my thinking and ideas and this helped me land on the perfect portfolio layout for me and my brand. I have learned even more about wireframing, it’s importance and how to do it correctly, from starting with paper and moving to digital. I think that it is satisfying to see how I got to my end result and the process along the way.
What is next?
I am happy with my final wireframe outcome, however I want to complete more detailed version of my portfolio before I begin to code this website. I want to feel more prepared and confident in the design that I choose. Then moving forward I will take this to the coding station and begin to develop this into a working portfolio website, I will use the more detailed wireframes that I have created to guide my design and I hope to design a portfolio that reflects both me and my brand.