Tavern Blog
Research
For the research of the of the tavern I personally didn’t have a specific 3D artist that I took inspiration from, but instead we took major inspiration from the Shrek films. As we had decided that we wanted the tavern to have Easter eggs in it referring to old fairy tales and Shrek is a story which contains plenty of fairy tale characters that we could take inspiration from.
As for reference for the actual structure of the building we just took to google and Pinterest. We made a mood board of a vibe/atmosphere we wanted to create within the tavern. 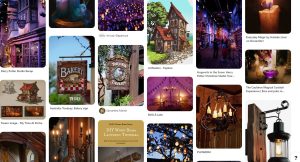
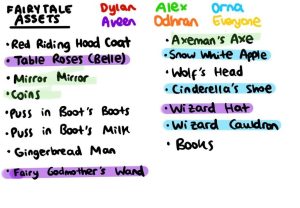
We picked what Easter egg we each would like to do.
Tavern Layout
As a group we all sat around a single computer and started to build the layout of the building within Maya, letting everyone take turns so that we all contributed to the structure. Here’s an early a version of how it looked:
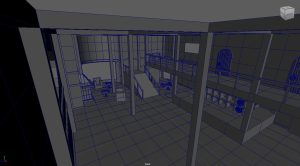
We tried to include as many classic tavern staples as we could such as plenty of log pillars, a large fireplace and balcony with private upstairs rooms. During this process we brought in a human sized model so that we could accurately set the sizes of things so that later during the process we didn’t run into the problem of the scene being too small to effectively move the camera around.
Model
Once we as a group had finished the layout of the tavern, we split up to begin work on our individual models, the models that I was given were:
Brick walls – The brick wall model ended up giving me a bit of trouble not from the creation of that actual model. The model came out well in my opinion but the problem I had with it was that I couldn’t get the object to move how I wanted it to within the actual Maya space, even with the magnetized I couldn’t get each wall to properly line up with each other. This would be a problem later since this would cause the texture to flicker in the final scene.
So, to avoid this I used the xnormals plug-in to bake the normal of the wall onto a plane so that I could just perfectly place the normal onto planes within unreal engine along with the textures.

I had to flip the greens into photoshop so that the shadows would be properly placed on the object.
Window – Making the window was a simple enough process since it was just square. To add more detail to the window I just added face to one side and used the extrude tool to lift the edges of the window. The diagonal wooden beams were just resized cubes and placed on top of the window.

After I was happy with the model, I need to make a curved version so that it would fit into two curved walls. For this I went to deform-nonlinear-bend. The first attempt failed due to there not being enough edges, used the multi cut tool and held crtl to cut lines the entire way round the object in the exact places it needed.
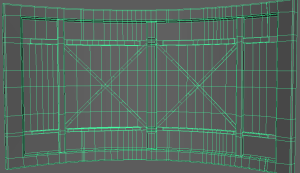
The edge loops didn’t come out perfectly but there was enough to allow the window to bend to the point where it fit in the curved wall.
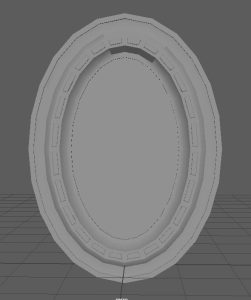
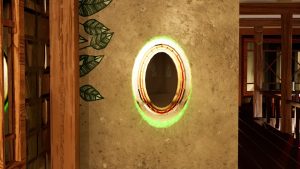
Magic Mirror – making the magic mirror was a bit troubling since once I had finished the model and went to texture it textures weren’t correctly applying. This was due to their being nGones, I then needed to go back to maya and make sure that the nGones were nGoners. I then brought the object back into Substance Painter and had no problems.
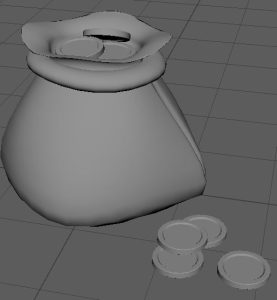
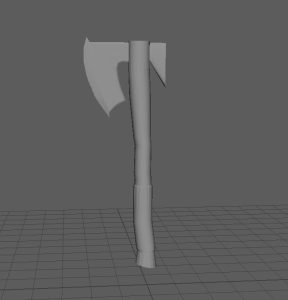
Coin bag, coin, Axe and Log Pillars – All of these models caused me no bother and were simple to create. The created by simply extruding and manipulating edges and vertexes so I could create the desired shape.

UV & Textures
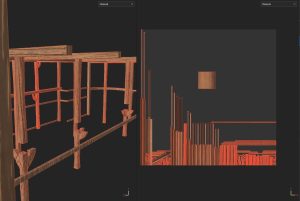
Prior to getting to texture my models and do something fun I had to UV unwrap all my models this was done by going into the UV editor in maya, deleting the preexisting UV map for my models. I then went create-create camera based, this way the UV model would represent what I’m seeing in the workspace and that way I could locate the places I wish to create cuts easier. Once I had created the cut I would unfold and layout each piece of the UV to create a neat UV map. Doing this makes texturing much easier since you can clearly see each piece of the object clearly in substance as seen below:
All texturing was done within Adobe Substance 3D Painter, this process went smoothly for all my models other than the magic mirror which I’ve already discussed.
The process of adding texture to the models would go as the following. Create a layer-add a black mask to the layer-Drag your desired texture onto that layer-select polygon fill and then proceed to click on the parts of the object that you want to be the previously selected texture. I would repeat the process for adding multiple texture to a single object.
Some objects though only required one texture such as the log pillars since they would wood all over. For the brick wall texture, I downloaded a free concrete material from the Adobe substance3d website:
https://substance3d.adobe.com/assets/allassets/0a7fe6cc37d2b042daff7cc7a8fc1c8d57bcb971?free=tru
Unreal Engine setup
When we first tried importing the scene, we had created into Unreal engine we ran into a problem of some of the object being connected. This was caused by the object being simultaneously named lambert 1, this was fixed by changing their names in maya and importing them individually rather than importing the entire scene in at once.
Once all our assets had been brought into the Unreal engine scene it was then a case of arranging them all correctly and then applying all the textures, we had created for them. We decided it would be best if we all used one computer and simply took turns applying our own textures to our models. Applying textures to the models was not an overly complicated thing to once you got into the hang out it. I chose to set up materials so that if I had multiple of one object I just simple drag the material onto the object and it would apply.
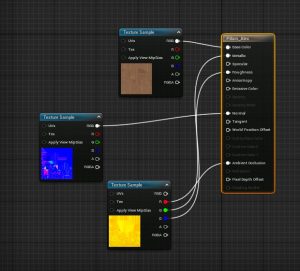
For the magic mirror I wanted to create a magical effect around it and for this I used the Niagara system within Unreal. I started by right clicking within the content browser-selecting Niagara system-hitting next with New system from selected emitters selected-selecting simple sprite burst-Upping the lifetime and changing the colour in initialize particle-Unchecking kill particles in particle state-upping the spawn count to 20,000 within spawn burst instantaneous-Changing the shape with non-uniform shape in shape location.
Lighting
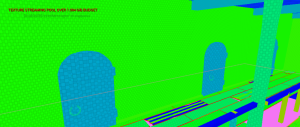
Me and Aveen lit the seen in Unreal and everything went smoothly until we tried building the lighting and realized that we had too many overlapping lights which was causing it to fail when we were building the lighting. Once we stopped all the overlapping lights, we were able to build the lighting. We then optimized the light map densities of object by using the overridden light map feature so that all the major objects that would be easily seen had a high resolution on their textures.
Rendering & Editing
Rendering out camera shots within unreal was really satisfying to watch all our hard work come together, rendering and setting up shots was much easier than I thought it would be. As setting up shots is simple just using keyframes. The whole process is very similar to using premiere pro.
Even though the majority of this process was easy we did have a few problems, the first being the camera just decided that it wanted to do a 360 mid shot with no keyframes telling it to do so. Even when I would add extra keyframes in to give unreal a more exact idea of what path I wanted the camera to take it would just do 360’s really quick. Unfortunately, I couldn’t find a fix for this. The next problem that we had was that during the rendering out process of a shot that contained an animation such as the fire for the fireplace, the fire wouldn’t appear but instead just the plane that it was on. To fix this we needed to add the media to sequencer and make sure that the media last for the duration of the clip since some were too short, we just lengthened them in the sequence to match the shots length.
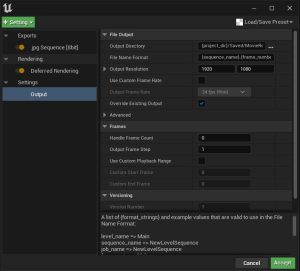
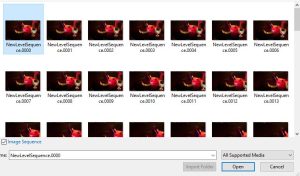
After all the shots had been rendered I brought them into premiere pro but since they get exported as png’s I needed to make sure that I ticked image sequence. This would turn all the photos into a video just like how you would’ve seen it play out in the unreal engine renderer.
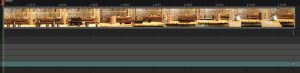
Once all my videos had been imported It was just a case placing them onto the premiere timeline and organizing them in a way I wanted. After I had arranged them I added a few transitions to in between the clips. I chose to use dip to black transitions when the clip was changing to a completely new object and a cross dissolve for when the camera was just showing a new angle of the same object. Next, I added music and sound effects, which I got from:
https://freesound.org/people/deleted_user_2104797/sounds/164661/
I finally exported the scene as using the H.264 setting for a high quality video while maintain a reasonable file size. After that I was done.
References:
Fire.wav by deleted_user_2104797 (2022). Available at: https://freesound.org/people/deleted_user_2104797/sounds/164661/ (Accessed: 19 December 2022).
Worn Concrete Bridge Support Wall Painted 03 on Substance 3D Assets (2022). Available at: https://substance3d.adobe.com/assets/allassets/0a7fe6cc37d2b042daff7cc7a8fc1c8d57bcb971?free=true (Accessed: 19 December 2022).
Reflective Post
From working on this project I’ve learned how important it is to communicate with my team effectively and file share effectively, so much time could’ve been saved if these things had of been done. Skill wise though I’ve learned a lot about Unreal engine and how texture things within it, I learned some basic particle effects from the Niagara system within unreal. The animation part of Unreal still remains a bit of mystery for me though, I felt that I was doing everything right when it came to creating an animation by applying it to a plane. Yet it never seemed to work and even when we got it working for the final rendering I had no part in it, which is why I turned to learning the Niagara system.
If I had to do this again I would definitely ask for more help from the tutors rather than try to self teach myself everything, not that I won’t still do that just maybe a little less. I also learned the importance of properly checking my models for things such as nGones and object being correctly labelled, since these small easily checked things caused me and my group a lot of hassle and ultimately waste quite a bit of time