Assignment 1 – 3D Environment – Observatory Group Project – 22nd December – 50%
(COMPILATION POST OF ALL WORK AND REFERENCES DURING ASSIGNMENT 1)
MODULE INTRODUCTION:
Our first assignment of second year was a group assignment where we had to organise ourselves into groups of five people. By building upon the skills we acquired from first year, we were tasked with creating a 3D environment from which we could produce a Cinematic Short film using the environment as its storytelling medium. It was initially due for the 17th but was moved to the 22nd of December. The assignment was also to simulate a studio-like scenario with our group to give us more experience working in teams on a joint project.
As a group, we had to develop and share the main environment concept and key assets for one of the options presented below. Once these were developed, we were then required to use the assets to develop our own interpretation of the environment.

I was really excited to work on this project as it was great opportunity to learn Unreal Engine and create a 3D environment like those in video-games and films.
My team collectively agreed that we wanted to model the Observatory because we all had a lot of fun initial ideas. Me and my group were assigned as Group 3 – Observatory.
RESEARCH:
In class, after we formed our group for the project, we immediately began planning and brainstorming possible ideas and concepts for the Observatory. Neave took down notes as we began thinking o

Our immediate first ideas for the Observatory Environment were to create a stylised Environment that was magical and academic.
We brainstormed having a giant tree in the centre and having lots of plants and roots in it, as well as sticking to the regular, circular room shape with a dome. Then we started considering igloo shapes as well as tunnels or side corridors and rooms to add more space. This caused us to think about temples in video games, and then cathedrals with domes in real life.
Our Initial Observatory Concepts on a whiteboard in class:

MIRO:
In the initial planning stages, my group created a Miro board so we could lay out the goals and targets for the 3D Environment brief and begin to generate various ideas of what our environment could look like. We were able to include references from famous buildings and landmarks found in real life as well as references from movies and video games, eg. Treasure Planet, Legend of Zelda: Breath of the Wild, Genshin Impact, Critical Role.


REAL LIFE INSPIRATION
Following this idea of a cathedral layout, we focused on real cathedrals and buildings as reference such as the Florence Cathedral with its duomo, where we thought we could use as a telescope observation deck dome. We also looked at the Sagrada Familia in Barcelona for it alternative and unique design, and even the St Annes Cathedral here in Belfast to understand a Cathedral design and layout up close.
Florence Cathedral, and Duomo:

Sagrada Familia, Barcelona:


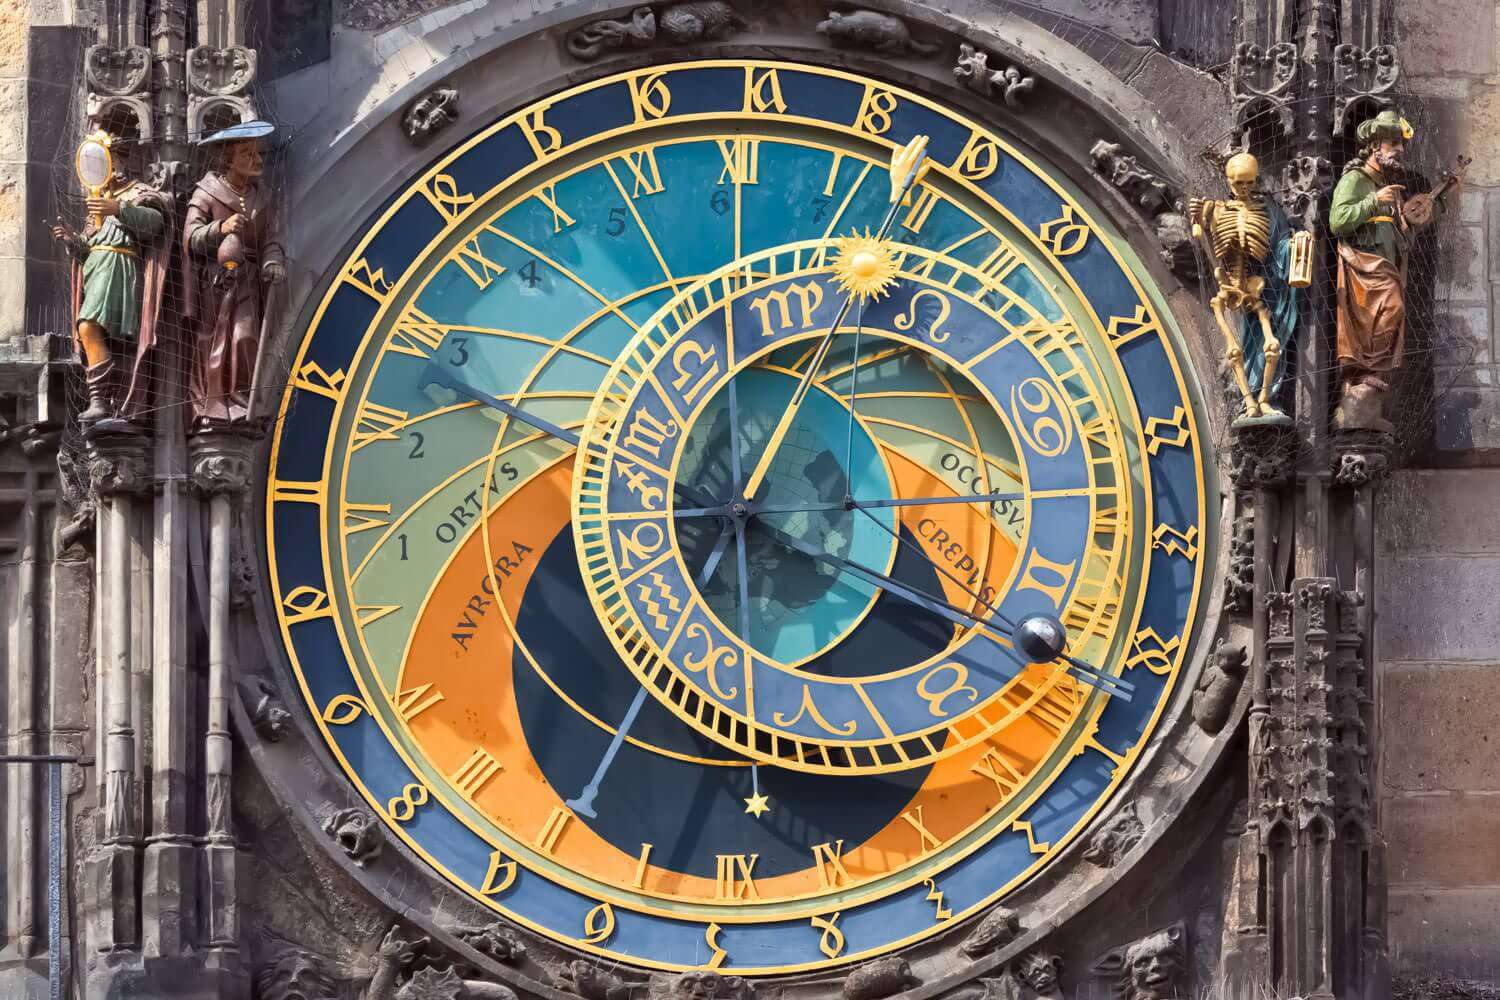
The Astronomical clock in Prague was particularly influential to the group as style and aesthetic inspiration. It even gave us plenty of colour and details in the design that we could use.
The design and colours of the Provincial Bank on Royal Avenue, Belfast (Old Tesco Metro) was also very inspiring as its dome and structure made it the ideal reference for ancient roman structure, similar to a cathedrals, and modern interior and use.


ARTISTS
To fully understand what I had to do in this project, I decided to research 3D artists, especially to find people that used Unreal Engine to create environments.
I found a few Observatory models on Sketchfab that helped me visualise what I needed to model, how to lay it out and various styles I could follow.
- Observatory: watermelon549
- Observatory Interior by Saular
The Observatory by Bradley Pujala was also a great influence on my work in this project as he modelled an Observatory Environment completely and created a Cinematic of the environment.
https://www.artstation.com/artwork/aRYWkR

I also found the environmental artist, Victoria Goldsmith, who modelled a 3D Astral Observatory Diorama that used Unreal Engine and documented the whole process, similarly to what we have to do:
https://80.lv/articles/creating-an-astral-observatory-diorama-in-ue4/


Her work was incredible inspiring for me as she goes into detail about her process and how she made her environment. The entire style, appearance and layout of my project was heavily influence by this project.
FIRST HAND IMAGES USED AS REFERENCES


CONCEPTS:
EXCEL
My group created an Excel sheet to divide up assets and tasks we each had to do. We also created a weekly goal so we would all be up to date and prepared for the final submission.

ART AND EDITS
Myself and my group members each set out to make rough concept sketches of what we wanted our Observatory Environment to look like as well as how we could possibly lay it out.


I decided to try also creating a colour palette concept and an updated “Cathedral inspired Observatory” – 
Since I was given the walls to model and texture, I first decided to create a rough concept design of how these could look, what masonry designs I could include, as well as what the colour and material could be:

I created a lantern concept art based on lanterns I had seen in 3D video games such as Kingdom Hearts, and also from real life as seen in my first hand photos. 
Traverse Town, Lanterns – Kingdom Hearts
BLOCKING:
For our second week morning class, we went through an Unreal Engine tutorial. We were taught how to sculpt environments in the engine, and then Henry took us through how to make a custom material – so after I sculpted a simple mountain range using the landscape sculpting tools, we got to that.


Alec then gave us a series of tutorial videos on how to begin blocking out a scene on Unreal Engine. These were really helpful tutorials that made me understand where to begin using Unreal Engine and how it will create our Environment.
My group decided to each try blocking out what we wanted the observatory to look like.
I found the following tutorial on YouTube to try and give me an idea of where to begin for blocking. It was really helpful in making a simple easy to follow series of guidelines to follow to block out my scene.
And also this block out on Sketchfab by Korolevalidia really helped me get an idea of what to aim to block my Observatory out like:
Blocking:


I could have gone into more detail by modelling rough larger props such as the tables and bookshelves, however I am very happy with the rough layout that effectively shows the observatory I want to model.
MODELLING:
WALLS
My first, and main task was modelling the walls. Since I had already made a layout sketch and created blocked out versions of the Observatory, it was simple to begin and get the shape of the whole room.
Following Henry’s tutorials I was able to model a brick wall by making blocks and stacking them.


When I brought the fbx into Blender I was able to create bevels on the edges to make each brick have more of a realistic look. However, when I tried to raise the …. and combine the mesh my Blender file would consistently crash after multiple remakes and attempts. This was most likely because my file for the walls was quite large. Therefore I was unable to go with my original idea of creating a solid brick wall with height maps and a textured surface.


I decided to make a wall from a plane very quickly since I had spent a long time on my previous wall attempt. This turned out to be much easier as I was able to extrude one wall plane panel around the edges of my layout sketch.
Later on in the project, when I decided to make the wall higher by creating a top wall and roof, this made it easier as all I had to do was extrude the top edges also. Modelling this way also make UV mapping much easier.
Following advice from Michael after our presentations, I bevelled all of the edges of the walls to make it look less sharp.
WALL COURSE BANDS
When I had created the first versions of my wall, I started using panels of the wall to create decorative mock ups and see how to fill and make their design more creative than just a plane. I have individual bricks I had created for the floor and ceiling Course Bands.
Thankfully, with help from Henry, he showed me how to extrude along a curve made from the edges of the walls, then add decisions to the object which made the brick follow the whole way along the edge of the wall. I had to adjust some of the divisions so it would sit on the wall top and floor correctly, however if not for this technique I would have had the tedious job of placing each course band brick along the top and floor edges.


DOOR
I wanted to make a door to the Observatory and so I began looking up 3D references.
- The Door – Peter Grogan
- Wooden Church Door – beachmouse
- Old Fashion Door – awramos
These particular models seemed to fit our Observatory so I began modelling my own version of them somewhat combined. The end result seemed plain with no details or textures so then I began the next step.

DOOR ARCH
I modelled an arch using a cube stretch out and the bend tool. I was also able to make the groves with the cut tool and adjusted these. The back of the model mesh seems to have a couple of errors where I may have moved some vertices without meaning to. However this part of the model will be against the wall, and so will not be seen.
This particular model was very difficult for me to attempt to UV, however, Henry showed me the best way to use the Planar UV mapping in order for the textures to sit correctly. By adding two of Joseph’s pillars, shrinking them in size and then putting the on either side of the door, under the frame, I was able to create a door frame. This led to my last door asset.

DOOR KNOCKER
Modelling the door knocker was relatively easy, as the shapes and placement of parts was simple, as well as the knowledge that this asset would be small and not seen very closely. I think I could have bevelled or smoothed the back of the door knocker, however I quite like the sharp edges that made it look more antique.

WINDOW FRAMES
I was able to use Joseph’s window models as a centrepiece on a panel of the wall and started creating a frame to go around it. I began with the arch for which I followed the same process of modelling as my door arch, but smaller and longer. I again added two of Joseph’s pillars, resized, and put on either side of the frame. I also made a window ledge to complete the frame.


For this I looked at the 3D model on Sketchfab by lpfeffer of an Observatory window frame which gave me a rough idea of where to begin and I needed to similarly make mine look:
And also, this church window inspired me for the frame and and how we as a group could create the stain glass windows. This correlated with our design theme of Cathedral Observatory.
LANTERNS
I was in charge of modelling Lanterns and so I decided to get inspiration from real lanterns. I was able to get photographs of light and lanterns in Belfast that I was able to use to reference my models.
The first lantern I used as reference was relatively simple. I drew out my rough concept of the shaped and how the lantern could look. I was able to get a rough view of what it would look like with glass as I put the glass object on X-ray mode.


For the next lantern, I wanted something fancier and more detailed for the Observatory. I found a lantern in Belfast that was exactly like I wanted to model and used it as reference.
This lantern followed much of the same steps, except of the handle which was somewhat more complicated. When creating the swirl design, I needed two bend curves, however when I tried attaching these, the UVs for where they connected broke into individual plane pieces. I didn’t have time to try and fix this however, and know the UV is not as accurate as I would have wanted.


When modelling and texturing these models, I also used the lantern model of Chris Tekshov, or MeanPhrog, on Sketchfab, as a reference:
ROOF AND BEAMS
I decided to model the roof much later in the development of the environment. Myself and my group thought that it could be avoided if the walls were high enough and to keep camera pans low. However, when starting to bring our first models into Unreal Engine, I realised we would benefit so much from a roof to keep in and reflect light, as well as for filming, as I wanted shots that could reflect the size and height of our Cathedral inspired Observatory.
Using this inspiration, from researching church and cathedral ceilings, they are often very, very high up and have wooden beams supporting them. This lead to me also making a series of support beams for the ceiling and room.


I think my models were quite good this year, however I would have like to have a wall with beveled bricks and height as well, to make it more realistic and so I wouldn’t have wasted my time on it.
I would have liked my model meshes to be a bit more accurate and precise, therefore looking a bit better as a whole. I also know that my models could be UVed much better as I am still not as proficient as I would like to be in this.
TEXTURING:
MARBLE TEXTURE; WALLS, WALL COURSE BANDS, WINDOW FRAMES
Myself and my group wanted the wall to have a clean white, marble texture, similar to those in cathedrals. I created my own marble texture in Substance Painter by using parts of other materials and altering them until I got a marble material I was happy with.


Since I was not able to get a brick texture on my wall from Blender, I improvised by finding a jpeg of bricks, bringing this image into Photoshop and making it so the sides line up and adding filters to make it less realistic. I then brought this back into Substance Painter and overlaid this on the marble material.

Brick Image Used to Overlay the Marble

Although this wall texture seemed very shiny, clean and pristine in the initial environment mock up on Unreal Engine, when we added post processing effects and lights, as well as being able to alter the material, this was not a problem.

I used the sane marble texture for Joseph’s pillars and dome arch, my door and window frames, and the floor.


FLOOR
I was not initially in charge to texture the floor, however I had time before the presentation to make a floor texture mock up. Searching online for marble tile materials, I found a Soviet tile material as well as a ceramic flower tile material. I thought these could work for the time being. I added the first material as a base and then used the second with a black mask to create a tile centrepiece. These were both overlaid by my marble material to match the walls.


I got feedback after the presentations that the ceramic flower centrepiece need hight around the edge or to be changed so there wasn’t a harsh change in the texture edge. I came to the decision just to get rid of this detail and stick to only the Soviet tile material as I found the detailing a bit too much, and only used it as a way to fill the room. Neave had modelled and textured rugs that could be used to fill up floor space much more nicely also.
The floor texture was partially influenced by the floor tile designs of Florence Cathedral:

WOOD TEXTURES; DOOR, ROOF AND BEAMS
When texturing the roof and beams, I used Joseph’s wood material that he made on my models. I then added some shadow and details in Substantial Painter using a black mask and paint tool.
These were not my priority to texture as these were going to be high up and mostly out of view of any closeups, and so I felt the textures were done.


LANTERN
When texturing the lanterns, I focused on using a pained black metal texture, then adding chipped paint edges and some signs of of wear.


For the fancy lantern, I added gold detailing and edges to make it a bit less plain.


I greated glass textures for both lanterns in Substance Painter, however at the end of the project, we did not need this as we made an emissive material in Unreal Engine.
TELESCOPE AND STAND
I was given the job of texturing the Telescope and stand. Initially I was a bit apprehensive and unsure of what to do, however, I looked at Joseph’s texturing for the armillary and used that as a reference.
I was able to use the brass and bronze smart materials to begin and get my metal texture. I adjusted these quite a bit until I was happy, and used black masks to section off the different parts I wanted to have with certain textures. I was then able to finish this off with signs of wear and scratches on the edges and metal.


 The stand was simple as I used a steel base with and overlay of a painted metal material. I then was able to add paint chipping effects and scratches.


I had at first wanted to texture the lens using a photo of the stars and sky, and then adding a glass lens on top, to give the effect of looking into space. However, in the end, the telescope lens was not going to be in any camera shots.
UNREAL ENGINE:
IMPORTING ASSETS AND MAKING MATERIALS
When I first started Unreal Engine, I began to create my environment. I focused on importing FBX models that were completed and sorting these into folders. I began the layout with these assets also.
This was the point I realised to get the look and camera angles that I wanted for my cinematic, I needed to have a higher wall and a ceiling.
INITIAL LOOK


My Unreal project had unfortunately, at one point, deleted my environment and assets laid out, however, this meant I could re-upload all assets with the updated FBX’s and textures so this did not hinder me too much.
I reimported my old assets and began importing the new FBX models and textures.
I then started making materials by following our lecture videos and plugging in the textures. I was able to parent my instance materials to one main material which meant that the process of creating materials for each asset was much faster.
INITIAL LAYOUT LOOK FOR PRESENTATION:


Having the first marble and wood textures complete, imported and then made into materials on my assets really helped me begin to visualise what my Observatory would look like.
Henry was able to show me how to convert the texture of my lantern glass to an emissive material which meant that myself and my group could use these as light sources. These reminded me of one of my original references of Traverse Town Lanterns from Kingdom Hearts.

I was also able to show my group how to do the same for the windows, which had textured designs which we were then able to make emissive.
LAYOUT
Much of my time towards the end of the project was spent focusing on the layout and duplicating assets such as bookcases, books, scrolls and letters.


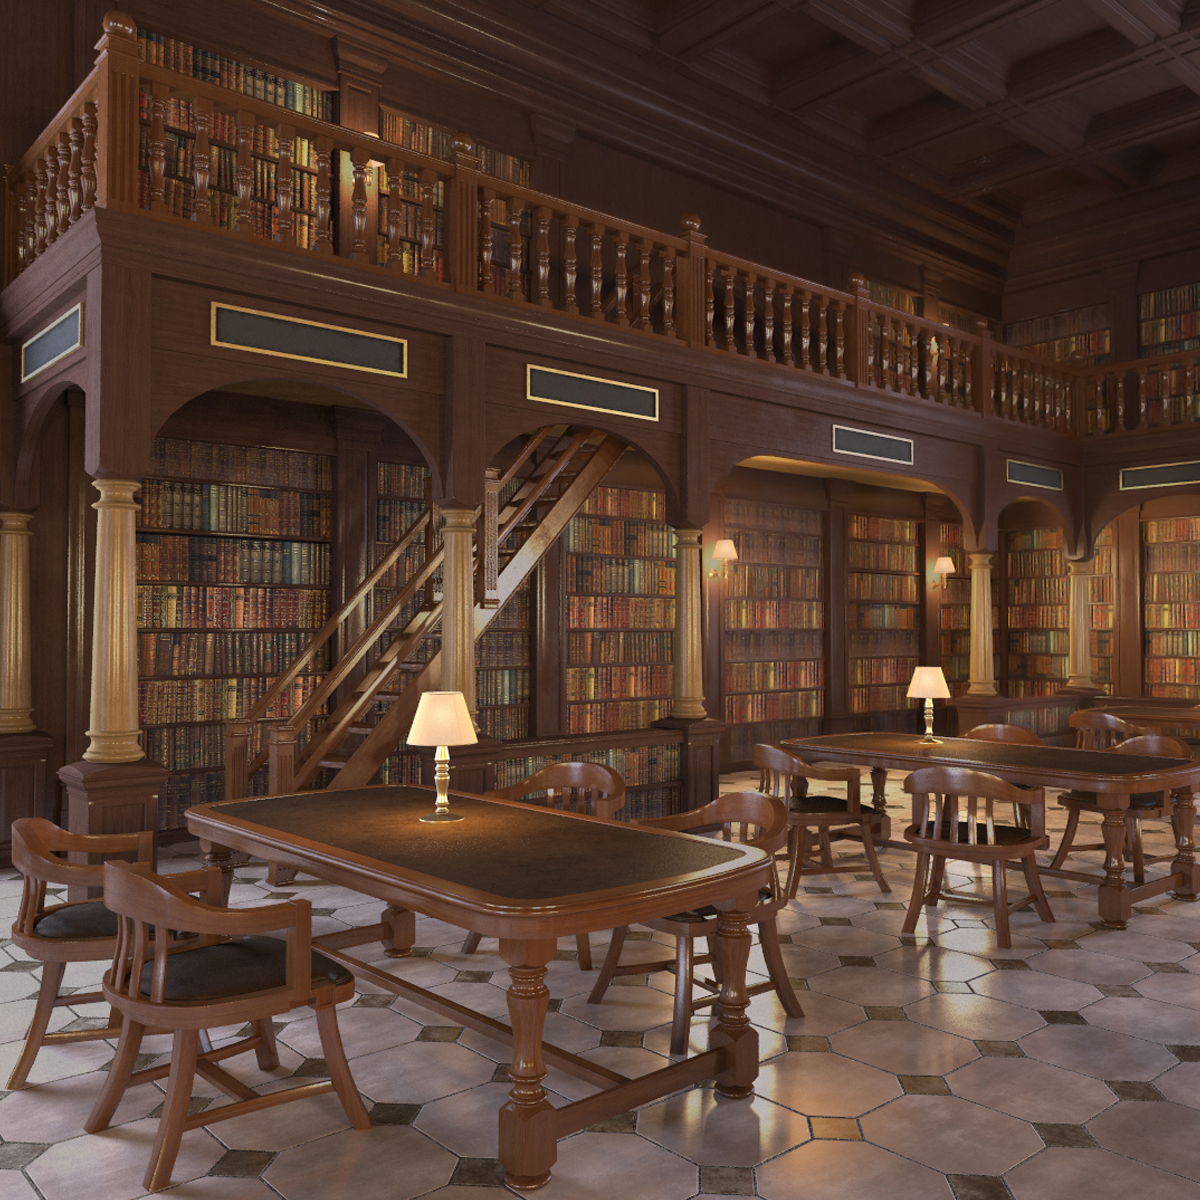
I looked at the following 3D models when laying out my bookcases and desks, as reference and inspiration on effective composition of books and items on the desk and shelves:
https://www.turbosquid.com/3d-models/classic-old-library-3d-model-1672006
The desk in this diorama by Hugo Strobe, was also very helpful to use as reference:
ADDITIONAL EFFECTS:
I was able to turn my sky to nighttime with stars by watching and following this YouTube video:
Joseph showed me how to bring in dust particles that were animated and moved in the scene that would give my observatory a more realistic look and these also got caught in the light and would make nice camera shots.
I also followed a YouTube tutorial on how to create fireflies, making my scene have a more magical look and glow:
Pre-Render:


My final layout I think is really nice and has really nice parts of the Observatory that I have created. I feel like I lacked in not making the telescope as the main focus but one of three; the telescope, the armillary and the study area. I could have laid the raised platform out more effectively to draw more attention to the telescope and made it a better focus.
When trying to do my final light build before making my cinematic, I encountered an error with my Unreal project and the lights would not build.

After contacting Henry for help, we tried restarting and various methods of trying to fix the error. Thankfully, Henry was able to find and solve the issue by discovering that it was that the lightmass settings for some of my assets were set too high, over 4k, and this was causing Unreal to crash.
I had to spend a large part of an afternoon fixing the lightmass density of each book, bookcase, chair and letter. After doing this, my project started working correctly, had no more error messages and I was able to build my lights for the final cinematic.


This was a tedious task, but I was glad to have my environment and lighting built and fixed for the final render.
RENDERING AND FINAL BUILD:
When my scene was laid out, I began to create my final output and visual. I had to give it my own unique and creative aesthetic by creating my own interesting lighting and render effects.
For the final render, I wanted my project colours and lighting to be similar to my concept art, focusing on blues and purples with accents of yellow/orange to compliment.
Through the post-process editor on Unreal, I was able to adjust the overall look of my scene by changing the saturation and hue to similarly match the colours above, and adjust the exposure, bloom and shadows.
I was also able to add increased lens flare which I felt gave my cinematic a more impactful look, and only 2% chromatic aberration which finished off the final visual.


I followed Henry’s advice and video lecture about removing all but the main directional light and then adjusted any spotlights accordingly. I would have liked to study lighting more, focusing on how my colour and light bounced off my assets in the scene, as well as where the shadows should be pointing and appearing.
FAVOURITE FINAL RENDERS:


CINEMATIC:
When creating the cinematic, I started by watching videos displaying grand old buildings that had a looming and spacious effect. Henry showed me the Cloisters of Glasgow University, which inspired me to find videos with effective camera shots and cinematography showing the buildings.
This video has really nice camera pans and angles that I used as reference.
I also rewatched the Harry Potter and the Philosopher’s stone scene of the students entering the Great Hall. The camera angle and shots give a really grand and impressive introduction to the environment.
I also looked at famous movies shots that also were very inspiring to me:
Neave helped me complete some basic shots to get me to understand how the cameras worked in Unreal Engine, as well as how to set up a sequence.
I then watched Henry’s lecture video, which really helped me think about what shots I wanted and showed me how to do a perspective focus, which would bring items into focus or blur them in the lens.
I was able to get 20 shots I was happy with, and then brought them into Premiere Pro to edit together and then submit.
Final Cinematic:
Although, I am impressed and like my cinematic, I ran out of time for creating the shots and was unable to send it away for feedback as I had no PC at home to make final edits on. I would have also liked to focus my shots more on specific objects, as well as make them much less simplistic.
SUMMARY OF TEAMWORK:
Throughout the entire creative process of making our 3D Environments, myself and my group members were very active in coming into university every Monday, Wednesday and Friday to work together, share our ideas, and help with any problems we encountered.
At home we would communicate on the Discord server we created for this project and shared files like assets and textures on the shared OneDrive Benny had created.
Observatory Project Discord Server:


Shared OneDrive:


We were able to work together during the afternoons of class to discuss our progress, come up with any new ideas or alterations, as well as seeing what people were working on. We also motivated each other so much and I really enjoyed this group!
———————————————————————————————-
I focused on 3D work for this project, over my usual focus on 2D work and designs, which helped me develop my skills in another medium I am less familiar with. I was not expecting to create a pretty decent quality 3D environment, with good lighting and rendering, as well as a nice cinematic. I am very pleased with the outcome of this assignment and in my group members who did great contributions and parts of this combined project.