Assignment 2 – Organic Modelling – Deadline: Sunday 16th May – 50%
(COMPILATION POST OF ALL WORK AND REFERENCES DURING ASSIGNMENT 2)
MODULE INTRODUCTION:
We were given our second modelling assignment that was initially due for the 14th but was moved back to the 16th of May. We were tasked to model/sculpt using Blender, retopologize, UV unwrap, texture and upload via SketchFab a Cute Character of our choice:

I was really excited to work on this project as I am very interested in character design and creation. My immediate first ideas for a Cute Character were animals such as rabbits, birds, cats, dogs and other small cute creatures. We were given examples and many of these were also animals.
RESEARCH:
I had begun my research for this assignment by looking at the 3D cute character models given to us as examples that were made by other 3D modellers on Sketchfab. I wanted to see how they designed their characters and was looking for inspiration in order figure out the type of cute character I wanted to create, as well as how to go about sculpting it.
I was most inspired by Emeryl’s Sand’s Vagrant: https://sketchfab.com/3d-models/sands-vagrant-b8b83e1e89cc4a20a9b4de1ce8c60dd0
and ZixiSun (zixisun02)’s Shiba: https://sketchfab.com/3d-models/shiba-faef9fe5ace445e7b2989d1c1ece361c
These were cute and very effective character designs to me that I wanted to follow. I wanted to make something similar to both in their designs and simplicity, with my own spin on the character.
Emilie Stabel Character Art: https://sketchfab.com/emiliestabell
I love the 3D modelling work of the following artists as well because of the style they use to model their characters in 3D:
- Hannu Koskinen: https://twitter.com/hkoskine , https://www.artstation.com/hannukoskinen


- Jacob Ovrick: https://www.artstation.com/jovrick , https://twitter.com/JacobOvrick


I also created a Pinterest Board to put all of my design and 3D artist references onto:
https://www.pinterest.co.uk/Prokuon/3d-art/uni-sculpting-assignment/
Initial Character Designs:
As I was brainstorming for a character, I did some really rough concept sketches of character designs and what kind of style I wanted for my assignment model:

I started with just drawing cute fantasy animals and creatures and when I drew the Wizard cat, I thought the design was the most fun and could be developed upon.

Then, after finding character design references similar to the cat, I began developing the cat character that would eventually become my final concept design.
Character References:


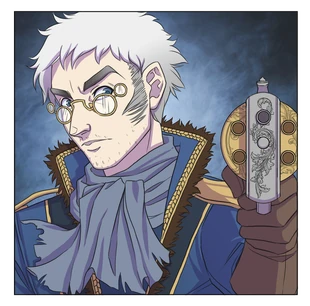


I used the above characters as my primary source of inspiration for designing, modelling and colouring my character. I wanted a biped fantasy cat character, and the first most obvious inspiration that came to mind was Puss in Boots’ character from the Shrek franchise. His designs and 3D model are where I started basing my character off of but I wanted to make my character different somehow. I then looked at other characters that were cats or had cats incorporated into their design such as Chat Noir from the 3D animated series Miraculous Tales of Ladybug and Chat Noir, and Captain Amelia from the 2D animated film Treasure Planet. I really liked Captain Amelias design and by combining her design with my initial idea from Puss in Boots with the character Percy from Critical Role, I was able to come up with my final character concept.
Some art that helped me when I was designing was:
Anastasia Matsu’s Captain Amelia from Treasure Planet: https://www.artstation.com/artwork/XkP40
and her own character design and model, The Gull Captain: https://www.artstation.com/artwork/aPKZX
I was also very inspired by Ashley Grace on Twitter’s Cat Character: https://twitter.com/willowsquest/status/1021992295703437312

I loved character designs like this and was heavily influence by anthropomorphic characters designed for a fantasy media.
Real-Life Reference Photos:
I also wanted to study how real cats looked and found some photos to help when designing my character’s appearance and their colours. I looked up coats and outfits that would suit a pirate or aristocrat, but specifically designs that leaned towards the Victorian style whilst also seeming suitable for a fantasy genre.


Final Designs:
In combining all of these influences, I was able to create my final character design of my Cute Fantasy Cat Character.

The way I wanted to present my character was that the context and setting would be in a fantasy game or media, and that the character would be an upperclass aristocrat, pirate or adventurer. I initially gave them a belt, earrings, and glasses as accessories, however, in modelling I had to forgo these as it became too detail and difficult for me to model. I also had to simplify the cape in the end. The pose was initially to stand with an arm extended to show the clothes under the cape, however, this also would be difficult to model the character T-posing and then move the mesh to fit the shape. I understand how I would have gone about making it, however to save time I decided to hid the arms under the cape. Finally, my character’s expression was neutral or blank at first, but as I was modelling the mouth, the character had a smile which I found to be much cuter.
Some Youtube tutorial references I used for sculpting:
INITIAL MODELLING:
The initial modelling stages were quite difficult as I understood how to model things such as the apple and dog from real life photos, however, using my own designs as reference was very different and I was very unsure of where to start. I started using metaballs, as that was what I was familiar with, to begin creating the initial shape of my model. However, this crowded the model and became very confusing to shape my character from very quickly as I kept selecting the wrong metaball and was not in control of when I would rescale them. After my one-on-one with Michael I was able to fix this thankfully early in the modelling process.
 First Draft of Model shape.
I had a one-on-one call with Michael O’Callaghan who showed me how to go about beginning to model my character using Hard Surface model shapes and then add on organic modelling into it for my characters head and hair.
He explained how to start off with a cube to block out the torso and begin by creating the shirt and sleeves, and then to add the head as a circle. He also showed me the main tools he worked with in Blender which were the Clay strips and Crease tools which I found very useful to know and use in my own modelling. To make my cat character’s tail, he showed me how to draw a curve and then extrude it in order to get the shape I wanted and then shape. He then told me how to mask parts of my model I that I did not want to affect, and then inflate and smooth parts. To create the hair, he suggested using the snake hook tool and then use clay strips to define this.
Screenshots of Michael’s modelling process:


This talk was extremely helpful to follow and visualise how someone with prior 3D modelling knowledge would go about creating my character.
Whilst I thought this was a good Idea to start in Maya, I wanted to learn about Blender as much as possible so I followed the Wizard gnome YouTube video to create my mesh and found that I was able to equally create a model that satisfied my design and only used Blender.
I also had a call with Henry where I was shown by how to used the Snake Hook tool in Blender which enabled me to add geometry and drag out parts of my model. This was incredibly helpful, especially for creating the hair and fur on the head! He also walked me through the process of Dyntopo in more detail, and how this would help build up detail in my character model. I used this when I was moving up from the rough first mesh up until the final intricate details. He also went over the draw sharp and stabilise stroke tools as well.
MODELLING PROCESS:
Whilst I was initially planning on having my character in a type of pose to show the arm and any details under the cloak, I found this to be very difficult and thought I was perhaps aiming for a model that was going to be too much to create within the time constraints and alongside other university assignments. I updated my model pose and design to be simpler so I could understand easier how to model this in my head, making it essentially a cone shape and then a head, boots and a tail.
Updated Model Design:

Initial Modelling:


I began by following the Sculpting a Wizard Gnome YouTube Tutorial to get my base character shape as it was the most similar in design to help me start creating my model. The video showed me how to mirror objects for the boots, ears and eyes which was really helpful to keep as much of my design as symmetrical as possible. This model base was much easier to sculpt from than my first try with the metaballs, and very soon I was able to used the Grab and Snake Hook tools to start moulding the character into shape.
Dyntopo:


When I turned on dyntopo I was able to start adding details to my mesh much more easily as there were more edges and geometry to work from. I started with my dyntopo at 10-15 and started making more refined versions of the characters’ head, ears, cape and boots. most of these were symmetrical up until a point, and so I was able to do this quite easily with the Snake Hook and draw tools.


Detailing:
 To start adding even more detail, I turned the dyntopo up to 20-25 for my model and was able to create details such as the face, the front of my characters shirt, and the cape trimming and folds. It also allowed me to work into the hair more into better points. I focused on using the Draw, Crease, Grab and smooth tools at this point in the modelling stage. This was a really fun process as I has somewhat gotten the hang of Blender and could understand how to manipulate my model.


Eventually I was able to create a high poly version of my model that looked decently like my Cat Character and I am really proud of how my sculpted details came out! I forgot to start modelling the glasses but decided last minute that it would be too much detail, and obscure the face.

Final Sculpted Model:

I am actually really proud of how my Cat Character came out when sculpting with Blender, especially because I have never used the program before. I think it looks really like my design but in a different, cool 3D way. The model was well over the Assignment limit of exceeding 40000 Polygons, but luckily I could move on to the retopology of the mesh next.
RETOPOLOGY:
For the retopology stage, I watched through Henry’s lectures on retopologizing the different parts of the face which were really helpful for me. I was completely new to this and had never attempted to do it before, asides from the in class tutorials, and so trying this on my own original model was very tasking. Whilst I understood how to retopologize a human characters face, I was very unsure of how this previous reference would translate onto a stylised Cat Character model.

Original face retopology reference.
I researched a bit online and found the following retopology references that I could use for my cat character model’s face:


The retopology on my Cute Cat character’s face after following the above references:


The retopology for this was actually very fun and understandable for me to follow, especially after having done similar bits and pieces for class. However, the retopology for the face and ears alone took quite a long time as I was drawing on each individual quad by hand.
I also watched the following retopology YouTube tutorial videos for further information on how to go about completing the rest of the model:
When I started on the hair, I was completely confused as to how I would go about retopologising this. I began by creating the edges of where the hair met the head and this allowed me to just follow the topology of the hair. The spikes on the hair and head were vey difficult and painful to make, but eventually I made what looked close to what I wanted. There were more occasions than I would like to admit where I had to use a triangle and I believe this may have caused some issues. Also, there were parts of my model where it was very hard to see, such as between the ears and hair, where to put the quads and this definitely created some problems in the mesh further on.


Top half of my cute character model retopology completed:


I realised at this point in the retopology, that to do the bottom half of the cape much more quickly, I could draw four large quads and join them to make a cube around the model. I then divided that into smaller squares using CTRL + left click which made the modelling process so much faster, despite Maya’s loading time steadily increasing.


The boots and underneath the cloak were the final parts I needed to retopologized in order to be finished with the entire retopology completely. These were simple in that I knew how to do this quickly, however, with Maya’s very slow lag when processing a new quad and the awkward angles for the bottom this also took a very long time but I was able to complete this reasonably well!
Final Retopology:


Overall, I think If I could to redo my models retopology, I would be much more precise and neater with where I would draw my quads. There are definitely some mistakes and inconsistencies in the retopologized mesh that were either too difficult to fix on time, or I just was not sure how this time. I would also complete the retopology much more efficiently if I could, yet, because this is my first time properly retoplogizing an entire character model I am proud of what I have done.
UV MAPPING:
UV Mapping the model was simple in theory, however every time I tried to Unfold my mesh, Maya completely crashed no matter how many times I reopen and tried again, even deleting the history and High Poly mesh. I followed our old tutorials on UV mapping and was able to UV map most of the model until I was focusing on the head, for which my program just became stuck.


Error in the mesh made during retop, affectionately named “The Black Hole”. This was the most likely cause of all the crashes.
Final UVs:

Eventually, I was able to send it to my friend, Jodie, who was able to cut parts and unwrap the whole model for me so I would no longer be stuck and unable to continue to texture the model. Admittedly, they are no where near the best UV maps possible, however this was the best the Maya program would allow for me to finish the Assignment.
COLOUR TEST:
Before Texturing, I wanted to make a rough guideline of what main colours I wanted for my model:

I used my final design and coloured it in and found it close to what I wanted, but a bit monotone. To include more colour, I followed a couple of the colour schemes of the characters I used for reference, such as Captain Amelia and Percy.
TEXTURING IN SUBSTANCE PAINTER:
Having only used Substance Painted only a couple of times before this assignment, I can say I am not very confident in my skills or knowledge of using its tools and layer system. However, this time I followed a few tutorials that helped me before, as well as some new ones on YouTube, which helped my understanding of the program a little more!
Old Beer Mug Substance Painter Tutorial :
This video had helped me a lot before, and it is very easy to follow the steps that the guide in this shows you. This really helped me get the base colours and starting layers for different lighting and shading for my character model.
Texturing Characters Playlist:
How to Mask:
Following the above videos and the tutorials we had in class really helped me in my texturing of my model. I followed the usual routine of baking my texture maps, however this time, following Henry’s tutorial, I was able to bake the original High Poly model that I sculpted in Blender onto the Low Poly mesh that I retopologized. I added smart textures to my characters cloak and the boots so they would look more like material.

I then began working into these by adding black mask paint layers to add shading and definition to the edges, creases and bottoms of my textures. I used a similar process with the hair, face and eyes where I created paint fill layers and added black masked on to to create stylised divisions in the hair, a nose, white for the ears and mouth and pupils for the eyes.


The textures and colours in the end did not turn out exactly how I wanted when the model was finished, and look quite creepy and slightly wrong in SketchFab, however I think the Substance version was the closest to how I wanted my character to look textured.
Final Substance Textures:

Thus, I completed my Cute Character model and uploaded it to SketchFab, where I played with some of the 3d Edit Properties tools until I was satisfied.
FINAL MODEL:
- SketchFab Link:
https://skfb.ly/o68zp
Evaluation/Reflection:
Overall, I am happy with my final model design and outcome that I have created. I am very happy with my model, having never sculpted using Blender before and starting from knowing very little, and had finished most of the retopology well. However, there were some parts of my retoplogized mesh model that had tiny gaps and a couple of overlapping shapes that I missed which could have been fixed if I went back and spent more time on them and learnt how to not make them. If I had to complete this project again I would be more careful when retoplogizing. I also am not completely happy with my textures and feel like they did not come out exactly how I imagined them. I will also have to be more careful and thorough when choosing colours, materials, and texture in the future. But, I think over the past couple of months I have learnt so much from the module and lecturers, as well as from my own study, and am proud of what I have made. I hope to improve much more with even fewer mistakes in the future!
File Links:
- Google Drive Link:
https://drive.google.com/drive/folders/1Qg7_gA-k-VmwNYROZmwvXugmcZ2sQ5SA?usp=sharing
- Final Model on Drive Link: https://drive.google.com/drive/folders/1OFiDAXFmTxuhi4RckbtSMVcOjhysVnjS