
Week 1 – Module Introduction
As this was our first week back, we were introduced to the two modules for this semester. The first one was our vertical slice project, which is mostly group-based work in making a playable video game demo. The second module is a Personal Development project that shows our development with voice sync and body animation. Both of these modules seem pretty exciting and from hearing about them today I look forward to the progress and outcomes of these two projects.
One of my main goals for this semester is to improve my grades and achieve higher than last semester. It’s not like they were horrible, but I drive to become better in the field, and improving my grades might help me get better at animation. Game development is an entirely new field for me, so I am a bit anxious about the Vertical Slice module, but also eager as I enjoy participating in playing video games in my spare time- so who knows, maybe I’ll find my niche!
Some of the things I aim to get started on this week, include, looking at inspirations for the video game and the roles I want to do in my group project. I might also look into some video games that inspire me to venture into this field and hopefully by the end of this project, I will know if game development will be the right career for me!

In the afternoon session of today’s class, we were organised into our groups to do some icebreakers and initial thoughts about our video game ideas. Above, is the list of the members in our group and their chosen roles. These are subjected to change accordingly if there are issues or if any members are lacking in the pipeline. All in all, I really like the dynamics of our group and we seem to have a lot in common which is a huge benefit.
After some icebreakers and getting to know our group members, I created a Miro Board for our planning work as well as a Discord server to aid with communication between the team. We set up a weekly schedule to have meetings via Discord Voice chat, as well as various text channels for organisation- these are shown below.

The Discord Server- created by me

Our first weekly meeting
Our first task for the following week consisted of a quick game mock-up, and after some planning on Miro, we decided to make a playable game about cleaning. Specifically, the person you play as is a student and your task is to put away and tidy your room before the timer runs out. This game was an initial task to test out how our team worked together and to practice management in our group, as well as roles for our actual project.

A screenshot of the Miro board planning
Initially, the Miro board ideas were a huge helper in deciding on the exercise we created during week one, but we were all inspired by some of the other ideas shown. For our actual game for this project, we went for the horror-styled, monster-chase idea under the ‘Reasons for story plots’ heading and the only thing left to do was to get started on the final project.

Here are the models and textures that I created for the week one exercise. I created some books and CDs based on the age of the character and these were inspired by modern comics, games and TV shows. I thought these turned out rather well and for the first week, I feel like I did a great job at the pace I was making. If I were to change anything, however, I would ensure to revise the UVS a bit more as they ended up being a bit dodgy whilst in Unreal and I believe it was due to some overlapping UVS, which I now know to check for in future models. Overall, not bad for my first week!
References
https://bulbapedia.bulbagarden.net/wiki/Vulpix_(Pok%C3%A9mon)
https://www.peakpx.com/en/hd-wallpaper-desktop-aocsv
https://tsbanimeoficial.files.wordpress.com/2012/11/pokc3a93.jpg
https://i.ebayimg.com/images/g/kFMAAOSwHrlcMPDV/s-l400.jpg
https://i.kym-cdn.com/entries/icons/mobile/000/038/355/1885987_170x100.jpg
https://psxdatacenter.com/images/hires/U/S/SCUS-94228/SCUS-94228-D-ALL.html
Video tutorials
This first video that I watched was really helpful in showing me how to save a snapshot of my UVS in Maya. As I never have painted my own textures in the likes of Photoshop or any other equivalent before, this is something I wasn’t sure to go about. Honestly, it was a lot harder than I expected, and by watching this video, it was short, straight to the point and very easy to understand. After I exported my UVS into Clip Studio Paint, I then watched the following video, which is pretty much a continuation of this one. Overall, this is a really informative video and I highly recommend this channel for its various, free lessons and tips for Maya.
This was the follow-up video to the previous one above. It basically showed the most effective way to paint UVS in digital software. This involves, painting inside the UV lines and also removing the lines after painting the UVS- this means that only the texture painted will show, otherwise the geometry lines will be embedded. The video also continues, showing how to place these textures into Maya. This is something I already know how to do and is inapplicable to this semester as we are obliged to work in Unreal for our video games. Nevertheless, this is a really helpful video and offers some tips that are simple, but yet effective for hand painting your own UVS.
Although I knew what I was doing after the first two videos, I wanted to look into other videos for inspiration and this was one that I was really interested in. The reason I chose this as an influence was due to how this person has hand-painted body information and outlines. They also add in extra details such as fur, hair and clothing textures- which pays off in the final product. Watching this definitely inspires me to look into doing details like this in my upcoming models, especially for the likes of animal-like characters that may have fur. This would make these creatures more believable and unlike solid colours, they would be far less harsh to the eye. It would make sense to do this if we end up going for a more stylised look. All in all, this video is absolutely fantastic and the process of the textures being painted is honestly interesting- I certainly found it educational and admittedly very satisfying to observe.
A quick playthrough of the Week One test game
Here is a video that one of our group members got of this demo. It shows all of our assets together, along with the AI that was done by the game design students. This game turned out well and is pretty fun to play when you’re bored. Definitely, a game that has a younger demographic in mind, whilst also providing the motivation to tidy your room. I quite like the premise of this game that we made, however, I will say that we will be doing a more advanced game with an embedded narrative for our project. The reason we didn’t pick this one was due to how it was too simple and lacking in material.
Week 2 – Facial Animation
As a team, we all pitched our ideas for the final game story and Chris, our Narrative Designer wrote these down as a chart below. The first photograph here was a draft of our initial idea, which then progressed into the one shown at the bottom. It starts with the character you play, Hannah Olsen, who inherits a house that resides in a town belonging to a cult that wishes to sacrifice you to the monster that inhabits the town. Doing so would lift the curse and get rid of the spirits that haunt the town. The mission of the game itself is to survive the night and escape the spirits that chase you throughout the levels. It will incorporate a health system, a sanity system (inspired by Amnesia) and stealth mechanics to enhance the feeling of risk in the playthrough. As the main character suffers from hallucinations, she starts off believing that the situation happening is the result of not taking her prescribed medication- which is a consumable in the game. It doesn’t get rid of the antagonist, but it does relieve the sanity meter, allowing you to survive longer.

Initial idea draft

Final Narrative layout
Character Designs- The Beast
In our story, there is a beast that haunts the player and it is the manifested spirit of a hound that belonged to Hannah’s ancestor, which seeks revenge for the sins that were brought down to the family. Here are my concept drawings for this character and some self-analysis of these designs.


Research and Inspiration
I was really inspired by this series of images that I had found on the internet. These inspired me heavily with the design of the beast, especially the image in the top middle which was exactly what I originally envisaged whenever we first discussed the character’s origins. However, I obviously didn’t want the beast to be a carbon copy of these whether that be with the style or design. Instead, I wanted the skull of the beast to relate to the environment that it died in, so I felt that a deer skull would be more suitable.


I was also heavily influenced by the mythical creature, the Wendigo…

…And the Black Shuck
References
d19ec1fa4dab6b286cf7e070cdaf51d5.jpg (700×1082) (pinimg.com)
26061658275e5afc7284c49b215e1986.jpg (1024×827) (pinimg.com)
f161e8141837e37955a3e42bcc52f153.jpg (376×542) (pinimg.com)
f161e8141837e37955a3e42bcc52f153.jpg (376×542) (pinimg.com)
“Wolf Skull” by shwampy | Redbubble
Skull Drawing png download – 900*693 – Free Transparent Drawing png Download. – CleanPNG / KissPNG
https://www.deviantart.com/k3-creation/art/Black-Shuck-760290132
https://www.artstation.com/artwork/KOOWO4
NPC- Mushroom Character
With our environment being mostly in a more rural, forest-land type of area, I felt that making up some NPCs of random small critters based on this environment would be a great addition to the story and the character interactions. These mushroom characters will be a set of hallucinations that the main character will see a lot throughout the first level.

Chosen Design

Front View

Back View
Final Model Outcome
Here is the final outcome of the mushroom character model. Honestly, I am surprised how well it turned out, especially since it was originally an experiment. I’m really happy with how the face looks and I feel as though the expressions work so well with the style of the character. As this creature will be a part of Hannah’s hallucinations, I felt that it made more sense to make it look a bit more cartoon-like to distinguish it from the other objects in the environment. So far, this has turned out great and I’m very eager for more of the modelling, rigging and animation work.

Screenshot of the model

The expressions (made using blendshapes)
The Animation Test
Overall, I feel like this animation turned out pretty great, especially since it was done fairly quickly as a test. Some of the best features include the use of blend shapes and the versatility of the squash and stretch rig. With the animation, it has decent and consistent timing throughout, except for the end when the reaction is a little too delayed in my opinion. However, despite this, I feel as though I did well, especially with the rig which was done using squash and stretch for an extra bounce to exaggerate the character’s personality. If I were to change anything about the character/animation, I would fix some timing issues and maybe make the character a bit smaller. Except for that, I’m fairly satisfied with the outcome of this week’s progress.
Research and inspirations for this week
Week 3 – Animation for Games
This week, I had begun the modelling and topology process of the beast model. It was made using Maya and I further aim to use Substance Painter for the textures. As I ran into some issues with the retopology and the poly count, I was ultimately unable to start the rig this week. This leaves my goal for next week to get round to optimizing the model and finishing the rig for animation, which will be handled by me and Samantha in my team.
Throughout the making of this model, I followed the style that the art team had proposed which was a Tim Burton inspired style, and I felt that portraying the character with sharp and smooth edges, along with the big eyes with small pupils would convey this decently well. Below is a photograph of some of the inspirations we had put shared effort into gathering.

A link to our Pinterest for better quality: www.pinterest.co.uk/animationgamedesign/inspo/
The modelling process
Here are some images that I took during the modelling process of the beast character. I began by blocking out the model with simple shapes to mark the limb placements and my plan was to follow this as a guide. After I finished blocking out, I sculpted the whole body using a new mesh and this developed over the course of the week. Whenever this was done, my goal was to do the retopology and reduce the poly count to match our game style and I feel like this worked out decently well. I did have some overlapping polys and some N-gons here and there, but I was able to fix these up and prepare for the next step of the Pipeline: texturing. Overall, I would say that this process was a bit of a struggle at times, but I pulled through and did the best that I could, and this worked in my favour.

Blocking out the shapes

Smoothing them into place

The process of adding more detail…

Creating the horns, ears and redefining the fur

Finished model for Retop
The Retopology Process
This process took forever to complete, but once it was finished, it was well worth the hours that I spent ensuring every poly-lined up and flowed in the most efficient way. Without a doubt, I ran into some issues during this process and the topology wasn’t especially easy due to the detail of the model’s fur and how big the model itself is. However, I used various references to help with this process, for example, I looked at topologies done of similar models using the likes of Sketchfab and this was a great way to help me learn efficient ways to go about my own. After I had finished my retopology, some of the polys on the tail weren’t smooth unlike the rest of the model, which struck me as odd because everything I had done up until then was done with care. So, to counteract this, I did some research on Google to see if anyone has experienced this issue as well- basically, to find a fix for it. This was difficult as the circumstances on most of the forums were vastly different from mine. Instead, I resorted to contacting one of my tutors, Alec. He insisted to unlock the normals on the model which ultimately didn’t do anything. It ended up being an issue with the topology done around the tail which was to do with how there were too many ‘star-like’ topology patterns in that area, which resulted in the tail being hard-edged. I went back, changed and edited these areas and this seemed to have fixed the affected polys. I believe this mistake was most likely down to my inexperience with retopology, however, this was a massive learning curve for me and something I will keep in mind for next time. The whole thing was worth the amount of fixing and editing and in a way, I am glad that I had these issues so I am aware of this in future. I’m overall really satisfied with the outcome of the model and the next step is to reduce the poly count, work on the UVS, add textures and then finally move onto the process of rigging the model.

Beginning the retopology on the face

Continuation of the previous step

Body retopology

Horns, eyes, ears, completed tail (I ended up making the eyes separate meshes for easier animation)

Retopology done!
Mesh with reduced poly count and smoothed
Here is the final mesh with a reduced poly count suited for the game. It is currently untextured but this is something I’m going to work on after I sort out the UVS.

Side View

Front View
Week 4- Continuation of the Beast
This week, I was mostly making progress with the UVs and textures of the beast character. I wanted to do these before rigging to ensure that nothing went wrong with the animation. This was the most efficient course of action and made more sense for the final product. With the textures, I was really inspired by the style of the game Leenie Boog as it is very stylised but also scary with how it uses its mechanics. I also enjoy how the textures have height and texture to them to indicate the fur even more so. If I have extra time, I might go back and edit the height maps of these texture files, which would give the beast more of a realistic feel to it.
The UV and texturing process
Sorting the UVS
Below are some images that I had taken during the process of sorting out the model’s UVs. It shows the process of me cutting and piecing them together to ensure that the pieces were equally spread for ultimate quality. Overall, I enjoyed this process and honestly, it paid off to take my time with the UVS. After all, they are a very important part that is mandatory for the texturing process. Nevertheless, I feel as though I did pretty great here, and it is evident that I’ve improved with my UV skills since last semester as I’ve had far fewer errors in comparison.
With the UVS, I had originally sorted them out in a way that was not efficient. Though they were sorted in an organising manner, when the textures were baked in Substance, they had some overlapping UVS I needed to fix. I then worked backwards and did them again and this thankfully was the only issue I had, so it was an easy fix. Below are some screenshots I took during this progress, and you can see where exactly I went wrong, and also where I corrected my mistakes. This is something that I initially didn’t notice, but I now have a better acknowledgement of how to go about overlapping UVS and how to deal with them a lot more efficient than before.

Separating the head and features

Further progress

Fixing the overlapping UVs and sorting them into place

Final UV structure
Texturing process
With the textures, they were fairly easy, and I had no issues during this process at all. The only thing to mention was how I had the update the textures as I decided to edit the UVS slightly, however, this meant that my textures also had to be redone, so it was more of an inconvenience. The end product still looks rather decent, however, one thing I was critiqued on in class was how the beast doesn’t really appear to be scary. I’ve decided to counteract this by removing the eyes as this was the most noted feature about the creature that has made it seem this way. Doing so will make it less approachable, and with glowing red eyes, it’ll appear to be more menacing. Making the animations will also be essential to making the beast more demented, once these are finished and ready to add to the game, this will heighten the effect more so.

Blocking out the solids

Getting down the details

Finalising the textures
Inspirations for the textures
With the Beast’s textures, I found myself being really inspired by the style of the game, Leenie Boog, particularly with the main enemy- Leenie Boog himself. I felt as though the textures and style from this game would work as a main influence with the beast, considering they are quite similar facial-wise. Moreover, Looking at the way this game textured Leenie definitely helped me to understand how I would go about the Beast. For example, I initially wasn’t going to add any height maps to the textures, but after seeing how effective it was in this game, I ended up deciding on the contrary. The addition of the heightmap made the Beast feel more like a furry animal and less like a piece of plastic. It has added extra definition that although small and minor, makes a huge difference.


Week 4 – Quick rigging tips for animators
Using some of the tips given this week with rig setups, I began to plan out the rig layout for the beast. I later scrapped doing the rig solely by hand and decided to use Advanced Skeleton 5 due to the lack of time I would have to get everything done on time for our deadline. Although it was just the beast I had to do, there were other things in the project I had to get a start on- other rigs, animations, modelling, voice lines, etc. So by using a pre-built rig, it was going to give me a lot more time to prioritise the animations themselves. Ultimately, I did like the initial rig I planned, but it also had many flaws and improvements to be made, therefore, it might be something I may continue in the future.
Initial rig layout

Side View

Top View
Advanced Skeleton 5 Rig

Initial build and side views


Adding Controls
Week 5 – Character rigging
This week, I decided to edit the beast’s rig immensely as I didn’t like how it turned out last week. Initially, I added controls to the tail and found out later it had pre-made controls that were hidden within the mesh. To fix this, I redid the rig and sized them up. After this, I went and added joints in areas such as the ears, and antlers because the basic build didn’t accommodate these areas. This didn’t take long at all, I would say it was relatively easy and rewarding to see the final rig progress. After this was finished, I immediately got onto the skin weight progress as I wanted to get the animations started as soon as possible so we could have NPCs in our game. Below you can see the progress of the skin weight painting as well as the final rig build.
Skin weight painting progress

Starting with the head

Top of the torso

Lower torso & counterparts
Rig test
After I had completed the rig, I decided to test it out to ensure all of the skin weights were done accurately and that there wasn’t anything wrong with the movements of the model. It ended up looking great, and although the animation itself was done quickly, it gave me a rough idea of the capabilities of the rig itself. Next week, I will start working on the storyboards, animatics and then animations and aim to have them done by the end of week seven.
Week 6- Animation progress
To help keep track of all the animations we were for doing this week, I set up an excel worksheet to keep track of our progress. Both me and my group member, Samantha had shared the animations for the beast, so it was important to keep in communication with our progress. Below is a screenshot of the Excel sheet and its layout.

The spreadsheet was rather simple, and colour coded to show the progress. We decided on the animations we wanted to do whilst on call and then wrote down our initials.
Link to the spreadsheet: Animation List.xlsx
Animation Storyboards
Below are some of the storyboards that I have made thus far. These were quick sketches to illustrate my rough ideas on how the beast will move during these scenes and are subject to change. Moreover, I am satisfied with how they’ve turned out, for the most part, though I will most likely remove/change a handful as some aren’t as effective- for example, I’m not fond of the jumpscare and will most likely change this a lot when working with the actual rig, and will probably remove some of the idle ideas I’ve got, such as the scratching action. Ultimately, these are at their early stages for now and are primarily for planning out the animations.


Animatics
Below are the animatics that I pieced together with the storyboards above. These were quickly done and were made to understand what the timing and frames will look like. Some of these, will change such as the sniffing and scratching animations as they don’t match the scary demeanour of the beast itself. This is something I will improve on whenever I begin the block out of the actual animations as they don’t convey well at the minute. At the moment, the main thing is to match the style that has been chosen which is inspired by the likes of Tim Burton and games such as Hello Neighbour and Little Nightmares- so cartoonish with elements of realism. Moreover, it will be up to the animations/sounds/AI to make the character feel more threatening.
Inspirations
Throughout this process, I was heavily inspired by a number of different sources and these are listed below. Not all of them are inherently relevant to the design that the beast has, however, they are more relative to the movement and animation style that I aspire to go for. An example of this would be the first two which are completely different monsters and style-wise, aren’t similar at all to the setup I have. Regardless of this, I want to make up for the style choice and make the animations more intimidating in comparison.
Aims for the following two weeks
In the next two weeks, I aim to have the beast animations completely finished and polished, as well as have them AI friendly for our games design team members. For instance, this will include separating the animations to allow them to manipulate the animations into certain blueprints, allowing the beast to react more accurately to the environment and triggers of the player.
Week 8 & 9 – Blocking out and completion of the animations
During the past two weeks, I have taken this time to put a lot of work into the animations for the beast. This wasn’t entirely easy as I had struggles with some of them. Most notably with the run animation, as this was something I haven’t had much experience with before using a quadruped set-up. However, I feel as though my struggles here were down to some skin weight issues I experienced and after going back and fixing these, the animation issues I had were resolved. Although this was a small mistake or two, it made me realise how much work goes into skin weight painting and next time I’ll be more prepared to notice any mishaps with it. Ultimately, this experience was very rewarding, and I am satisfied with the animations themselves. From the feedback this week, I was told that the model was “too cute” and that I should remove the eyes from the rig which is something I won’t include when exporting to Unreal. Truthfully, I was really upset with this feedback as I had done my job at following the originally intended style guide we all agreed upon as a team. I honestly felt like I was being made fun of rather than getting constructive criticism from my tutor- it was being mocked for looking like a “Pokémon”. Regardless, I will take this critique in a positive light and be more aware of ways to improve my art.
Videos of my progress with the animations
Below shows the progression of my animations through the past two weeks. I have included the playblasts that I have kept records of during the animating process. This shows my thought processes during the making of them.
Run Animation
Blocking out the leg frames
Adjusting the timing- placement of frames needing work
Timing and pacing improved by a lot- here’s a front view
Adding movement to other parts of the body
Final Animation- Looped and revised
Pre-Chase Animation
Blocking out frames
Further blocking and timing adjusted
F
Further continuation of timing fixes, more movement and anticipation added
Final Animation- minor tweaks and polishing
Sniff Animation
Blockout
Fixing the ‘jitters’ and adding more movement
Final animation *Sitting action at the end was later cut*
Sniff & Walk Animation- made to be blended into pre-existing walking animation
Jumpscare Animations
Next level loading screen animation
Door Interaction
The translation to Unreal
Here is what a small handful of these animations look like in Unreal. This is an example of how some of these animations were separated to be more AI friendly, as well as the deduction of the eyes of the beast.
This was the final version of the Sniff & Walk animation shown before
The separated roar from pre-chase animation- easier for AI
Loading screen animation- what it looks like in Unreal
Conclusion
Overall I am quite satisfied with how these animations have turned out so far. They have a decent sense of weight, motion and anticipation, making the animations look believable to a degree. Moreover, with the animations themselves, I ensured to make varied responses for the beast. This shows in the way the beast reacts to the player trying to escape the cabin too early, resulting in the animation labelled, ‘Door interaction’. Basically what happened here, is that the beast will jumpscare you and will automatically reset the player to the start. This is to prevent the player from skipping anything important in the first half of the game demo. Another example of varied responses includes the sniffing animations. These were made in addition to the AI which has been programmed to remember where the player last was. By adding the sniffing actions, it makes the scene tenser as the player can see that the beast is searching for their location. Ultimately, there are probably a lot of things I could’ve fixed up or enhanced with these animations. For instance, if I had the time, I would’ve made more animations that made the beast more terrifying. An idea that I initially had for an animation included the twisting and bending of the beast’s neck/head – kind of like how an owl would rotate its head, but more intended and with a lot of bone-cracking sounds included. However, by the time I got the model, UVs, textures, rig, skin weights and the other animations finished (which were more of a priority), I didn’t have the time to create these. It was my job to basically set up everything to do with the beast prior to animation. I had to move on in the pipeline to make up for lost work due to a lot of our members not participating. Perhaps if someone else had aided me in the modelling and rig process, or even if there were more students animating in the project, this could have been viable. It is definitely an animation that I would really like to go back and add during my spare time.
Ghost Character Concepts
As I was also in charge of the character design in this project, I decided to draw up some concepts for the ghost character this week. These turned out great and I ultimately couldn’t decide on which one to choose for our canon design, therefore, I asked my team members in the Discord chat which ones they preferred. This was a mixed response, and to decide on a design, I decided to combine all three of the designs that we agreed upon, making everyone satisfied with the design. I further combined the designs by taking attributes from each design and then piecing them together as one character. Ultimately, this worked out rather well and I’m happy about the final outcome.
Screenshot of the group conversation

The Concepts


Colour variants
For the colour of the ghost, we ended up deciding to go with a mixture of numbers 8/9 which was great in my opinion, as I felt these were more true to the nature of the ghost being a spectral being, and these colours definitely enhance that believability.

My inspiration for the design…
With the final design choice, I was inspired by Aimee’s design of the witch before she materialised into an evil entity and the image of this character is shown below for reference. I incorporated features such as the wavy hair-like flames and the choker necklace (which is hidden by the tongue in the final design). I felt that by bringing these features in, it would create that familiarity between the two characters, allowing the player to summarise in their own heads what has happened in the story. This would mean that they wouldn’t have to be spoon-fed this information. Albeit, I do feel that I could’ve exaggerated some of her features a bit more in the ghost design, which might’ve made it easier for those who haven’t been involved in the project as the perspectives are going to be vastly different.

All in all, I’m glad to have asked my team members for feedback as this really helped me make the final design for the ghost character. It further made me realise how important it is to keep this kind of communication within a team. Despite the team members in our group who haven’t been in contact, I feel as though I and a few others have been able to establish a good level of conversation about our project. Collaboration is something that I care about when working with others, and I’m relieved that hope isn’t completely lost for our group.
Week 10 – Asset making and concept work
This week, I spent some time modelling some assets, some being collectables in the game and others being static meshes for decoration purposes. It was a bit of a refresher to do something different this week that wasn’t animation related. Though I enjoy animating, it’s something I need to take a break from every now and then, and making extra assets and textures really helped avoid burnout. The assets I’ve created are shown below with further information included.
Battery- Consumable item

Light switch- interactable

Lantern- Interactable

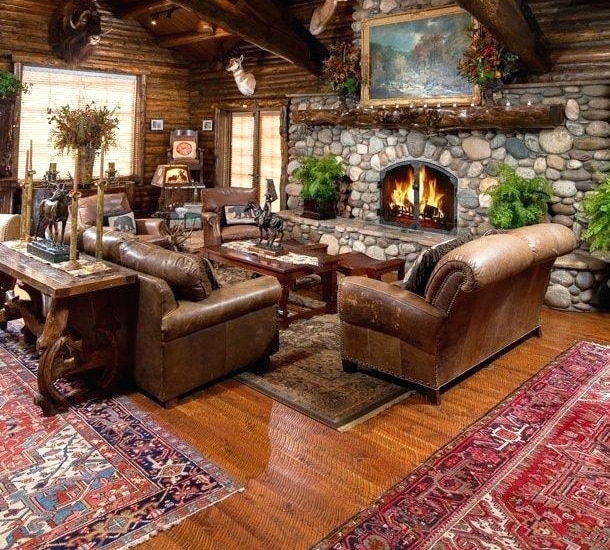
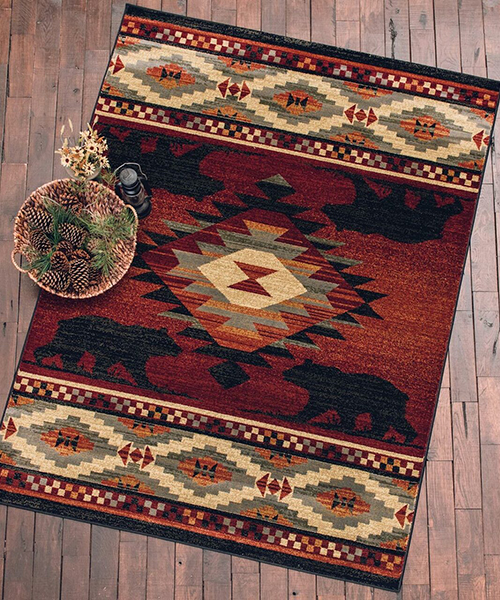
Bear Rug- Static item


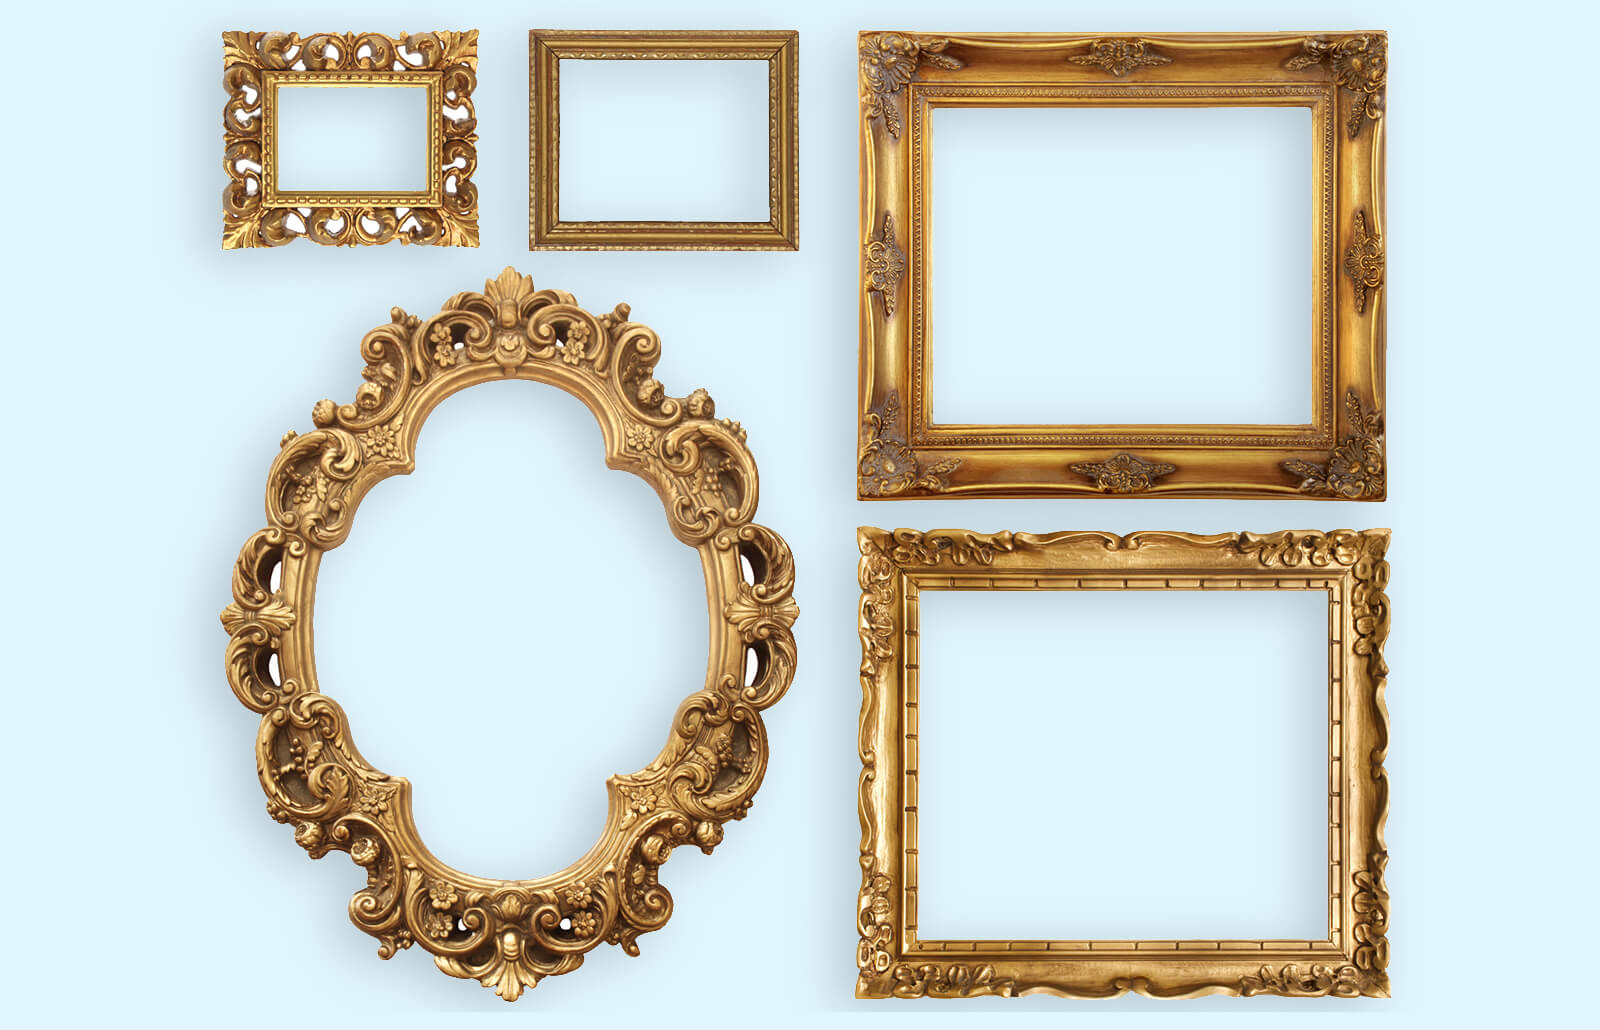
Photographs- Static item


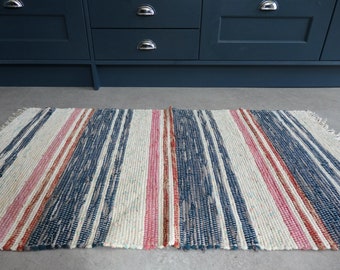
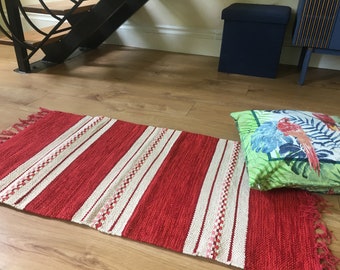
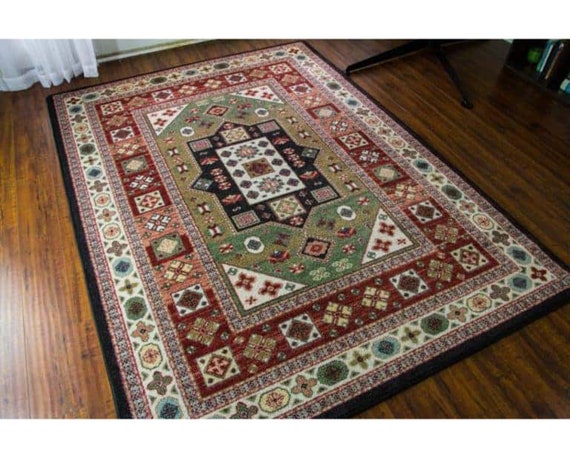
Long Carpet- Static item

Overall, I really like how these assets turned out. My favourites would have to be the bear rug and the lantern as I feel they match our style the most. Some of the others such as the photographs don’t appeal as much and this is due to how my drawings translated into Unreal. Prior, they looked a lot more vibrant and I think it might be down to the lighting settings in the project.
Concepts/inspirations for these models


References:
81102_02.jpg (700×700) (lighting-direct.co.uk)
chocolateruby.jpg (734×551) (moose-r-us.com)
bear-carpet-rug-picture-id578091046 (479×359) (istockphoto.com)
Mount_and_rug_-_Black_Bear_Rug_with_Head_800x.jpg (800×534) (shopify.com)
palace-size-Persian-sultanabad-antique-rug-in-rustic-great-room.jpg (1600×1200) (claremontrug.com)
91C+UWqJF6L._AC_SY741_.jpg (437×741) (media-amazon.com)
rustic-cabin-living-room-interior-nazmiyal.jpg (610×550) (nazmiyalantiquerugs.com)
91w3PRmmDtL._AC_SY879_.jpg (447×879) (media-amazon.com)
LK8052-High-Country-Multi-Web__48710.1631202328.jpg (931×1280) (bigcommerce.com)
black-bear-diamond-rug.jpg (500×600) (canadianloghomes.com)
il_340x270.3363647431_bnoy.jpg (340×270) (etsystatic.com)
il_340x270.3686221481_n6ws.jpg (340×270) (etsystatic.com)
il_570xN.3228149224_m52e.jpg (570×458) (etsystatic.com)
vintage-frame-picture-id518293895 (682×1024) (istockphoto.com)
proud-award-winning-doberman-pinscher-picture-id187089998 (408×612) (istockphoto.com)
050277_4.jpg (1000×1000) (consortiumeducation.com)
262393-1600×1030-antique-picture-frame-styles-values.jpg (1600×1030) (ltkcdn.net)
22870043225_4.jpg (561×800) (abebooks.com)
Week 11- working on other NPCs
Rig Process
This week I got started on the rig of the ghost character. The model itself was made by one of our team members, Thomas. The process of the rigging itself was manageable but prior to rigging I noticed that the model wasn’t centred and there were a few symmetry issues that I had to end up resolving. This made the process of rigging slower as I wasn’t able to start right away. Regardless, using Advanced Skeleton 5 here was a lot more smoother and quicker than with the beast model as there were more limbs and additions to consider joints for. This meant I was able to start the skin weight painting and animations a lot sooner than anticipated. Below are some images of the different steps that I took with the rig.

Initial rig build

Adjusting the joints to fit areas of the model- hands, fingers, cloak, etc.

Mirroring the rig and fixing the joint locations. You can see here that the right hand is out of place due to the model not being symmetrical. In order to somewhat resolve this issue, I had to adjust the whole right side of the character which took a while to look similar.

Finished Rig set up
Ghost Animations
Shortly after building the rig, I got straight into planning the animations. The way I went about this involved storyboards, animatics and then a block out, leading to the final animations – the same format as the beast character. This process wasn’t too bad, though I did find myself struggling to think of animations that would work with the rig set-up. Thankfully, I wasn’t the only one doing animations for the ghost as Samantha in our team also did half of the required animations. I initially only had to do two animations for the ghost, but decided to do an extra two- those of which being variants. This meant that the AI team had more variation between the animations. Below, I have included all of the animation concepts and will include connotations where needed.


Animatics
Here, I pieced together the sketches from the storyboards to time together with some animatics. I did this in order to get a rough idea of how I’d like the pacing of the animation to go, and if I would add any extra movements or in-betweens. After doing this, I’ve learned that I will most likely add in-betweens and a sense of anticipation, as these animatics don’t portray this very well. Doing this would increase the effectiveness of the animation and make it more visually interesting when playing the game. Now that I have completed the animatics, my next task is to move on to blocking out the animations, which will do a lot faster now due to the planning of the composition.
Blocking out/Work-in-progress animations
Here are some play blasts that I took during the making of these animations. As shown below, a lot of these start off with initial block outs, or random movements that helped me figure out the direction of the final animations. I enjoy looking back at the original block out to the final work as this has given me motivation to trust the process, it has influenced me to keep at my work and to continue improving my skill set.
Graveyard rising Animation
Jumpscare variant one
Jumpscare variant two
General Rise animation
Final Animations- revised and polished
Below are the final animation results. These turned out pretty great and so far and are quite fitting for the character of the ghost. Furthermore, I am happy with this outcome and my favourite animations have to be the jump scares by far. I feel as though they are quick-paced, and show off features of the ghost that define it as scary (e.g. the big, sharp teeth and claws). Matched with the quick and sudden appearance of the character really adds to the scare level of these jump scares. Another one I am pleased about is the Graveyard rising animation. I put a lot of thought into how the garment would move, as well as the weight of the ghost as it moves upwards. With a lot of experimenting, I was finally able to achieve a sense of weight from the cloth and was able to achieve an effective, well-anticipated rise animation. Overall, this is good progress for me, and I can see and feel a huge leap in improvement in my work since last semester. I aim to keep this up so that I can make a powerful, effective portfolio of my work.
week 12 & 13- Sound effects, Voice acting and last-minute assets
Sound effect/voice line work
During this week, I decided to take it upon myself to do a huge portion of sound design for the game. Originally, these were meant to be sourced from the sound design students, but this fell through due to the lack of communication of the appointed members of contact in my team. Nevertheless, I went ahead and took the initiative and pushed out a number of sound effects, and all of the voice lines for the main character, Hannah Olsen. The sound effects themselves were relatively easy to do for a beginner like me, however, the voice lines were not so much. First of all, the script our narrative designer, Chris laid out described Hannah as having a southern American accent, preferably being Texan. Instead of having to go through the bother of changing this, I went with it and gave the accent a go. It started off being really challenging, so I looked at some videos on YouTube, particularly interviews hosting people who were Texan- most notably Holly Hunter and Renee Zellweger. In addition, I also looked into some accent training videos which really helped me understand the accent in a more educational matter. Moreover, I have included all of the sound bytes below, both effects and voice lines along with captions for context.
Sound Effects
Download Link- https://drive.google.com/drive/folders/1ovQiftWBu2AOYHp1cTcKpTQ6gLa7_t4d?usp=sharing
Voice Lines
Download Link- https://drive.google.com/drive/folders/184MxlcnBLnWy3Jj_TZjVBKdhbbAEjzLT?usp=sharing
References I used during the voice line training
I feel that I got the most inspiration from this video with Holly Hunter. Her accent is extremely broad and strong, which is what I imagined Hannah Olsen sounding like. In comparison to Renee’s accent, it was a lot more effective for our game. Despite that, I still took inspiration from a mixture of the two.
Renee’s accent is a bit softer and not as strong, however, I love her mannerisms and the personality that is portrayed here. It conveys a timid, yet charming individual which is exactly how I envisaged our main character to be. With the two of these videos, I had aimed to have a mixture of both personalities using these accents.
Accent Training
I found this video extremely interesting and also really helpful in making the sounds I needed for the accent. The way it’s described as a, “a lot of bunching in the back of the tongue… opening in the back of the throat is so small that sometimes you get that nasal twangy sound… The lip corners are tense”. This was the exact posture that was needed to replicate the accent and it came out better than I anticipated. Further on in the video, she explains how to pronounce certain letters, such as R’s, A’s, E’s I’s and U’s which I never even noticed prior to observing the accent. Ultimately, after I had watched this video, it made me realise that there was a lot of potential with this accent, that it could give our character that extra bit of intrigue. Nonetheless, I enjoyed watching this video as it gave me a new perspective, and also a whole new skill that I’ll probably use with future projects.
Additional Filler assets/decorations
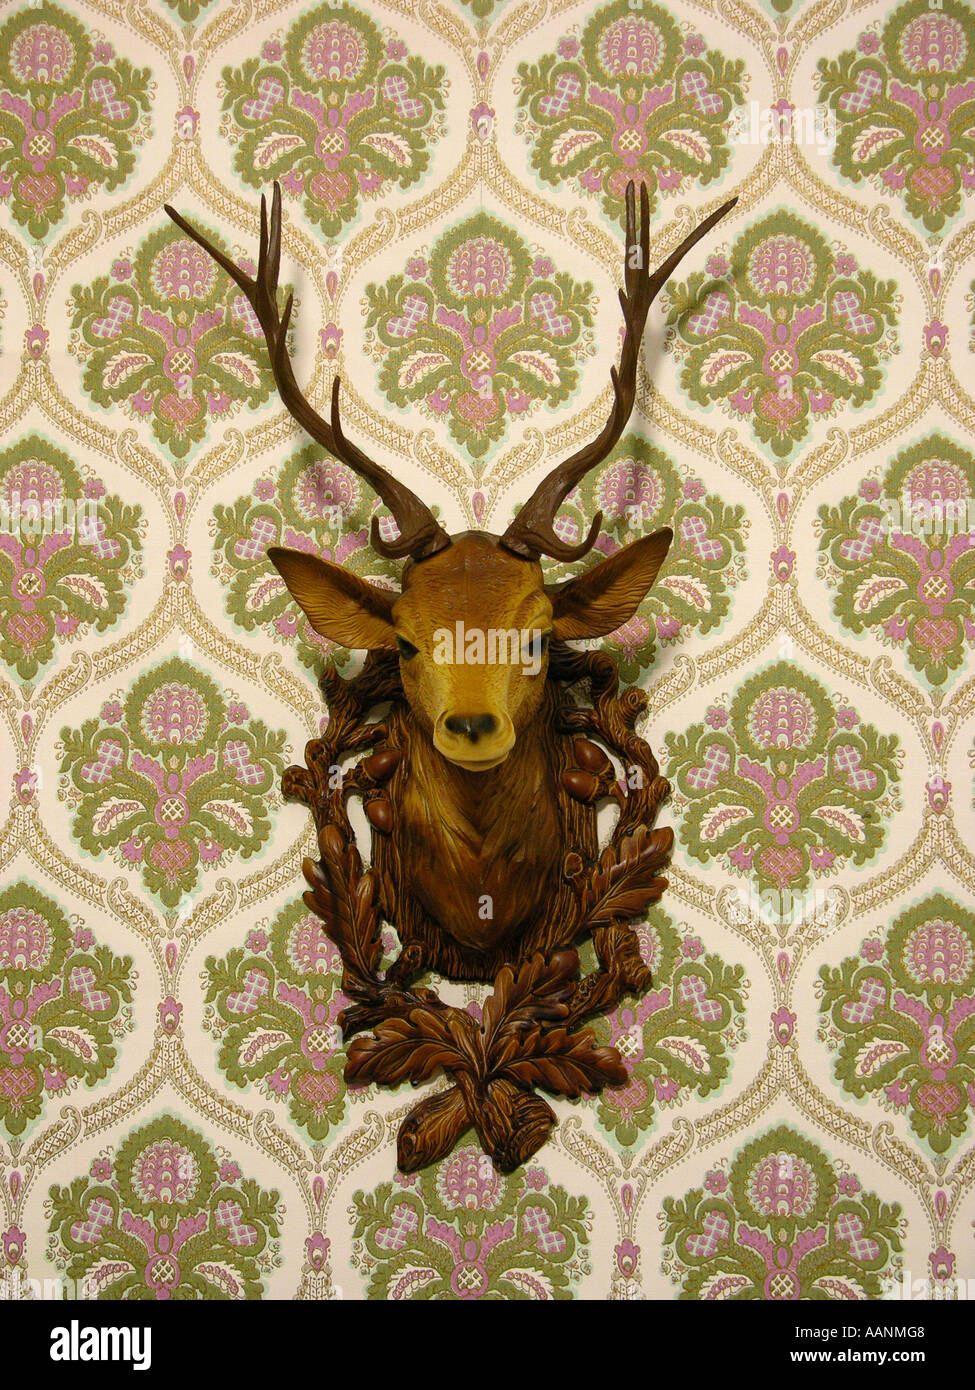
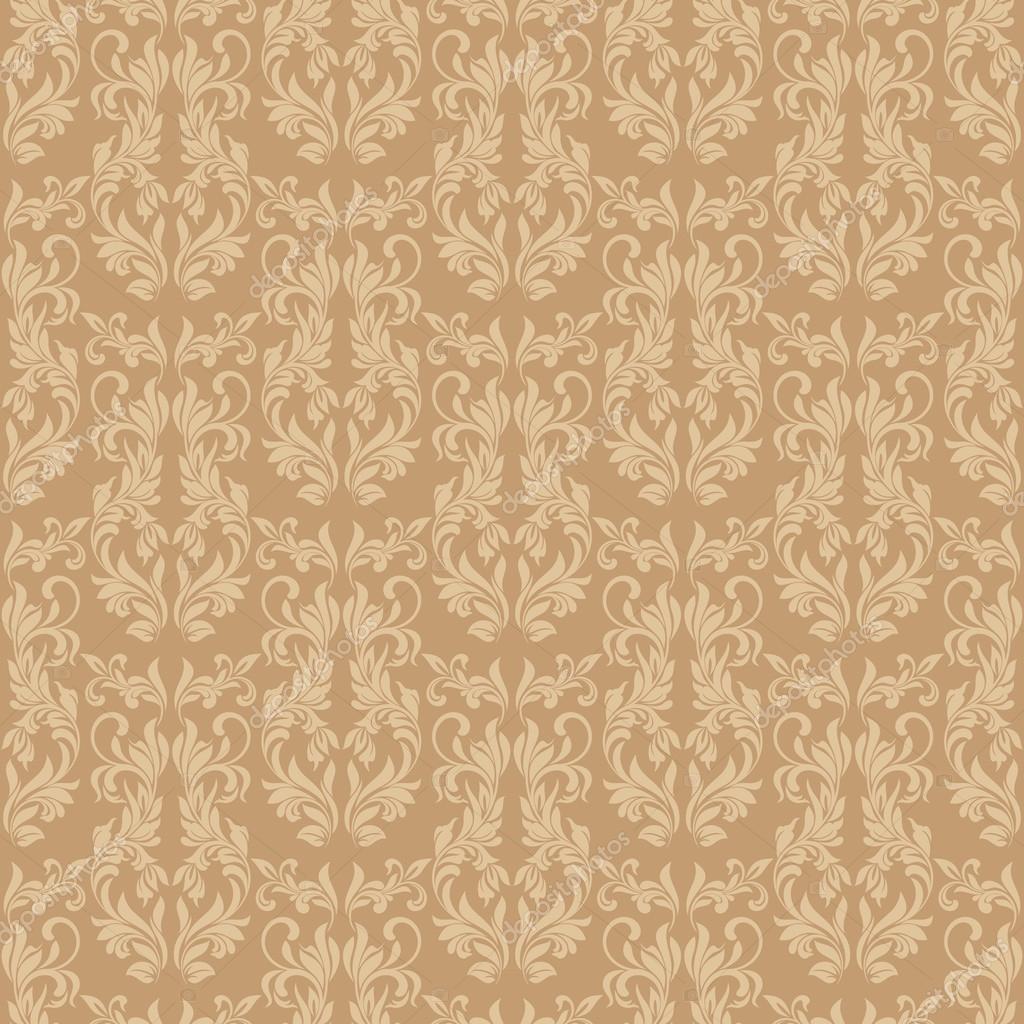
Below, I have visually documented what I have been up to during week thirteen. During this week, I made a whole new asset list for our team which included miscellaneous assets to be added to fill up the level. I gave myself a bunch of assets to include on the walls and floors and an additional book asset to aid the story relevance. Ultimately I feel like these models came out better than expected, especially since they were last-minute props. The floor/wall textures were done using a plane, and then transferred into Substance Painter. I have included references of inspiration in accordance. I hand drew the photograph images, as well as the wallpaper design, which was made in photoshop, and further converted to a texture using the UV maps. With the wallpaper, I wanted to create a texture that would resemble a deer skull with antlers. However, having it as abstract and quite vintage appearing. This ended up being rather subtle which I like, as it’s one of those things that won’t be inherently obvious, adding an extra layer of mystery.


The wooden floor belongs to me, but was sourced from my previous project last semester titled, ‘End of Era’.
References
Vintage Wallpaper | Stock image | Colourbox
plastic-deer-head-on-an-old-fashioned-wallpaper-AANMG8.jpg (975×1390) (alamy.com)
depositphotos_87400970-stock-illustration-old-vintage-wallpaper-classical-seamless.jpg (1024×1024)
Level Placement- Adding assets into the rooms
The very last thing I did was add a bunch of assets into the scene. This was already done for the most part, but there were a few rooms that were very empty or had nothing at all. I went ahead and redecorated the kitchen, library, bathroom, living room, added food assets into the dining room, made up the pantry room completely. This isn’t including a lot of the floor replacements I made with the carpets and wood.


Week 14- Final evaluation & Submission
In summary, this semester has been an amazing learning curve for me as I could never have imagined being a part of game creation. It has broadened my horizons with many outlooks in 3D Animation, and it is an area I will happily get into if the opportunity arises whilst looking for placement/and or future jobs. Although this experience has been a big learning factor for me, I will say that there were times it got frustrating. One problem with my team this semester was the lack of communication with a lot of team members. There were two students who never interacted with us at all and didn’t even contribute to the project which was extremely irritating as all the active members (myself included) had to do what would have been their share of the workload- it put the game in massive jeopardy. I overall found it to be a jarring task to get in contact with members of the group- there were times I’d reach out and ping everyone but had very limited answers and motivation. As somebody who requires a good level of communication in a group, I found this to be tiring at points. Regardless of anything, I feel as though I did my absolute best in this project and did my part with the work I assigned myself. In the end, this was still a positive experience for me, as I will be more than prepared to communicate with future teams and will have a better idea of how to deal with absent and irresponsible team members.
With my own work this semester, I have improved significantly in comparison to last semester’s project. I have noticed that my animation work has become more fluid and realistic. This might be due to how I have been practising non-stop and paying extra close attention to detail. Alternatively, it might even be the result of using an abundance of references, self-recorded footage, storyboards and animatics for every final animation. Whether or not that’s the case, I am happy to see it and will continue using these methods to advance higher with my skills.