Modeling
I was initially really optimistic and excited about beginning the modelling process. I had two main references for my model, which were Marines’ catshark design and a photo of a catshark.


I tried to keep my model as close to Marnies design as possible, so whenever I was hard modelling my character, I kept continually referring back to these images.

However, during one of our presentations, Mike gave feedback, saying that having the sharks in a sitting position would be much easier during the animation process, so I went back to the drawing board and started again with a model in a sitting position.

I was much happier with this model, but I ran into trouble when doing the tail, so instead of fixing it, I decided to remake the model because I felt it was a chance to make a better model, so I tried again. Part of the reason I wasn’t happy with it was that the head of the model looked very odd to me; it seemed too squashed, so I wanted to make a longer, more slender snout. While modelling, I also ran into problems joining the mirrored side of the model and both sides not merging correctly, so I completely started over.

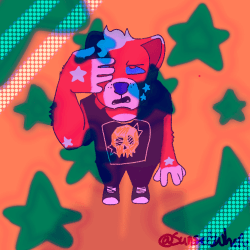
I wasn’t happy with this model for a different reason; I felt it would look better if I elongated the snout. However, I fixed this slightly before texturing, and I ended up with a model I was very happy with, as I felt it adhered very well to Marnies Design.

Texturing
Last semester, texturing was something I dreaded; however, I found myself really enjoying it this semester as I tried to view it more artistically than I had before. When I was texturing, I had downloaded a brush that Marnie had suggested called ‘Stylized Base’

So I used this material while texturing my model, and I ran into a few issues while I did so, such as colours spreading across different parts of the body, but it was easily fixed by going back and fixing my UV map by adding more seams in the correct places.

This was the base coat I came out with, and I was pretty happy with it, After this, I kept layering colours from Marnies character sheet over using different brushes, such as plastic gloss, at different opacities, and this gave me a really nice effect.

I also used different settings on my paint layers, such as multiply and darklight, to add painterly-esque shading.
Rigging
Rigging (especially the weight painting) was much harder than I thought it was going to be. The main issues arose with weight paint. My rig got done quite well with the experience I had at the time.

I attempted to do IKs; however, I was struggling quite badly with it and left it alone as I didn’t want to fall behind schedule. Weight painting was a massive issue, and I struggled for about two weeks before I fixed these issues:


I did not want my model to deform like this, so I kept trying and failing to fix this issue, so I reached out to my group for help, and Marnie helped me out by saying to turn off auto-normalise as she had a similar issue, and I did. This worked and fixed these issues.
I also had issues parenting my eyes and their bones to my main models rig and had to reach out to Alec to fix these issues and got them resolved.
I also did a few shape keys for a model but didn’t get around to making controls, so instead I had them as presets.

With this, we were ready to start animating. However, I also made a few props for the project along with Gabriel, while Marnie did the environments.


Animation
The animation process in blender went relatively smoothly; however, once I rendered the animation as PNGs and put them through Capcut, my animation slowed down considerably compared to other people in my group. This is one of my old animations where it’s quite noticeable.
In my initial animations,, I couldn’t get the pufferfish’s bowtie texture to work (later on, Gabriel helped me fix this); however, I carried on with the animation at this stage just to see how I wanted to do it in my more polished animation.
After we presented our animations to Rachel and Andrew, we got some feedback about lighting and composition as all our scenes had different lighting, but after redoing my animations, I went back and fixed my lighting so all of it should have similar continuity now.
With my final animations, they still came across as slow even though I fixed frame rate in blender and frame duration in capcut however I still experienced this problem but not as badly.