For this project we were assigned to work in a group in collaboration with the Game design students in order to provide the visuals of a game we were all were to create together. To start off we came up with the idea of having a 3rd person walking sim take place on a alien planet with a more fantasy theme and so from there we decided we would decide the hierarchy of our group and after a vote I was elected as the teams Art Director as well as the concept artist and animator of our group.
Concept Art-
For this assignment I did almost all of the concept art for the characters we’d see in the game, at the beginning we knew that we wanted to have 4 unique NPC’s, at least one fungus based character, another plant based character and two vertebrate characters along side our main character, who in previous discussions we decided would be some sort of robotic character as the sci-fi contrast to the normal fantasy stuff in the game.
Fungeye:
The very first concepts that I worked on for the game was the fungus creatures, before sketching I went online and developed a mood board using images of different fungi and fungus monster character designs to use as inspiration. From there I did various silhouette drawings of what I might want my designs to like to help make sure that I had a unique shape langue and silhouette for each design.
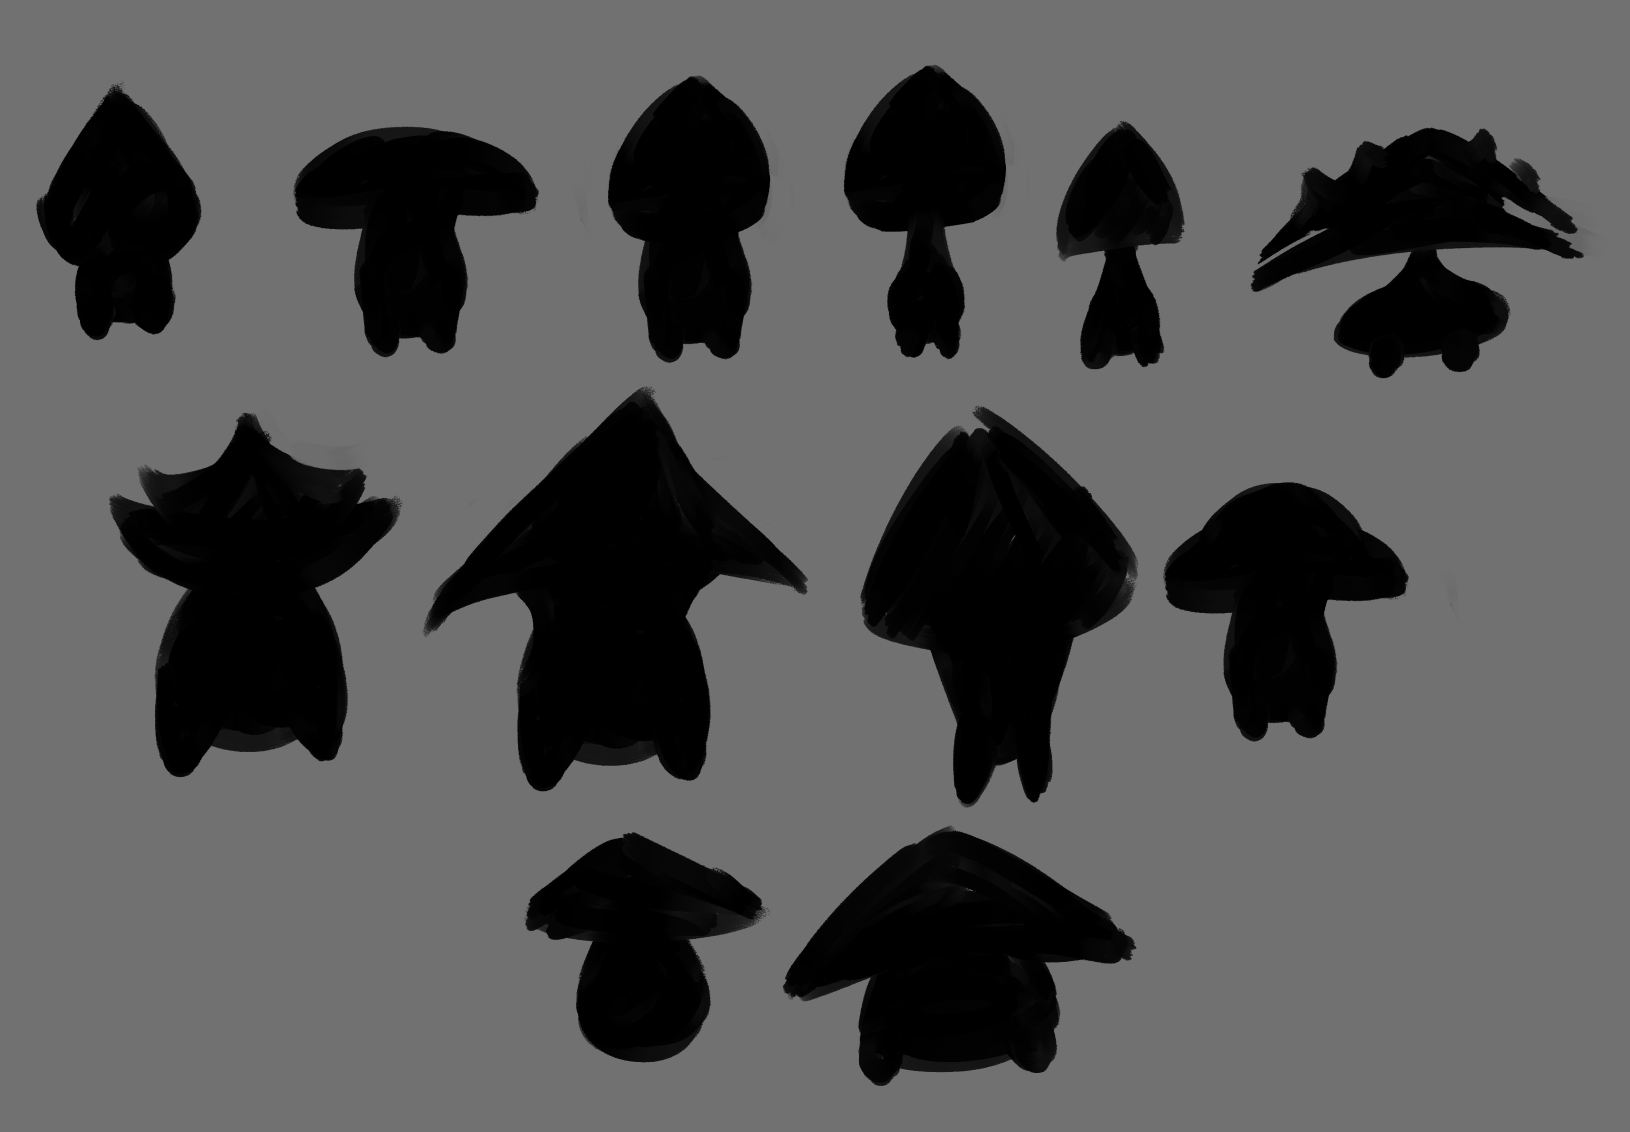
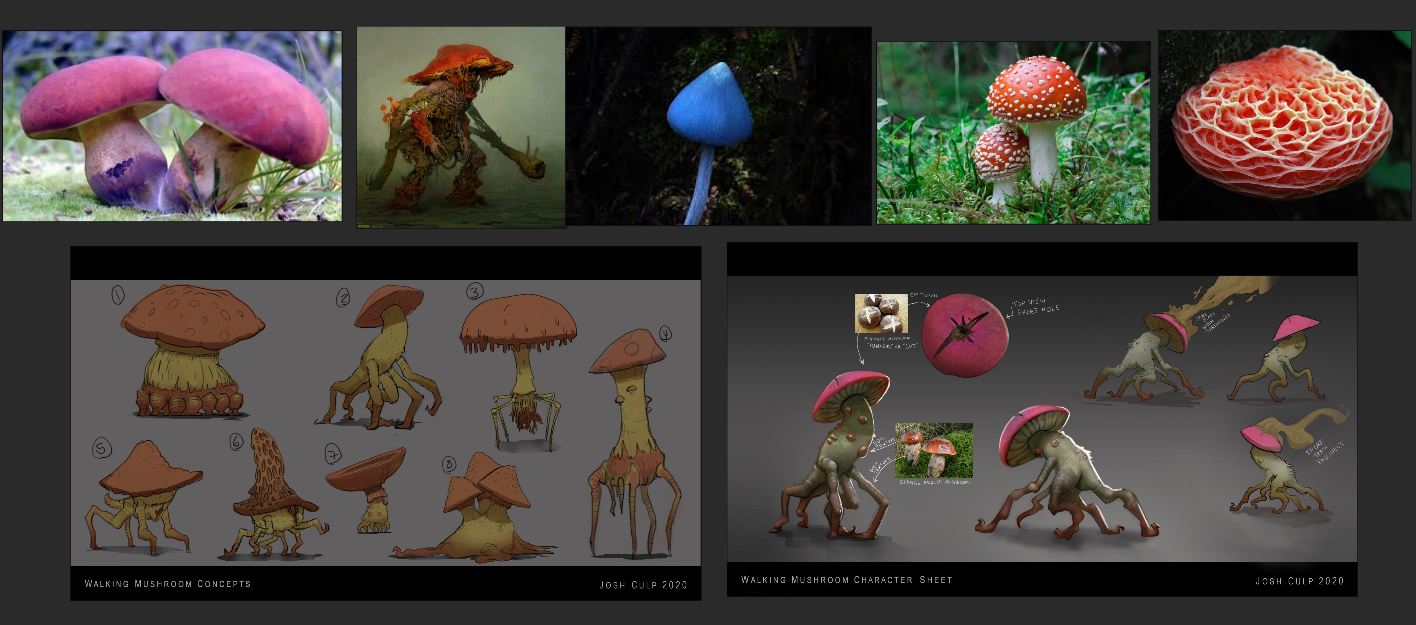
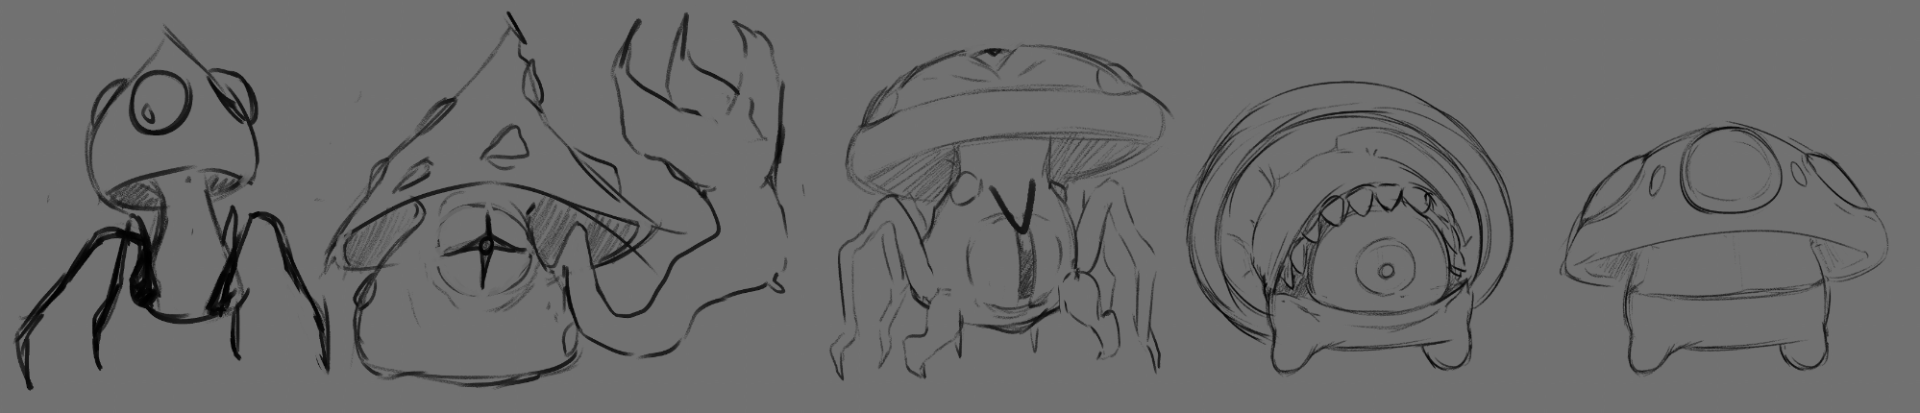
From there I took a select few of the silhouettes that I liked and used their unique shape in order to create a monster fungus design. I knew some of these might be used as either allies or enemies and so I wanted to make sure I had a range of designs to pick from when it came to showing it to our group and so I decided to try and have a theme for each design, the first was mostly basic just being a mushroom with creepy legs, I wasn’t the biggest fan of that design because it didn’t have much personality, but the next one did, I thought up of the idea of a fungus monster being some sort of mage and so I made its cap pointed up like a wizard hat and gave it an arm which would be used in order to conjure up spells. The next design I wanted to go for of an insect or arachnid look and so I gave it long spindly legs and ant / spider pincers on the front of it’s face, the final design I wanted to go for a more cute design and so I just had a little mushroom but with two little stump legs and a large mouth that it can open up in order to reveal an eye in the middle, this design would most likely have been used for a neutral or friendly character for the player to interact with.
Live Creatures:
Like the previous designs I had first gathered a mood board of a bunch of different creatures, however I really took inspiration from the xenomorph concept where if a chest burster infects any kind of creature, a xenomorph of that creature would be created once the chest burster is born, and so I wanted to see if I could make different types of creatures for this planet that looked distinct and different but still feel related at the same time. From that I went and sketched out handful of silhouettes to see if I liked where I was going.
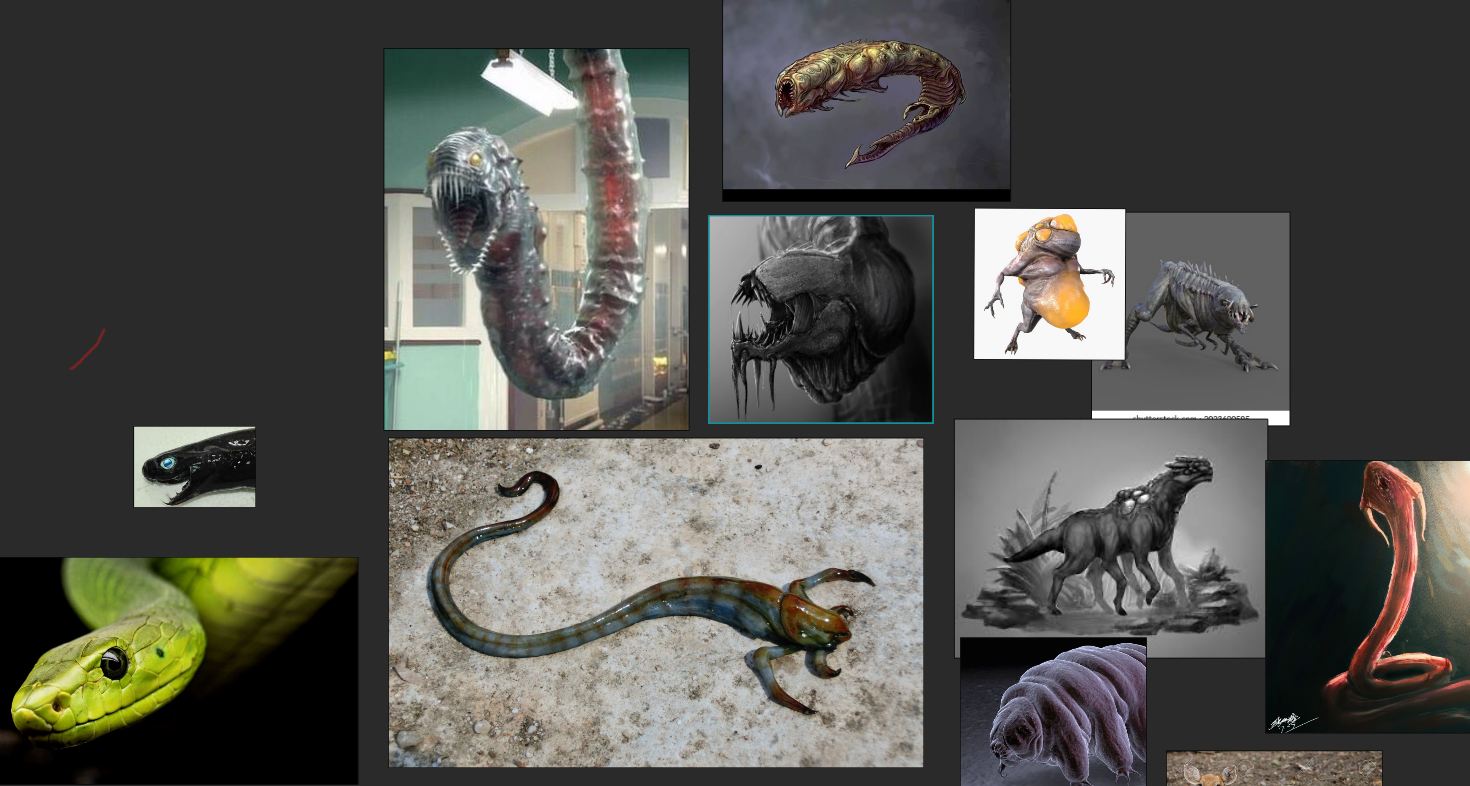

From there I made my first design which was a snake-like creature with sharp teeth and a spike on the end of it’s tail that would be treated the same sort of way as a scorpions tail, I wanted to try and use this concept as a basis for my other concepts and so I though of what the creature might look like if flew and so I took inspiration from game borderlands with it’s Rakk enemy, being a creature with a massive wing span and a sort of pincer mouth. Finally the last design, I wanted to go back to the xenomorph concept with the more Armoured looking body and so I began to think about what kind of 4 legged creature would look interesting with a armoured body and still stick with the sort of theme of my other designs and that’s when I thought up of using a deer as inspiration. Using a photo of a deer laying down I was able to create my own 4 legged creature, for this design I gave it more of a armoured head with a spike on it which may have worked like a deer’s antlers, also in order to keep with the theme of my other two concepts I also gave it a spiked tail.
Plant Monster:
Finally there is my plant monster, for this design I again got a mood board with references, this time looking at Venus fly traps and other carnivorous plants, in addition to other carnivorous plant monster concepts. From there I made two quick silhouettes before quickly picking a design that I loved. From there I began to develop the sketch into some bigger and better. Taking heavy inspiration from the man-eater plants in the game bullet storm. In that game they had an environmental hazard that was a giant man eating plant stuck to a wall, it had this vine tongue which it used to grab enemies that you kicked into it or the player if they weren’t careful and so I took that and used it in my concept, turning the sketch into a plant monster with an eye that would use a vine in order to attack the player!
UE4 Assets-
For this next part I had to take on the responsibility of making custom materials, assets and some gameplay features for the game during the downtime between me making my concepts and having a finished rig ready for me to animate.
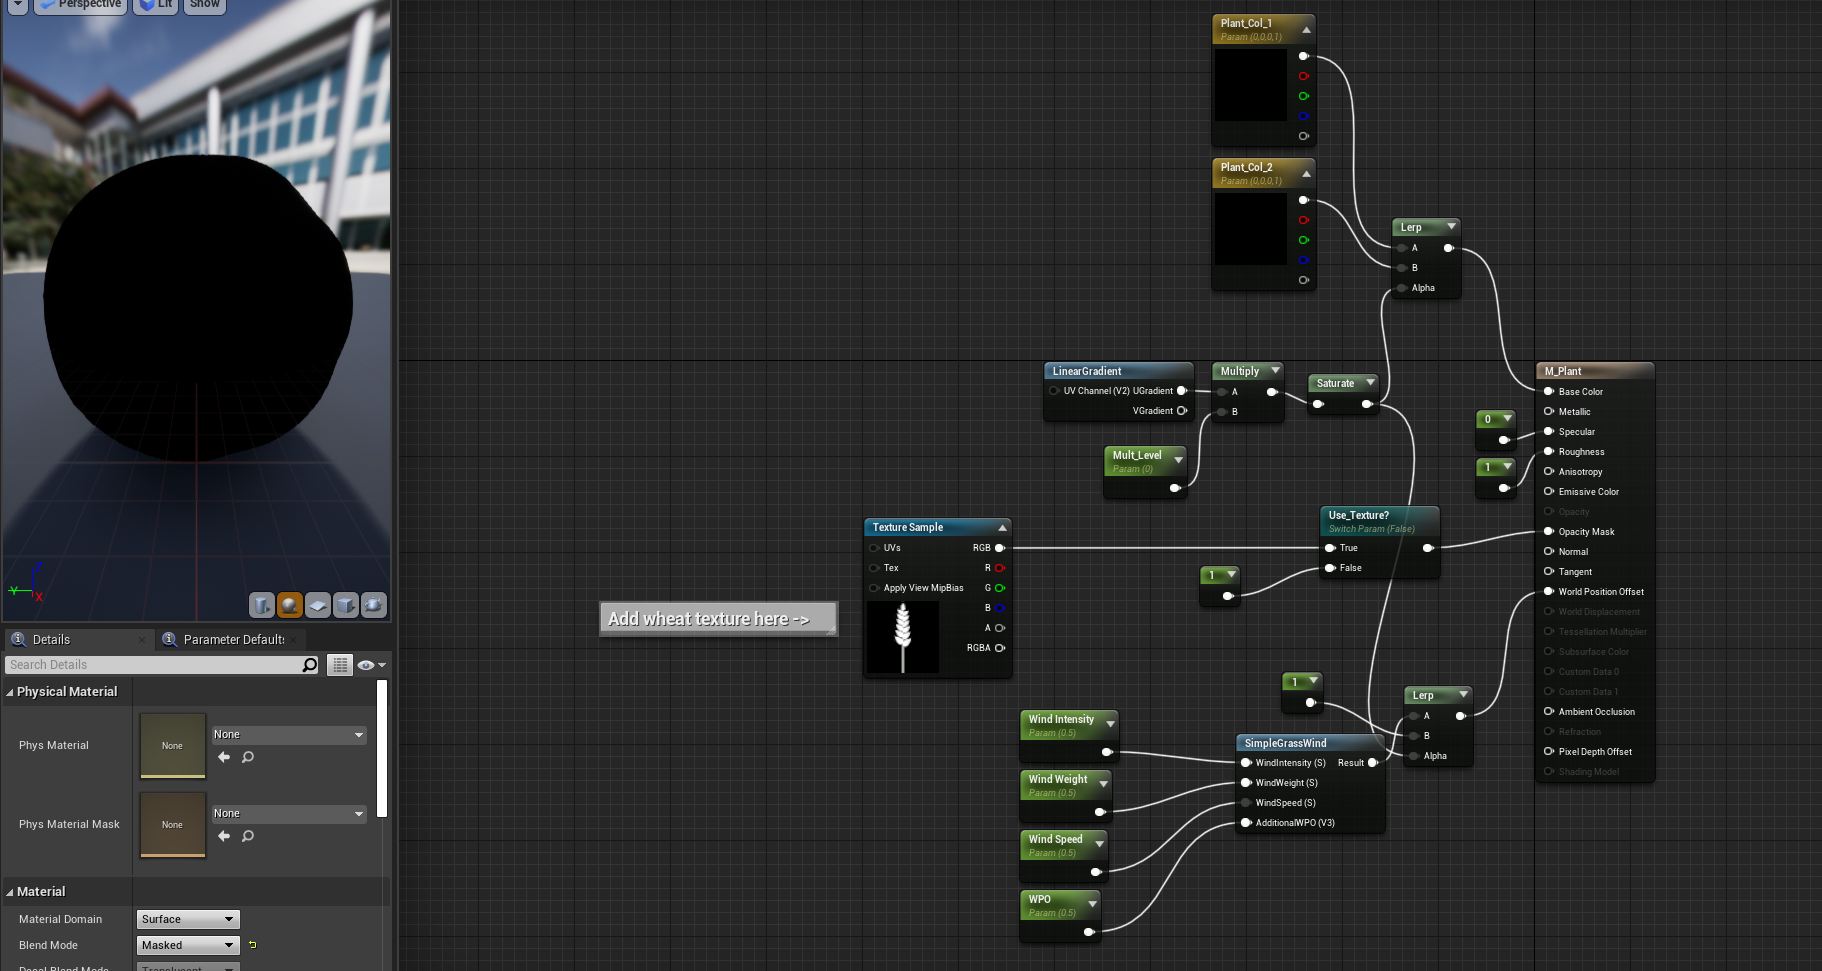
Leaf and Wheat/Plant:
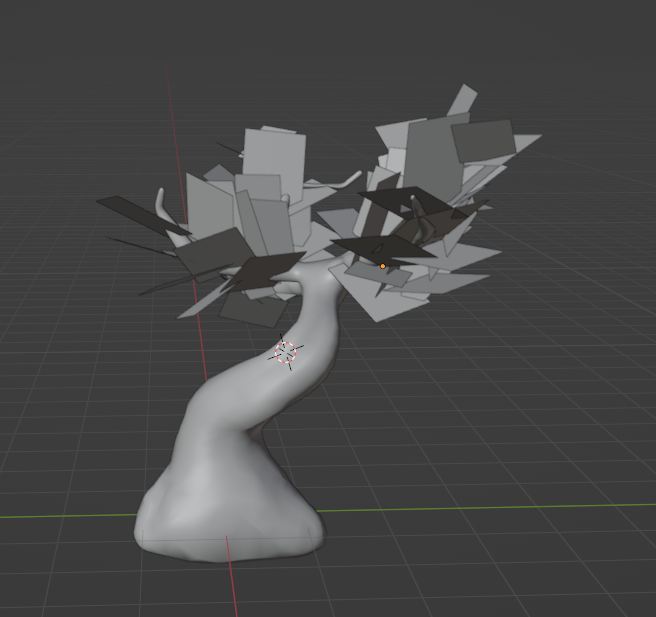
I’ll start off with the leaves I was first given a model of a tree trunk by Ben McCullough which I then had to take into Blender in order to scatter planes around the branches which would be used as the basis for the leaf material, in the beginning I did this by hand but after some research I learned that I could use the hair particle system in order to create large clumps of planes in almost whatever shape I wanted to have.
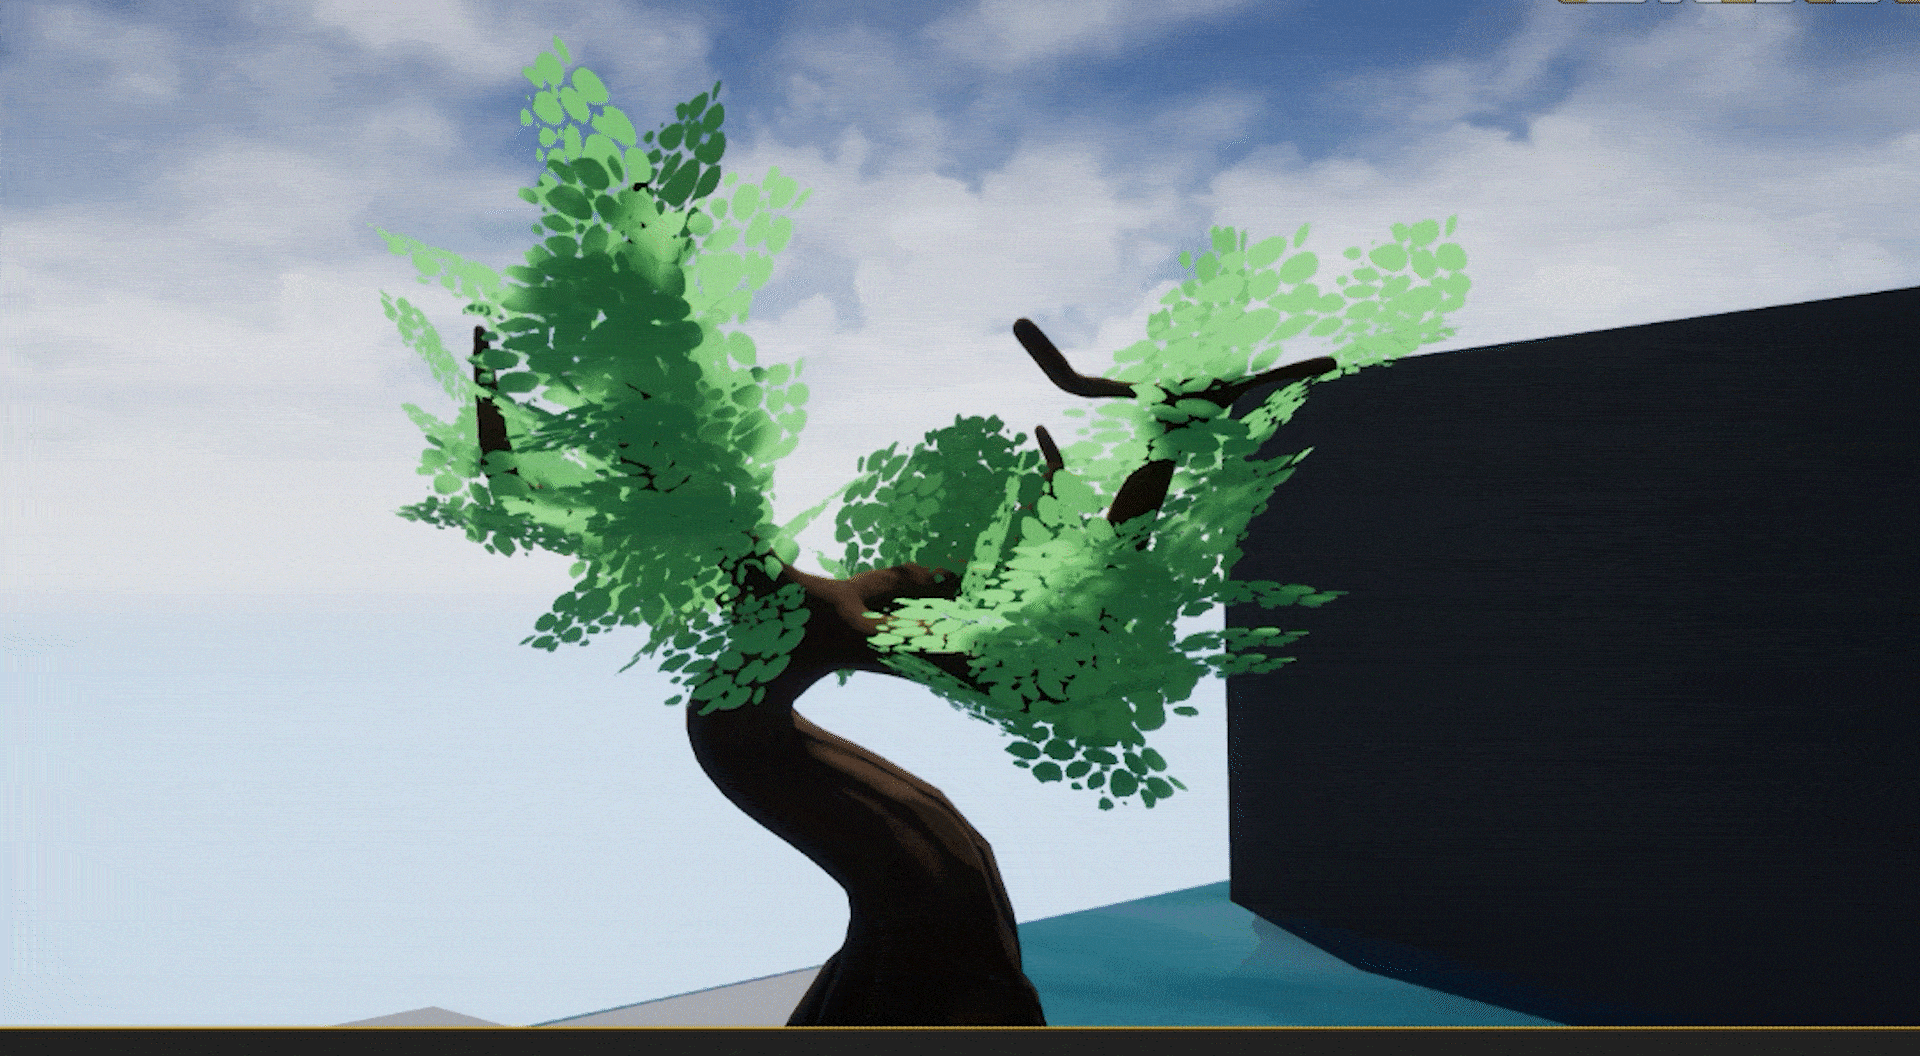
Once that was done I was off to make a texture for the leaves which would be used as an opacity mask to turn all of these planes into clutters of leaf petals, I did this simply in Clip Studio Paint, painting my design in black and white because in UE4 the mask keeps everything that’s dark opaque and everything light translucent or transparent, all the colouring would be set-up in the engine in order to create a more modular asset to be used in multiple places or different kinds of foliage.


This is the final step to the process, here I changed the blend mode to masked and added in my texture I made in CSP and put it into the “Opacity Mask” slot to create my mask, from there I needed some colour. Originally I had just settled on using a single parameter in order to colour all of my leaves, however after getting feedback during one of my presentations in university one of my tutors pointed out the fact that the leaves just blended together and it was getting hard to distinguish them from each other and so I came up with a solution with my limited experience at the time, that was to change the base colour of the leaf from a solid green into a gradient. Next I wanted to add some movement to the material to make it seem as if it was flowing in the wind, this is where the “SimpleGrassWind” node came in handy, with this I was able to give my material a subtle wave motion that would give off the illusion that the leaves were animated a bit. I wanted to change this at a later date to something more dynamic however I never had the chance to.
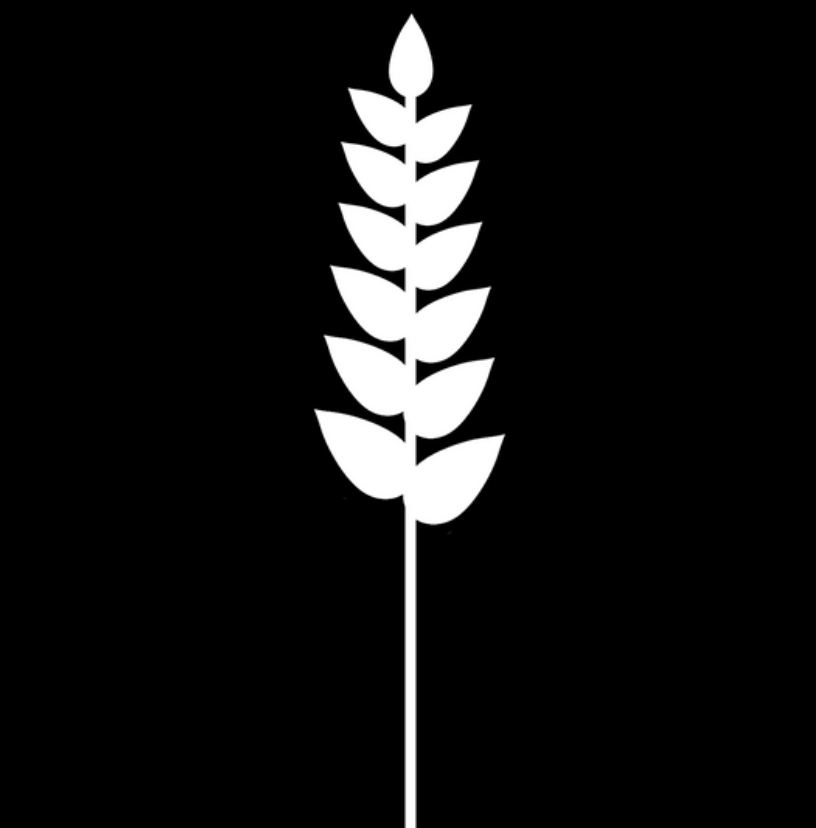
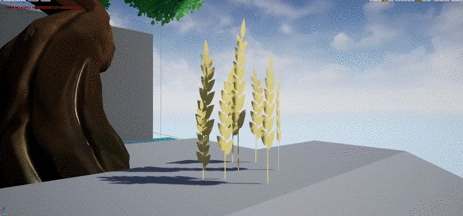
The same process was used too for the plants, I started off by making a black and white design for the plant in clip studio paint
Next up I created a quick model using two planes that were crossed in into an X, from there I made a few copies, changes their shapes and sizes a bit and then exported an fbx that would be then added into my unreal project.
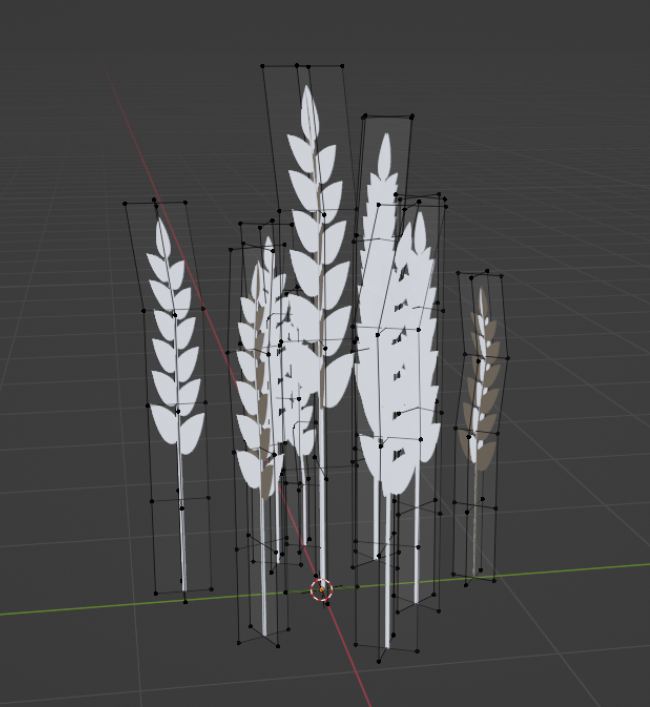
Once that was done all I had to do was make a copy of the leaf material but just change the texture from the leaf texture to the wheat texture. I had also added in a linear gradient in order to force the gradient to go from bottom to the top, this was also useful because I could then use this information to also have my wind effect be less dramatic the closer to the ground the wheat was.
Water:
The water material in the game was a lot more complicated than the leaves however I did have some experience with making a water material from my previous assignment so I had mostly just copied my methodology for creating water from there and applied it to my material here. Unlike my previous assignment however I didn’t just need normal maps to create the illusion of moving water and single layer water material nodes in order to create a light scattering effect under the material but I also had to learn about distance fields. Since this game was much more stylised than my previous project I wanted to add in some elements that would not only give some visual distinction where the environment came in contact with the water but also provide a more toonish nature like something found in the Breath of the Wild or Windwaker.
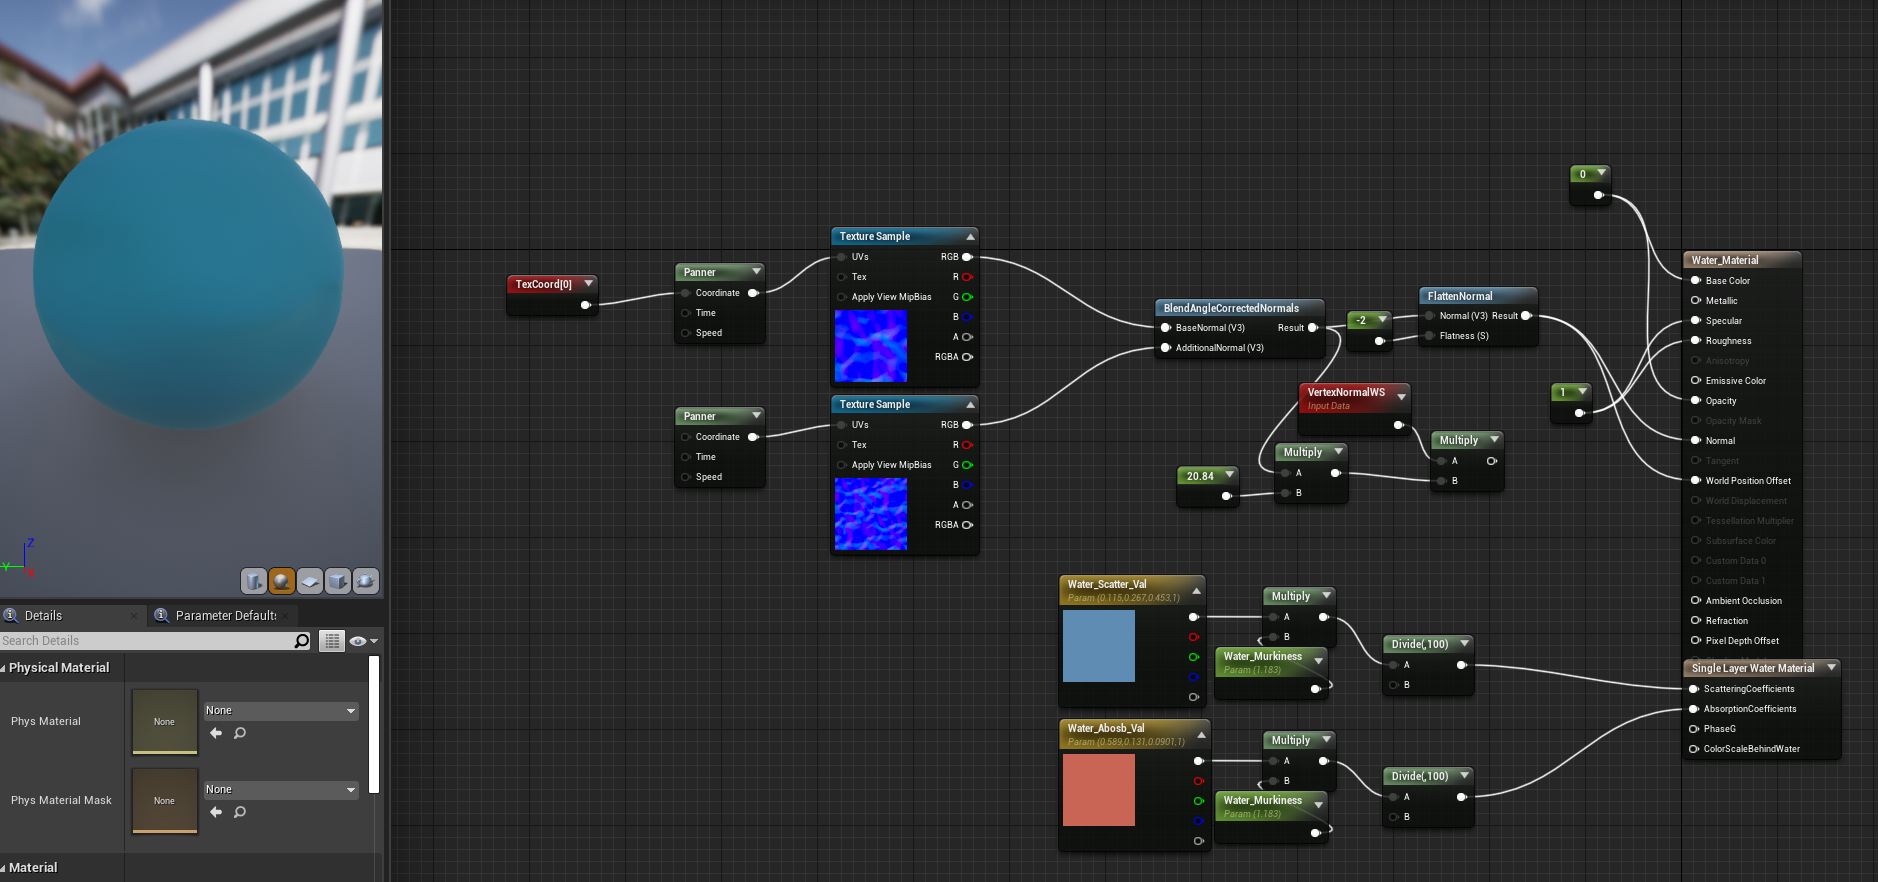

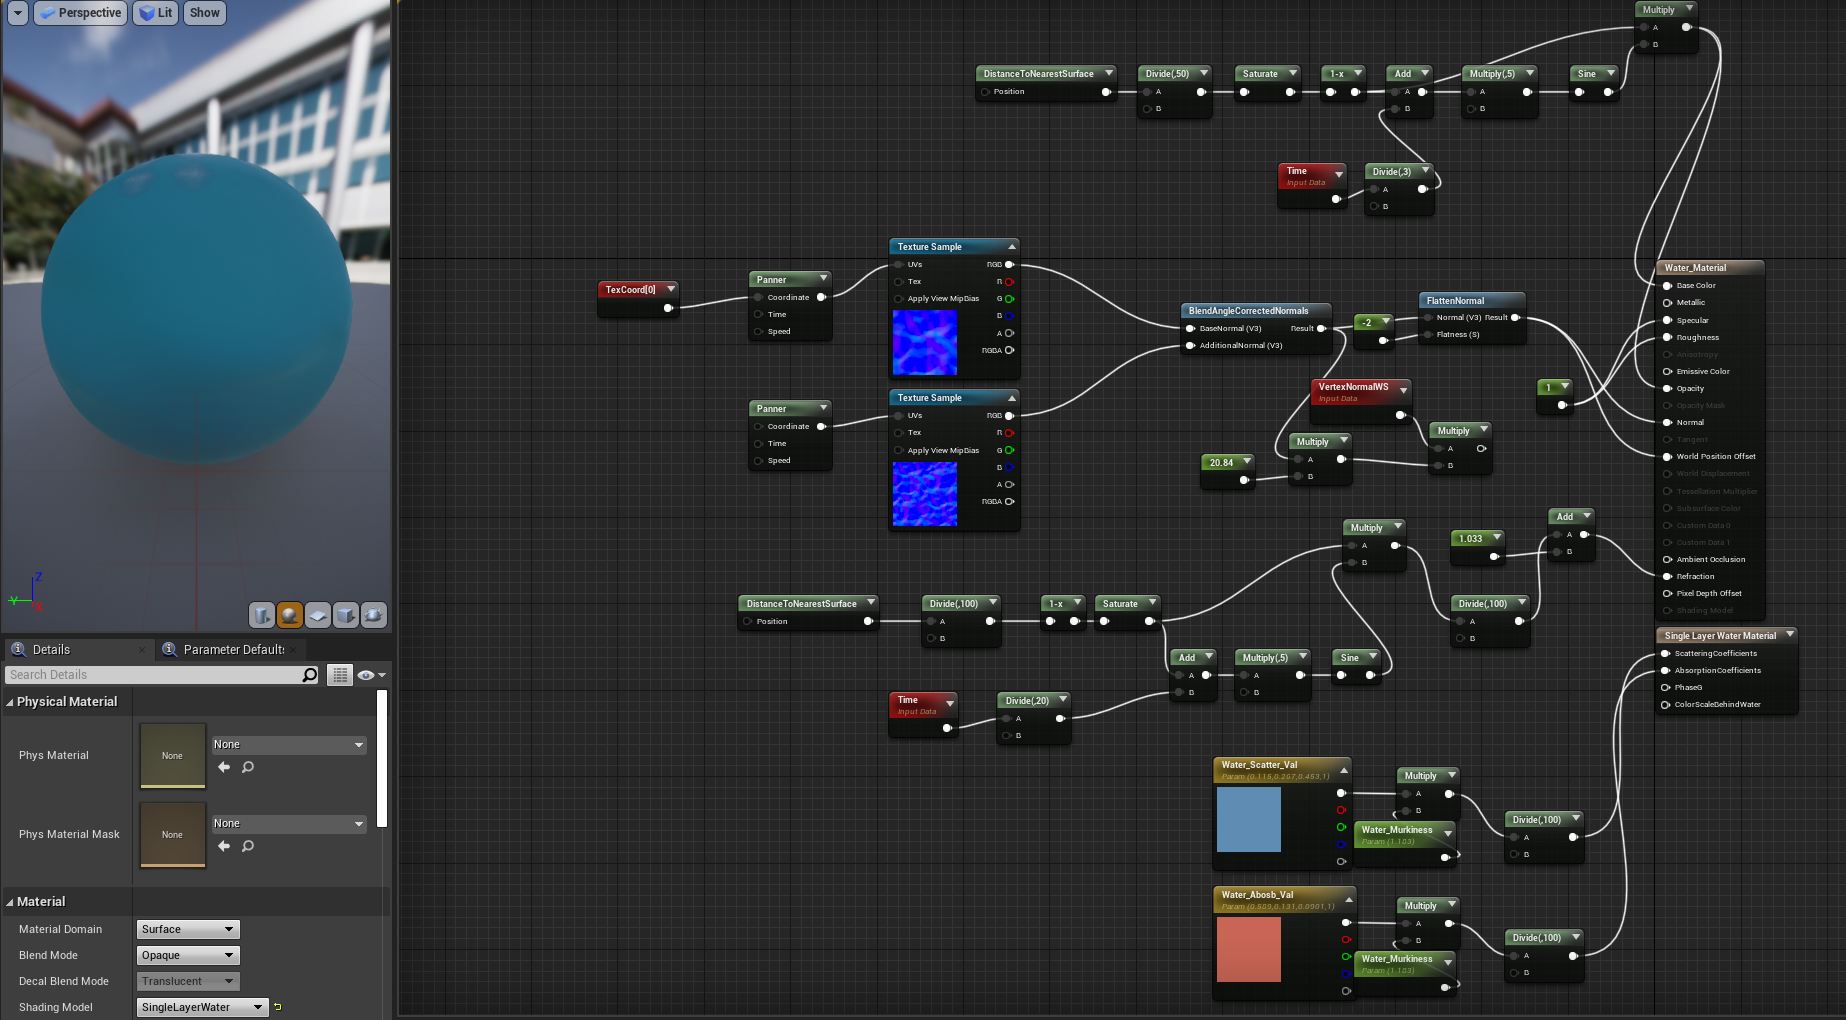
To do this I had to learn about and use Distance Field, simply put when a object(A) comes in contact with another object(B) with a distance field, a line is created where to two meet, using this data a gradient can be created which works perfectly for the effect I want to create.
From here we can take this data and create a pulsing effect that will pulse out from wherever the object is coming into contact with another object.
After which we can make it so the effect fades instead of encompassing the entire object.
From there we can make more ripples using the multiply node, in this case I thought 5 would be enough so I stuck with that. In addition to that slowed down the speed of the ripples as they started to speedup with the added number of ripples. If I wanted to make this more modular I could have added single digit parameters into the b port of the divide node as well as the b port of the multiply node, this would have given whoever was using this material to create an instance where the could have increased or lowered the number of ripples as well as change the speed in which they pulsed out.
Next I just copied that line of nodes and pasted it into my main water material, from there I applied it to both my base colour and opacity in order to create an opaque white ring on top my water!
Scanner:
The last major thing I had made in the game was the games scanner mechanic, this was done almost exclusively using post processing materials. I started off by using creating a new material and changed the material domain to post processing in order to allow me to make a new post-processing material. From there I was able to create a spherical mask around the camera which would make a white circle that would fade out depending on whatever distance value I wanted it to be
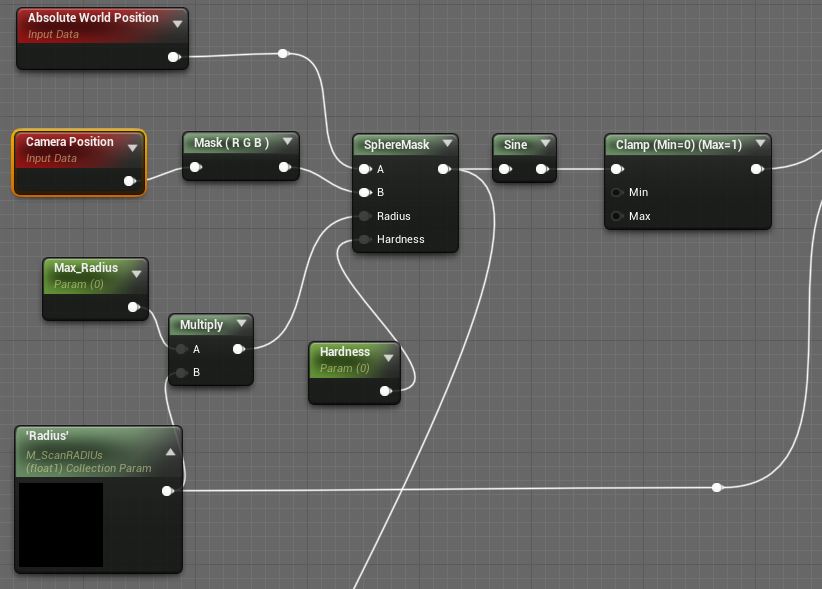
From there I was able to take that value and multiply it with the SceneTexture at PostProcessinput0 which is just what the scene looks like normally also creating a mask that would show the normal scene where the black parts of the scene would normally be, effectively now making a normal ring overlay my world. In addition to that I also made it so that the colour of the ring would be customisable with the “Scan_Colour” ring variable.
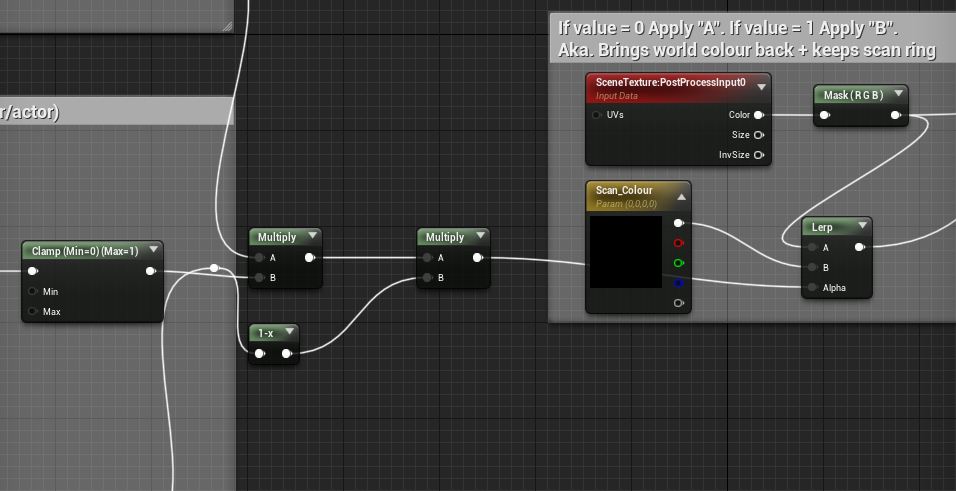
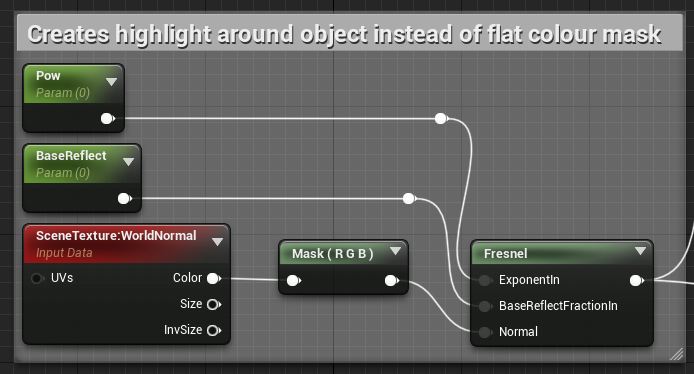
In addtion to this I also added in a highlight mechanic which allows for the level desginer to pick any object in the game and turn it into any colour they want once the ring passes over it and this is all done using custom stencils. With custom stencils enabled in the project I am able to create a unique bitmask using any number I want, this simply means that I can assign properties to a stencil number, so say if I give stencil 1 the properties of being green and stencil 2 the properties of being pink, that would mean that any object given stencil 1 will turn into a bright emissive green colour and any object given stencil 2 will turn into a bright emissive pink colour!

In addition to that I had also used a fresnel in order to put a highlight around an object instead of it being turned into a solid colour. This was obviously made customisable by using parameters in order to allow for the game designers and level designers tweak the look to whatever they wanted.
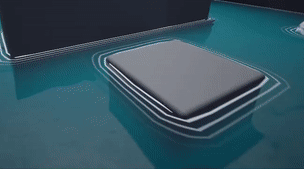
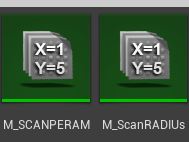
The final step of this process was to attach the ring to the player and have it expand out once the player hit a key. To do this I first had to create two different Material parameter collections, one to be used as a tracker to constantly track the players x,y,z coordinates and another that will be used in order to expand and shrink the ring.
To get the players XYZ coordinates I created a vector parameter simply called Player_POS. I then had to go into the level blueprint and put in the node “Get Player Character” and connect that into the “GetWorldLocation” this will then allow for me to output my characters location into anything and so I created a “Set Vector Parameter Value” node into the blueprint, changed the parameter to “Player_POS” and now the “Player_POS” will always give out the players location.

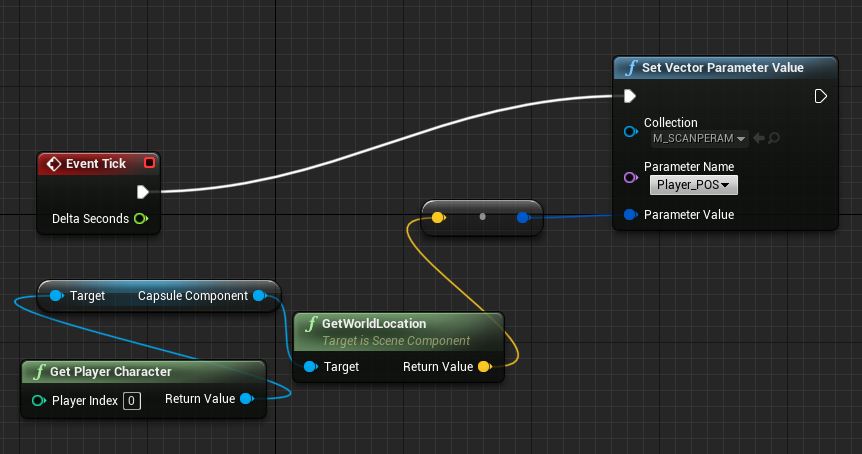
And so now I will swap out the “Camera Position” node from my material blueprint with a paramater with the “Player_POS” parameter collection and now no longer will the circle emanate from the camera but instead the player location

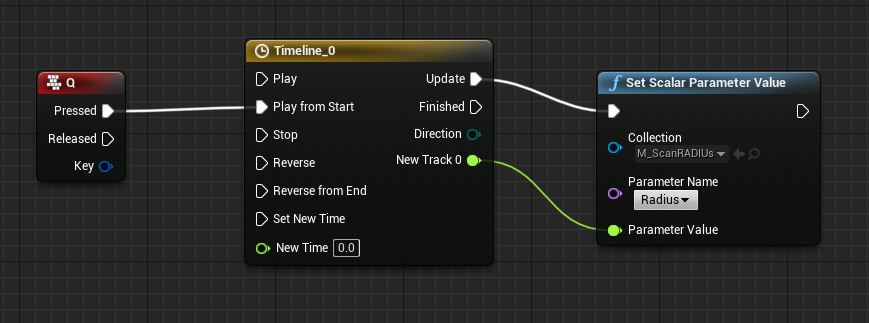
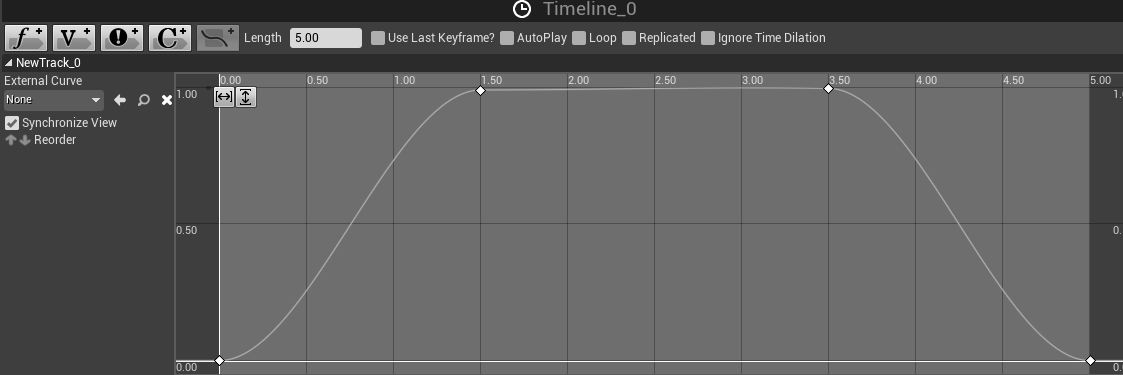
Finally all that was left was to do was to get the ring to expand when the player pressed a key. This was done using a scalar parameter I called “Radius”, I created a parameter into the post processing material and multiplied it with the maximum radius of my sphere mask, I did this so that I could use my Max_Radius parameter to be the limit of my range and then use a timeline in a different blueprint to shrink and expand the circle output. Once that is set-up I’d then move onto the ThirdPerson Character Blueprint where I’d add and connect a Key Press, a timeline and a set scalar parameter value node together. All a timeline does is make a value change to another over a specified time set by the scripter, in my case I felt like having the ring expand in 1.5 seconds stay still for 2 seconds and retract in 1.5 seconds would be a appropriate amount of time for the ring to be out for, letting the player get a good look of the surrounding area and the highlighted items before having to scan again.

Once all that is set in place and connected, this was the result.
Animation –
Finally the animation side of the project, unfortunately I was ill for a long while right after the rigs were finished so I was only able to do a handful of animations for the group.
Idle:
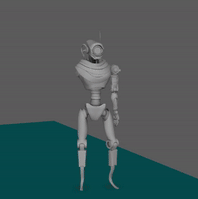
For the main idle loop I knew I wanted to keep it simple and unambiguous due to the fact we were creating a walking sim without any real narrative and so it was hard to give him much of a personality, however I did get some get references and ideas from videos I sourced on YouTube with people taking their own references. For the animation it is simply just our main character standing still and sifting his torso to the side, while we didn’t have much of a story I did think that it would be a cool idea for our character to have to keep adjusting himself with the extra weight on the one side of his body which he wouldn’t normally be used to.

Jump:
For the jump animation we didn’t have much of a choice in terms of getting rid of the anticipation due to the fact our jump happened on frame 1 and so I went on mixamo and took some references from there on how I should go about creating my own jump, from there I saw a good reference for a falling idle animation which I then took inspiration from for my own falling idle animation, as for the landing I got a reference for that in another video I had found online.
https://www.mixamo.com/#/?limit=96&page=1&query=fall&type=Motion%2CMotionPack
Idle Action:
Next was the idle action animation, here I needed to make an animation that the character will do after waiting for a while, I took inspiration from the very first reference video I found when the guy looks over his shoulder, I thought that might fit well for our character seeing as he’s on an alien work and he’s supposted to explore it, maybe he should be curious and look around a bit. There is a bit of a sudden stop when he turns his torso, however I think this works better in the animations favour and gives the character a bit of flavour since of course he’s a robot, he wouldn’t turn his body naturally.

Conclusion:
Overall I feel like I did a decent amount of work for my group that I was satisfied with, it really took me out of my comfort zone, especially when it came to working on things like UE4 and it’s material blue prints and scripting. I’m proud of my concepts here too, I felt like I was able to convincingly make these sort of alien / fantasy hybrid characters, in addition I’ve never really made a design as in-depth as our main character robot design, having to revise over my work after getting feedback was pretty new to me but I really enjoyed it and felt like I was able to grow my skills and get an better overall outcome from the experience. I think as an art director I did a decent job overall at keeping a style going for the game, however I know there have been a few fatal mistakes I made along the way, I was way too lenient on my team at times and didn’t check up on them nearly as much as I should have, from now on in the future I’ll know not to let anyone slack and be a bit more hard on the people who are falling behind without good reason for the good of the team who are waiting for them to finish their work and also for the good of the project.