During week 8 of our project, we presented our game in our first playtest, I worked some more on altering my textures to fit the scene, and we are continuously planning our next steps for the upcoming weeks.
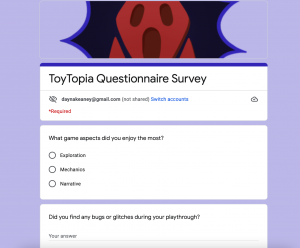
James and I were present to set up our game for play testing on Monday. It went quite well and we got some good feedback from tutors and classmates, using our google forms survey. It was fun to see people have a go at what we have so far, however I do agree that the progress and visual of our game is still quite behind, and we need to quickly get some models , narrative and textures sorted at least for next week.
We had meetings on Sunday and Tuesday to catch up on the feedback we got, and the progress inside the game. Our main concerns this week were to alter the blocking out inside UE – as textures could not tile correctly in multiple places, and to finally add models to our game.
This week I helped to layout the play area with slide that will be inside the ball bit room. I used reference from images collected in our Miro Board of the particular shape and layout of play areas. My teammate Patrick was able to replicate the layout well inside UE.

Reference:


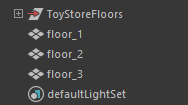
Next, I made a plan on how to fix up the improper tiling and visible seams on the blackouts. In many rooms, especially the bathroom walls, the tiles were appearing as multiple sizes, and there were multiple parts to the walls because of the doors. I have asked Patrick to export parts of the floors and walls from UE, into FBX files.


Once I got the fbx’s I opened them on Maya in a separate file and set them on x-ray on a reference layer. From here I was able to replicate the shape of the floor or wall I was working on with the grip snap on so it would accurately fit into the shape. Once I has made the individual shapes I combined the mesh. I added edge loops around areas that edges aligned, and deleted any inside mesh faces. This would help to structure the mesh better. I made use of the merge tool to merge duplicate vertices in one spot, as that occurred many times around these block-outs.

Once I was finished I made use of the clean up tool in case I had missed anything. Then I went onto UV mapping the meshes. For some it was quite tricky but I made use of the cut/sew tool, and the unfold tool.


I brought some of the work into substance painter to apply my textures on. I first brought in the floors. I baked the mesh and got my substance designer texture file ready. I imported the texture in as a smart material, dragged it into the layer of the material and it worked very well. If we choose to go this route for the blockouts, they will work pretty well. However this process is very time-consuming. We may look for another solution but for now this is our only option.
This week I also continued with my texturing progress. I am aiming to have them all finished by next week so they can all be brought into the engine.

I started working on the puzzle play mat that will be shown in the play area rooms. I was recreating the pattern look of the foam puzzle piece and created it as a tile sampler. I worked with masking greyscale colours to apply different colours as 2 x 2 tiling on the material. I made an image of a puzzle piece with the bits going around a square, added this in as a bitmap and plugged into the pattern input in the tile sampler node to get the shape of a puzzle piece.

References:


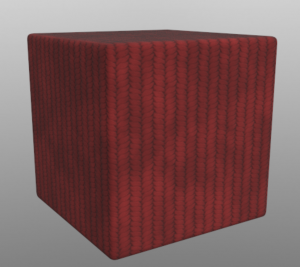
For the toy collector room, I reused the old carpet design I made before, and changed the uniform colour to red. I gave it some grunge colouring and altered any other changes. Im glad I could use the carpet design again, and it adds to the visual to make it seem more valuable from other rooms.

I made a beige wall, similar to my other plain walls, for an additional variation for any ceiling or wall that may need it.


My wood material from last week appeared too uniform-like, that it looked much like bricks instead. I revised the wood material to a different colour, and irregular variation in the wood planks.
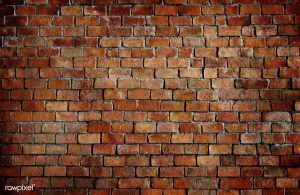
I also preferred the idea of adding a brick wall to the basement, so I copied and pasted the original wood material and altered the material to look even more like brick. I made use of the dents in the height map to add wear and tear in the brick, and masked the tiling to get different color variation.
References:


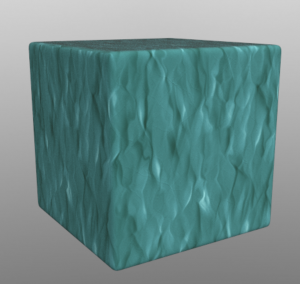
I revised the yellow plain wall to suit the toy store room better, and made a new green plain wall. I am planning to use this for the ball pit room as it has a ‘swamp forest’ theme.
Lastly I again worked on the ‘water floor’ for the swamp room. At one point I was hoping to add lily pads to the material for additional detail, however since its for the floor, it may not always be seen during to the balls for the ball pit. So I will be sticking with this design.
References:


We have time this Monday to present our weekly tasks taking into consideration the feedback we got from the playtest, and overall progress that is needed, like producing models, and texturing the environment.