This week for the weekly Modelling Challenges we looked over texturing. Texturing is the placement of material, colour or pattern onto an object or model. We were required to test out a program called Substance Painter along with working in Maya. Substance Painter is known as the place to build and structure textures onto already-made models.
Source: Week 04 – Texturing – Substance painter intro.mp4, Breaking maps for smart materials.mp4, export maps from substance to maya or sketchfab.mp4
First off, we were given a UV mapped hard surface model ready to texture. We jumped onto Substance painter during class to get used to the program and then attempted to place texture onto our object.
Source: Substance Painter

Before I do anything else, we bake our ID maps. I scroll down at the right column of menus to find texture set settings-bake mesh maps, change mesh size and tick ‘Use low poly mesh as high poly mesh’, to help keep the mesh the same. Then change the ID setting ‘Colour source’ to ‘Mesh ID/Polygroup’ To help generate an ID map based on the seperate models in the one file.
 Once ‘Bake selected textures’ is clicked, we get multiple mesh
informations, and each one helps determines a seperate feature e.g. shadows, edges, each model, thickness.
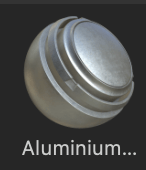
Now I could pick a smart material to place onto the model. I chose ‘Aluminium Brushed Worn’ to test out first, and just left click and dragged onto the model to place.
 what I could also do is place other materials. I did this by dragging
 another material onto the model (Chrome Blue Tint) , right click the layer it comes from, select add mask with colour selection, turn in ID map and click the parts of the model I want this model to have.
![]()


I also added a stencil from the right menu in a yellow colour to add detail. I could then save this texture in a folder and bring it into Maya, with the blank object open, or else straight into sketchfab, where textures can be easily uploaded.


< Source: Sketchfab