Now that we have a finalised, structured story, with plenty of concept work and visuals to help our progress, we can move onto the 3D production of the animation! During week 7-8 we have been practicing our use of 3D modelling in both Maya and Blender, and have been making simple assets to use in our 3D previs.
The previs is the 3D version of a storyboard. Not much in a previs should be too detailed or textured, all there needs to be is the use of camera shots, timing and 3D character/scene assets. Great benefits of working on a previs is that you can build the entire environment all in one scene, you can move your camera wherever you like with distance, focal length etc. included, and you can add in your model all ready to start animating.
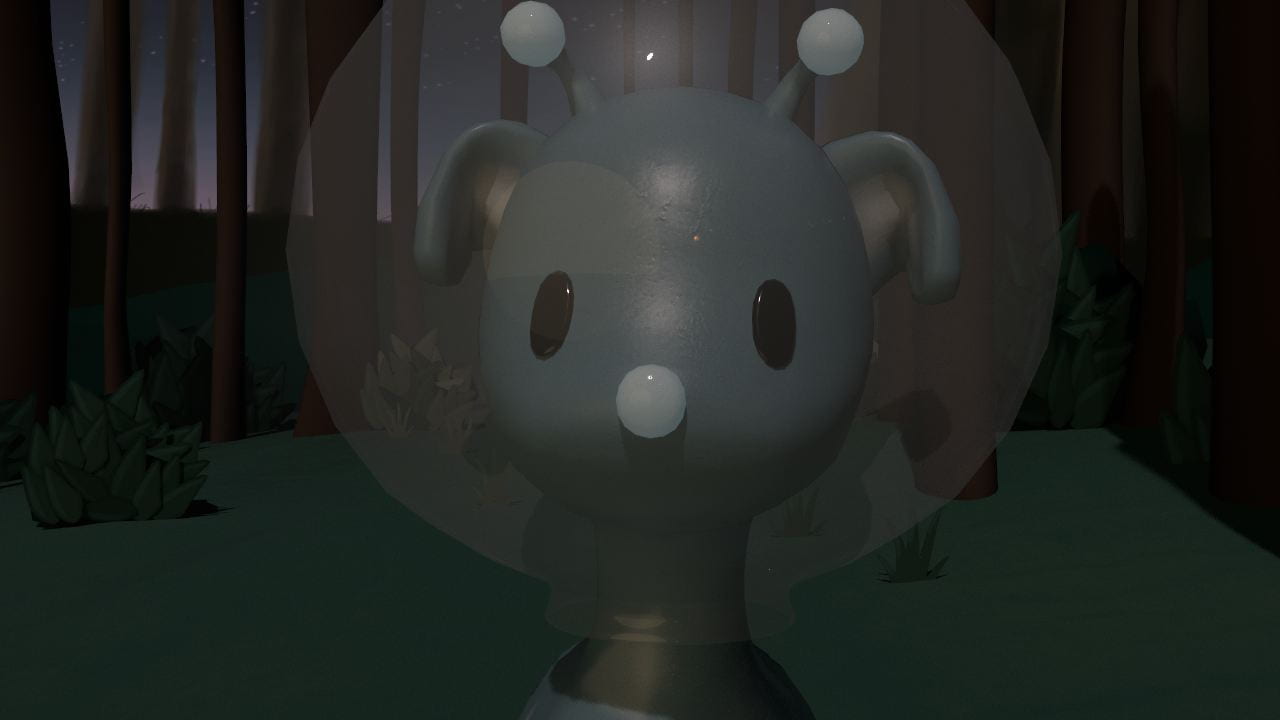
To start, I had been working on simple 3D assets of our two characters, the Alien and the Giraffe. I made use of the combine features while being wary of certain vertices and faces. I also included a rig for the tail in the Alien asset to practice its movements and how it’ll respond to emotion. They were quite fun to make and I feel I would be ready to help out with the more finalised assets of these characters when we get to that part in the future. As a result, we all used these same assets of the characters to keep the same look for everyones shot.


Last week we decided on our shots and who would be animating which shot. I went for shot 4 and shot 5. I made a new file in Maya and built a quick and easy asset of the environment. I made a group of tree trunks as cubes stretched high, I used spheres for the tree leaves and bushes and smoothed them out. And I also placed down a plane surface, added vertices to create an irregular-ground look, and also smoothed it out. Lastly I placed my character asset in through reference editor. I did make my previs shots firstly as all greyscale, however my group were going for colour in their shots so I quickly assigned each shape a material (lambert etc.) then I changed their colour to something suitable.

Next was the camera work. In the first shot I wanted to create the dolly effect as that was what the group and I decided would look good. I zoomed the camera from a high place, and low down towards the character where it ends. This created a nice effect when I animated the character moving forward later on. In addition to the character, I made it so the alien would subtly swerve to the right and left as it provided a snail-like movement.

We also wanted to add butterflies to the story, so In my part, the butterfly flies into the forest in a quick pace, which indicates the alien to go in and follow it.
For the next shot, I made a similar scene using the same assets I had before (just in a different position) I set the scene for a side view and for the camera to track the alien moving to the right. I animated the alien looking around and inspecting where the butterfly went. In the actual animation we will make the alien expression a little more scared and hesitant. I added a touch to the background for where the alien moved, a silhouette (butterflies that look like evil eyes) would appear behind it – this would add a little more scary tone to the animation in the future. I placed a tree at the end in the foreground so that I could link it to the next group members previs shot, as theres would start where mine ended. The character asset does have a tail and is shown in the others work. Unfortunately the tail was corrupt and I could not get it fixed, so I had to hide the constraint in the scene.

Here are my previs shots below.
After we got this done, we made a presentation showcasing our work so far and what position we are in right now. This helped us keep on track and with the feedback we got, we can improve on what we do next. This included our progress with the story, our additional designs, our assets and our animatics/previs video. During this time we had also decided on the name of our animated short – “Antenna Met You” !


Source: https://docs.google.com/presentation/d/16QGO9ELaHXy8dKOL80pEt9TUMPmRGPncY30U_h3wZuE/edit?usp=sharing
During our easter break, we have been planning out job roles for our next step of progress. We set up this project management website called Trello to help us write down our essential to do list (for assets) and to assign each member of the group a role to complete. We discussed this through a call. We first decided me and Alisa should finish off some last-minute concepts we still needed such as the final colour palette, and a turnaround of each character. We also assigned roles to Matthew and Alisa to test out modelling these characters properly, and see how it goes. As well as this, we assigned Jennifer and Ben the role to test out background and texture painting to see how our sky environment could look and our assets textures could look like.

On our week back to uni, week 10, we started to take actions in our jobs to continue our project. Matthew and Alisa has been working hard on the proper models of our two characters and testing out other assets, I have been testing out tree assets and making plane images for small details such as grass, Jennifer and Ben are producing some texturing work for the backgrounds and other assets.
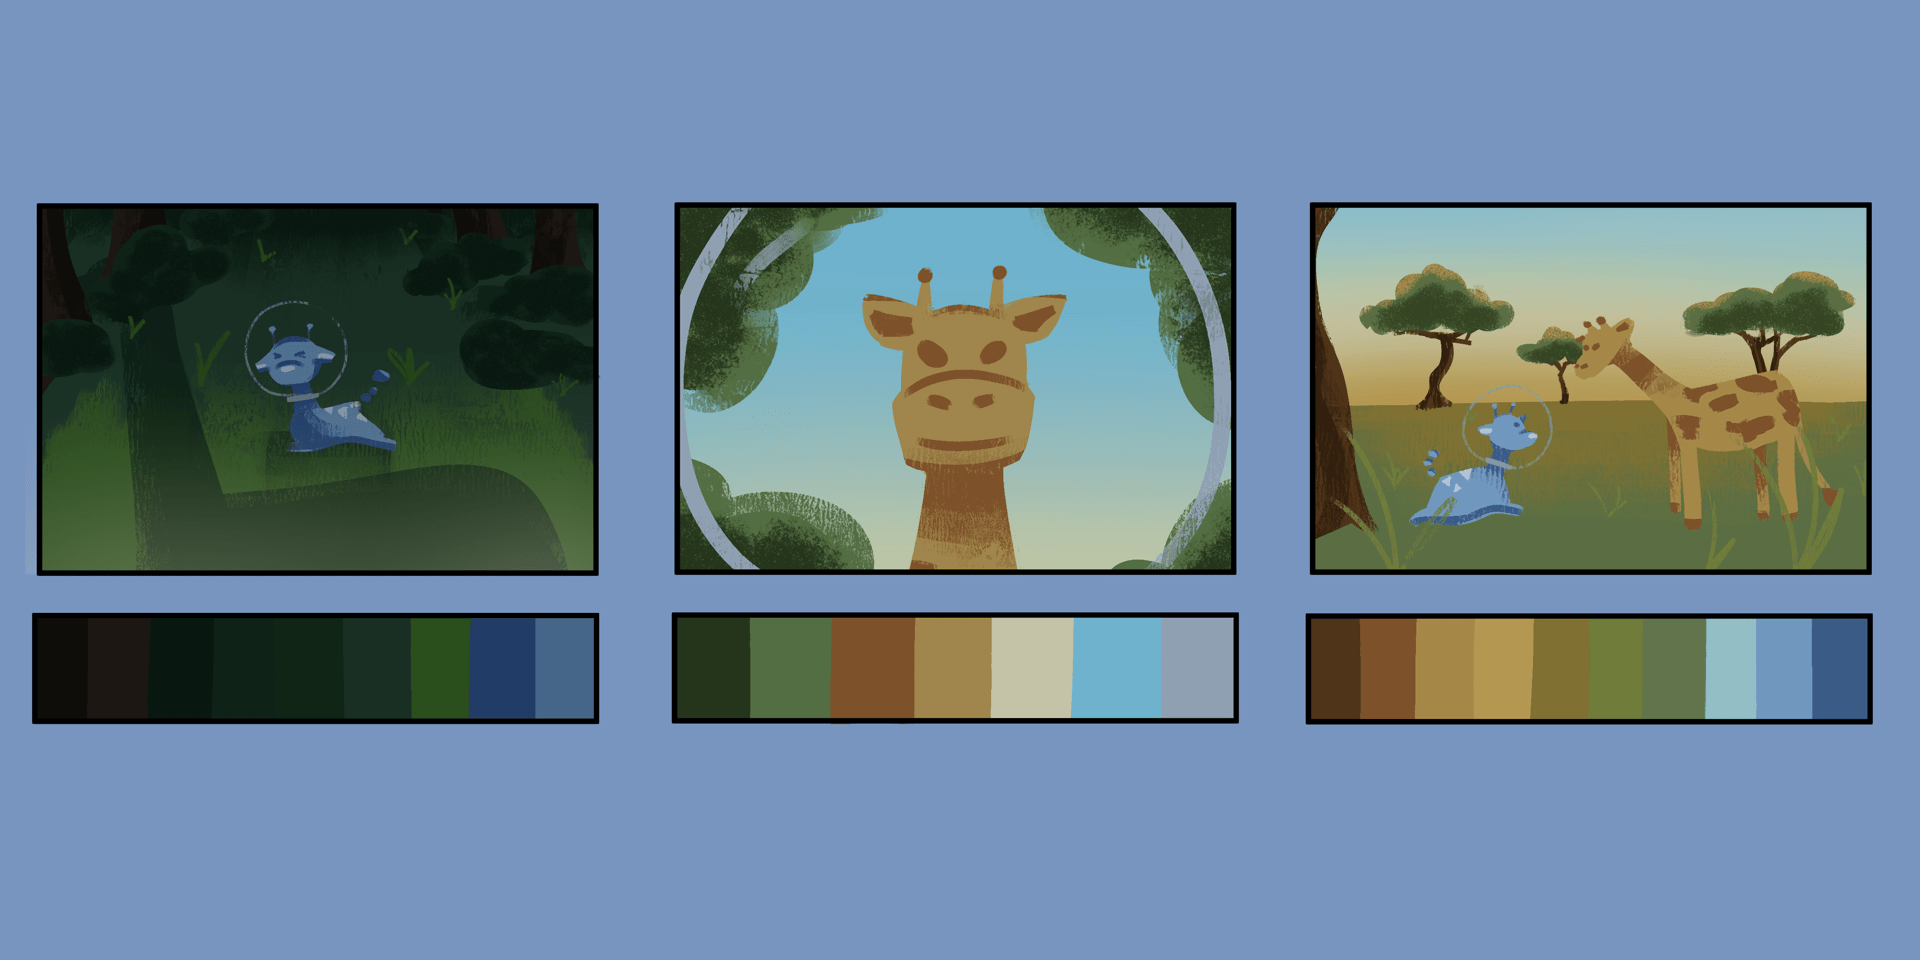
I made my colour palette simple but vibrant – I was going for a sequence of colours that flow from the blues and purples of space, to the dark greens of the forest, to the oranges and yellows of the savannah. I made sure to include at least six shots that resembled the four-five main scenes we will be making for the animation, so that each scene has a clear colour scheme to follow.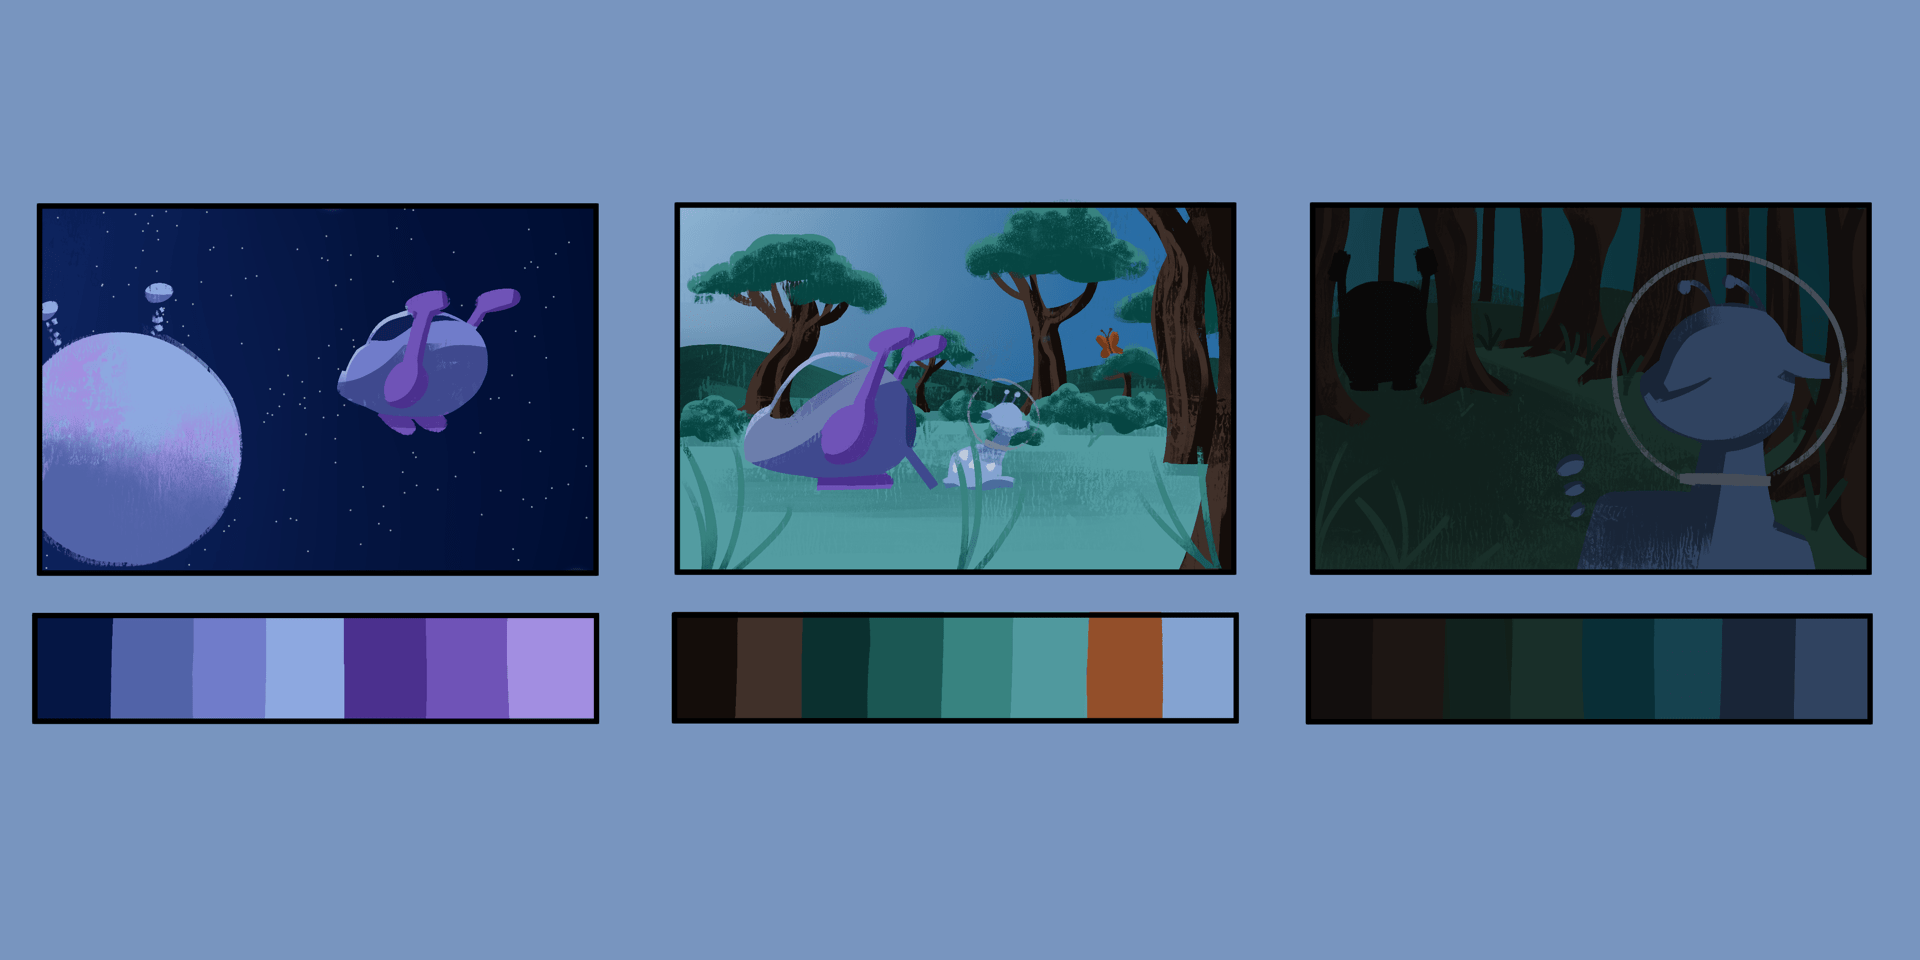
I was working with a savannah tree asset this week and was testing out toon shader concepts on both Blender and Maya to see how they would look. I first followed this video called ‘How to Create Ghibli Trees in 3D – Blender Tutorial’ It was a very interesting process and my first result is below. I think its a great look however the look we were going for was to look more toon like – with more simple tones in the colour value of the tree.

Source: https://youtu.be/DEgzuMmJtu8
I then followed this video called ‘Maya Toon Shader Tutorial’ for making a tree on Maya. I first made my simple shapes in the position I wanted then I followed this tutorial for the toon shader settings and how they work. I feel as though this was a much better result and made a second one in case we required another one for our scene. This look was what we were imagining and looks a lot like some of our references we collected. The tone and shader placing was a little weird to look at at first but it looks cool as the tree alltogether.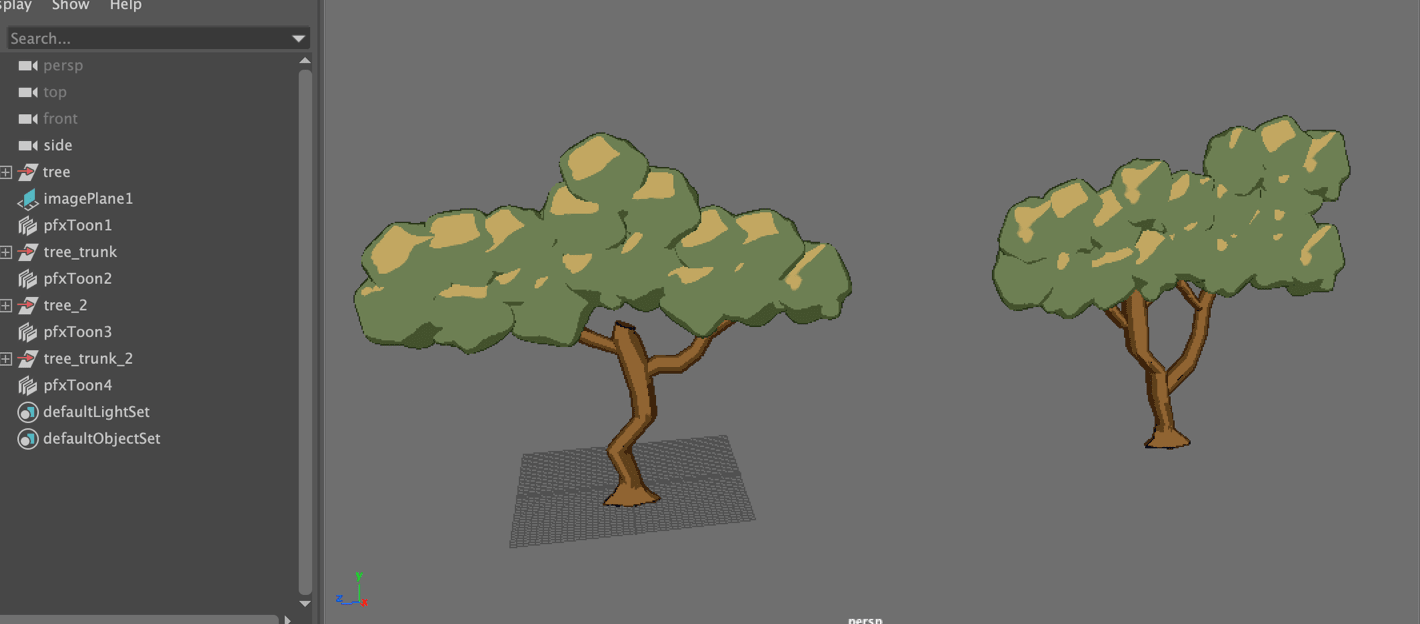


Source: https://youtu.be/QNywO1AUtEA
During our Thursday class we got great feedback and some questions answered for what we have made so far and what we will do next. We talked about the rigging of our characters, the use of the bend tool, how we will apply both textures of our own and the toon shader to assets, the use of an Arnold plane material to place down sky painting we will make, and so on.
Next our group will keep working on our 3D assets and plane assets for the end of this week, then we will be ready to set everything into the animation scenes files and start recording the camera.
 During our call in week 11, we had polished up our organising for starting out animation process. During this week we are each starting to build up the different scenes in separate Maya scenes. Then we will be placing in our characters, assets and textures when they’re ready. Before this, we will organise the environment, place down the lighting, and structure the camera shot, so that the assets are ready to be animated to the camera movements.
From this screenshot above, Jennifer is building the space scene, Matthew and I are building the two forest scenes, Alisa and Ben will build the savannah scene. We have organised our own deadline dates so we can stay on track for the next and last presentation.
We decided a few things before going to decide on finished designs on our assets. We all agreed to follow the colour palatte of each scene that I made a while ago to define the colour scheme for our work. We were also concerned about the transferring of files and how textures and materials may be lost in the process. After the call we had made a Maya workspace placed in our google drive folder so we can add our Maya scenes and source images onto there when we are done, and it will hopefully help connect all the imports and references we make in the end.
Alisa and Matthew during this week are finishing up the rigging of the characters, (also Alisa has made plane images of bushes / Matthew made a Planet asset), Jennifer is working on some texturing for the sky and other assets, Ben is working on the ship asset and other texturing, and I have been working on some forest tree assets, and working the toon shader material. – As we are doing these tasks were also building the scenes.
So far I have been working on the second forest scene, which is featured in shots 5, 6 and 7. I placed down a plane floor and used the Bend tool that our tutor taught us in class, that allows me to bend the side of the plane up so it can cover most of the camera shot. I placed down the dirt ground path, some tree assets, and a Skydome light and directional light. I also placed down slim polygon planes with my grass assets attached to them. They work well on the viewport however they appear with a black background on the render view. This is something I am currently trying to fix.
I also placed in a temporary made ship from our previs for the silhouette shot, until the actual ship asset is finished, then I’ll replace it. I have added toon shader onto the trees and they seem to work well, but I needed to add the directional light to help the shades appear, as the Skydome light couldn’t do this as light is projected all around the scene, rather than one side.
Below is how the render view is looking through the camera shot at the moment. Next I will be able to gather the textures for the sky, trees, bushes, fix the grass, and I’ll add the character in very soon.
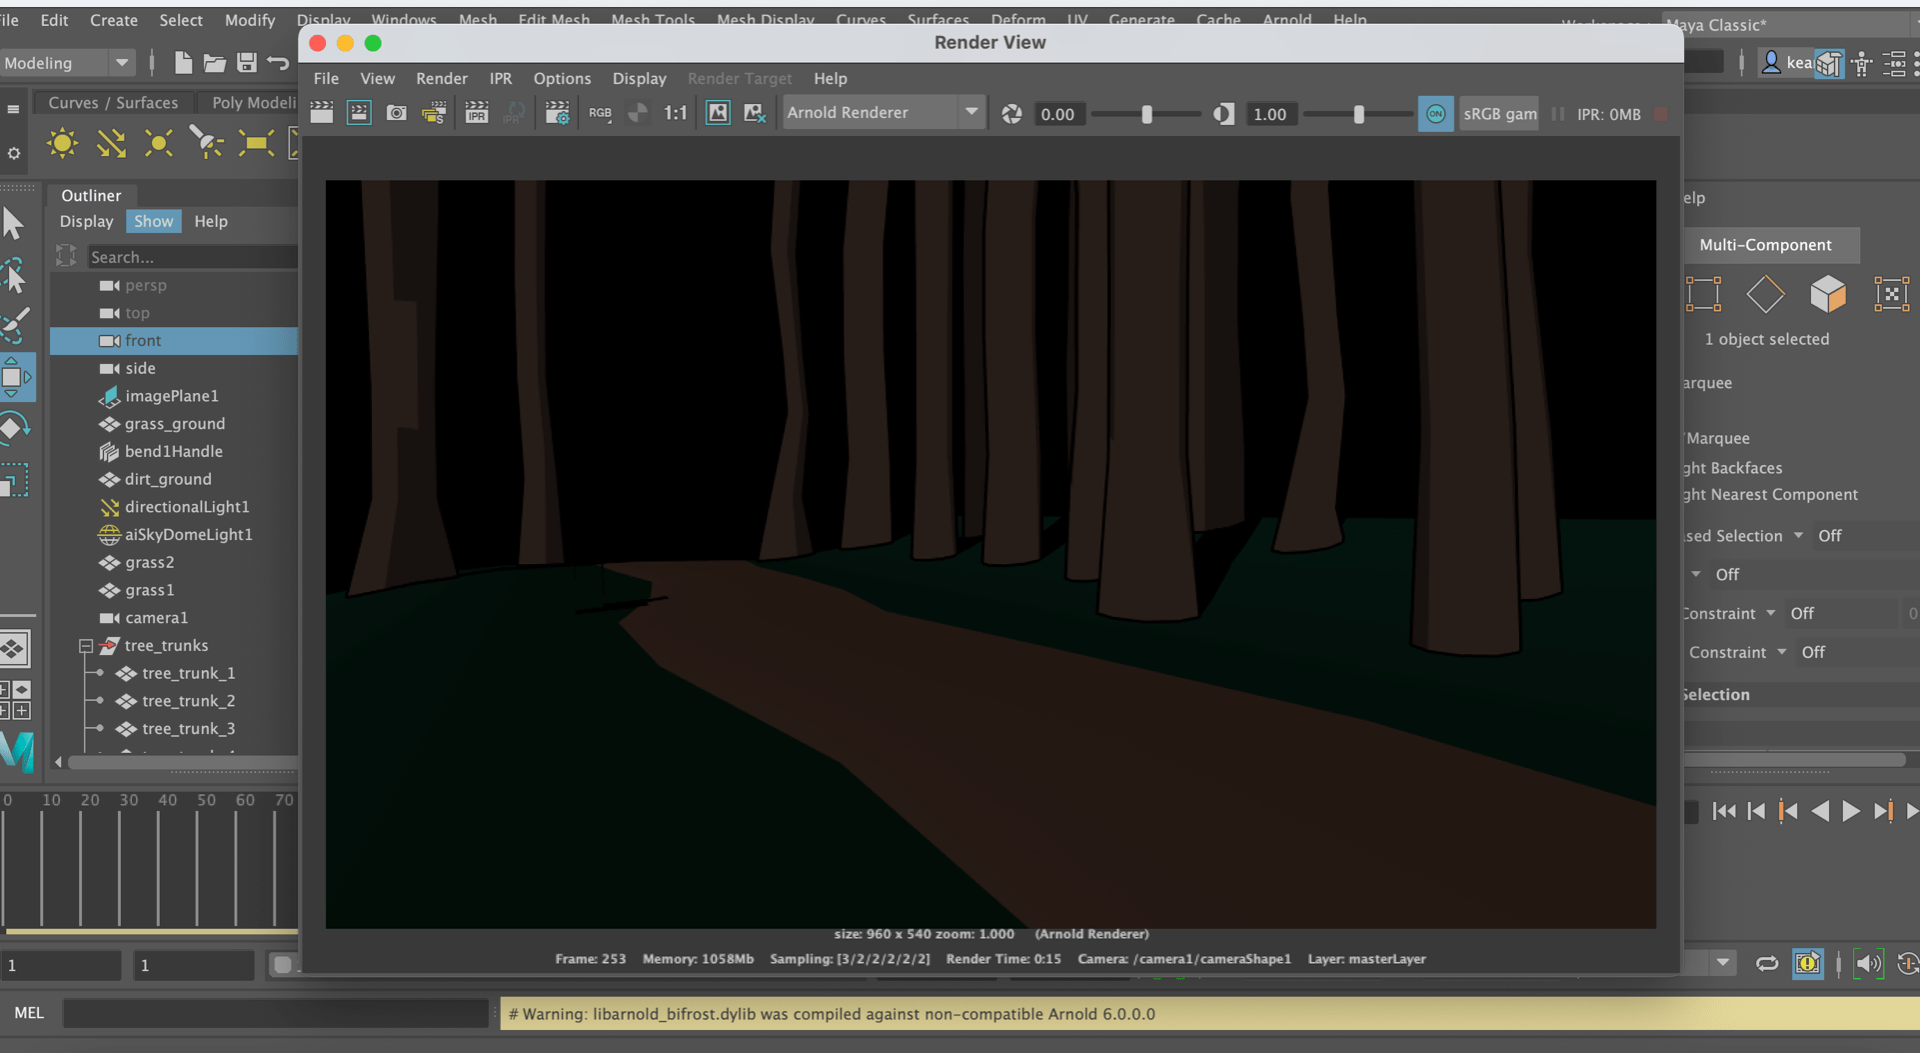
During our week 11 class, we asked a few more questions about some problems we were coming across. One was about how Arnold render was appearing as hardly anything while we could get some better result through Maya hardware. All we really had to sort out was the format of file image I wanted to save a render view as if I wanted it, or else if I want to view the scene, to always go with render sequence – as this will have a better outcome.

Arnold renderer preview on the left, Maya hardware on the right
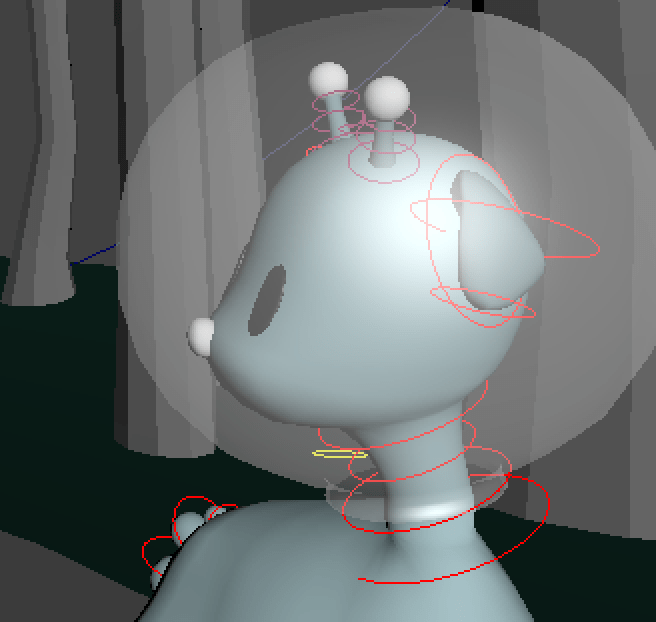
Another little problem was for the head-turn of the alien character to look behind them, but the neck became distorted and skinny. We handled this by just slightly adjusting each neck control softly, also turning around the body for more effect, and also turning the head, so that the neck wouldn’t look as bad but we could get the result we wanted.

Matthews video showing us a better way to turn the head
So far I have imported the ship and alien assets and have animated the main movements, and structured the scene a little better for whatever made it look better. I also showed my progress during our class on week 11 and my tutor suggested that the turn-back camera shot could be adjusted a little better, and showed me a nicer outcome that I tried out later that day.

The next day of animating, I managed to fix the problem with the plane image/transparency and applied my grass textures to the scene. I followed this YouTube video called ‘Maya Arnold Opacity (transparent texture background)’ that helped us with the process of adding a colour base material, and an alpha material to the plane that allows the image to work as we intended.
Source: https://youtu.be/82Vgd0E3p2w


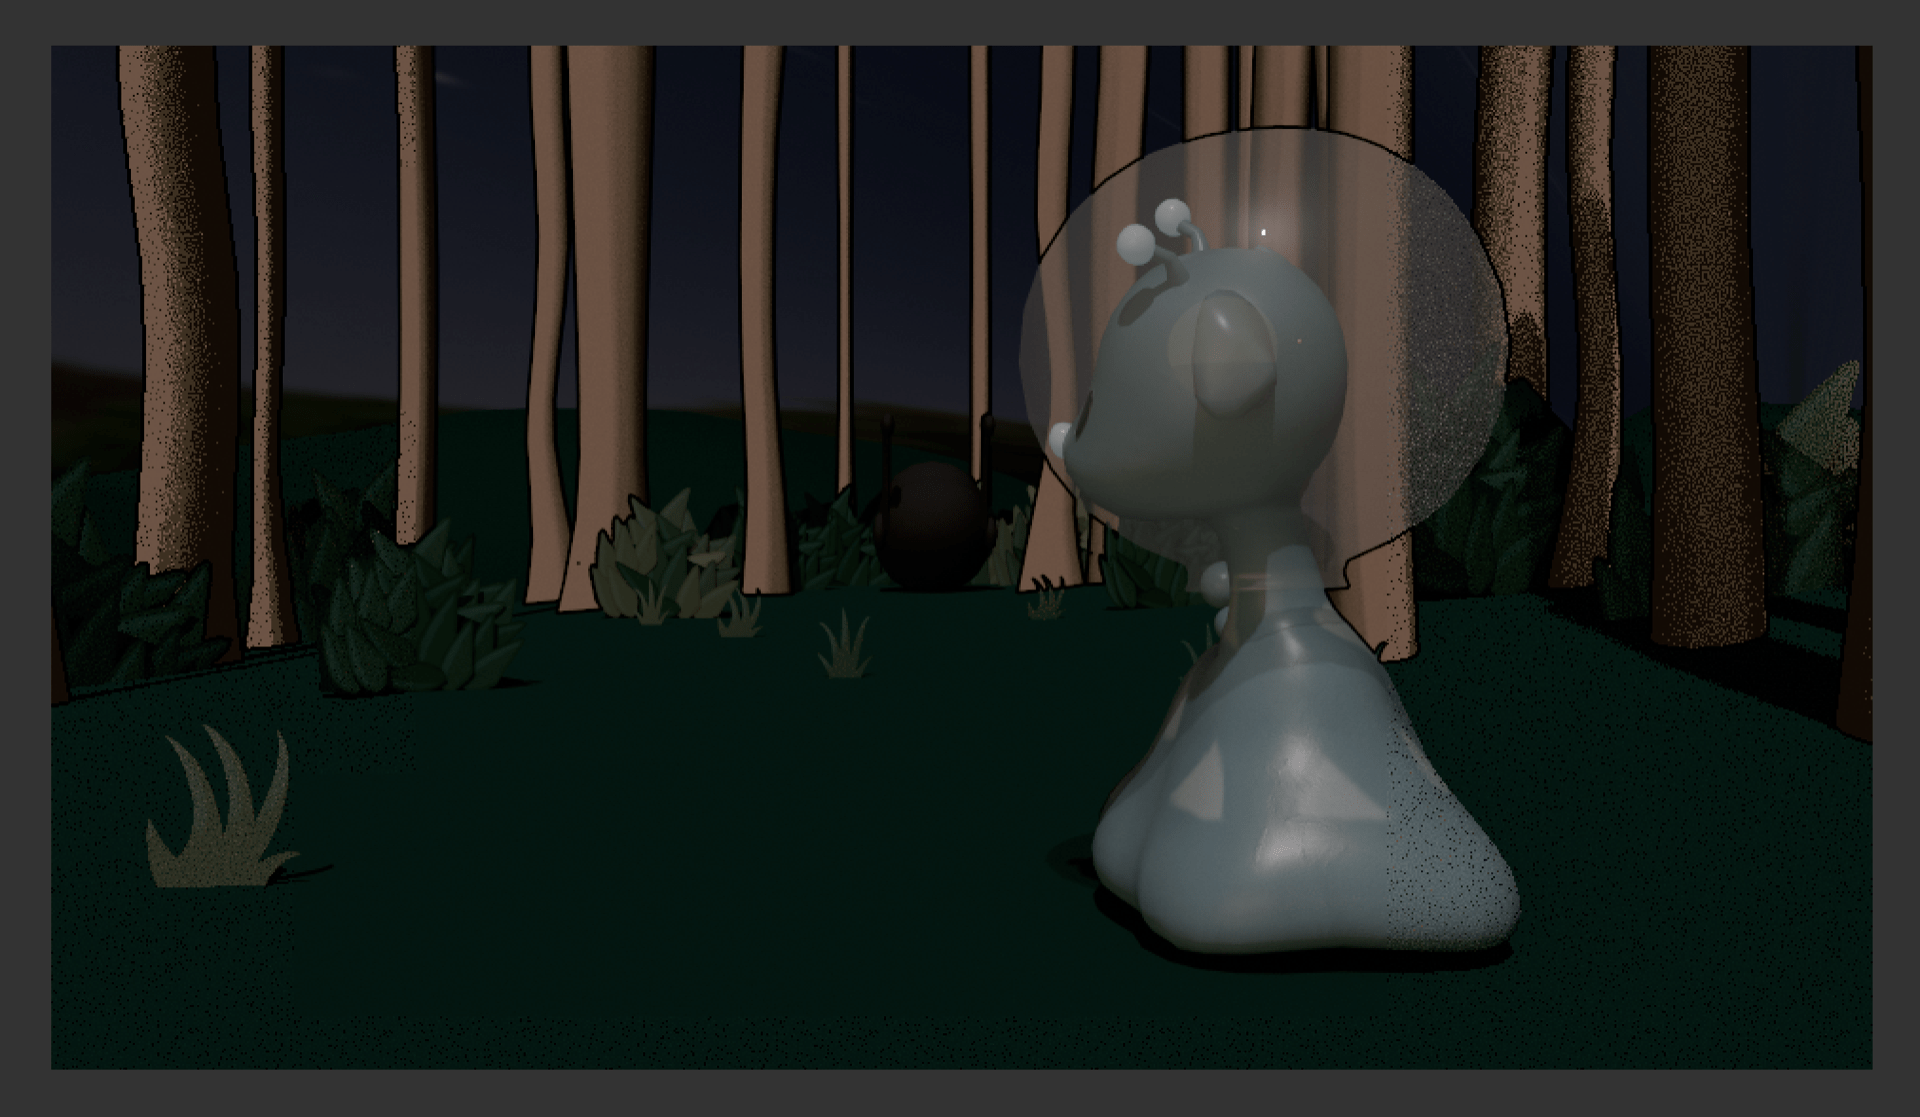
I also applied the textures of the alien rig this day as Matthew had just finished them. Matthew also provided the rest of the group with little tutorials for the alien rig and how to apply its textures. This is how my scene is looking at this stage.
After this stage, I had done a little more animation on the walk cycle and the head movements. I was prepared to add in the giraffe asset as it was completed by Alisa.


Images that Alisa had sent to us of the Giraffe asset and Textures
Unfortunately, something went wrong with Maya. As soon as I were to go press the ‘Import’ option to add in the giraffe asset, the program freezes, and gives me no other option than to force quit it. For a long time I have had no luck with fixing this situation. I had even tested this on a different computer, and it gave me the same frozen reaction to me clicking on ‘import’. I plan to contact a technician from my class if the problem doesn’t solve, and/or hand over my file to my group, to help out with adding any assets I am missing to the file.

Most of my teammates tried out the file I was working on to see if it was different for them. However they had the same problem, when clicking on the ‘import’ button. So the problem was situated in the file I created.
We finally figured out a way to go about this (adding the last assets I needed so I can finish the scene then render it). We did this by setting a new scene, uploading the giraffe and bush assets first, then importing my file last. This eventually made it more suitable for me to work on, even if the ‘import causing freezing’ error still occurs if I press it again.
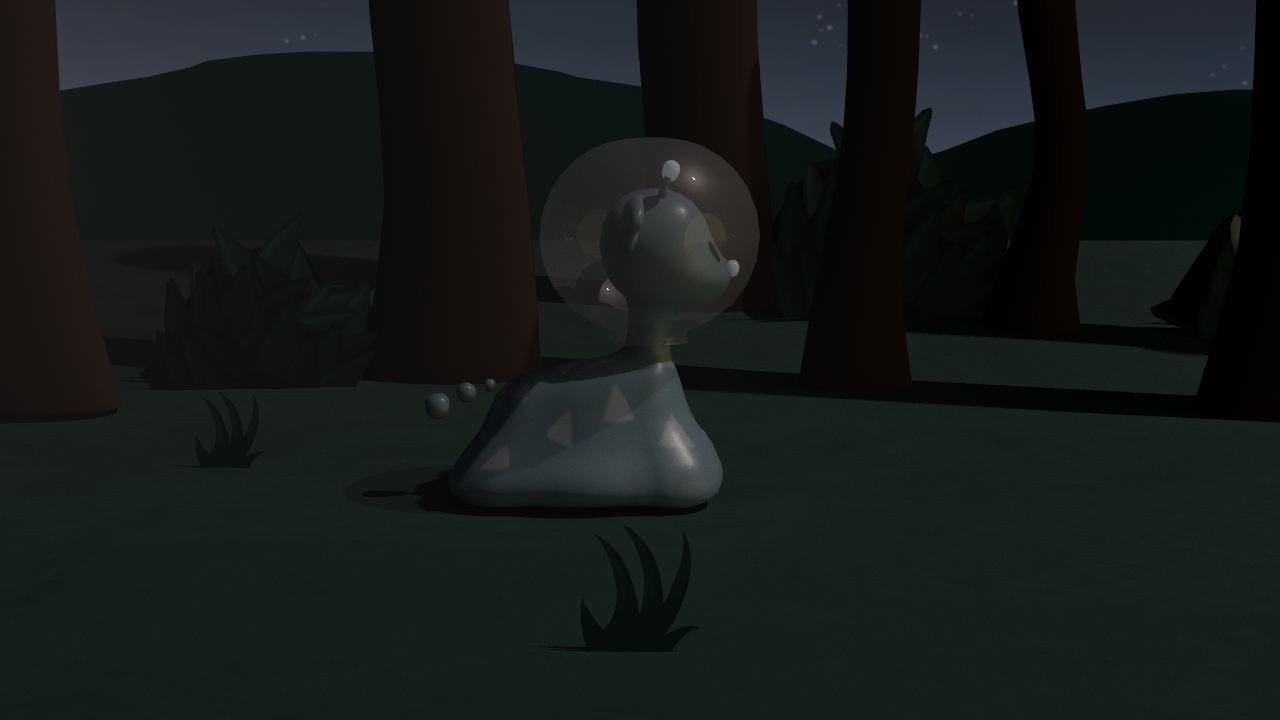
I made a new scene with everything as either a reference, or imported in. I added the giraffes textures, and the leaf textures of the bushes. I polished up the environment, the alien animation, and the last touches of the camera. For now, I am waiting on the background images and then we will be ready to render our scenes.

I worked some more on the lighting and render settings to make sure it is suitable for the process coming soon. I was making sure the lighting was not too dark but not too bright to get the idea it is the middle/end of the night – about to become sunrise, in my scene.


It took a while to get something that works, but its looking okay so far. These were previous adjustments to the intensity of light which I thought were a little too dark.
 At one point, the shadows were so strong that we couldn’t see the alien character here when she runs into the giraffe. As a result I looked up to see how I can adjust the shadows to avoid this look.

I started to work on the softness of the shadow and the temperature of the light, which made the scenes a little noticeable and nice. You can see the light shining on the trees with toon shader on, the light shining nice on the alien, and the shadows forming a lot better relating to density and softness.
After getting the right Skydome and directional lighting settings, and Jennifer finishing our painted backgrounds that we could place down as an Aiflat material, I was able to correct my scenes pictured below. Using multiple lights and working with colour temperature really helped the scenes image and how they are meant to be portrayed (first scene – scary and dull, second scene, discovery, lighter scene)


The backgrounds I used that Jennifer created
As a result of these lighting adjustments, this will hopefully connect well to the next scene that will appear that Alisa has made. I also made adjustments I thought of last minute that will follow onto the next scene, and from the last scene better; I did this by turning the giraffe legs to facing the back of us, and turning the spaceship around where the door is so it makes sense the alien came from there.
This is what the Playblast looks like just before it goes into the rendering process:
My first attempt at rendering this scene for a long period of time, didn’t go as planned. I believe a material such as toon shader, or a wrong kind of setting, had caused my render sequence to appear grey/blank with a subtle outline of the toon shader. For the rest of my group, they either had a very long process of rendering or they also had some kind of error. For our last presentation coming up, we decided to show playblasts for the scenes we were missing for showcasing and focus on the proper rendering after.
 What I was hoping for

What was appearing
For our presentation, we showcased our current production process which included the character modelling/rigging, texturing, animation tests and other assets made. We also talked about our problems and solutions as there were many to address. As a result we presented our current progress on our animation and gathered good feedback relating to a camera angle, the lighting, and symbolism for the butterfly. Overall they were happy with our work.
Source: https://docs.google.com/presentation/d/11_S-BksNa3CGSgHhSOF4xMBPFjv8JiZuzAF8LnrFOik/edit?usp=sharing
After the presentation, we reevaluated what else we had to accomplish for the final submission date. We discussed we were to fix up camera angles, lighting, and perspectives in our scenes to allow it to flow better. We also discussed how we will render our scenes and decided we could either try going back to the campus computers, or else render with our laptops at home at a reasonable time in the day, as they take a long time.
I have come back to my scene as I want to adjust it a little bit. First of all I split my scene into two files: the first two shots being the first part, and the last shot being the second part. I figured this would help my rendering progress as there is less animation in the file to process into one sequence. I also did this so I could apply different lighting to the second part, so that it will connect more smoothly with Alisa’s scene that appears straight after. Also during this time, we decided to scrap the use of the toon shader as it was giving us too many problems in mostly the Arnold renderer.


In relation to the textures, I made sure to keep everything together with my source images folder in the Maya workspace so that each file could be connected correctly through the file path option. During this time I was adding in the giraffe textures again, and I made my own ground texture on Substance Painter (same as Matthew and Alisa did) so that the ground looked a lot nicer in the render view.
Around this time I have been testing the renders to see if they are working well. Here is how each scene looks during the render process:

As a last touch, we decided to add a mesh light effect for the spaceship lights. This will act as a ‘creature with bright scary eyes’ that the alien, already very scared in this situation, thinks it is.
My teammates found this clip from Home Alone that gave us a little inspiration of how we wanted this scene to play out and the kind of emotion, and reaction I were to try and capture. This is from a YouTube video called ‘furnace fear’.
Source: https://youtu.be/kd0VdX_9ZfM
I added two cylinder shapes onto where the top two thrusters sit on the spaceship, and squashed them a little to give the illusion they are bright scary eyes. I attached a mesh light to the meshes that allowed them to shine a bright light. I adjusted the lighting until I was happy with them and included them in the final animation.
During the render process, I could see that the lights made a static effect while the animation played which I thought was a great addition even if it was not meant to happen.

And after four days of progressive rendering, here are my final rendered scenes below:
After all our rendering of the scenes done, we could move onto post-production where we will be editing everything together!