This is the start of the weekly modelling challenges. To start off I am required to model a simple vase/jug object in the 3D modelling software, Maya. I will be following my tutors tutorials and tips on how to go about this task, and as I do this I will be documenting the challenges/mistakes/problems I encounter during this time.
Source: Weekly Modelling Challenges, Week 1 – Vase/Jug, Vase model Part 1-5.mp4
I started off by looking for a reference photo for a vase on the website Pixabay.com that my tutor recommended. I was looking for an image that had a simple design, and is in a good angle for me to interpret the shape.

I first picked out this jug image that included a handle and a unique-shaped sprout, but the angle it is in would have been difficult for me to attempt as my first model, so I kept looking.
I found this vase image that had an interesting cup shape and two handles. It is also placed in a good angle to work from. Though I decided to keep looking. Even though I liked this shape, I wanted to start off with something more simple. I may look back on this vase later on to try out in my own time.

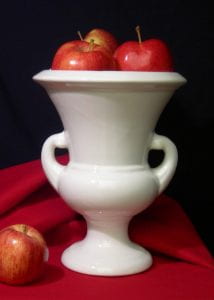
I found this vase image that I thought was perfect to start off with. It had a simple round body design and was placed in a good angle for me to work from.
 I placed my reference images onto my display by going to View-Image plane-import image and picking it out from my sourceimages folder that I saved the image into.
I placed the images into one layer, and set them to R for Reference so I don’t accidentally click on it as I work on the model.
 I placed down a cylinder as my base, and turned on vertex mode to drag the cylinder to be the same height as the source image, so I am effectively working from reference.
![]()

I start using the Multi-cut tool and holding the control button to add rows of vertices to give me the ability to manipulate the base into the vase shape.

Here you can see where I’m beginning to shape the object to where the main points of the vase are etc. how far it goes inwards/outwards.

the result of shaping the vase

As soon as i’ve got enough rows of vertices to create a smooth shape of the vase, I moved onto detailing the bottom of the vase. It requires a rounded, thick stand rather than a straight diagonal line.

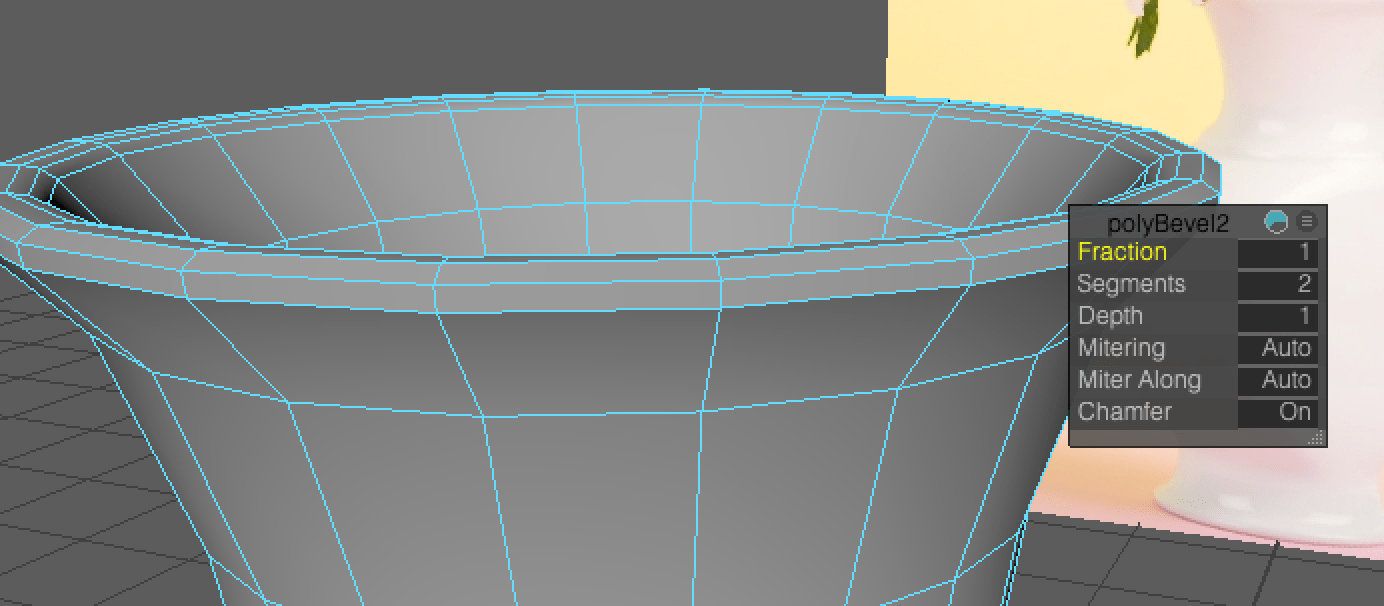
I used the bevel tool to manipulate the stand even more by adding more fractions to the area of edges I selected. This created a more fitting shape for the vase.![]()

Continuing on, we are required to replace the triangles that form on the top and bottom face of the vase, to four-sided shapes. I clicked the vertex in the middle, and used the bevel tool to stretch out the circle until it creates a multi-sided shape around the face.
![]()
![]()

However this turns into an NGON. To prevent NGONs in the mesh, I used the Multi-cut tool to draw in lines across the face that helped give each shape at least four sides.

![]()
Here I have bevelled the top face of the vase. I highlighted the vertices of the face and equipped the extrude tool to push the middle of vase downwards. This creates the hollow inside on the vase.
(I used the multi-cut tool on the top face after the extrusion)

Heres how the extrusion works when it is pushed down with the move tool.

I continued the process of extrusion by selecting it, moving downwards to each row, scale it to the direction the sides are positioned to, and press G to repeat the process. I stopped the process just above where the stand of the vase is.

After this I went onto creating a more rounded rim to the vase. I selected the edges by turning on edges mode, shift selecting one edge, then shift double-selecting the edge next to it to select the entire row of the edges. I was able to use these selected edges to bevel.
 Here I am using the bevel tool to manipulate the rim of the vase to make it stick out more and become more rounded. I added 1 fraction to the edges.
After this I gave the vase a smooth material, I cleaned up the history and looked to see if there were any mistakes in the mesh.
 This was my first attempt at modelling the vase. This was also my first time modelling in general so I think I did a pretty good job. I wanted to attempt the modelling a second time so I definitely have a good idea of what Im working with.
I did make a second attempt before I started over and did the third attempt below. I started over because I was accidentally positioning the edges of the vase after I had made the extrusion in the inside – this made it so the inside shape was inaccurate to the outside shape, which I thought would cause problems in the future.
This is my third attempt. I like this one better as the body is much more like the reference – its more lifted, and the stand and rim of the vase is more rounded as it goes inwards. I added a simple PhongE material to match the design of the reference. I am not great with lighting yet, but I did add a point light to give the vase a highlight, again like the reference.
I managed to finish this model with no mistakes in the mesh of the vase.

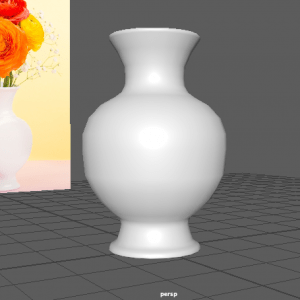
This is my rendered image of two versions of the vase I modelled. I don’t exactly understand the process of rendering yet but this is my best attempt. I made one vase with a PhongE material set to white to resemble the reference photo I was using, then I added the Maya Marble texture to the other vase that creates a unique, blue design.
Overall this was difficult to achieve as its my first try with Maya. I came across complications when snooping around the options for rendering the scene and creating its material. A few times the application did crash on me due to a mis-click or something that couldn’t engage with my model. It is a slow learning process but it makes me more ready to tackle the next model.