Class
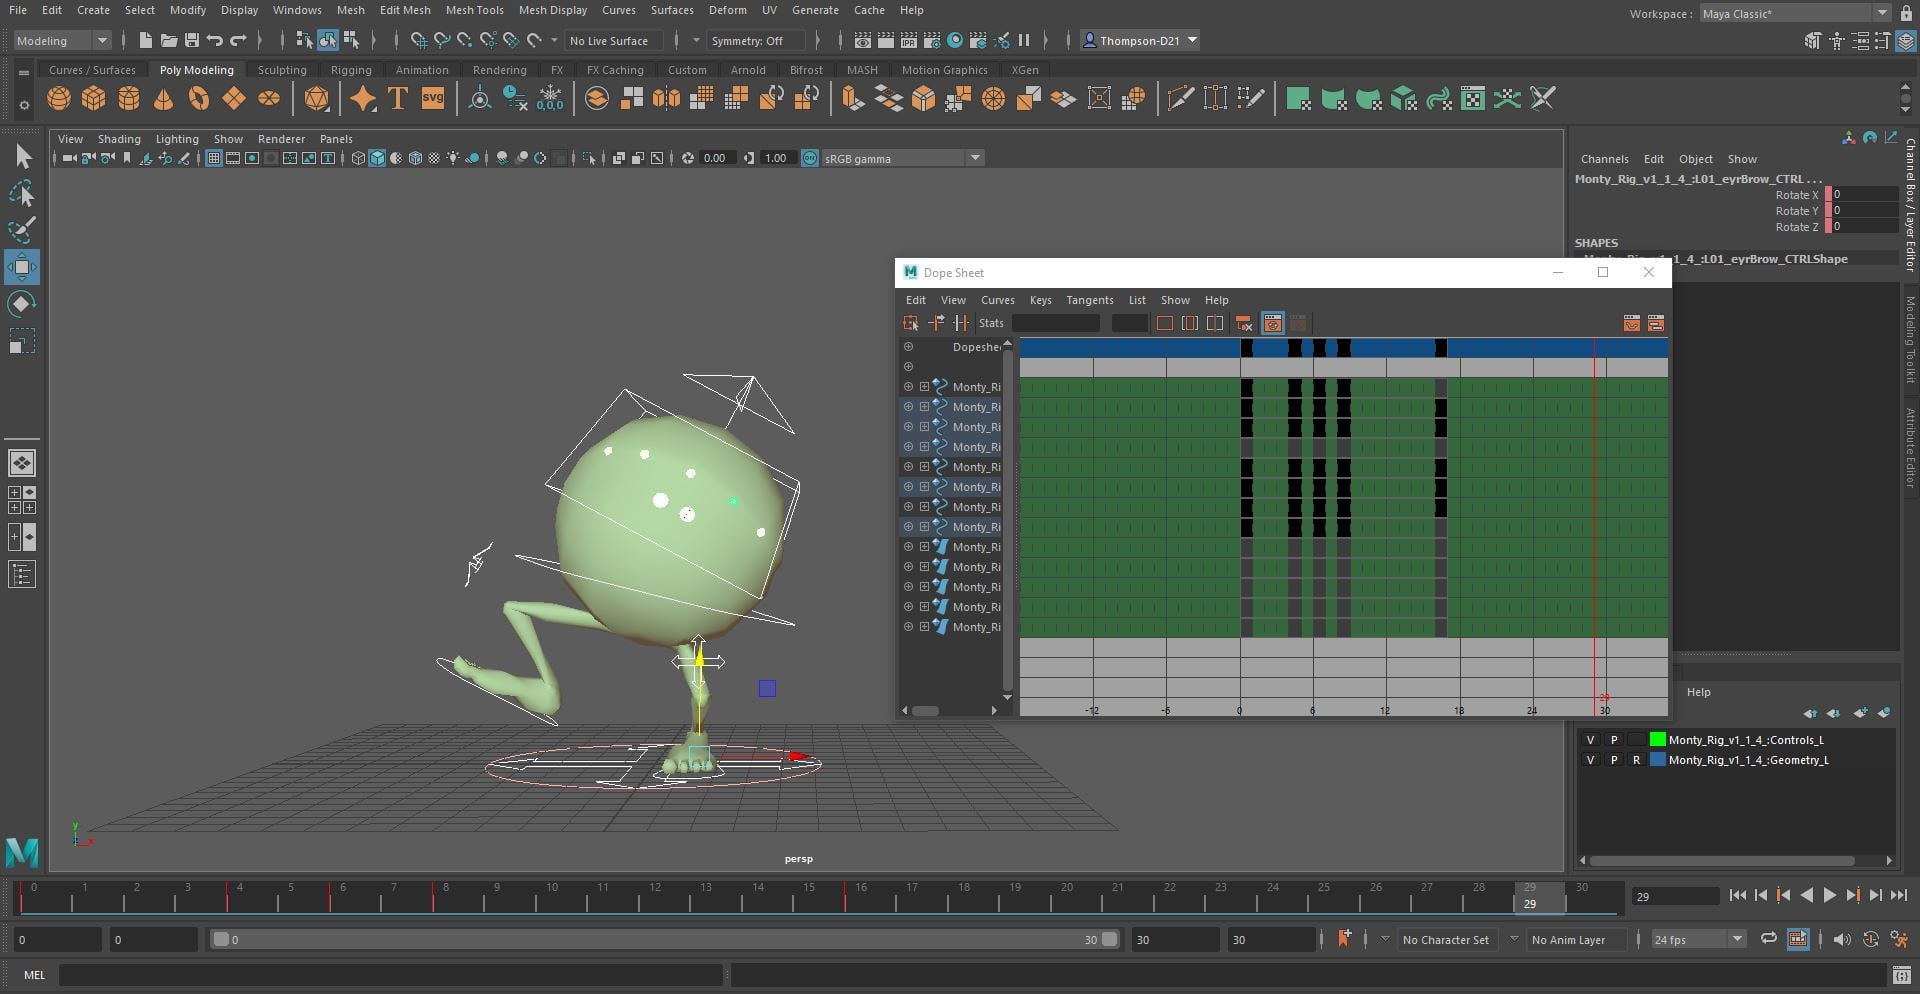
In the morning class we were tasked with creating a jump cycle. There were three videos to follow along with. First, I referenced the Monty file so if the rig needed updating, I would not have to reanimate the jump. I then blocked out the movement and timing.
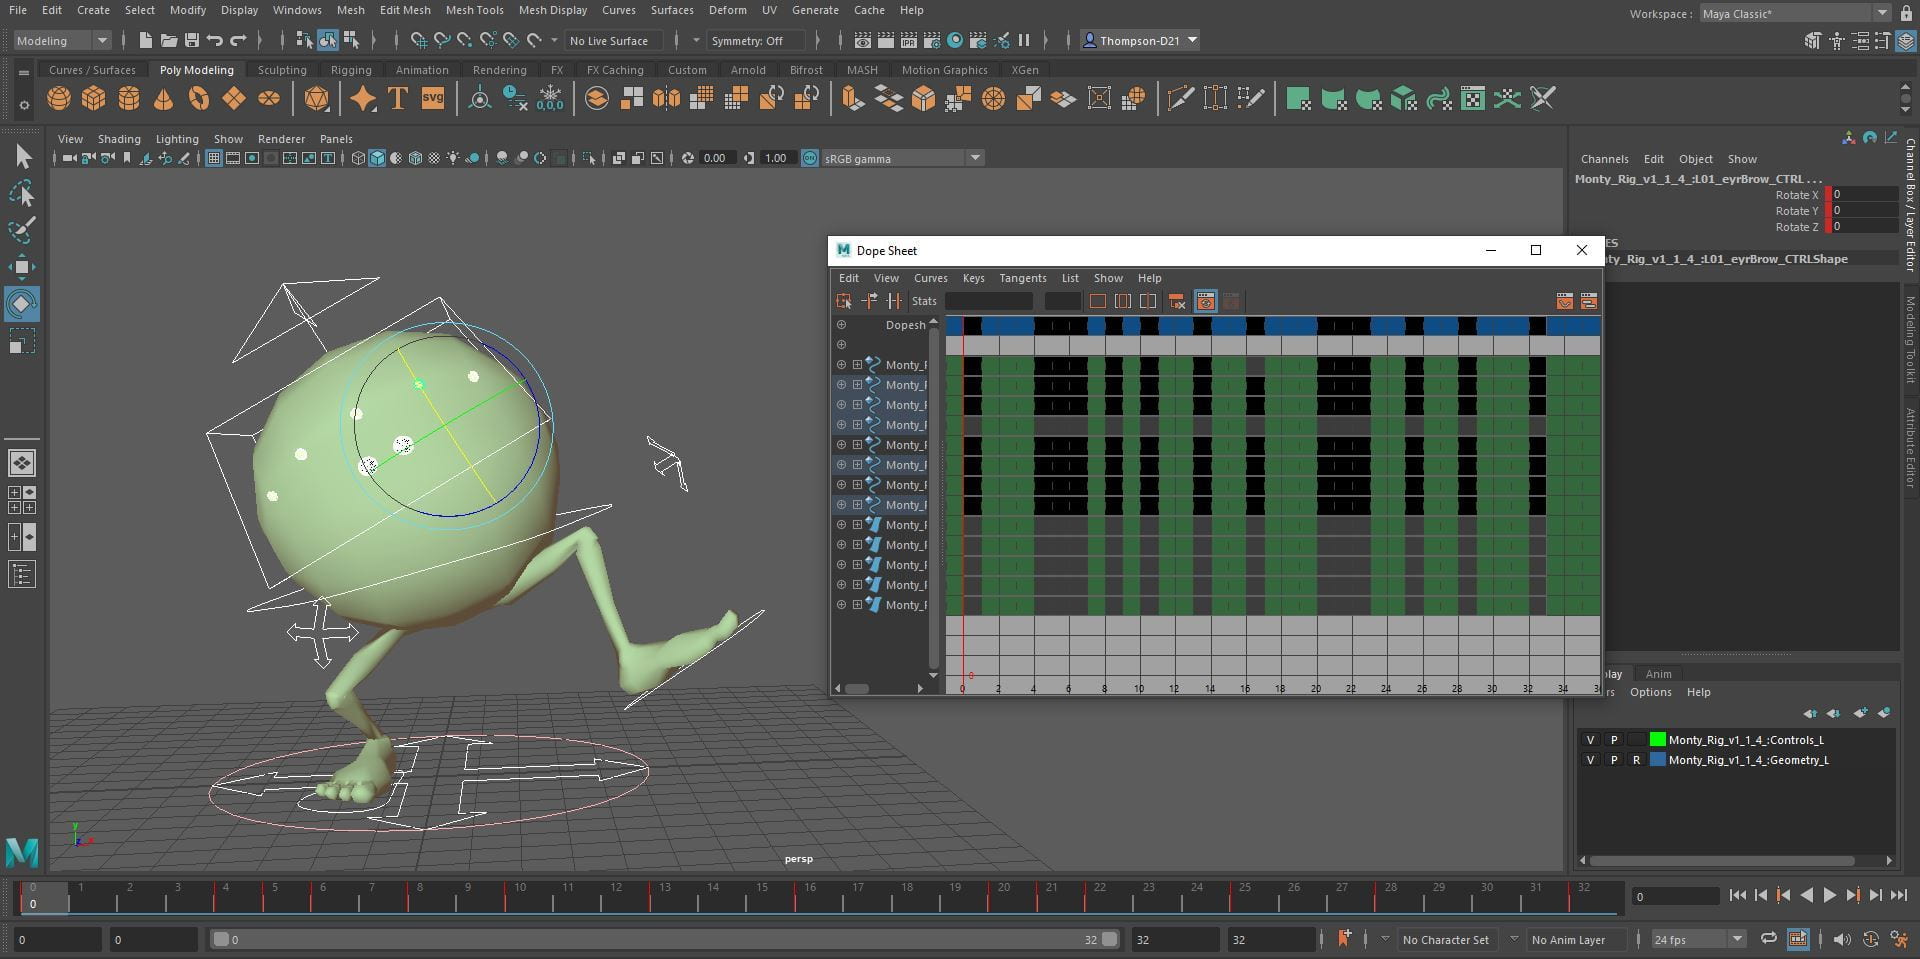
Next, I added some inbetweens using the tween machine plugin and creating some myself. I also repeated the jump on the other leg to make the animation loop.
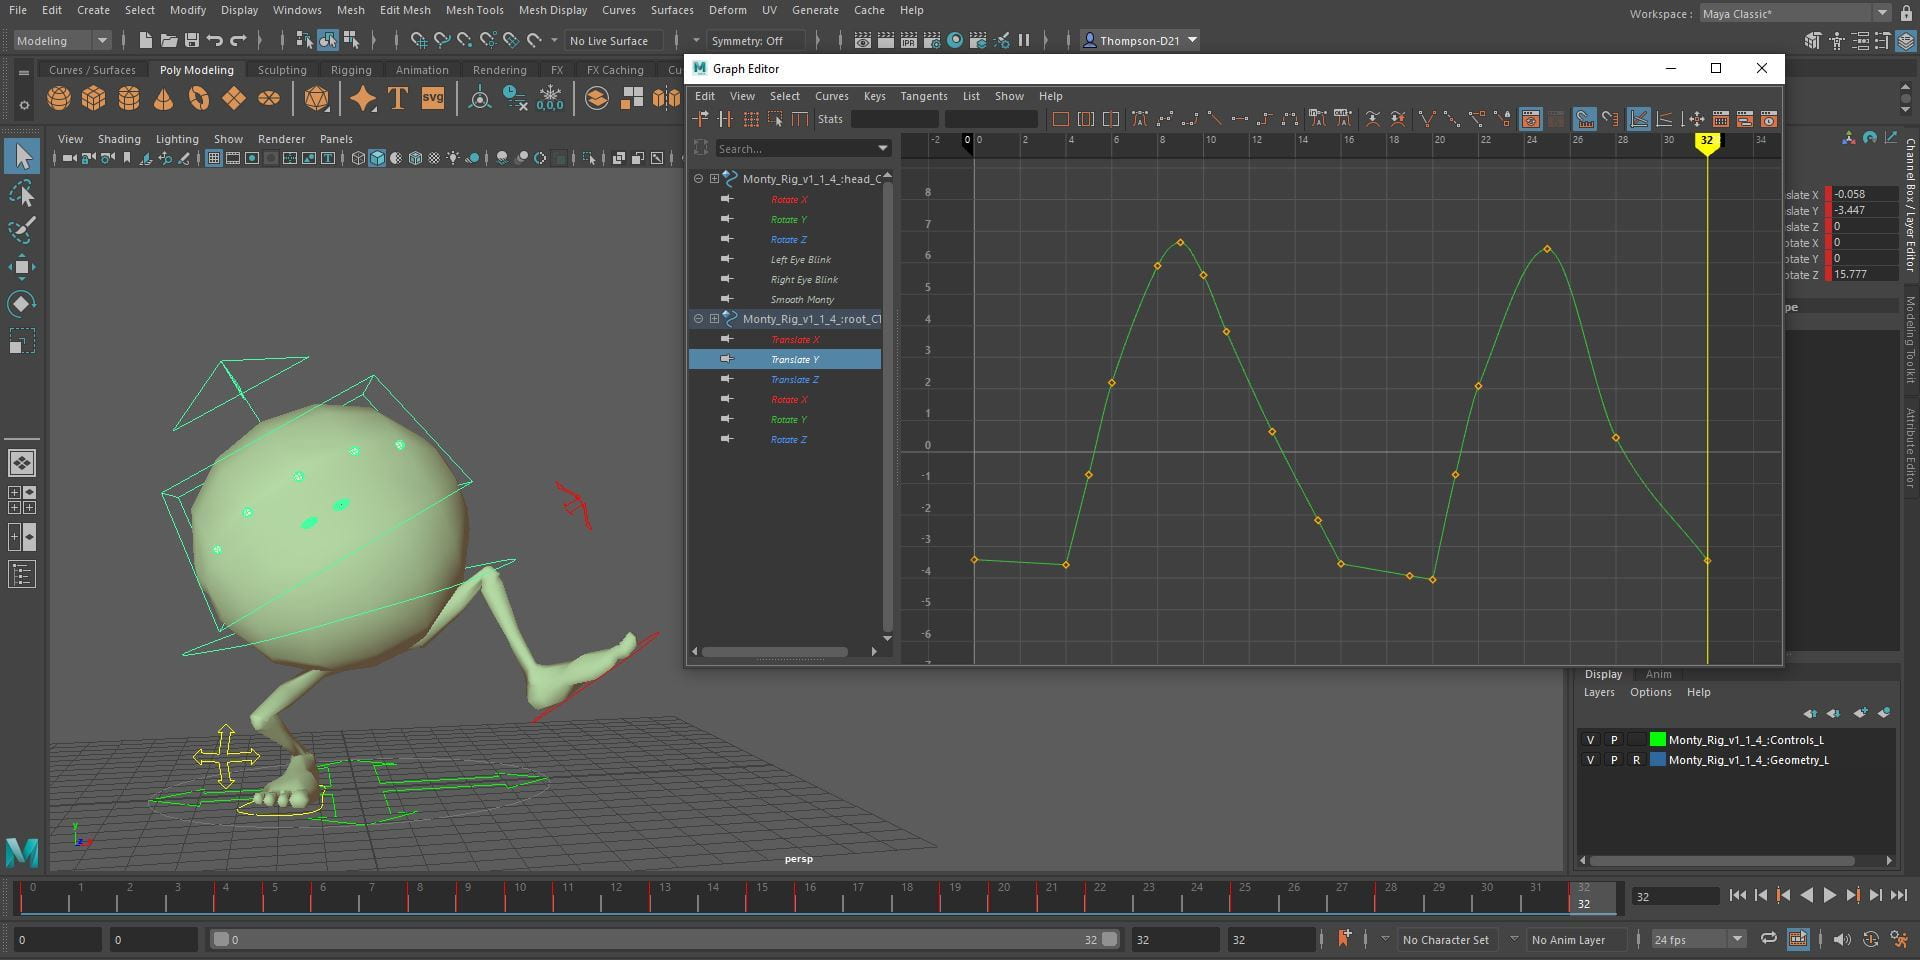
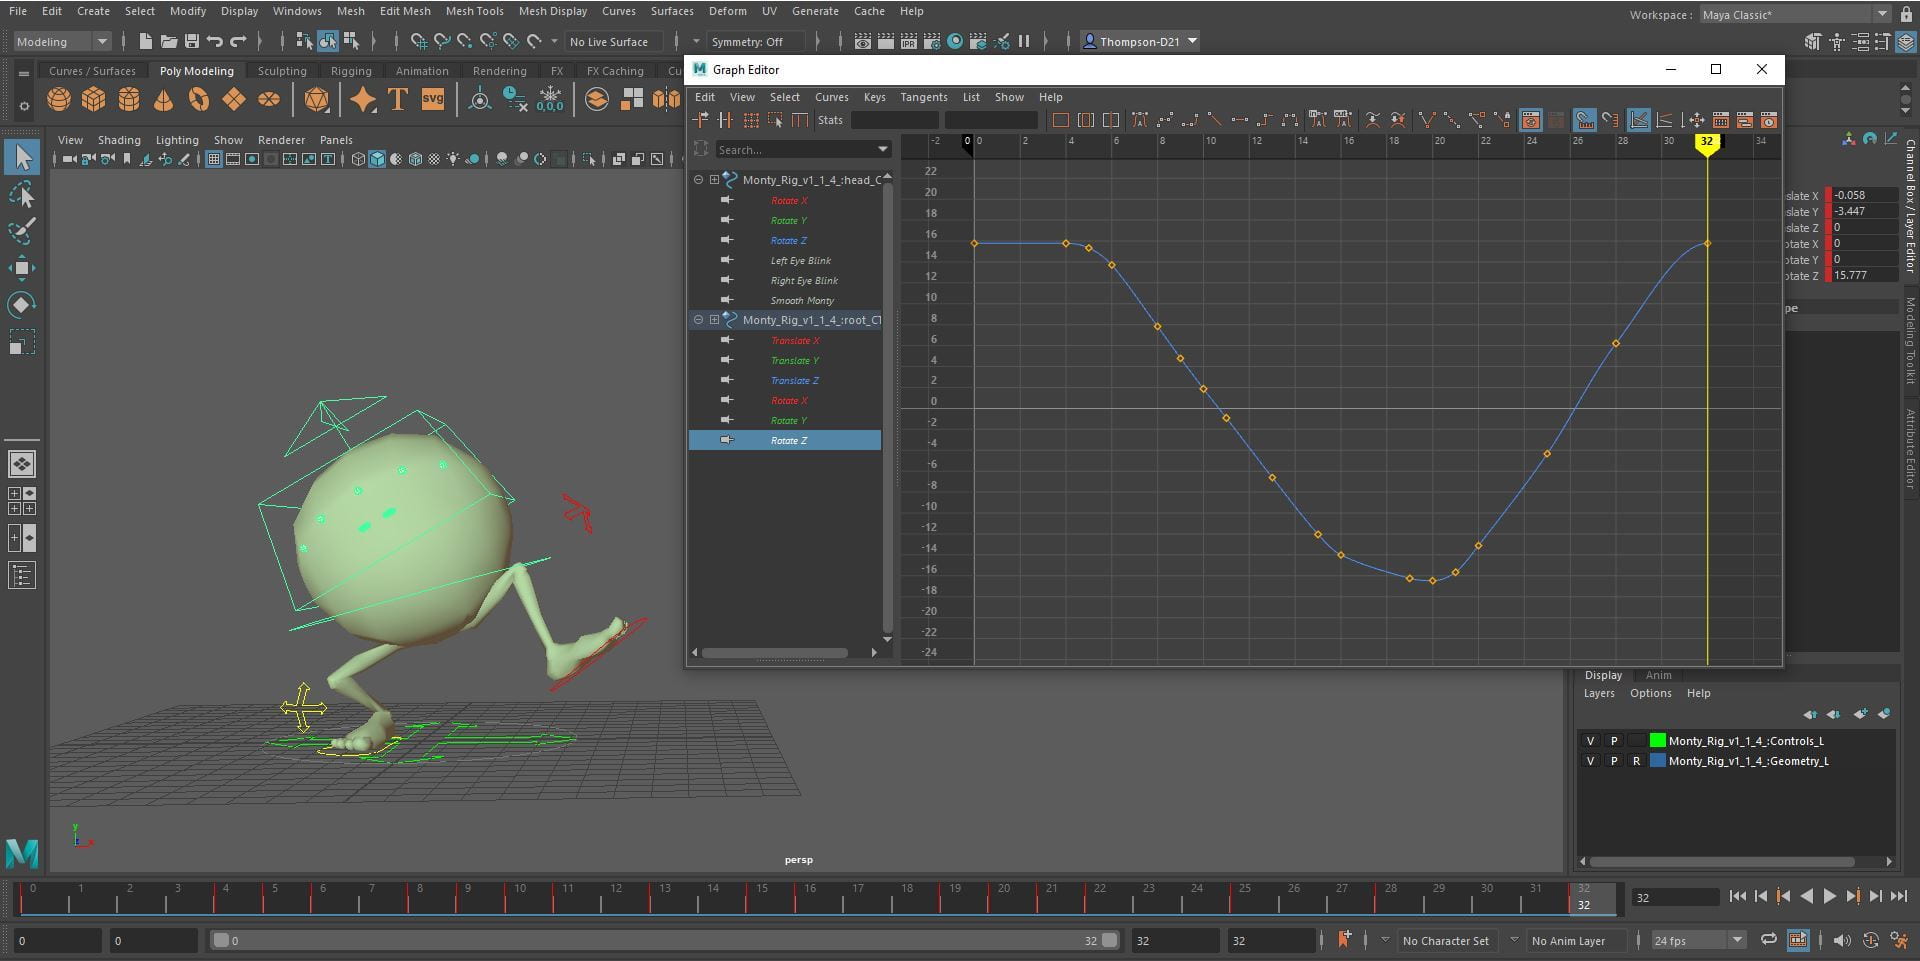
Finally, I tweaked the movement of the jumps and fixed his legs a little. I also adjusted the movement of different body parts using the graph editor, I selected the head and turned the bottom points to linear to make him feels heavier and less floaty. To give him more personality I made his eyes open and close when he jumps and falls.

Overall, I like how the animation came out. The movement looks smooth, and everything flows nicely. If I was to do this again, I would try and make him less floaty as he falls a little slow.
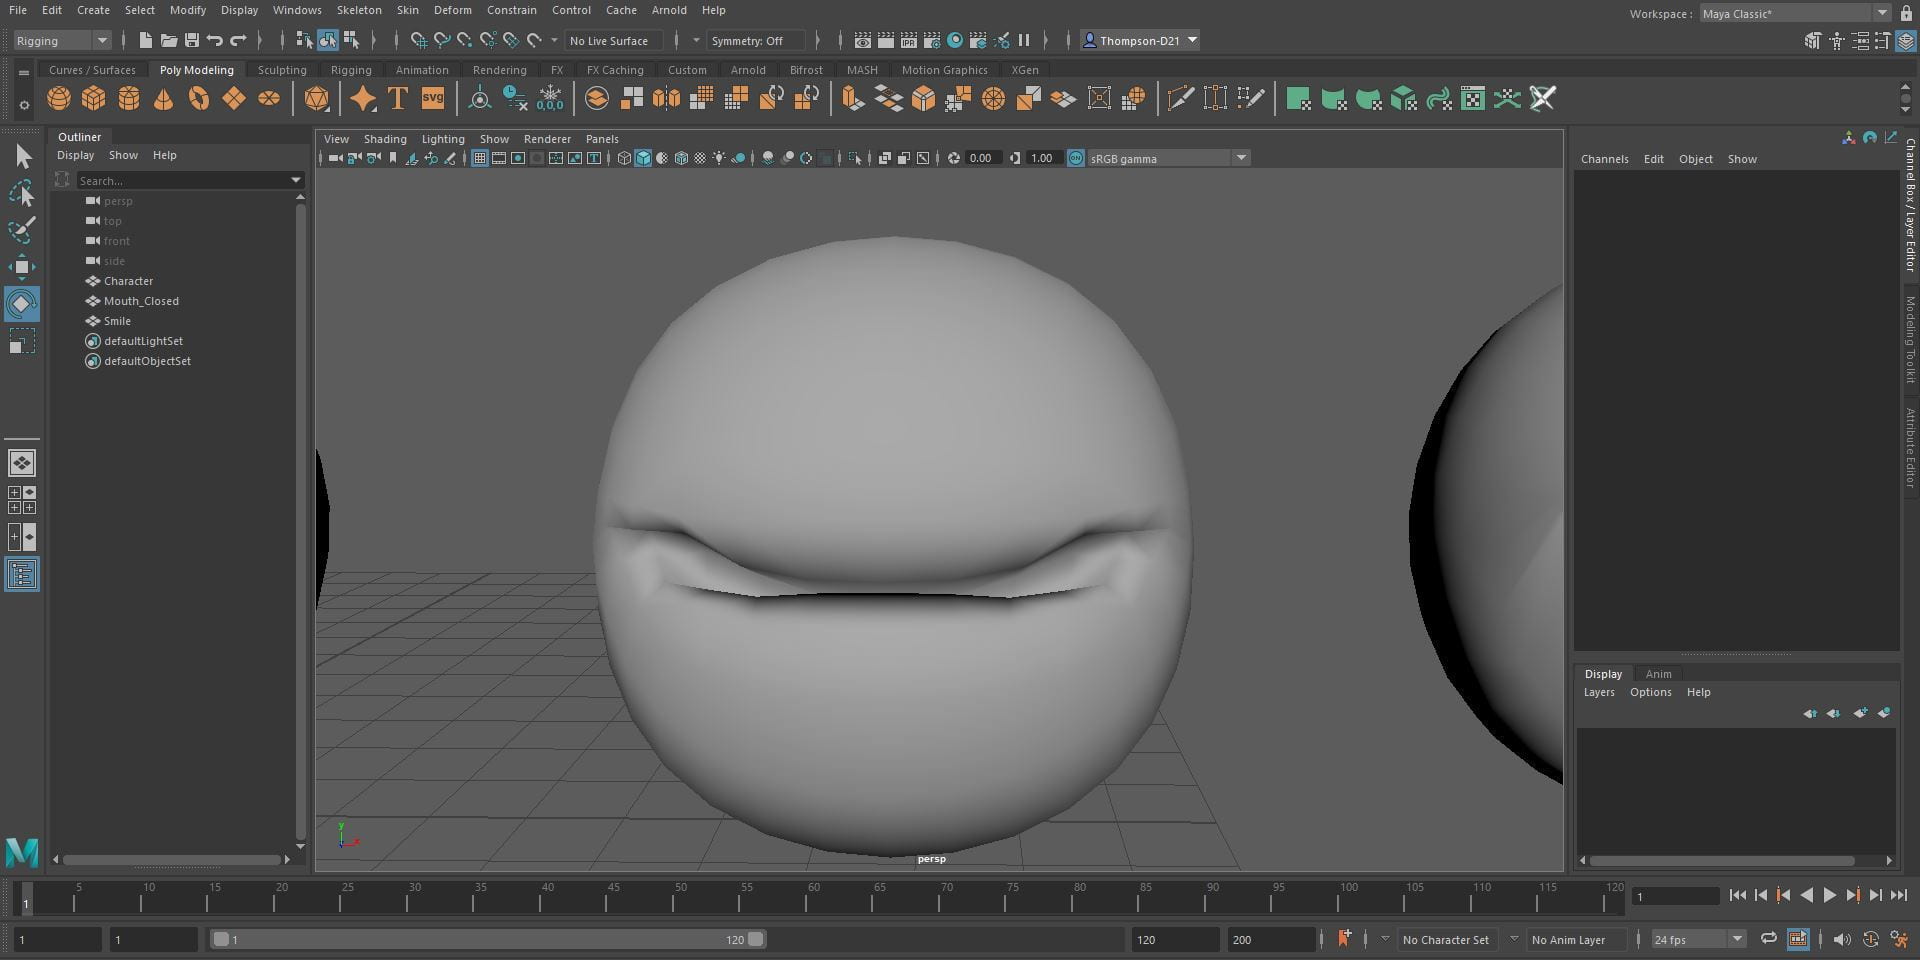
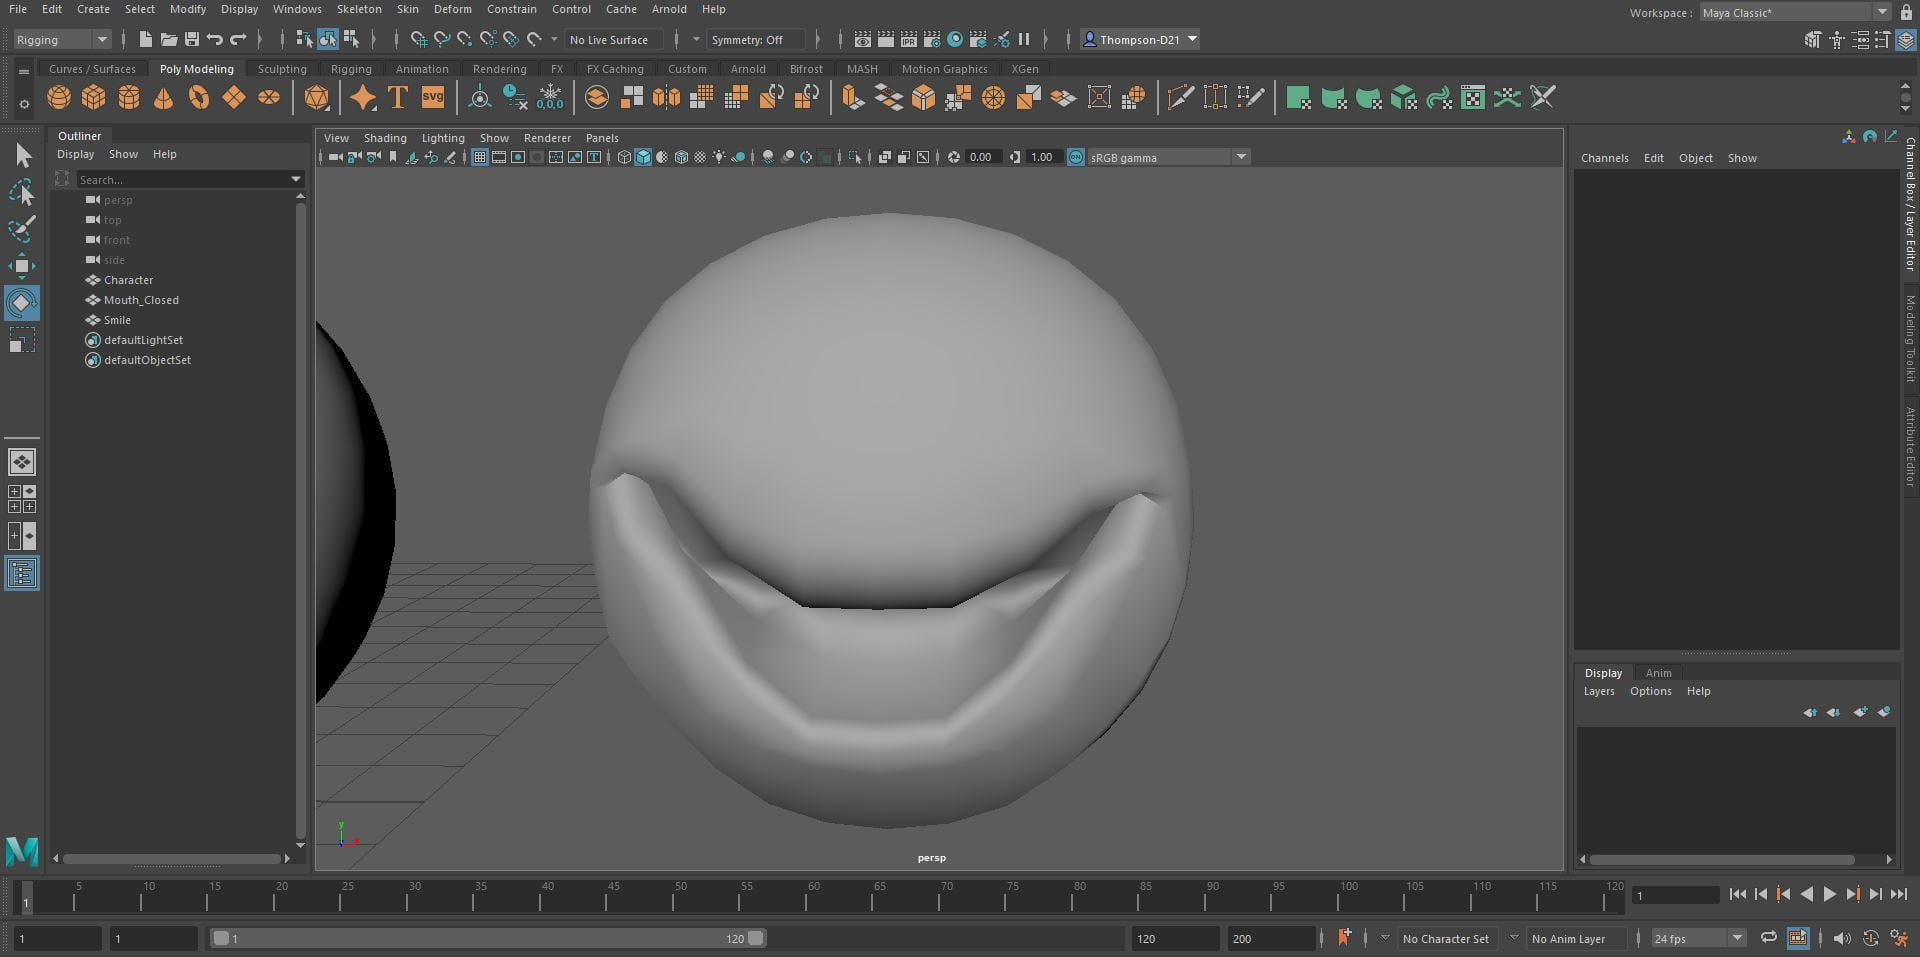
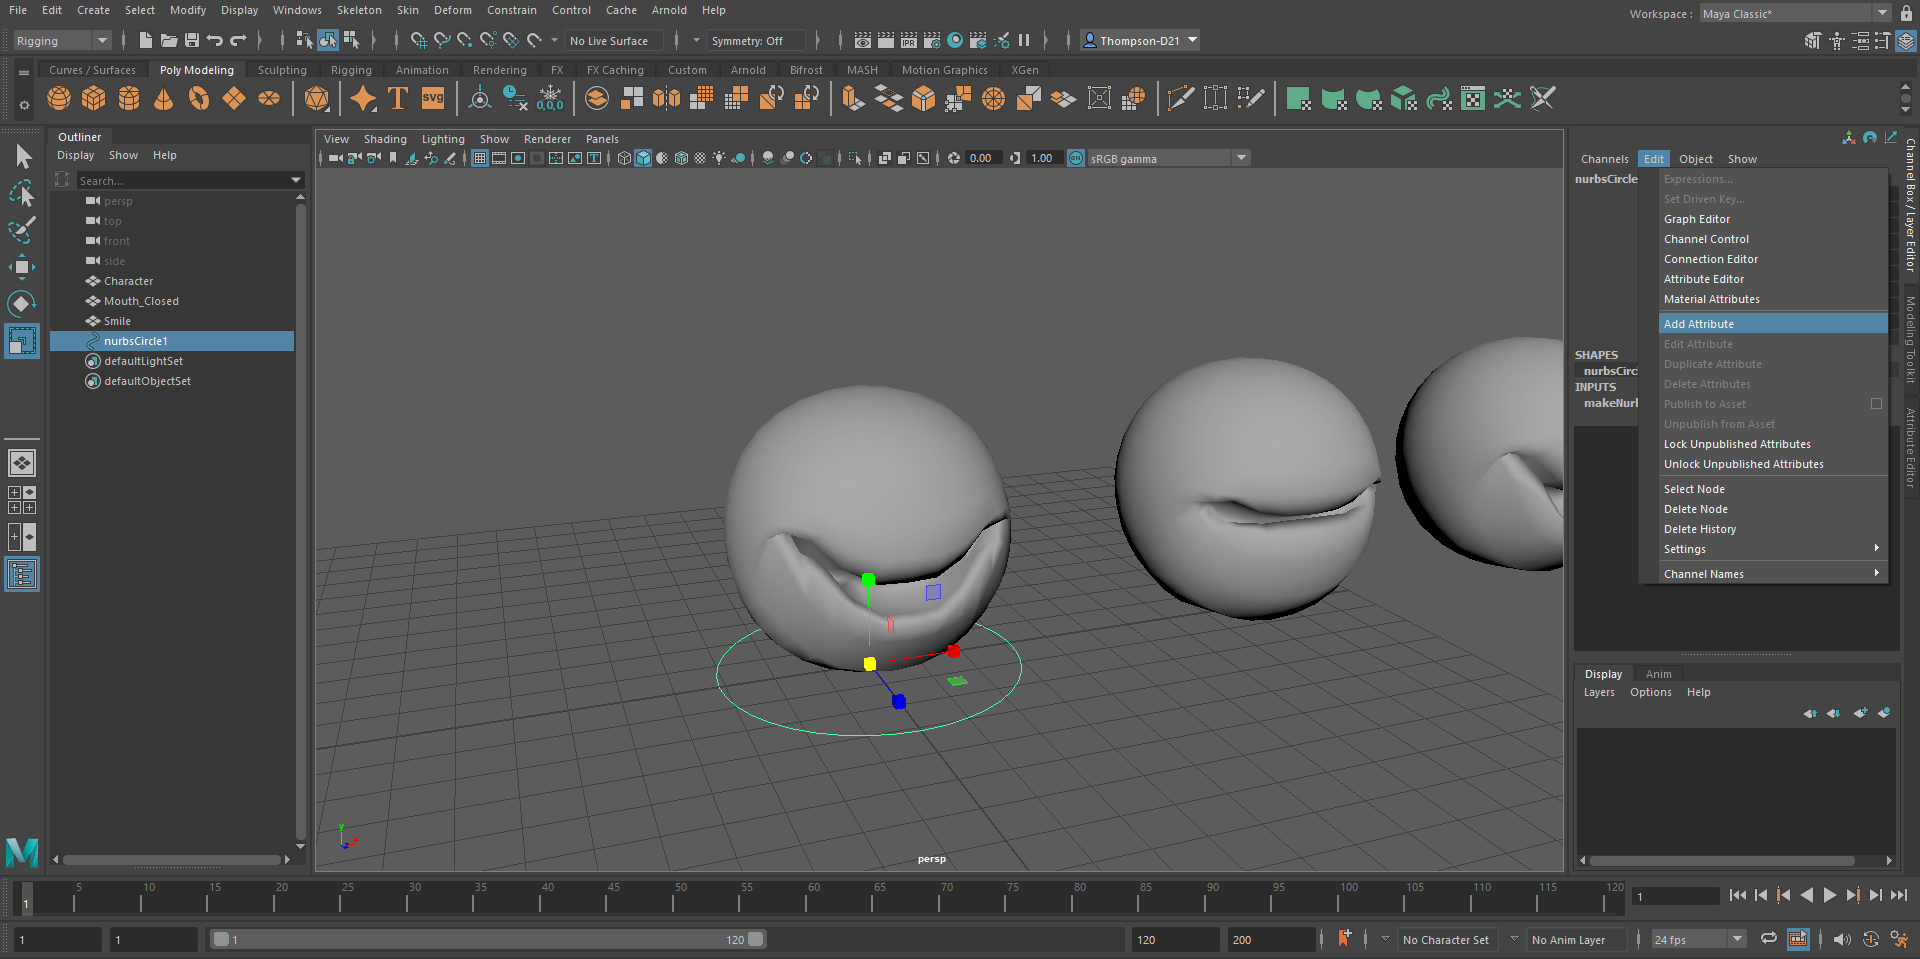
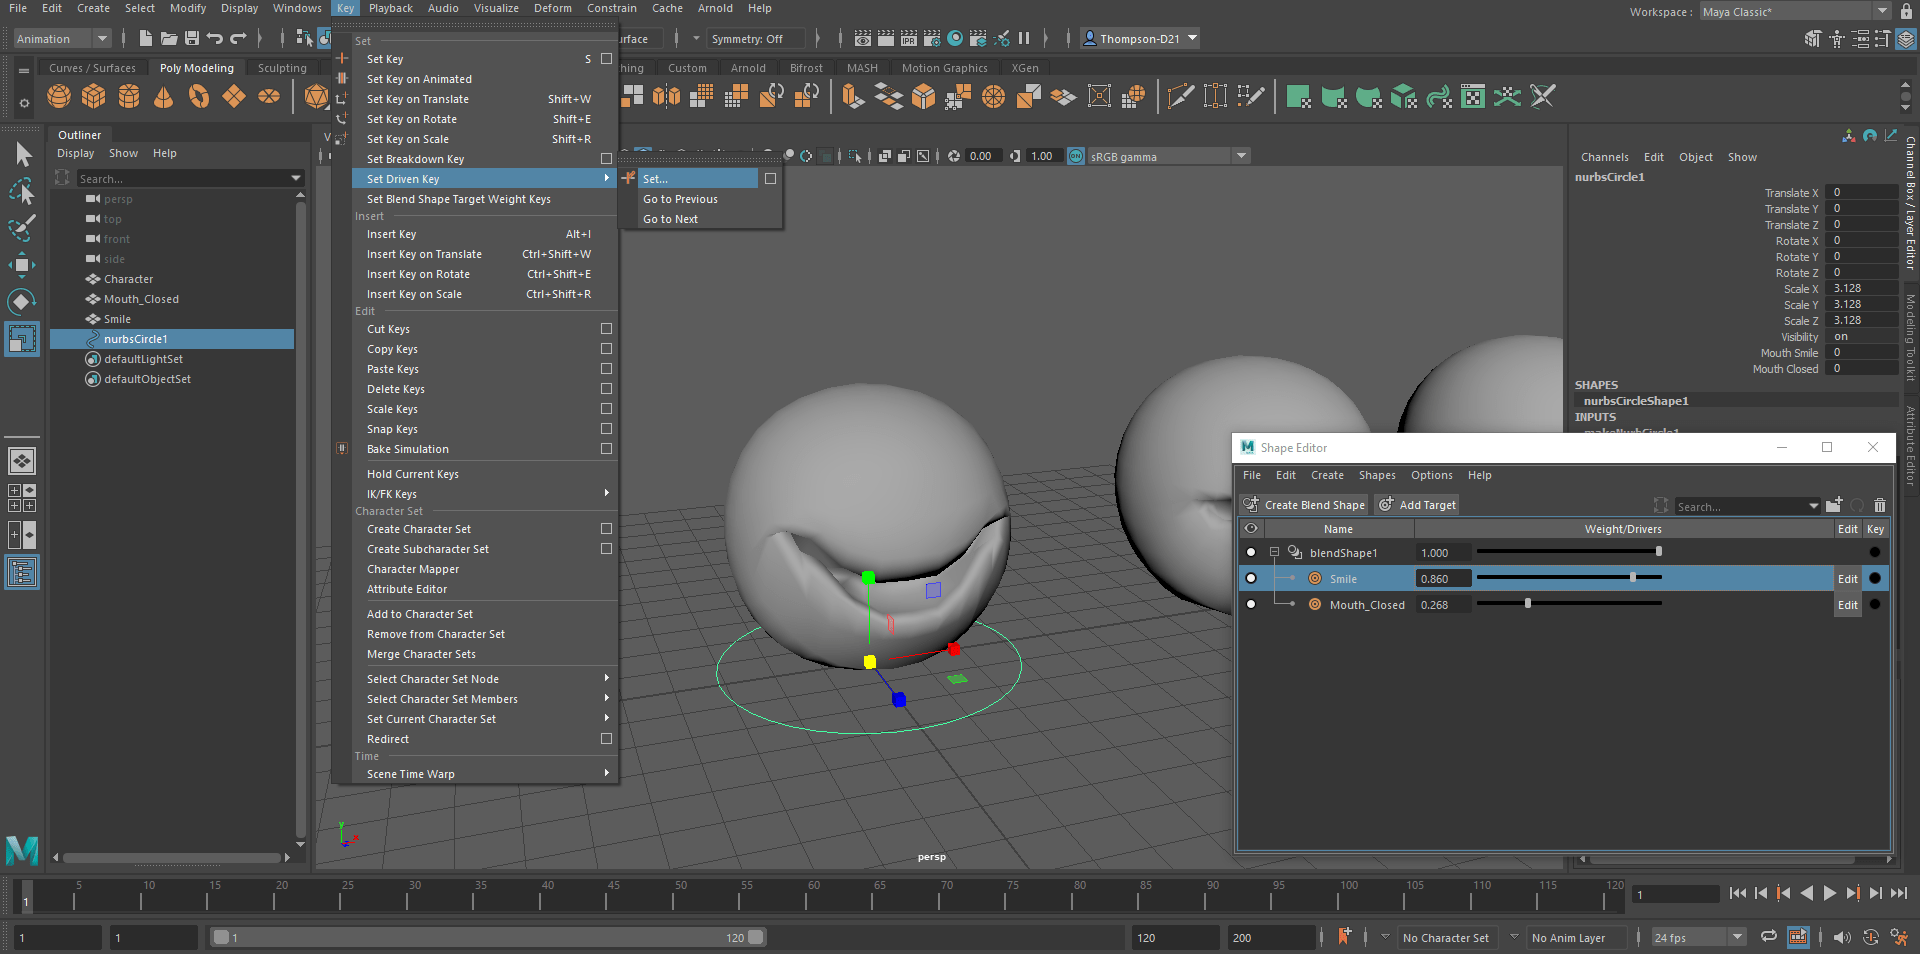
In the afternoon class we covered blend shapes, rigging with joints and skin weights. The first video covered blend shapes. I started by duplicating the sphere twice and naming them in the outliner. I then selected the two duplicate spheres and then the main one, I then changed the menu to rigging and click the deform menu, click blend shape. Next, I clicked windows, animation editors, shape editor. This allows me to edit the shape the shape by using edges, faces and vertices. Cannot subdivide the shape or delete faces. I shaped the first face to have a closed mouth and the other an open mouth smile. To connect the attributes to the blend shape. Change the menu to animation, key, set driven key and click set.

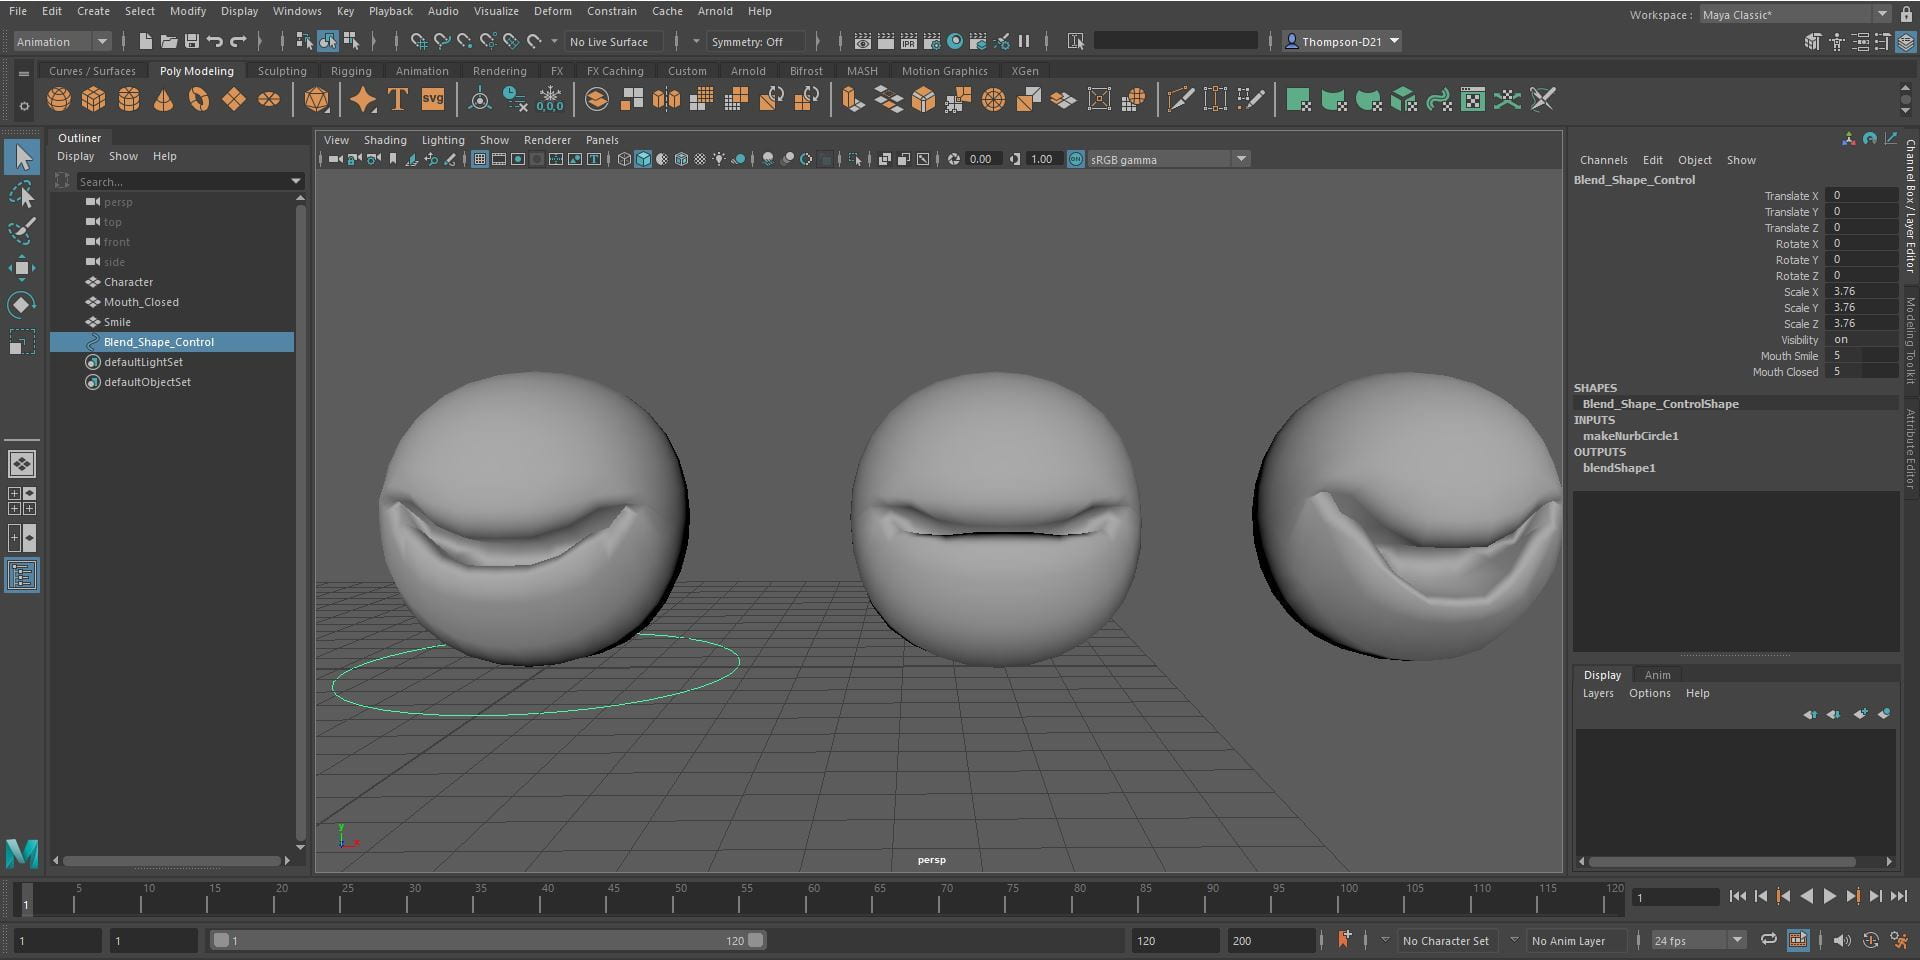
Overall, I found this a little confusing to do but I do understand it and will continue to practice for the future.
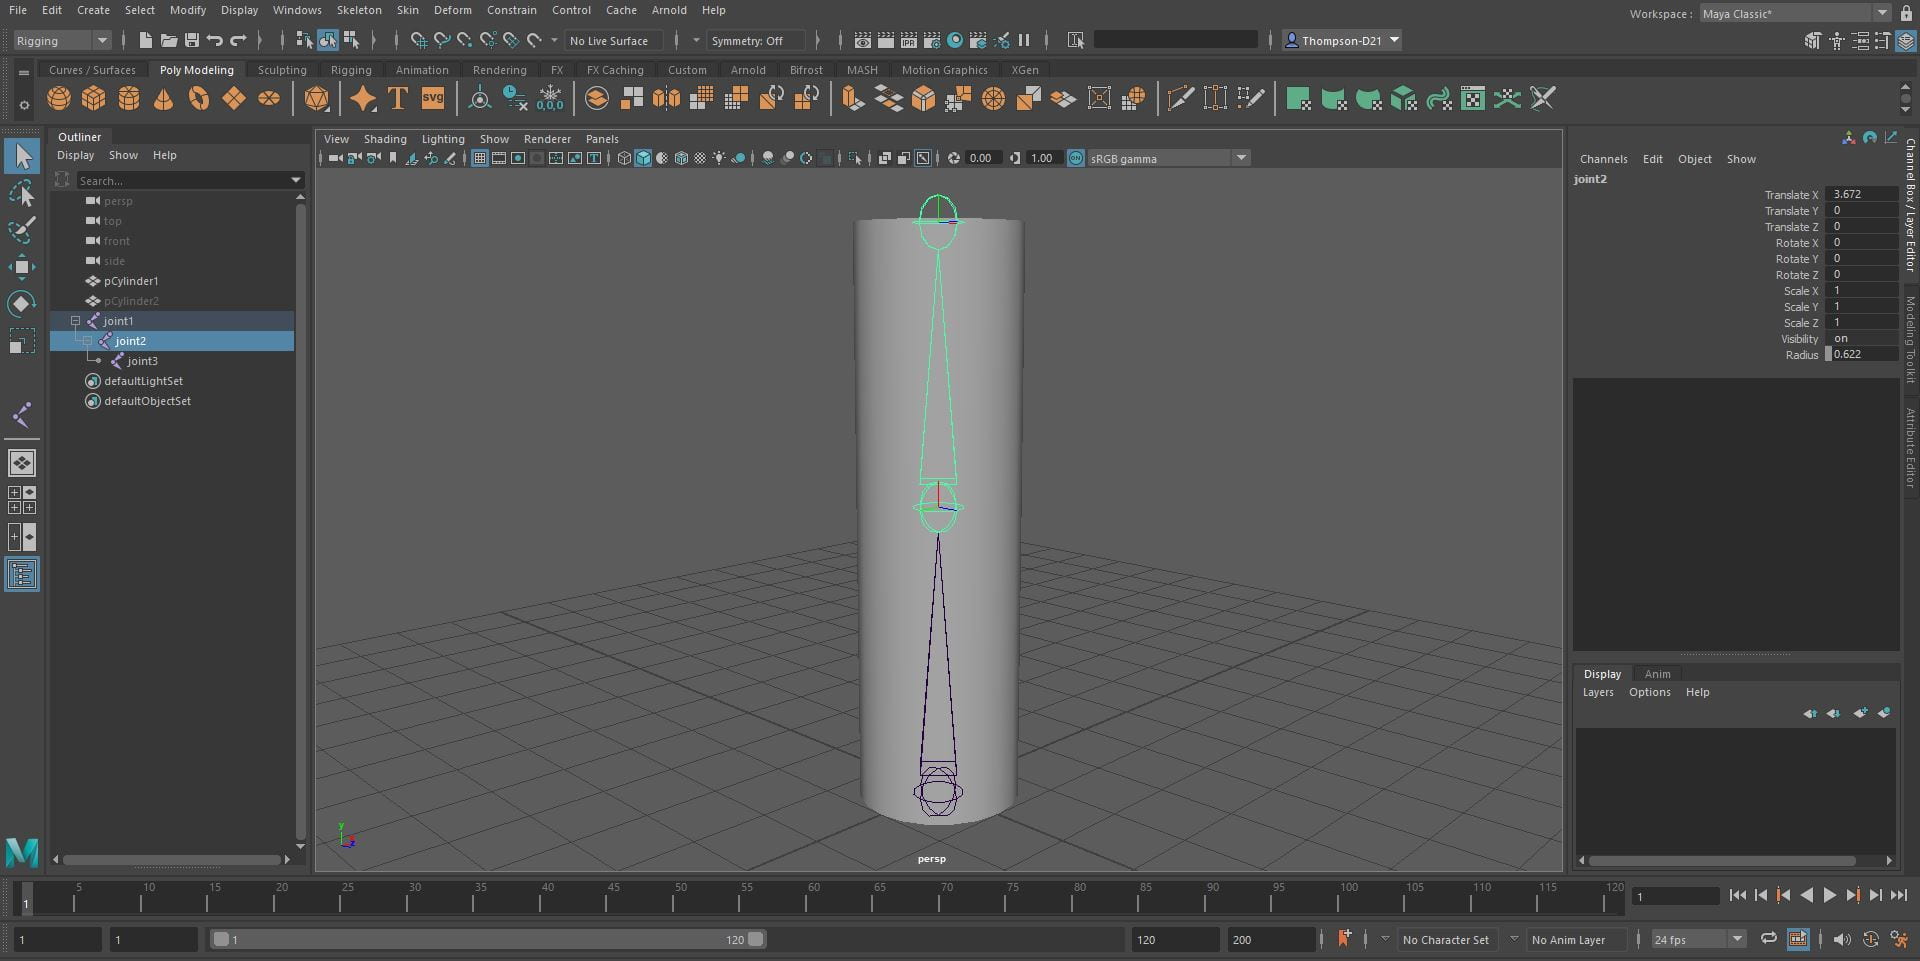
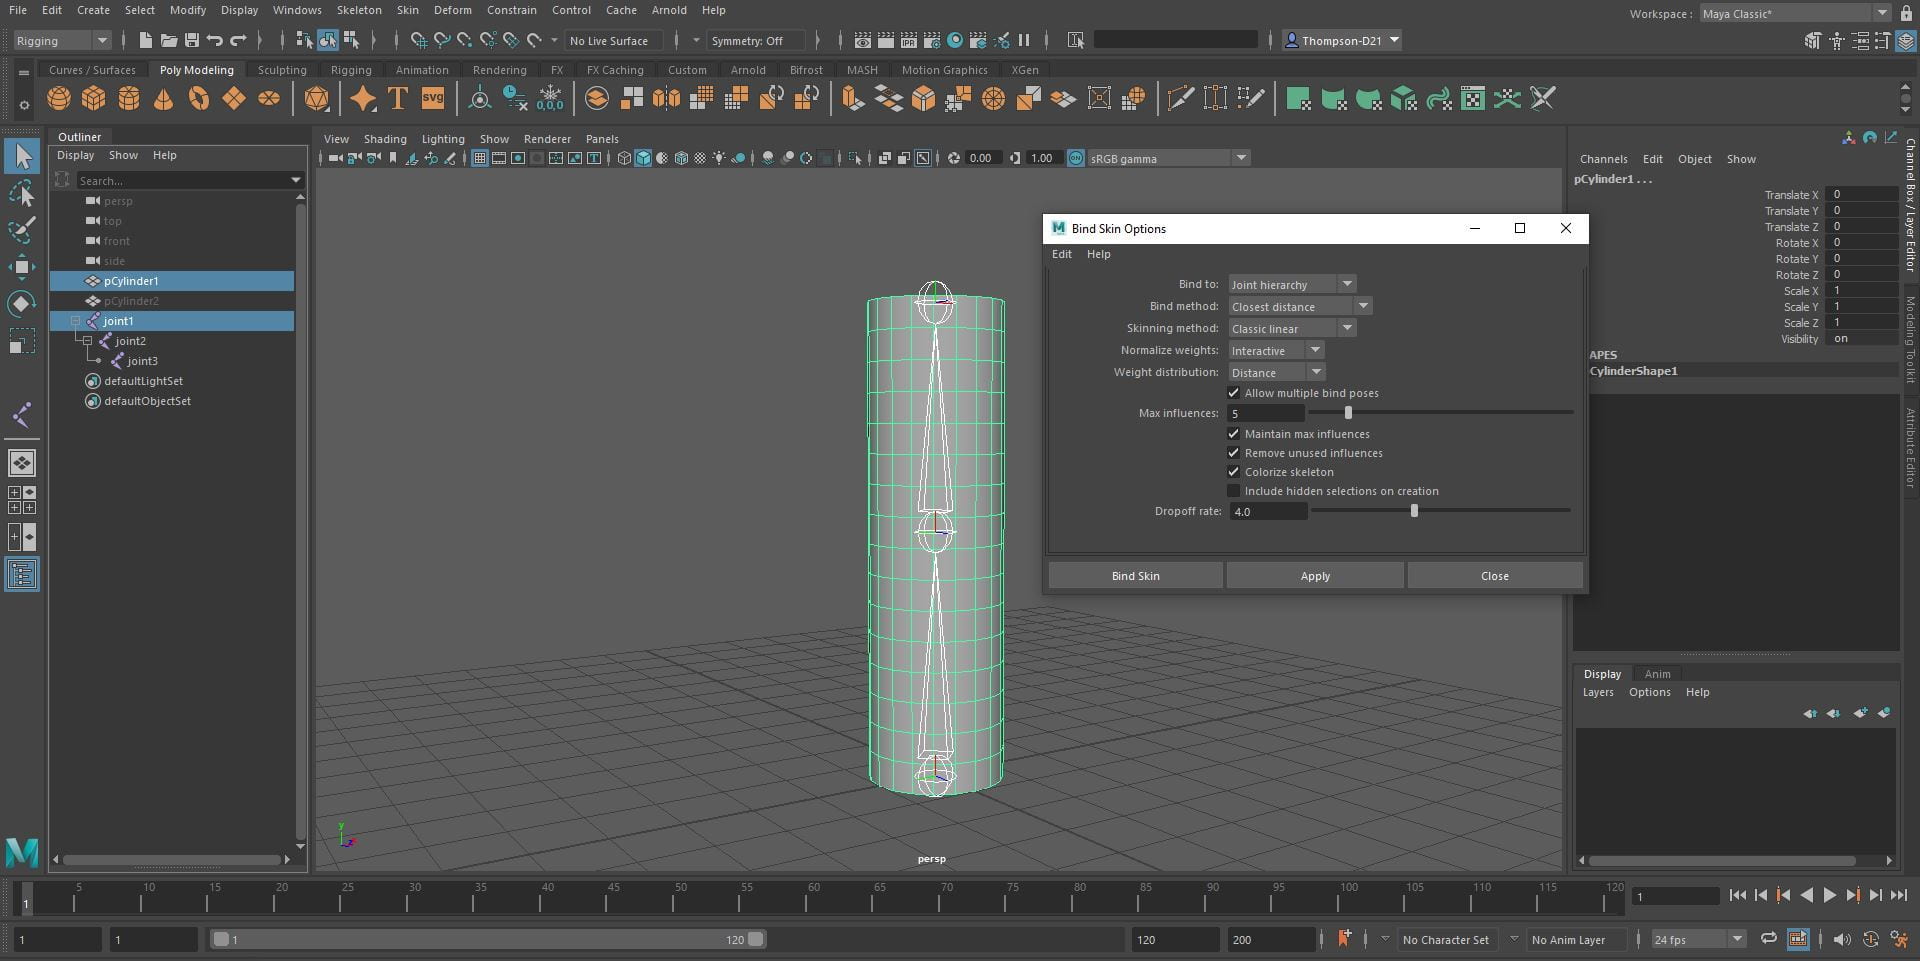
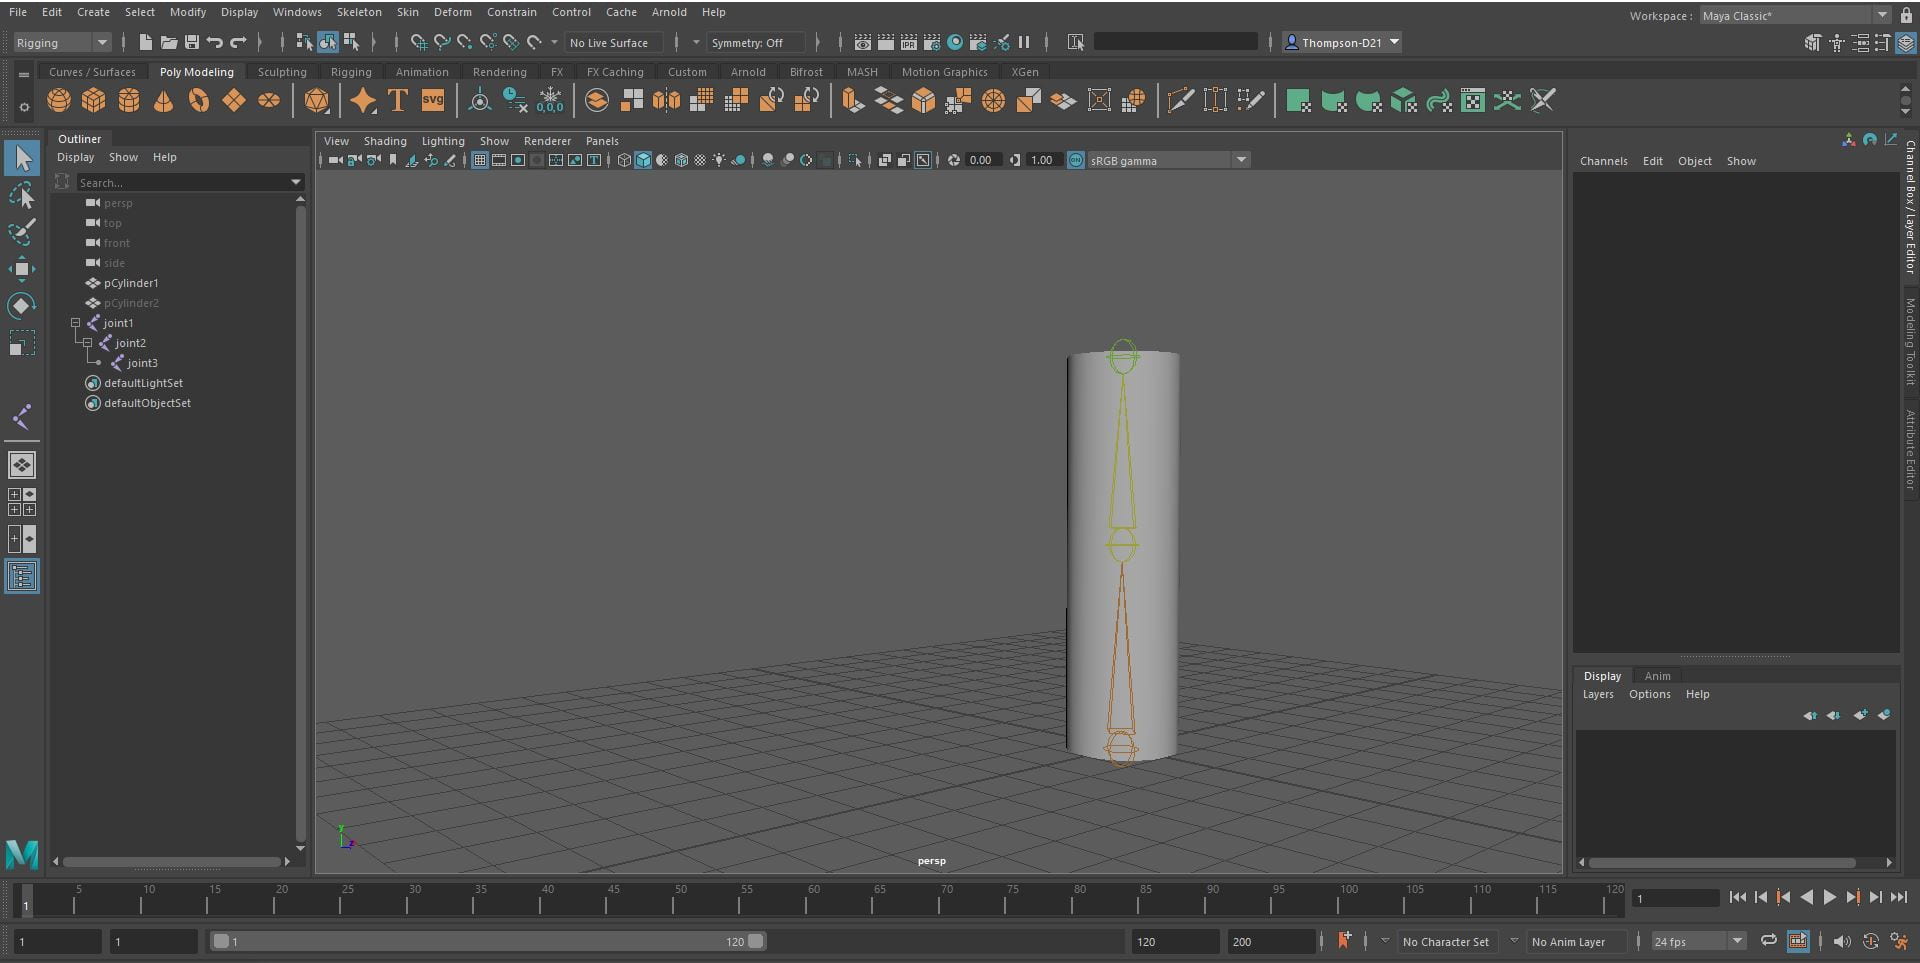
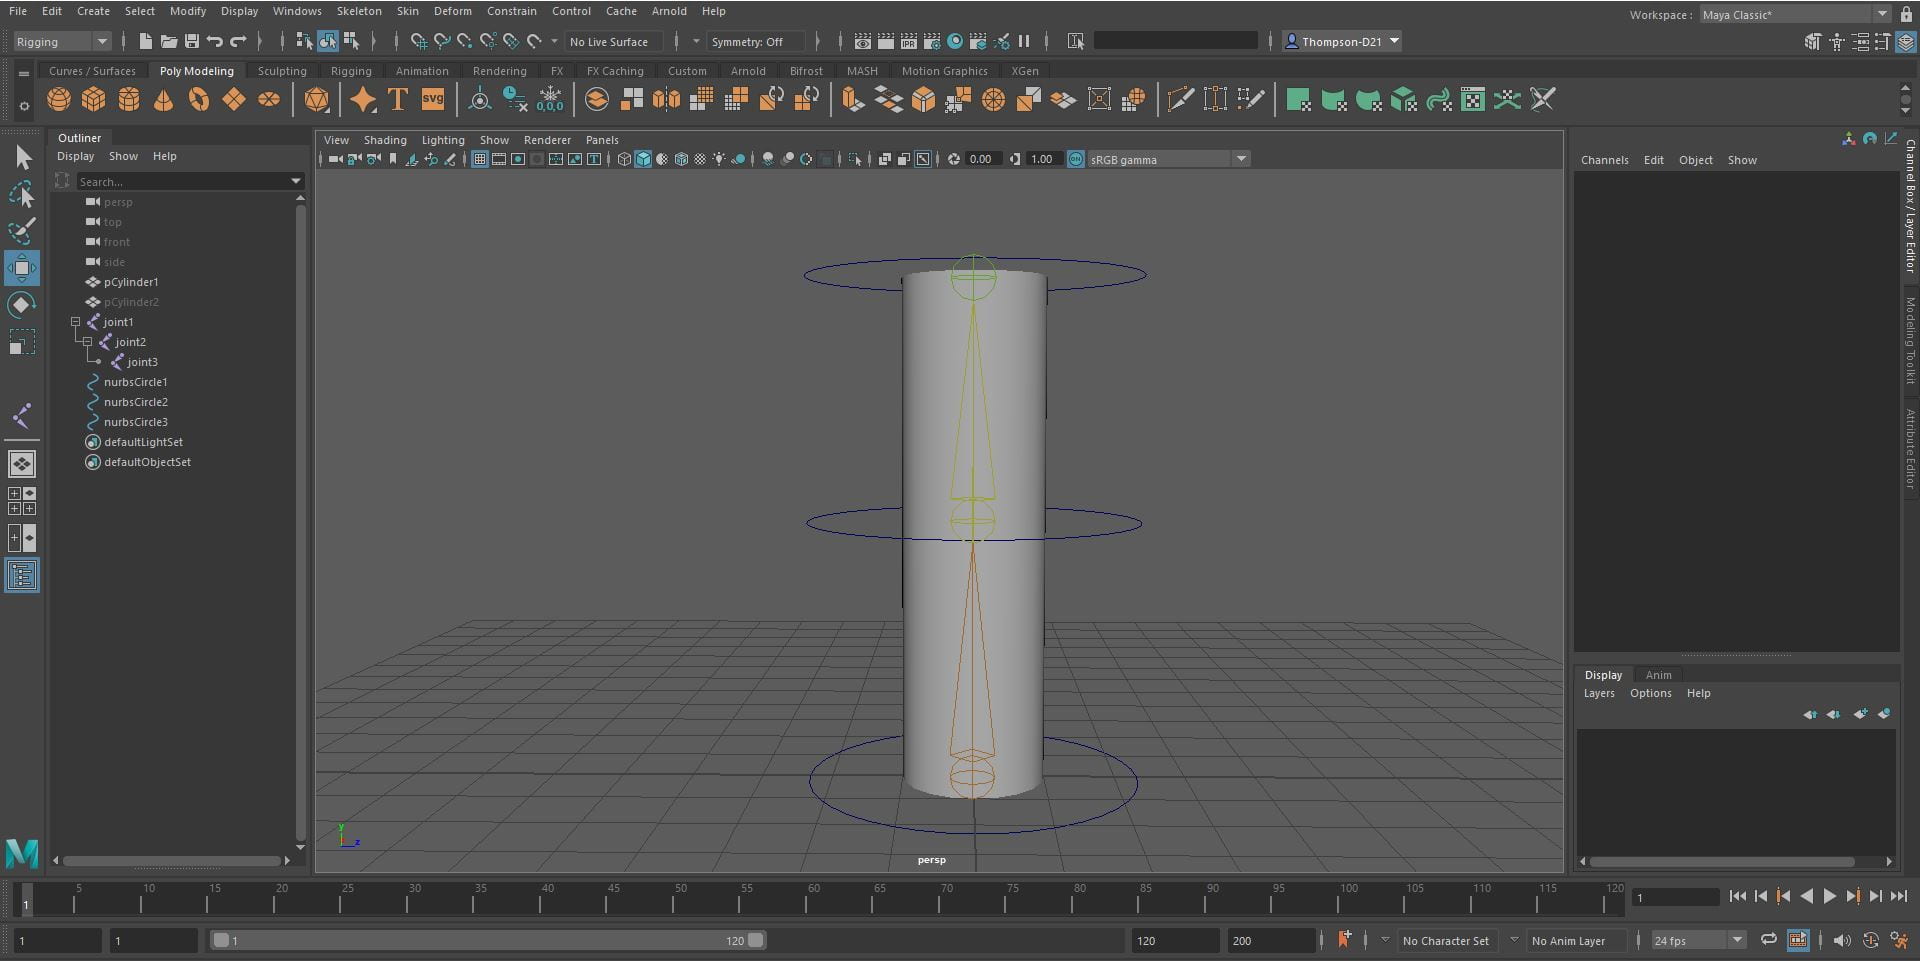
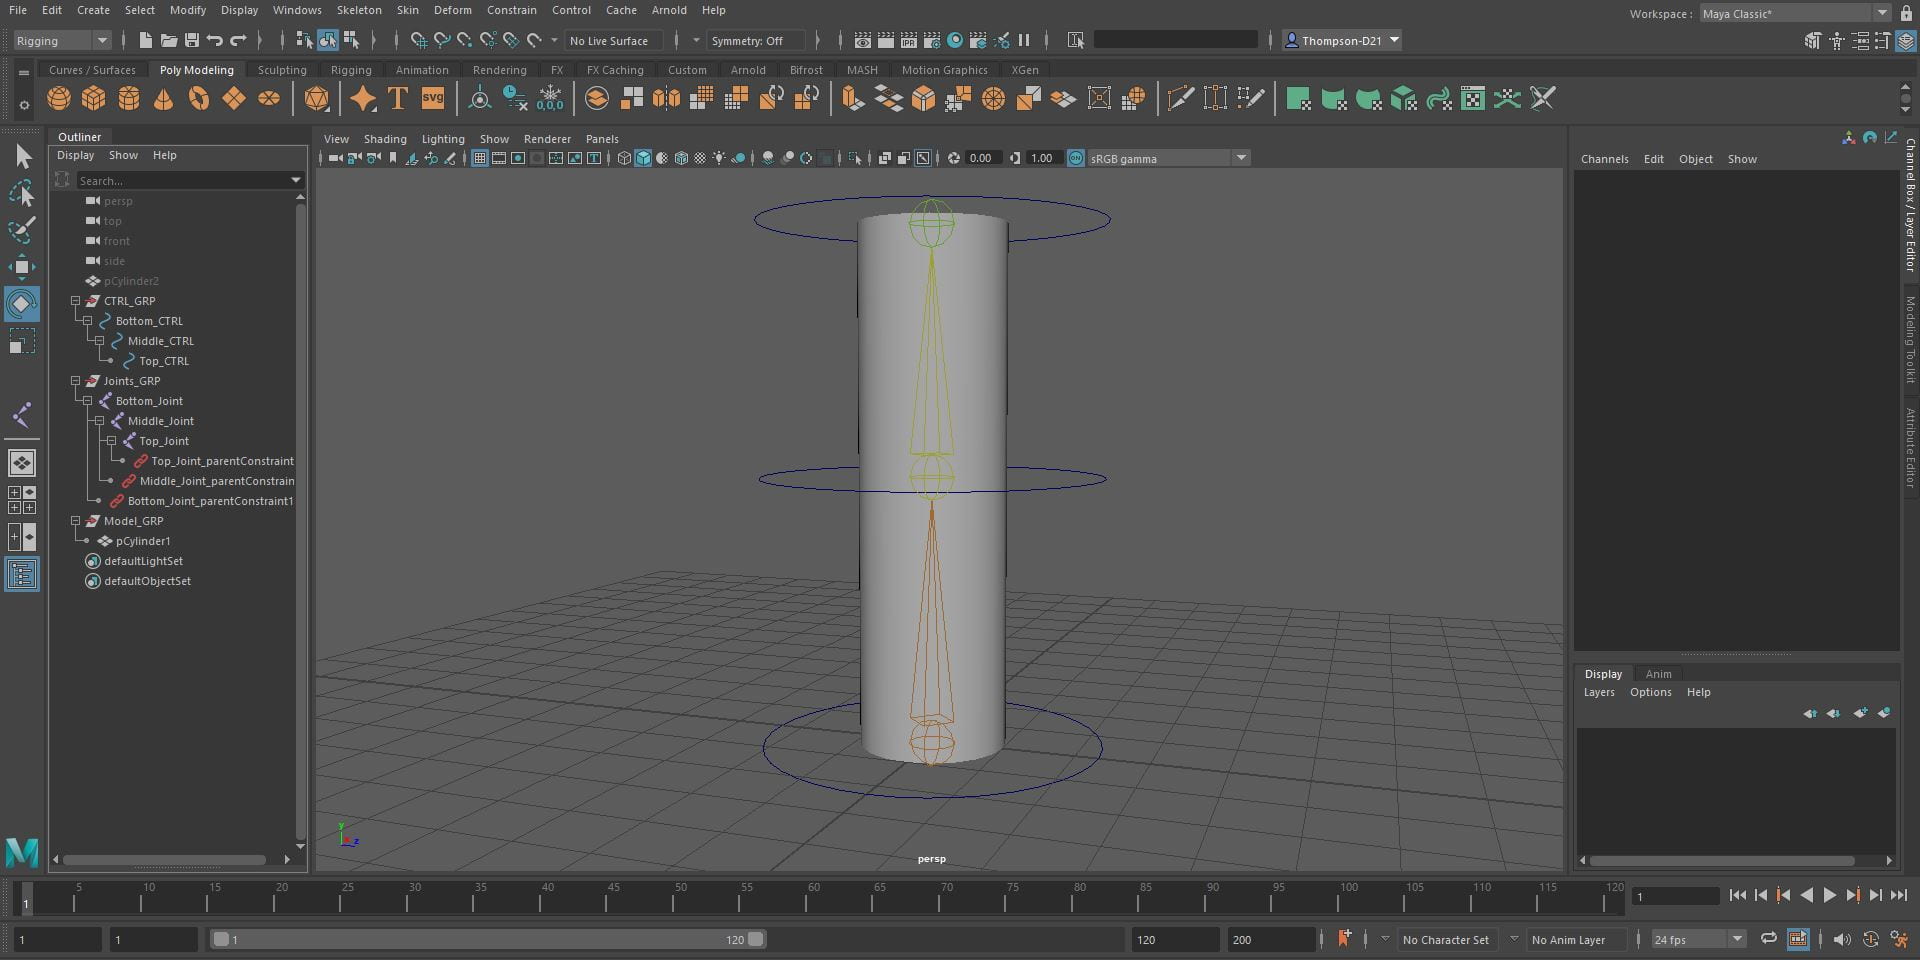
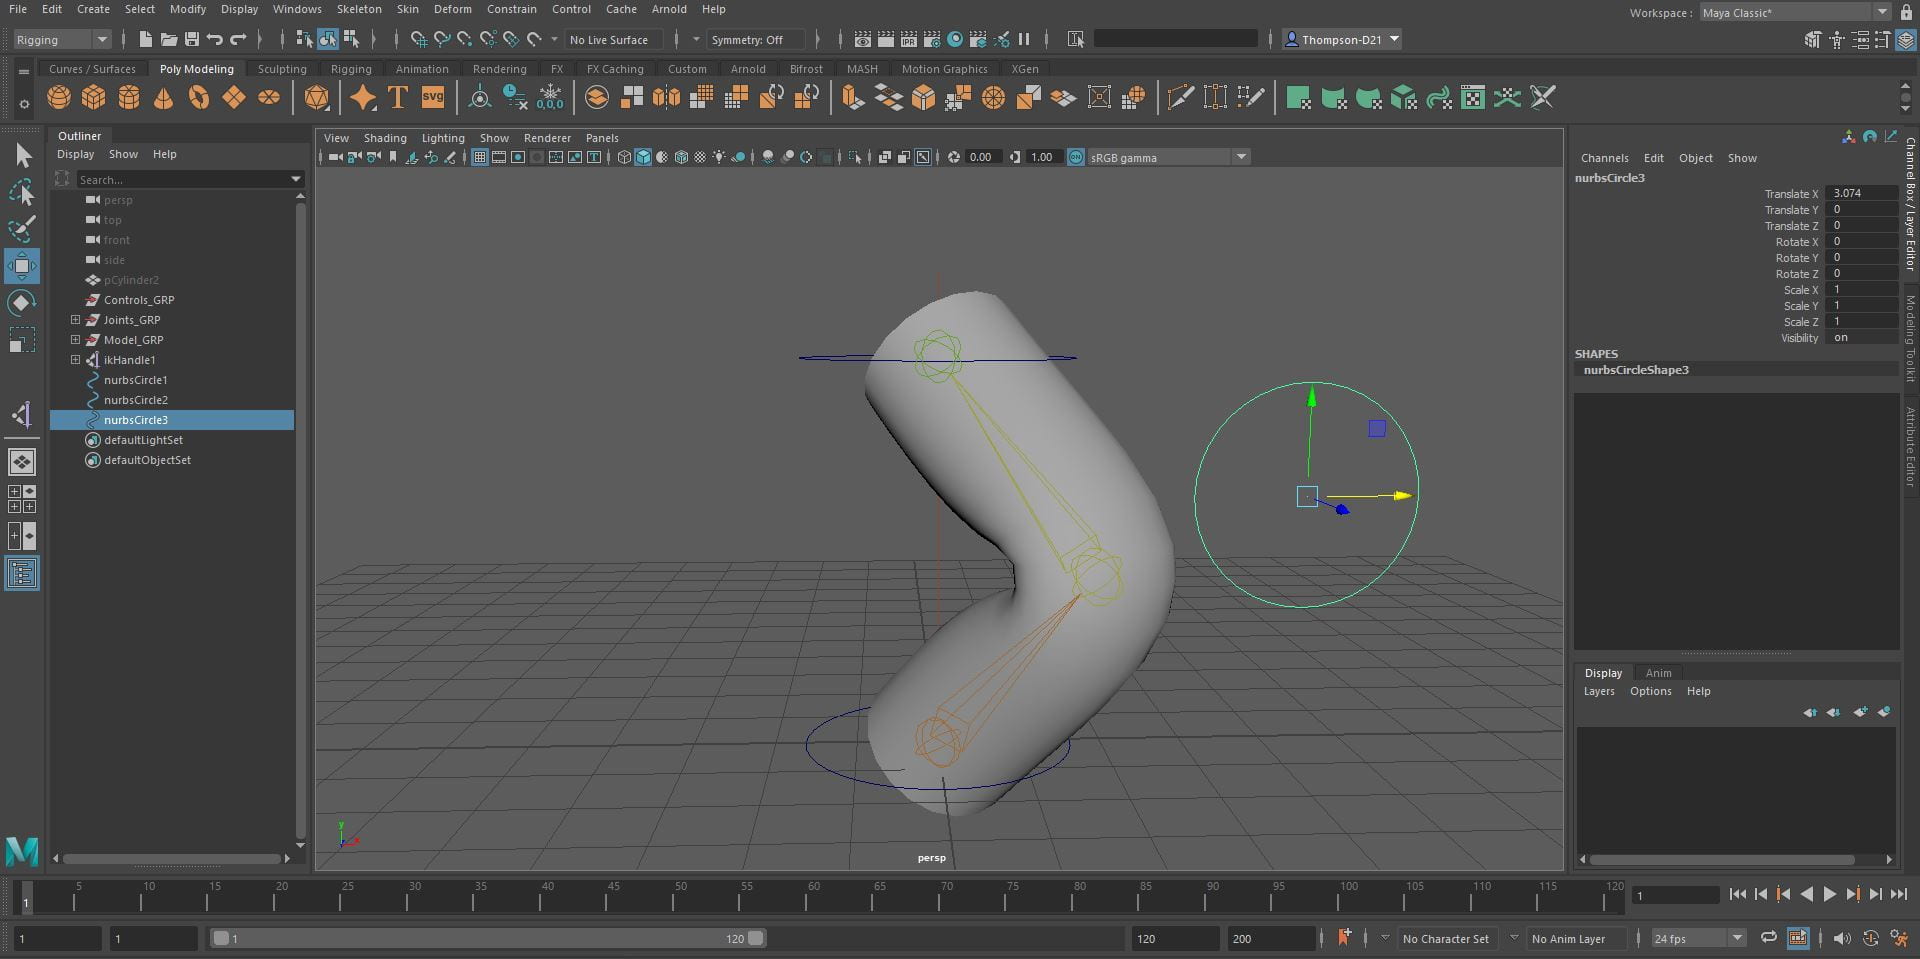
The next video talked about adding joints to a model to make them bend. To start I change the menu to rigging, click skeleton and click create joints. Left click to add a joint and hit enter to finish a joint chain. If joints need edited/moved don’t rotate them this can cause problems down the line, only use the move tool. Select the first joint and then the cylinder, click skin and then bind skin. This makes the skin move with the joint. To control the joint, add NURBS circle to the bottom of the joint, snap it by holding v. Do the same for the other two. Next click the circles in the outliner and drag them to parent them. To add constraints, click the circle then the joint and click parent in the constraints menu, do this for all the joints. Lastly, select the bottom control, then the joints group and click constraints, scale. This will make the model all scale at the same time.

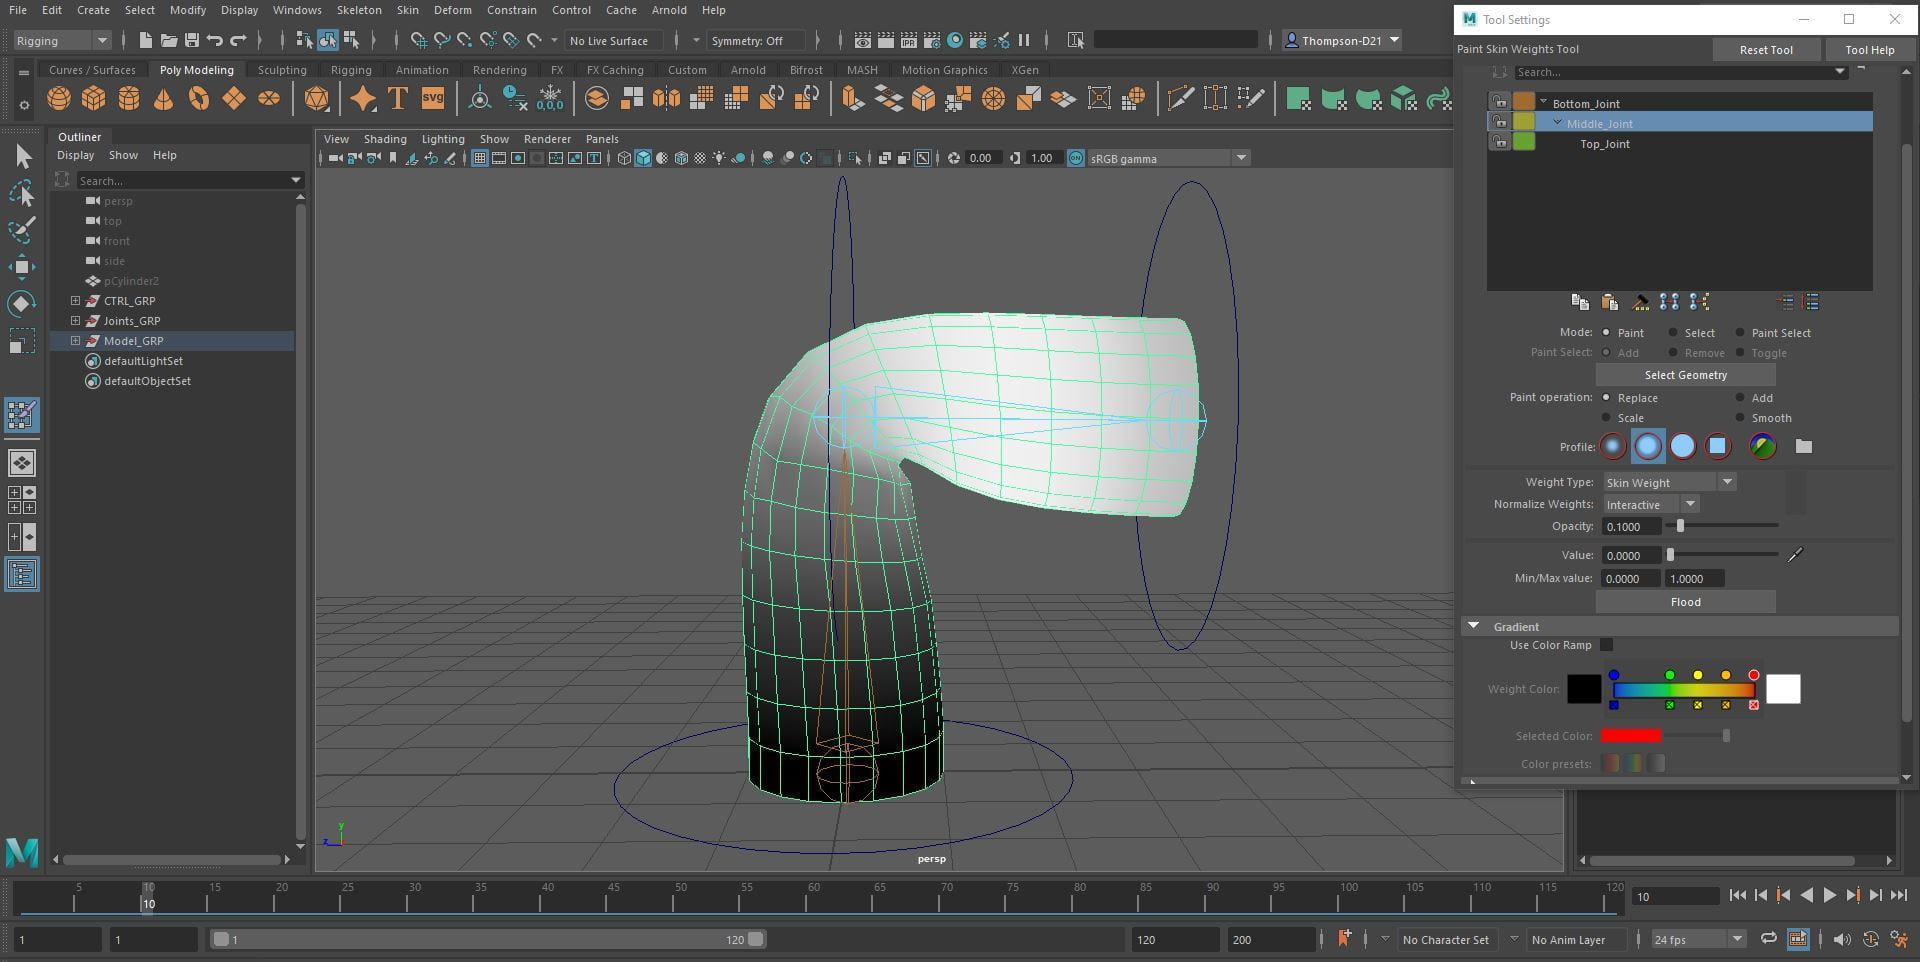
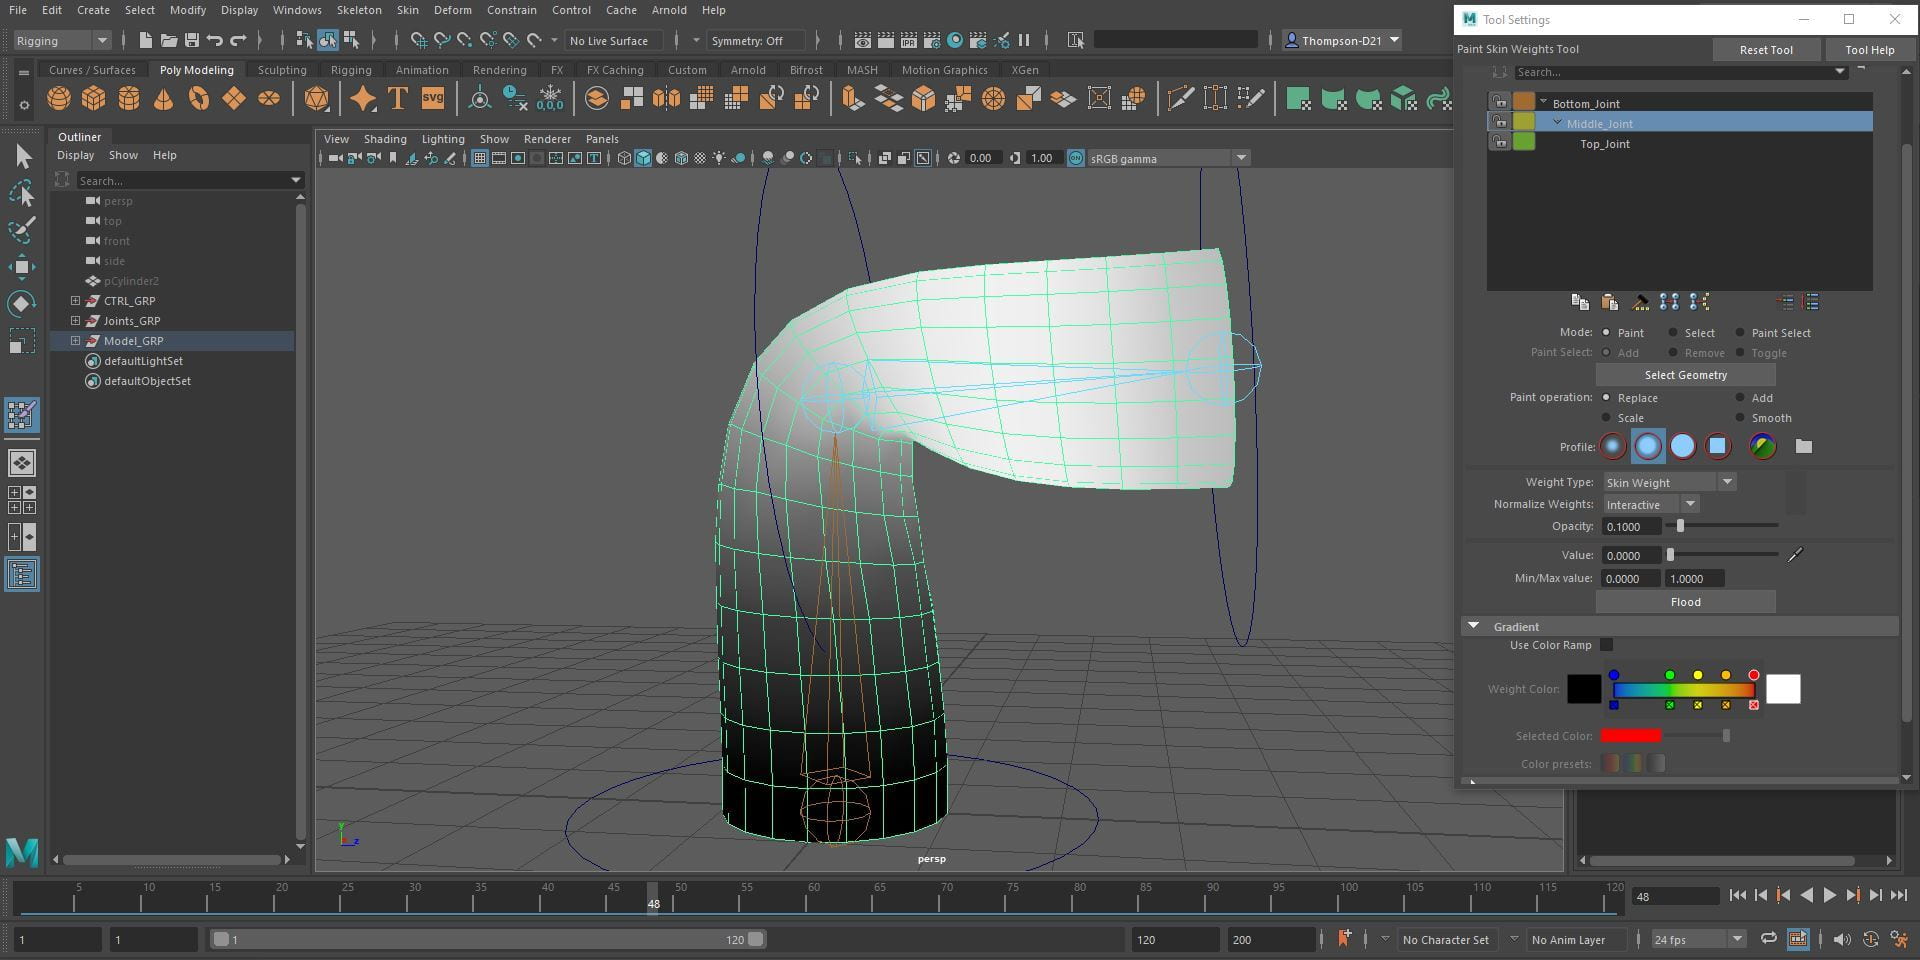
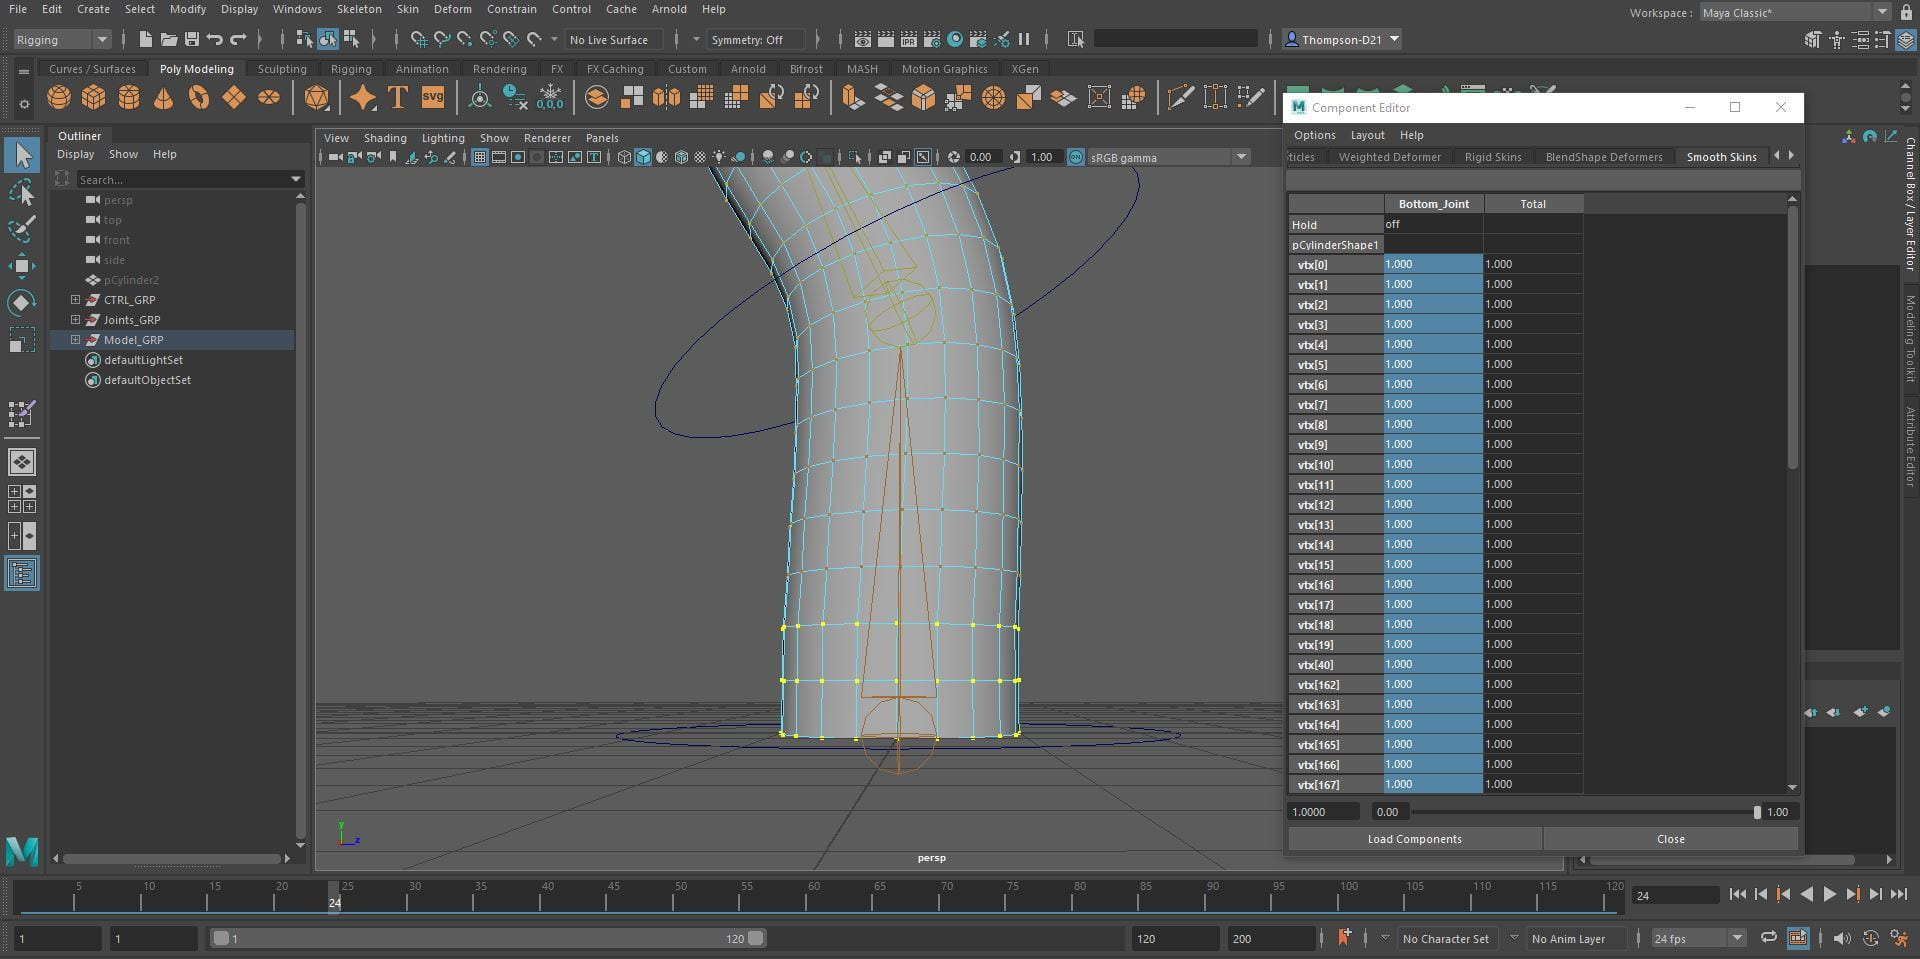
The third video discussed skin weights. Using the same model as the previous video hold control, right click, paint skin weights tool. Paint straight black at the bottom of the cylinder so it does not move when the joint does. Change the opacity to change the intensity and colour along the vertices getting lighter the farther away from the bottom. To fine turn this click windows, general editors, component editor. Select the vertices you want to edit and change the numbers in the boxes. The paint skin weights tool is good for large areas of editing, the component editor is good for detail editing. Editing the skin weights of a model will help it bend and not collapse.

Homework
For homework we had to finish the video tutorials and continue to work on the Monty rig assessment and create a presentation discussing the progress of our 30 second animation assessment.
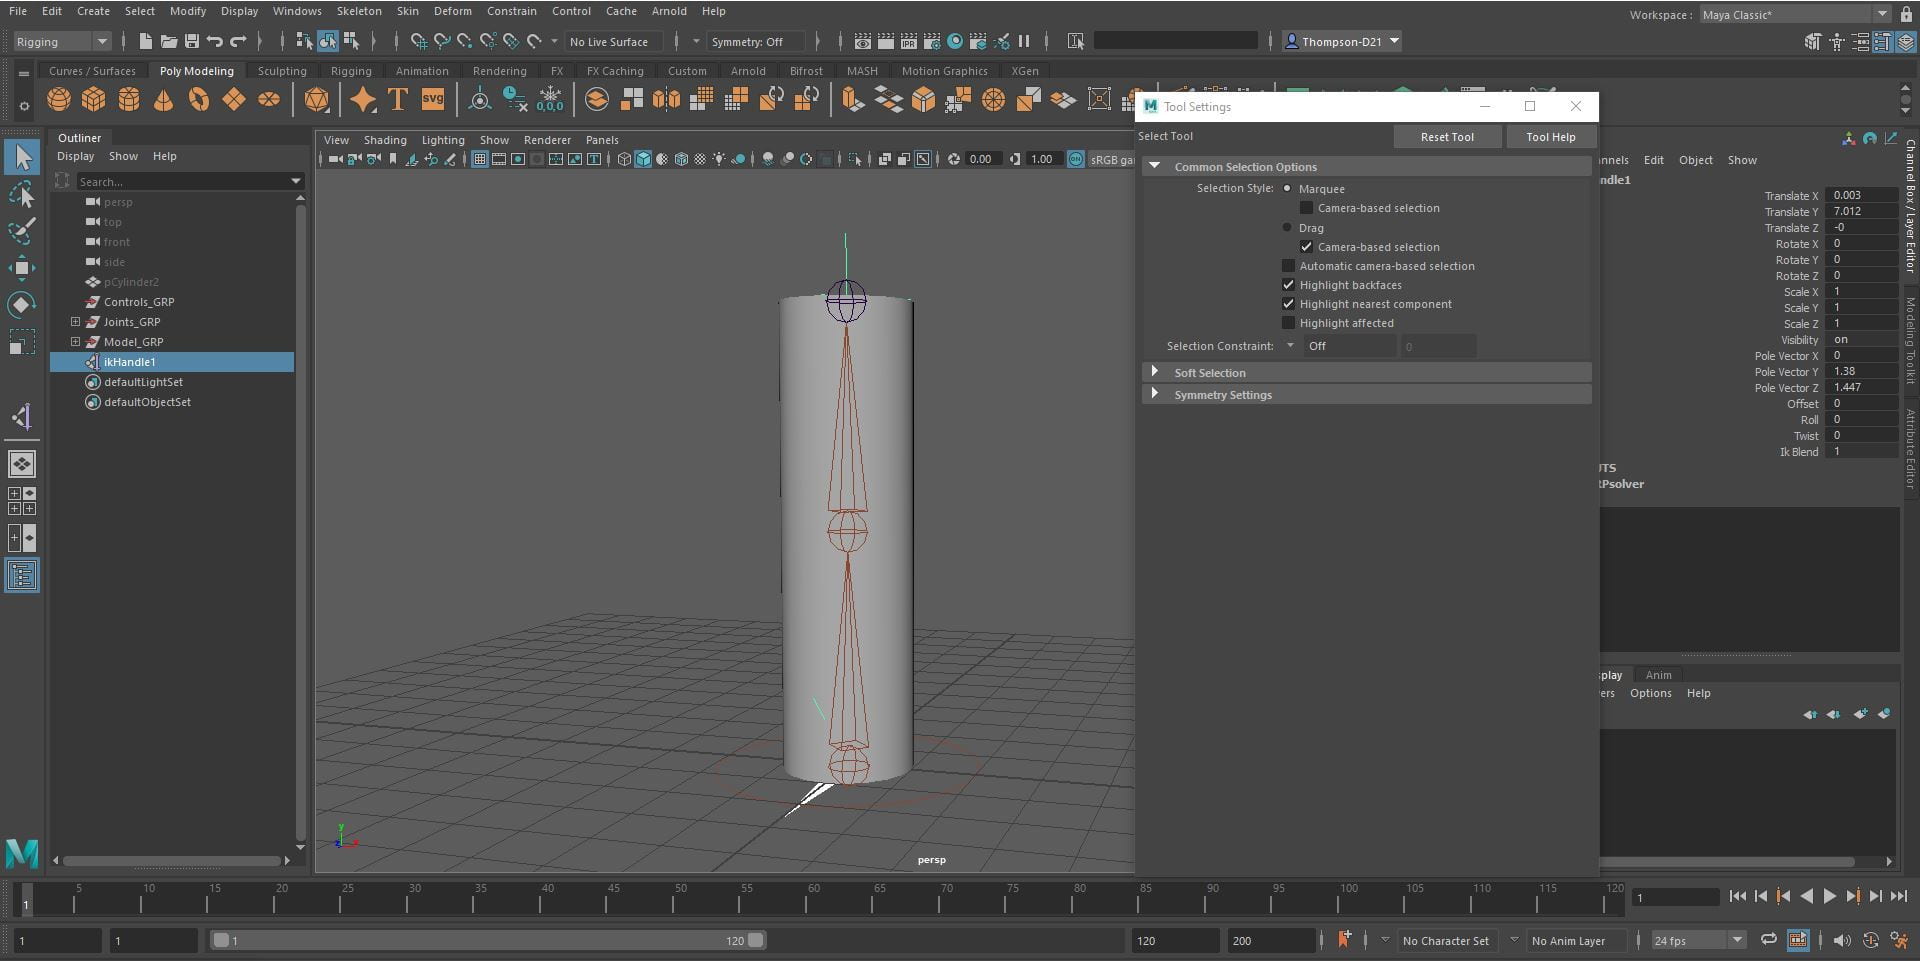
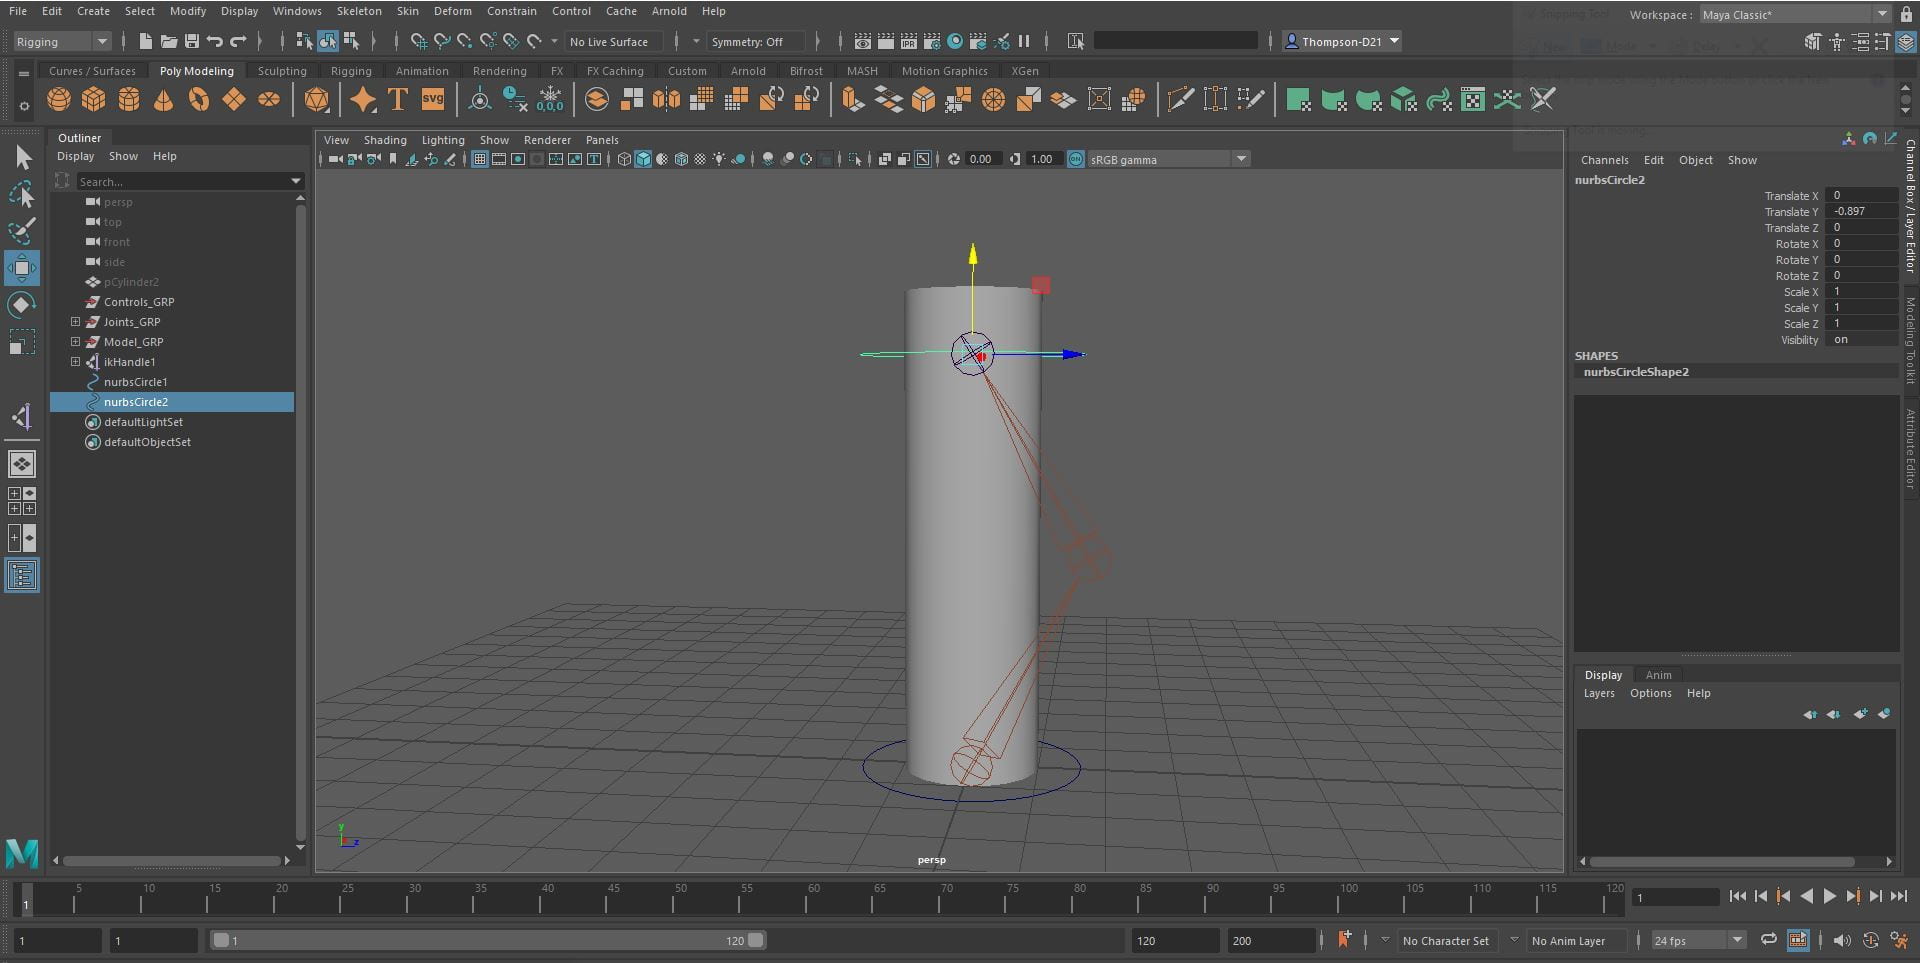
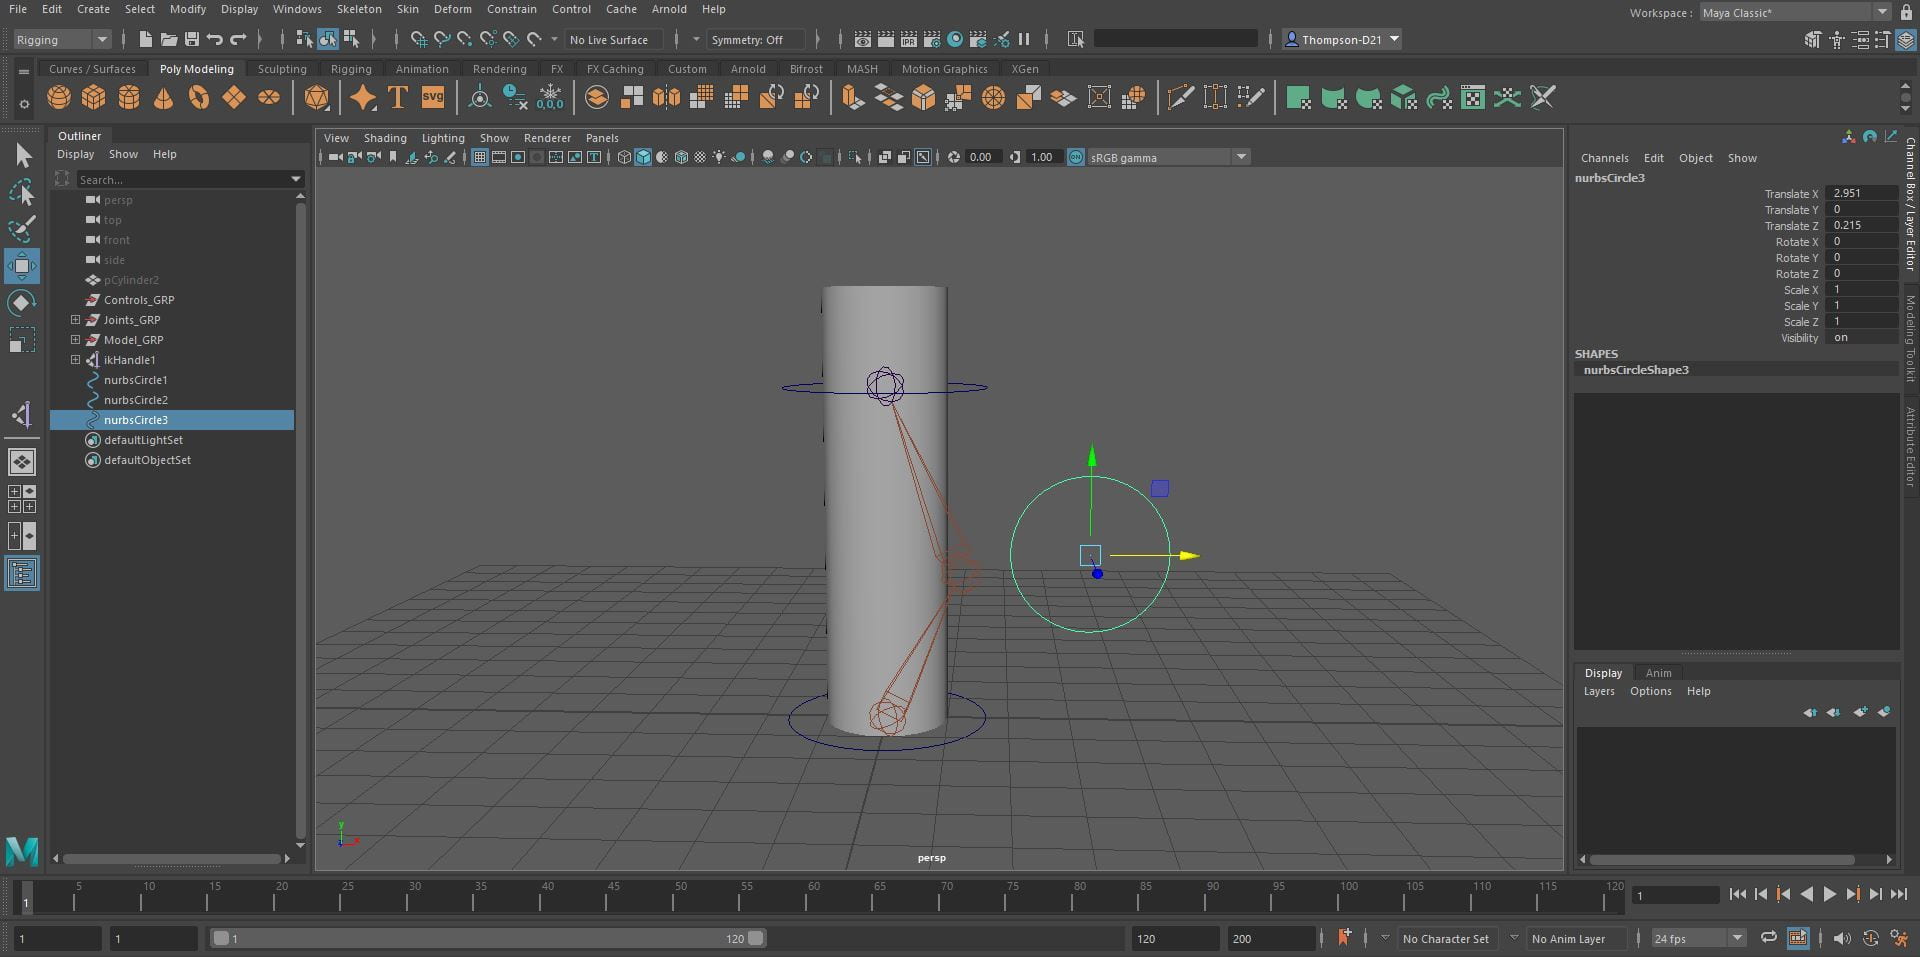
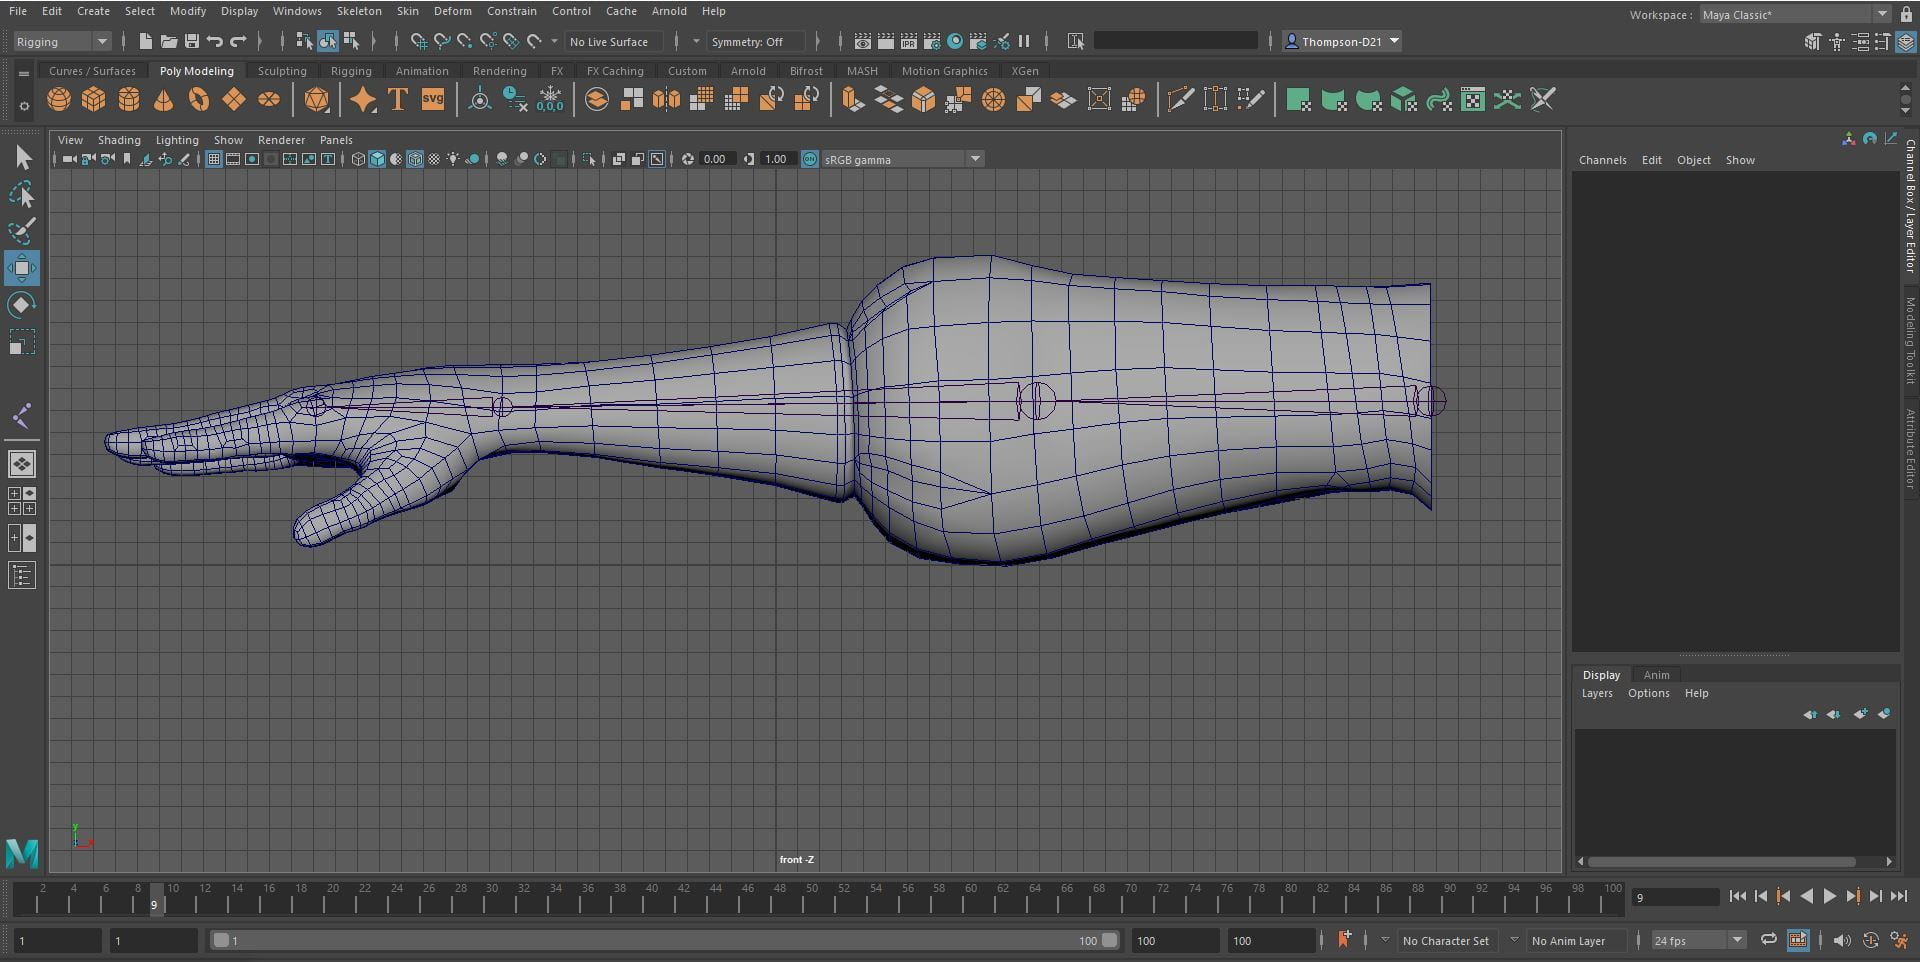
The fourth video how to make an IK joint. To start I selected the top joint and change the menu to rigging. I then clicked the skeleton menu and clicked create IK handle. Add a slight bend to the middle joint to show the rig which way to bend. Add NURBS circles to the bottom joint and the top joint. Select the circle, then the IK handle and parent them using the constraints menu. Add another NURBS circle to act as the knee joint, snap it to the middle joint and move it out from the model to make it easier to use. Select the knee circle, then the IK handle, click pole vector in the constraints menu. To bind the mesh with the joints, click the bottom joint, click the mesh, click bind skin in the skin menu. To be able to move the whole rig add another NURBS circle at the bottom of the rig. In the outliner drag the control circle into the control group and move the other controls into the global control. To make the model scale, click the global control then the joints group, and click the scale option under the constraints menu. Tidy the outlined by grouping the controls, hide the IK handles and the joints and make the mesh a reference layer so it cannot be edited.

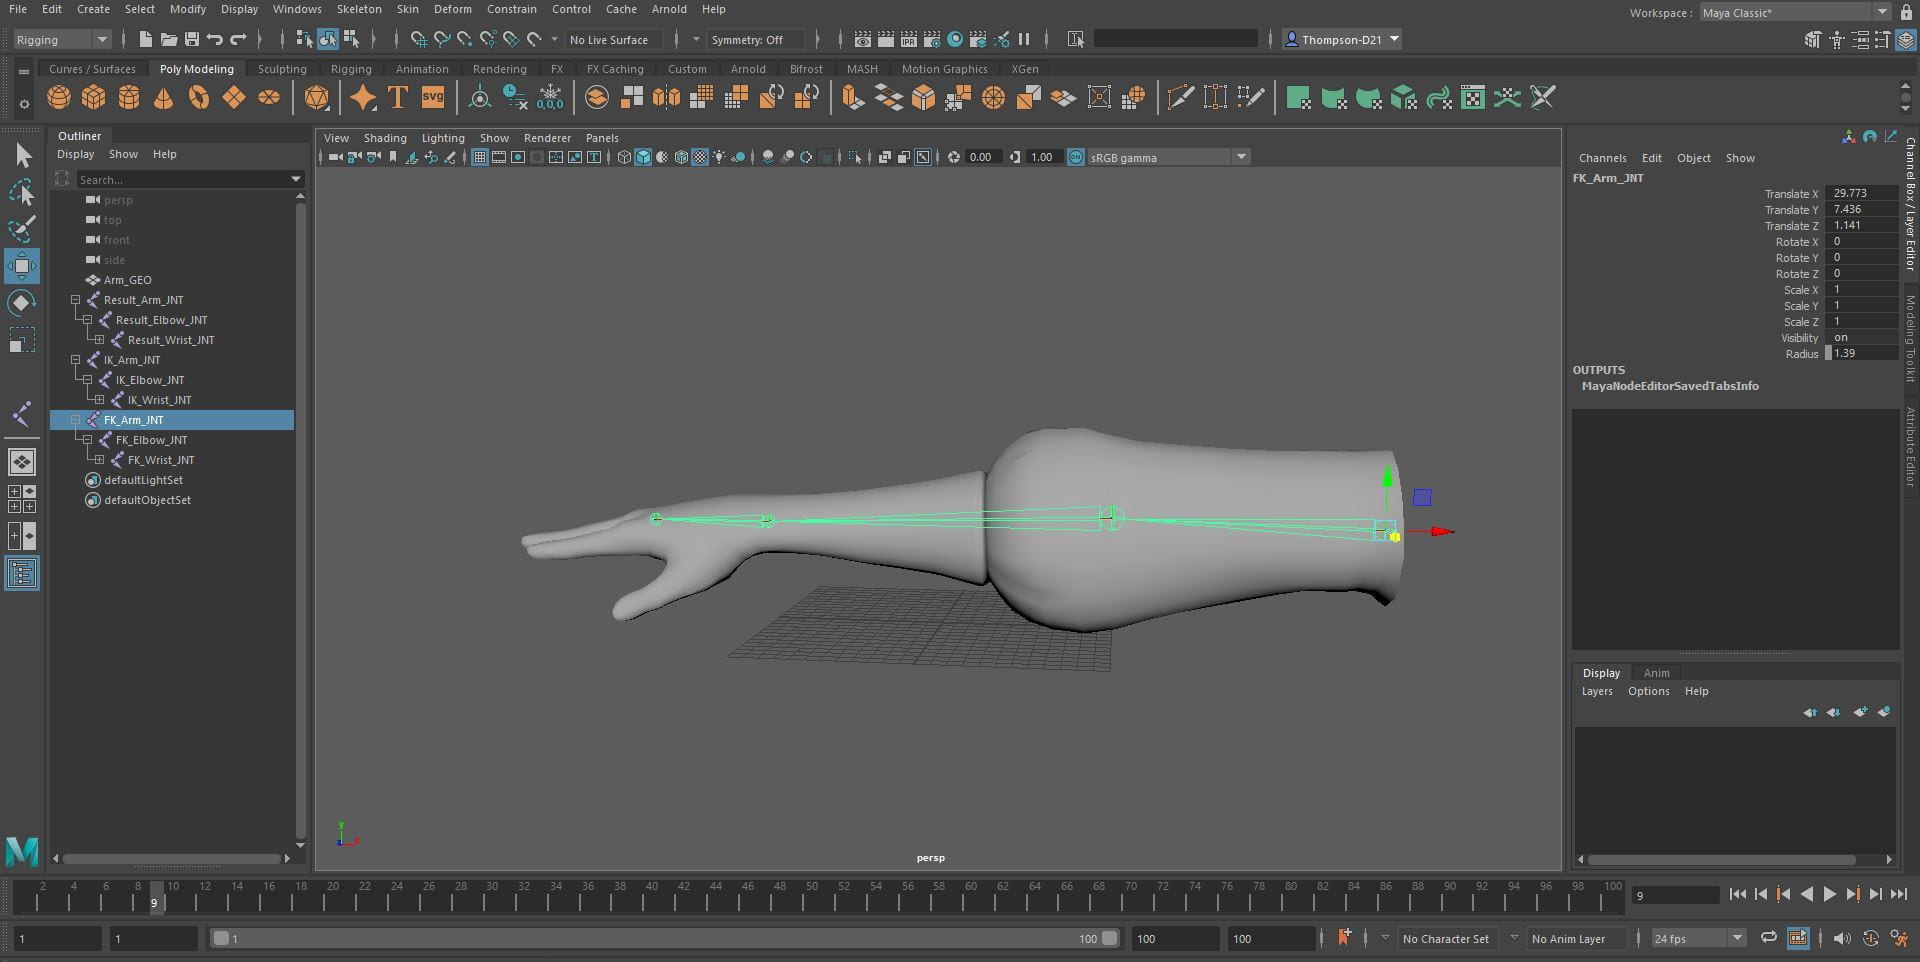
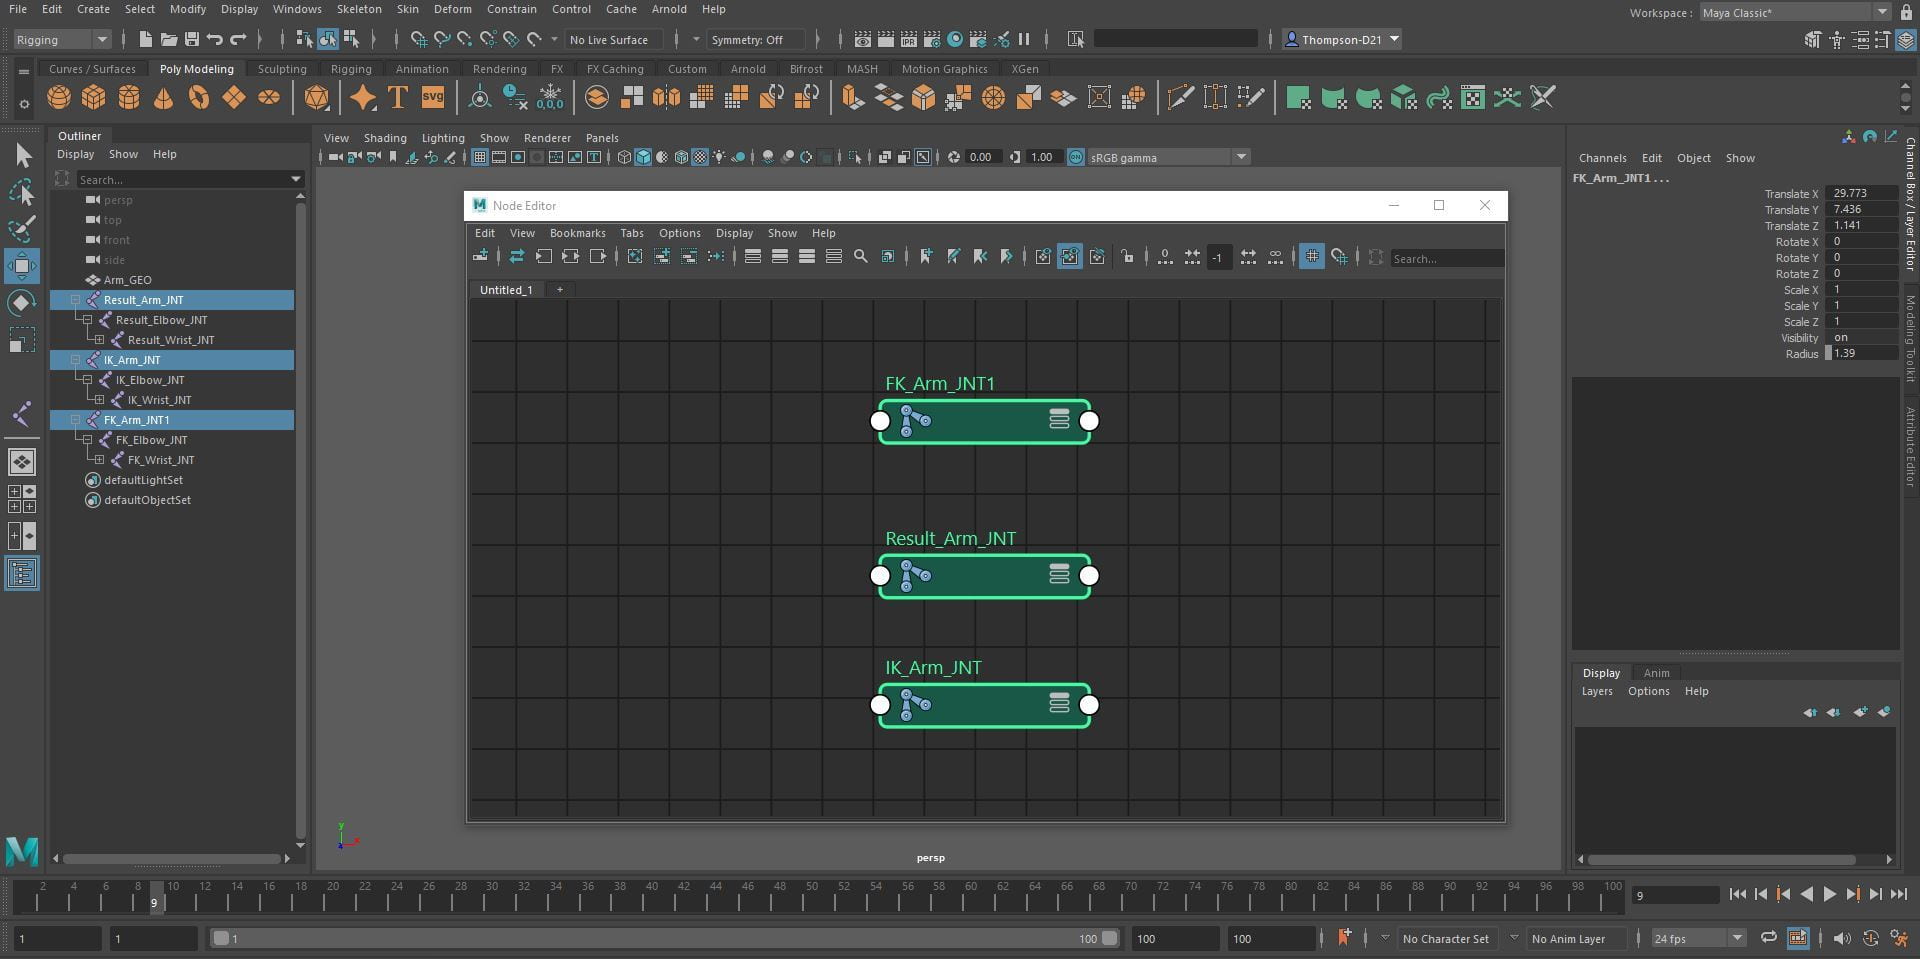
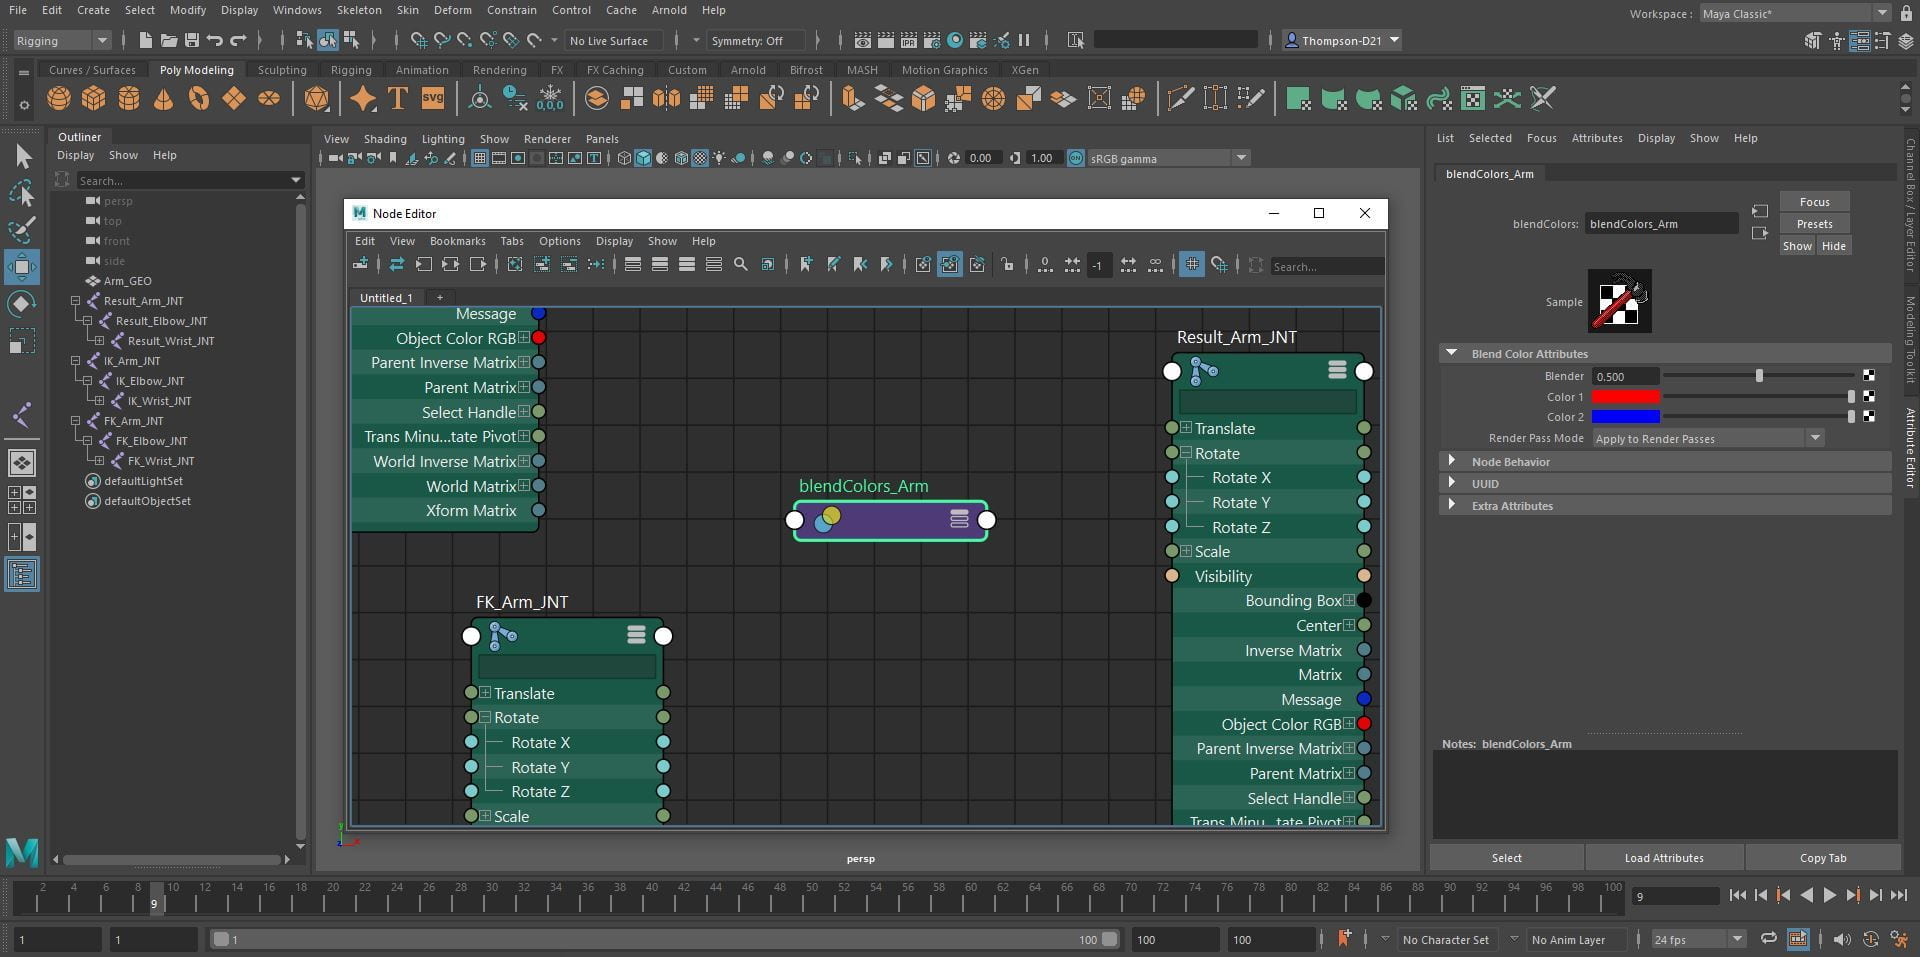
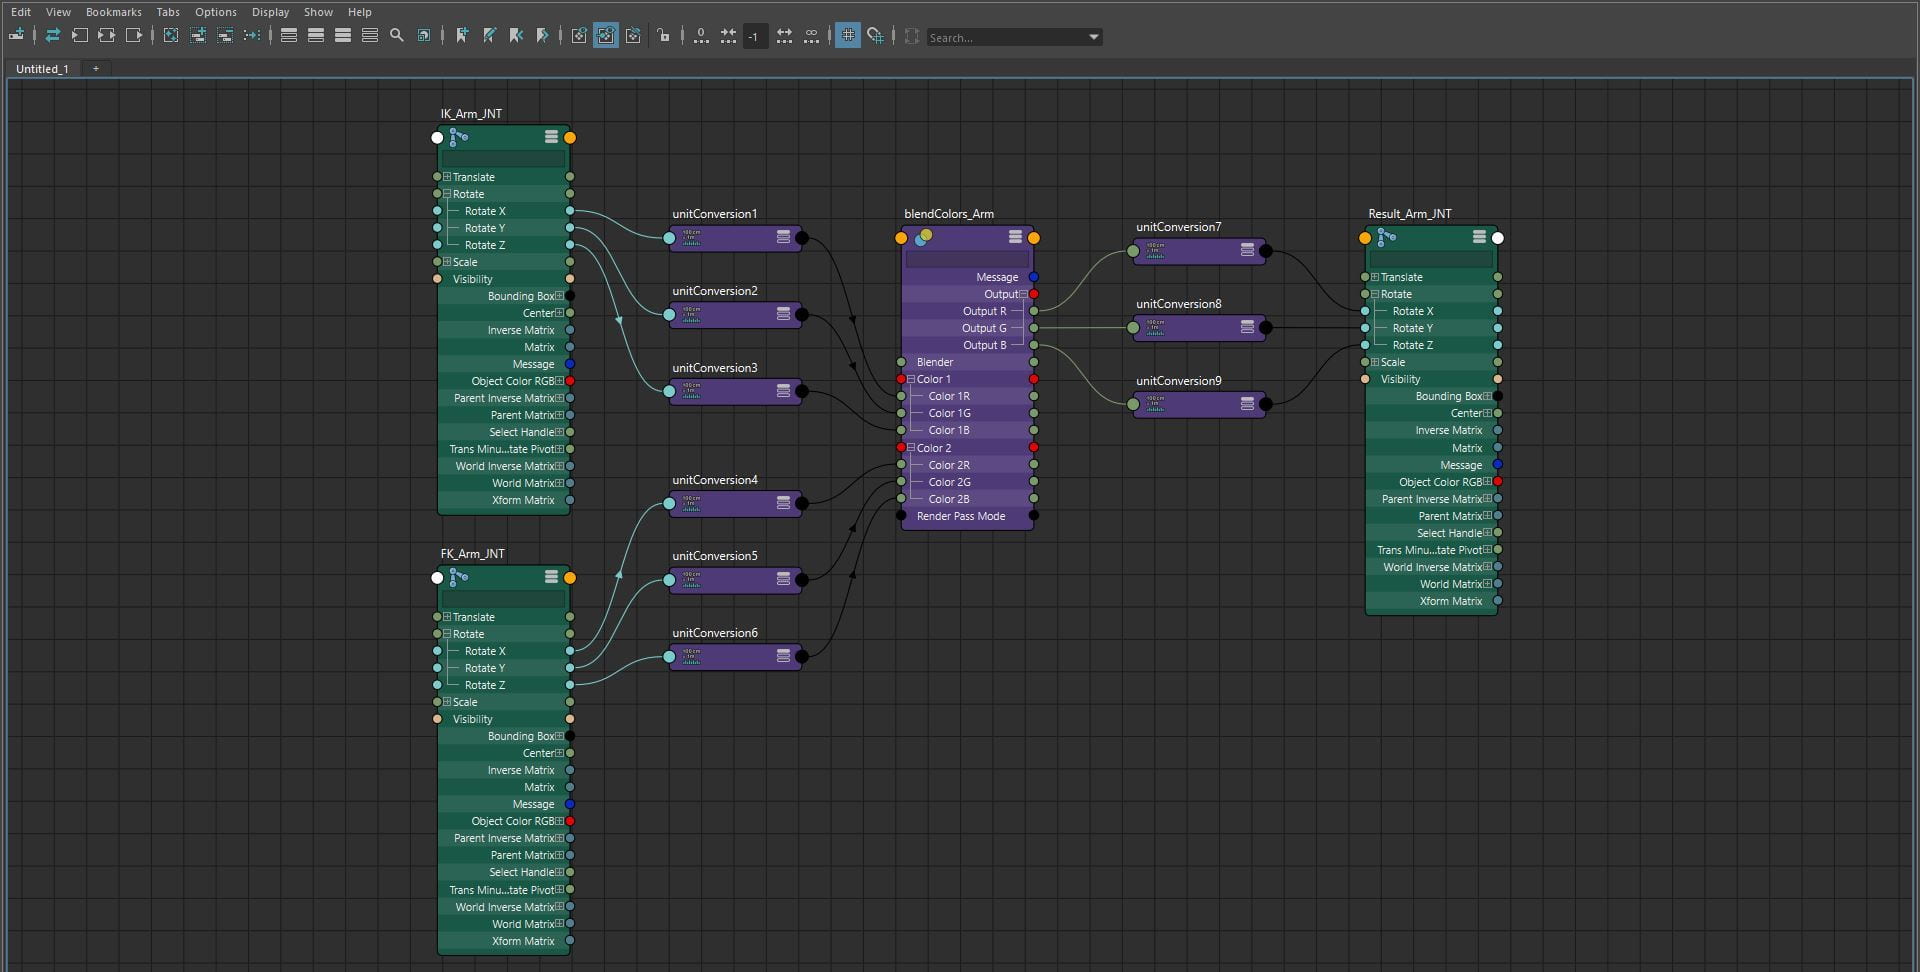
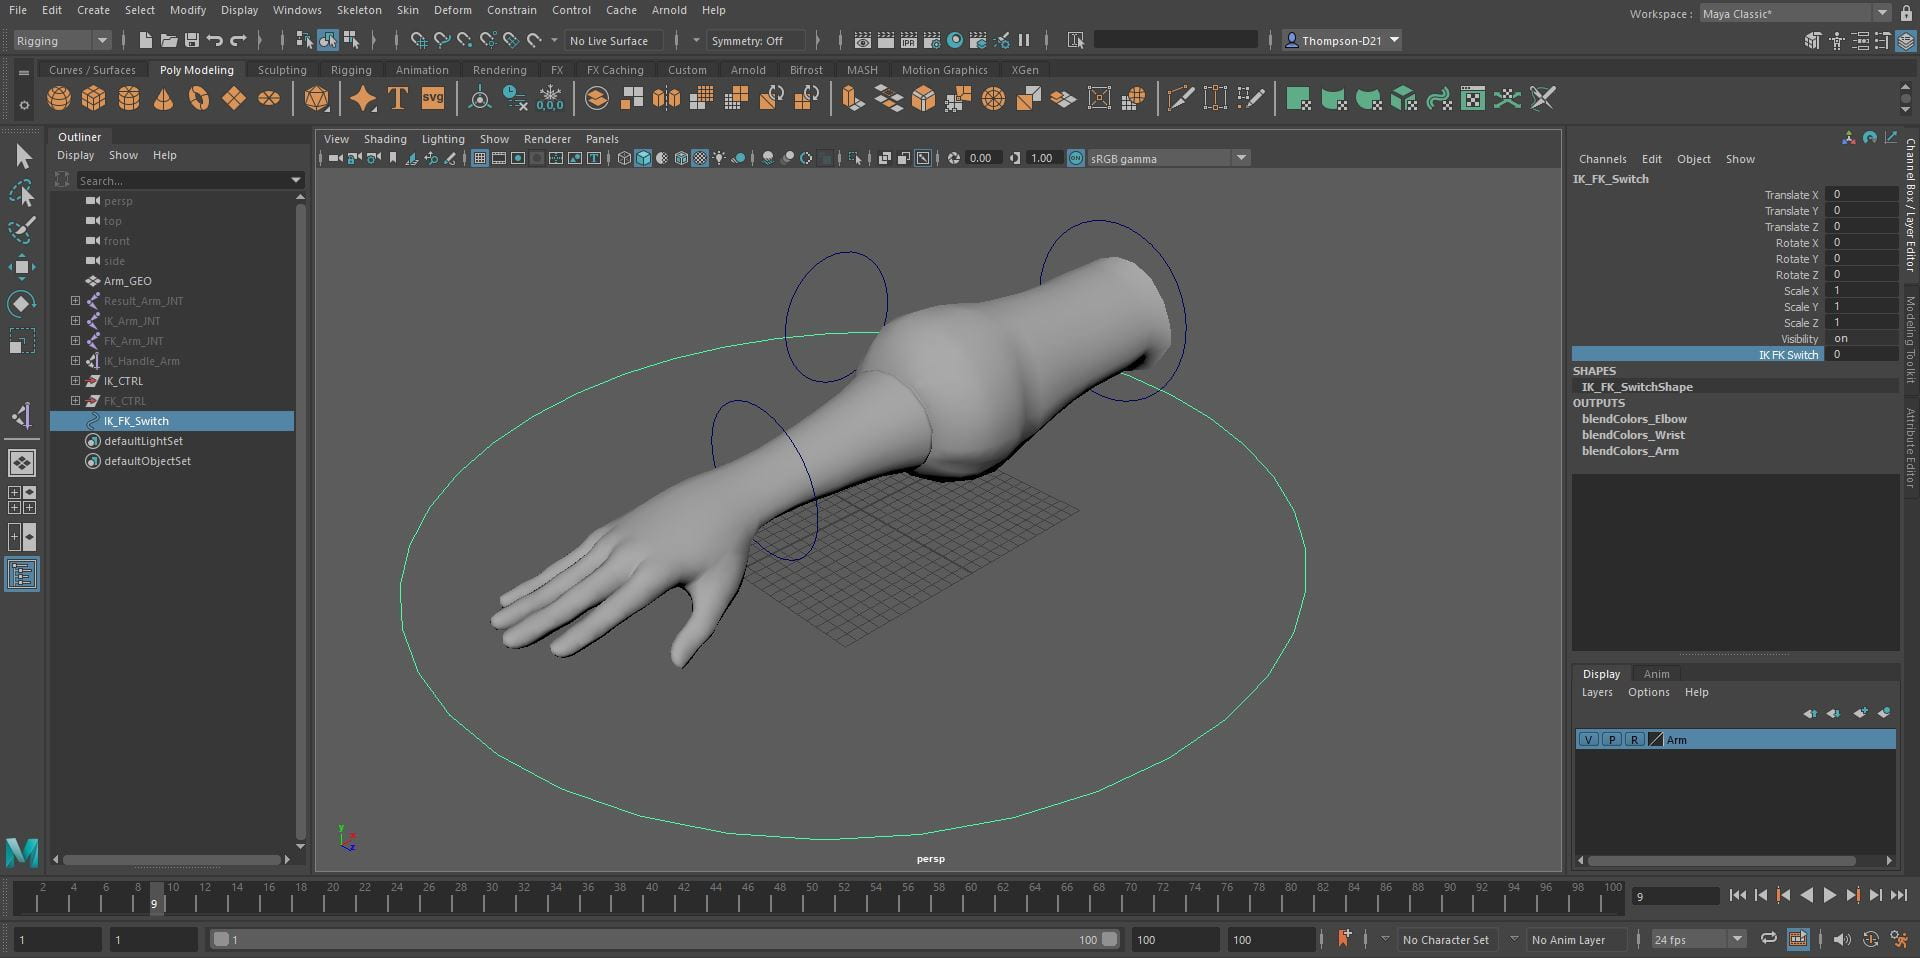
The fifth video was broken up into two parts. Place the joints at the top of the arm, elbow, and wrist. Duplicate the joint chain twice and rename it to IK and FK. Open the node editor and select three arm joints and click the button with the plus in the node editor. Click the three bars at the end of a node twice to open the menu, click the plus sign beside the rotate option on all the nodes. Click tab, this brings up a search bar in the node editor, search for blend colours. The IK goes into colour 1 and the FK goes into colour 2. Plug rotate X into colour 1R, rotate Y into colour 1G and rotate Z into Colour 1B. Do the same for the FK node. Plug the Output R into the Result Arm Rotate X, Output G into Rotate Y and Output B into Rotate Z. Click the minus button to clear the nodes without deleting them and do the same process for the elbow and wrist.


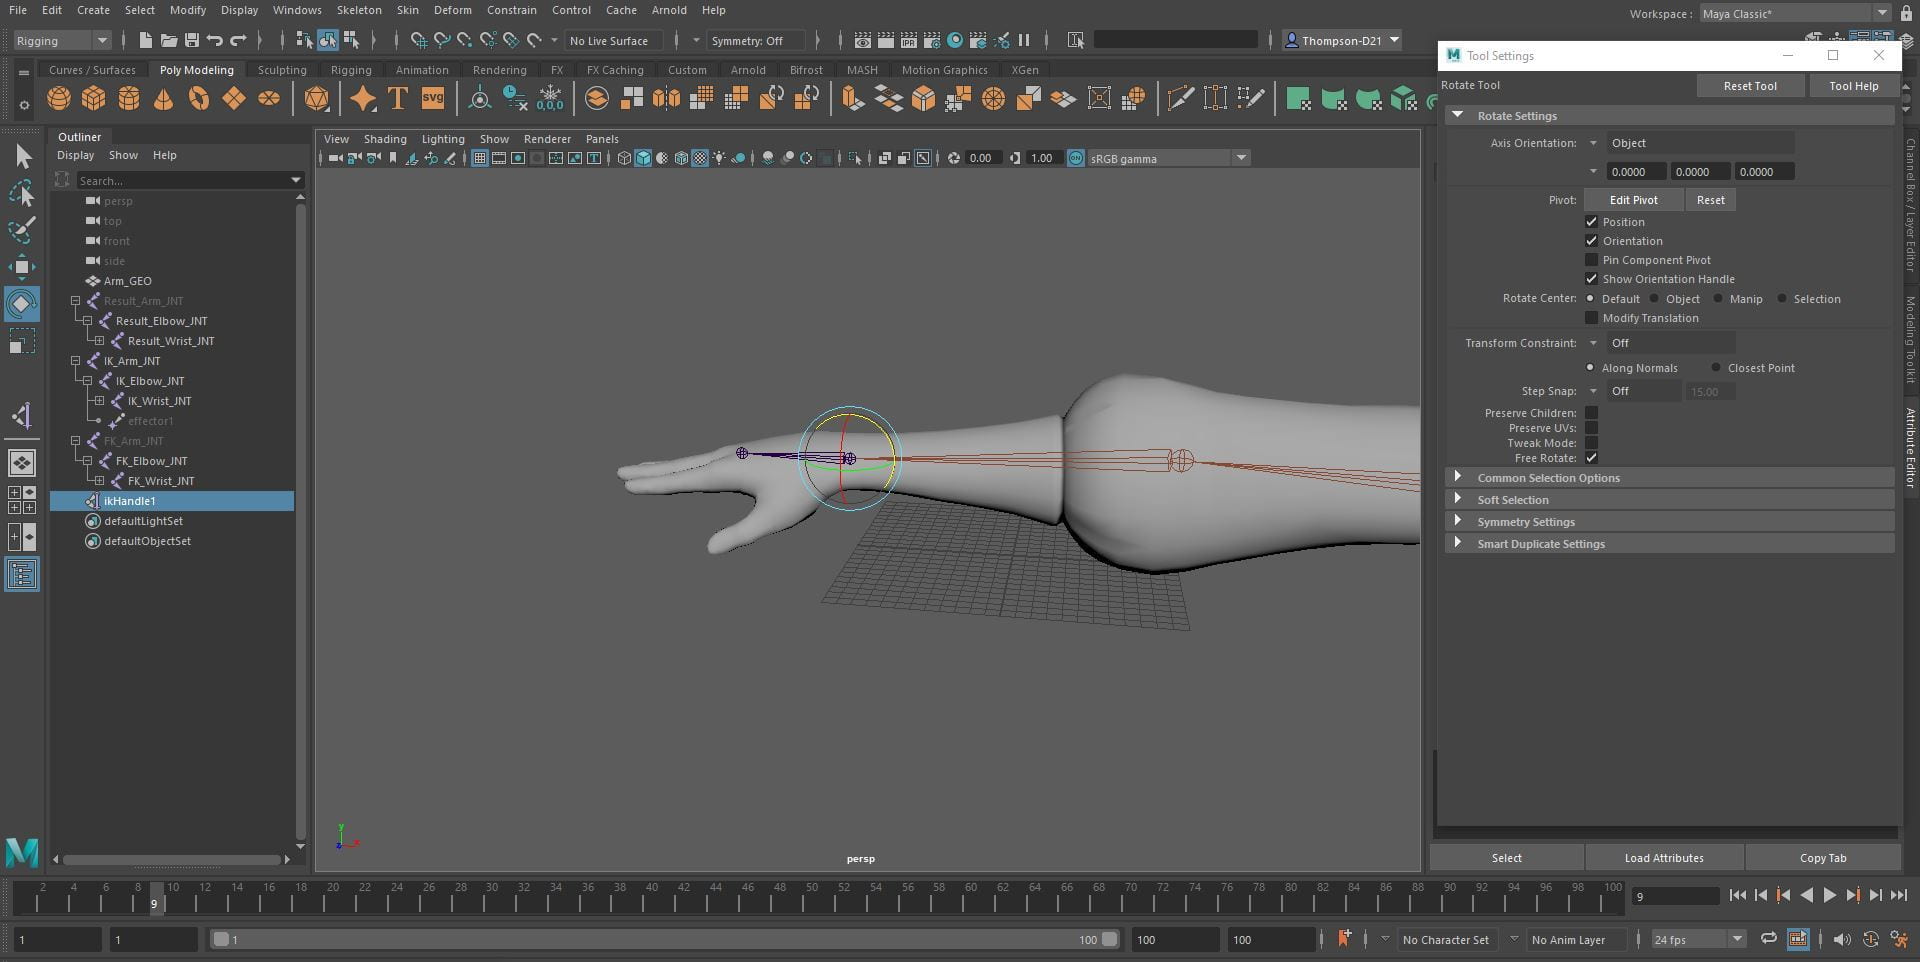
The second part of the video explained how to make a switch for the IK and FK rigs. To make the IK rig, hide the result arm joint and the FK arm joint in the outliner, click the skeleton menu, click create IK handle. Click the first arm joint then the wrist and add a NURBS circle, freeze the transformations and delete the history. Do the same for the wrist and the elbow. Select the arm circle then the arm joint and parent in the constraints menu. For the wrist and elbow click the IK handle then the control circle, parent in the constraints menu. Name the control circles and group them in the outliner.
To make the FK rig, hide the result arm joint and the IK arm joint and IK handle in the outliner. Create NURBS circles for the arm, wrist and elbow joints. Select the arm control then the arm joint and parent them using the constraints menu. Do the same for the wrist and elbow joints. In the outliner parent the wrist under the elbow, then the elbow under the arm control.

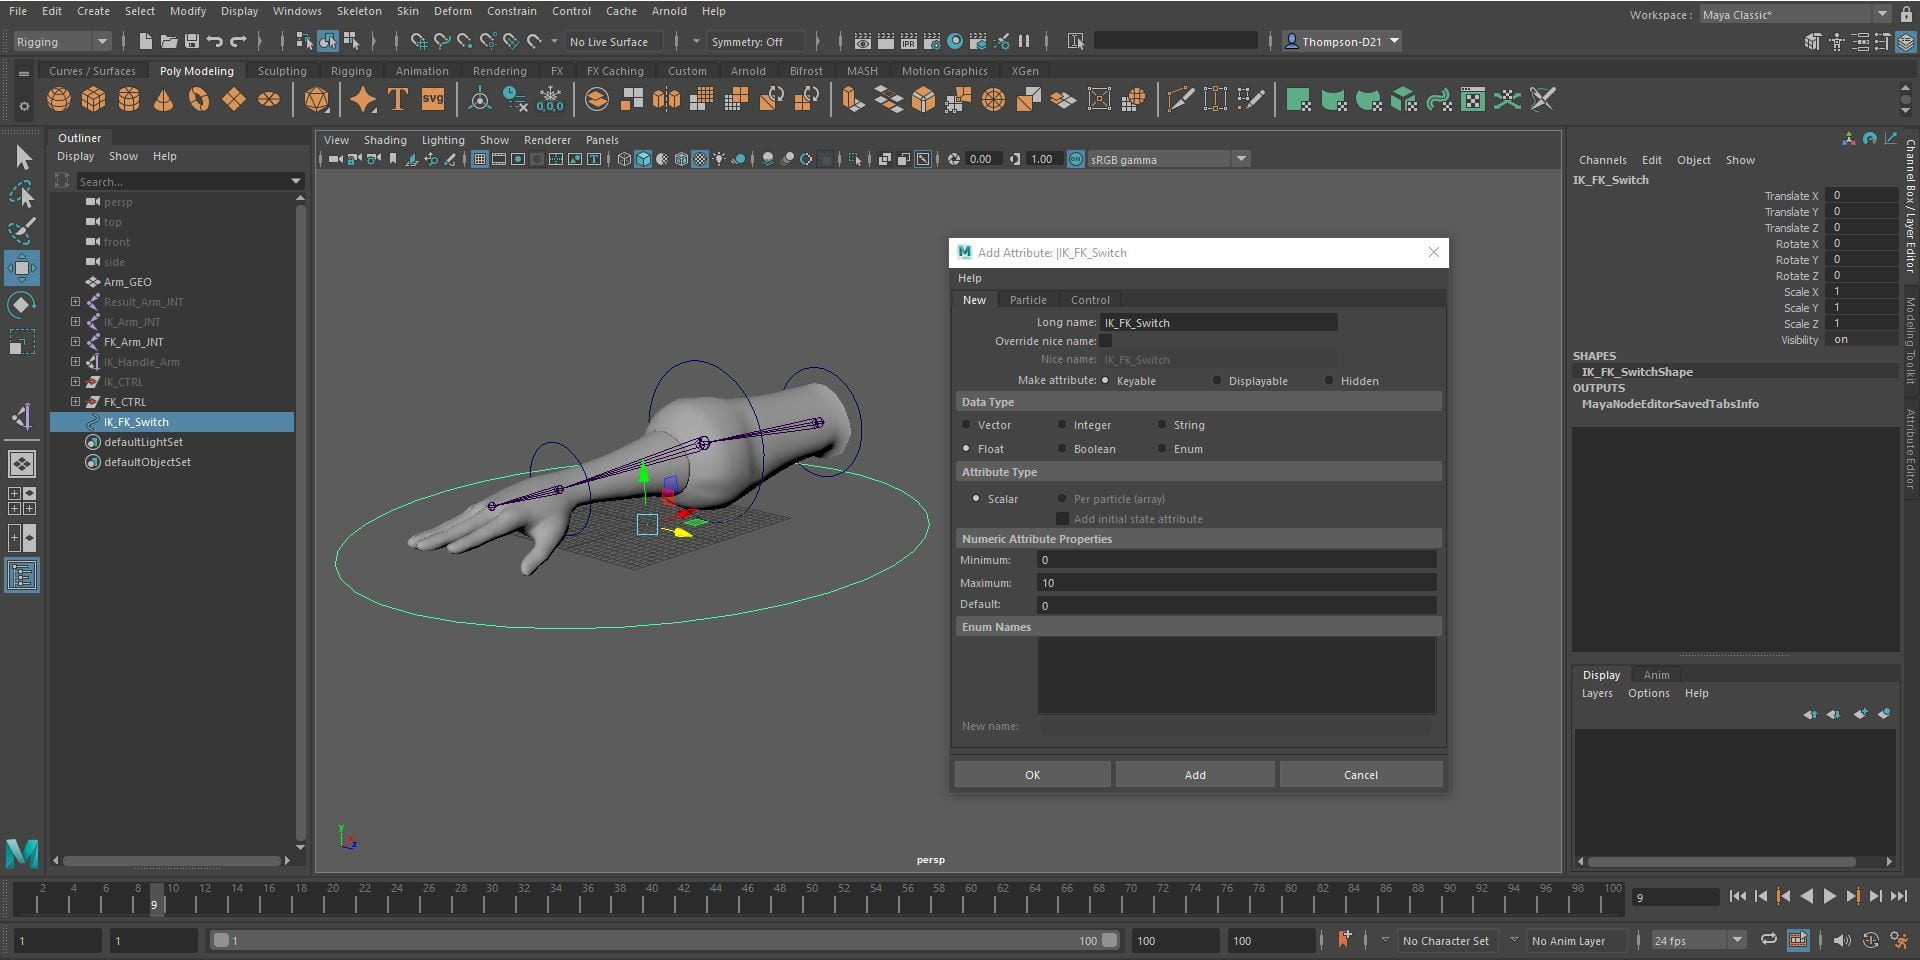
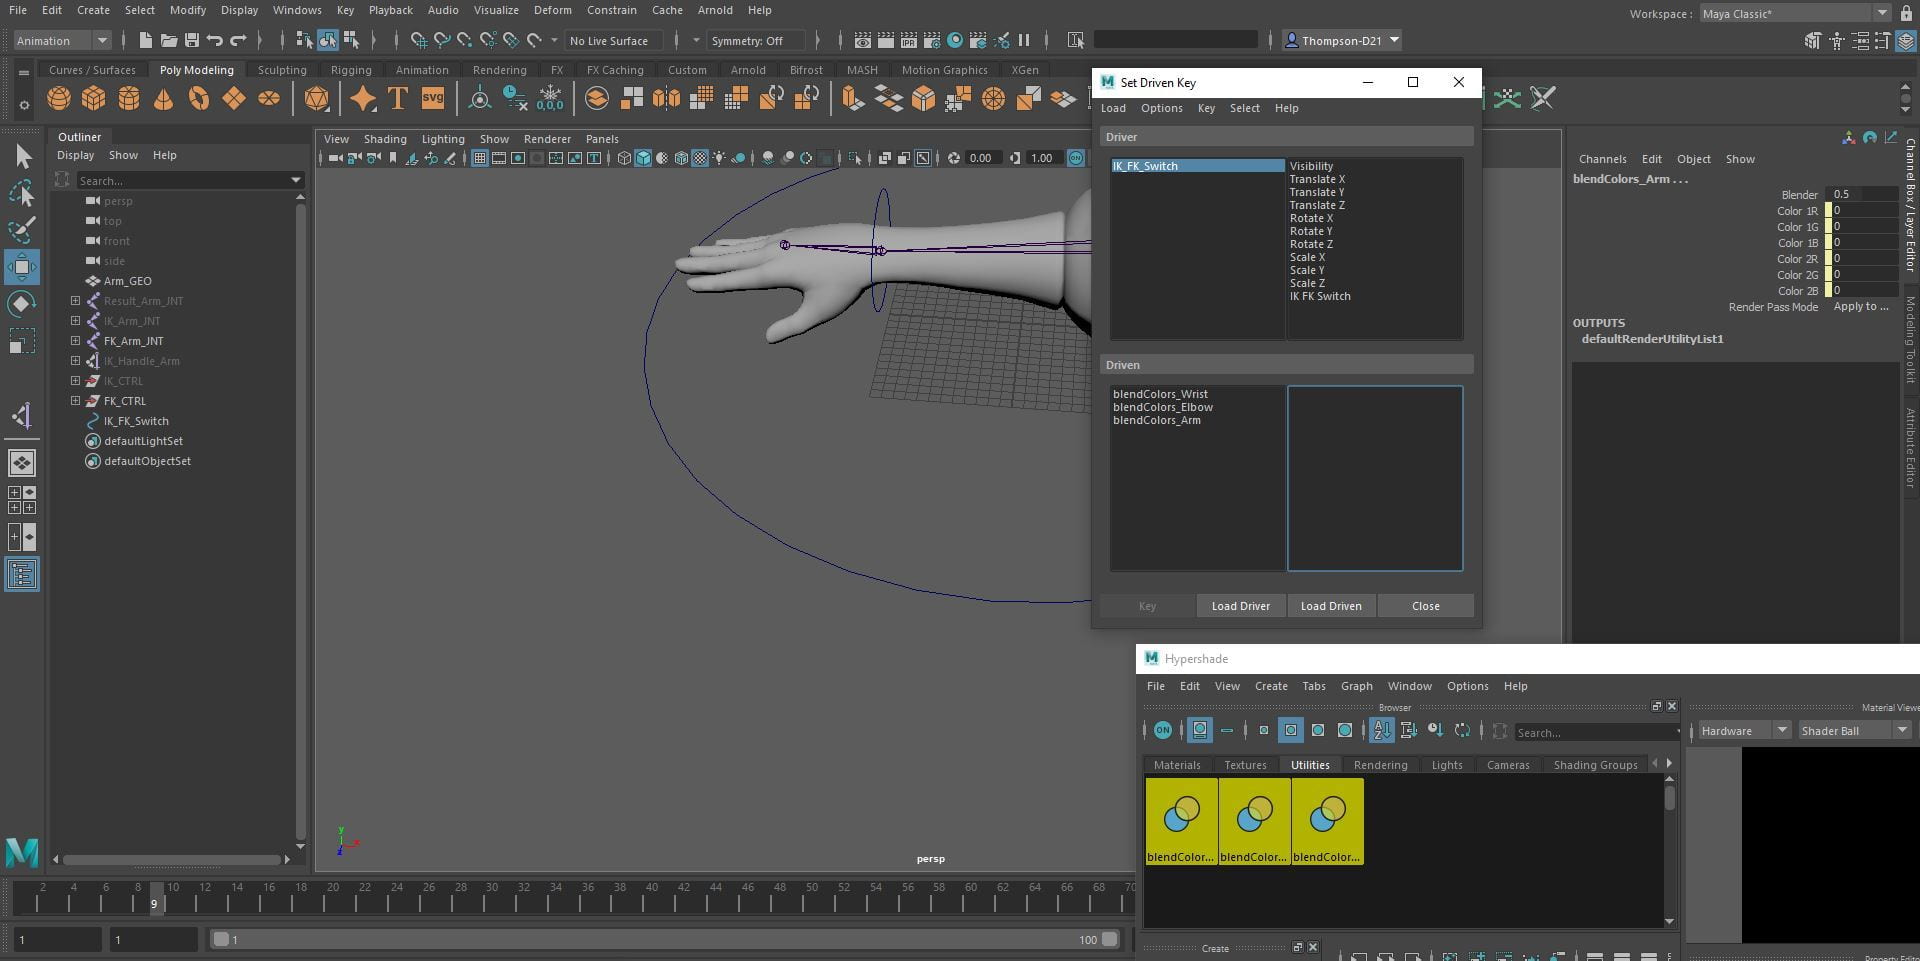
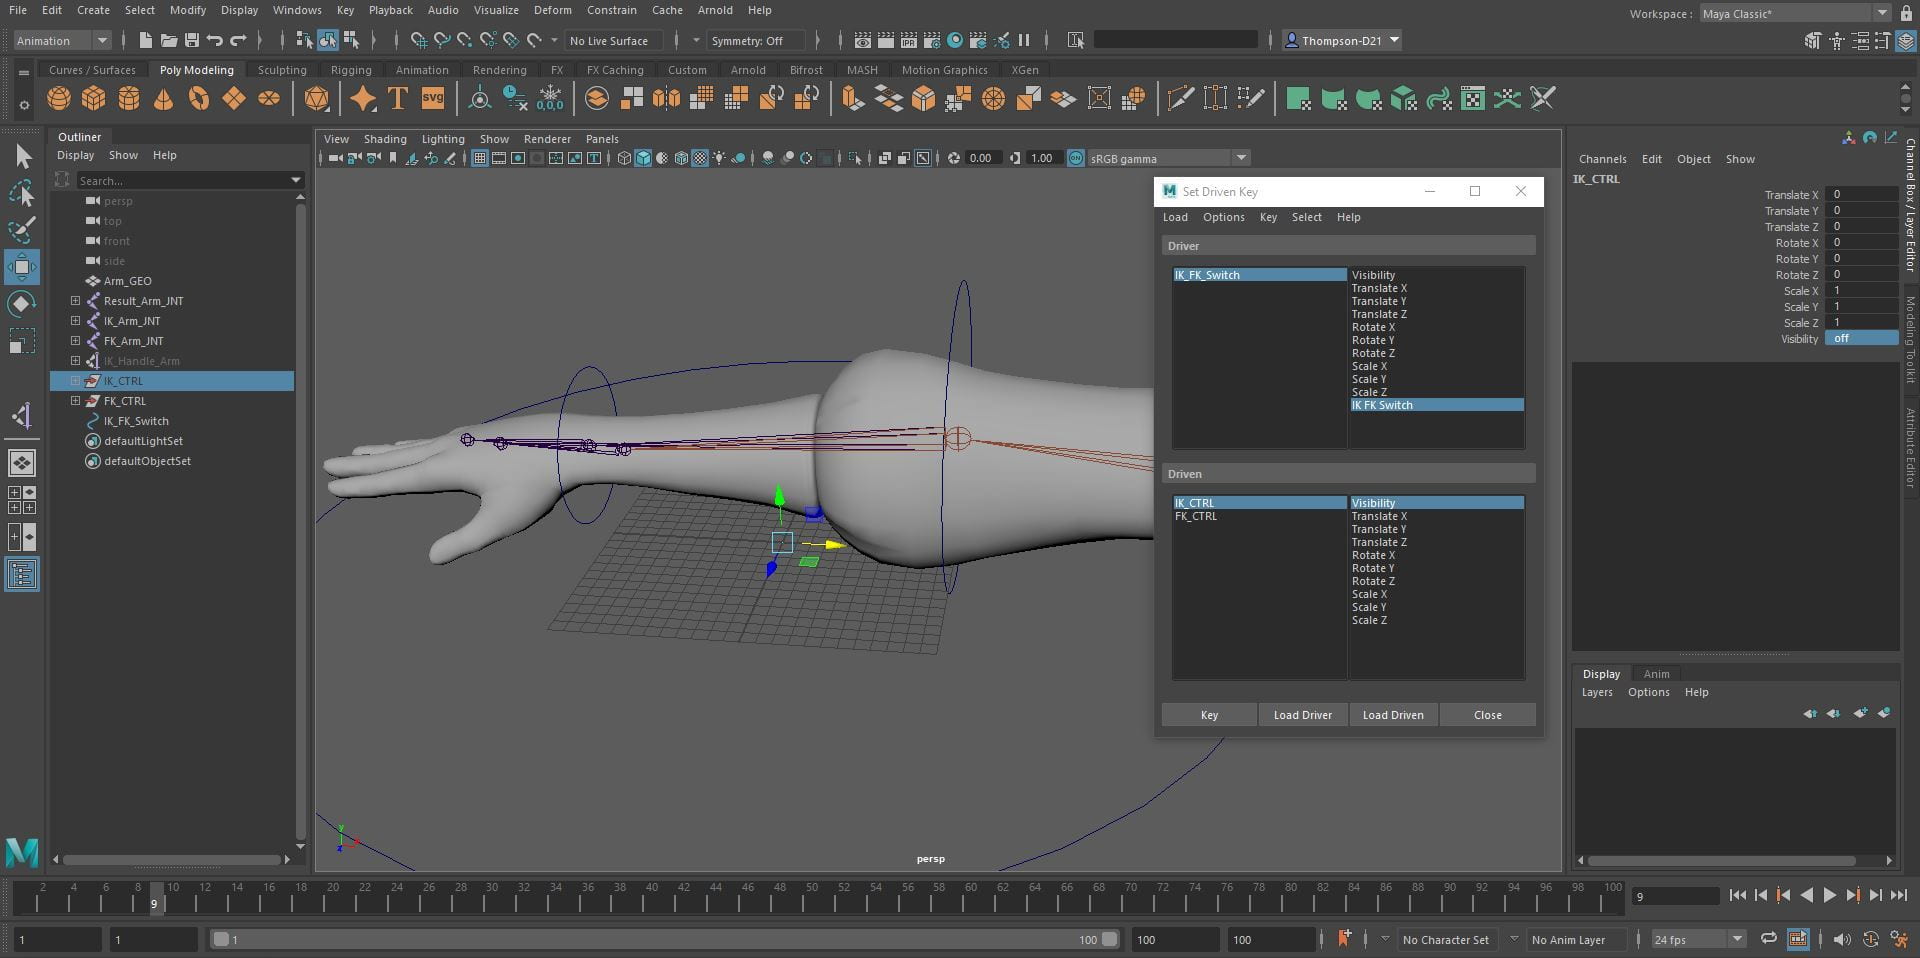
To make the switch add a NURBS circle to the bottom of the whole arm, select the circle. In the channel box click edit, add attribute and name it IK FK Switch and click add. Open the hypershade and select the utilities menu. Change the menu to animation, click key, set driven key. Select the IK FK Switch control, click load driver, select the three blendColours in the hypershade, click load driven. Change the IK FK Switch in the channel box to 0, select the IK FK Switch in the driver menu and select the three options in the driven menu, click the blender option on the right. Change the blender option to 1 in the channel box, click key. Change the IK FK Switch in the channel box to 10, select the three options in the driven menu, click the blender option on the right. Change the blender option to 0 in the channel box, click key. This creates the switch.

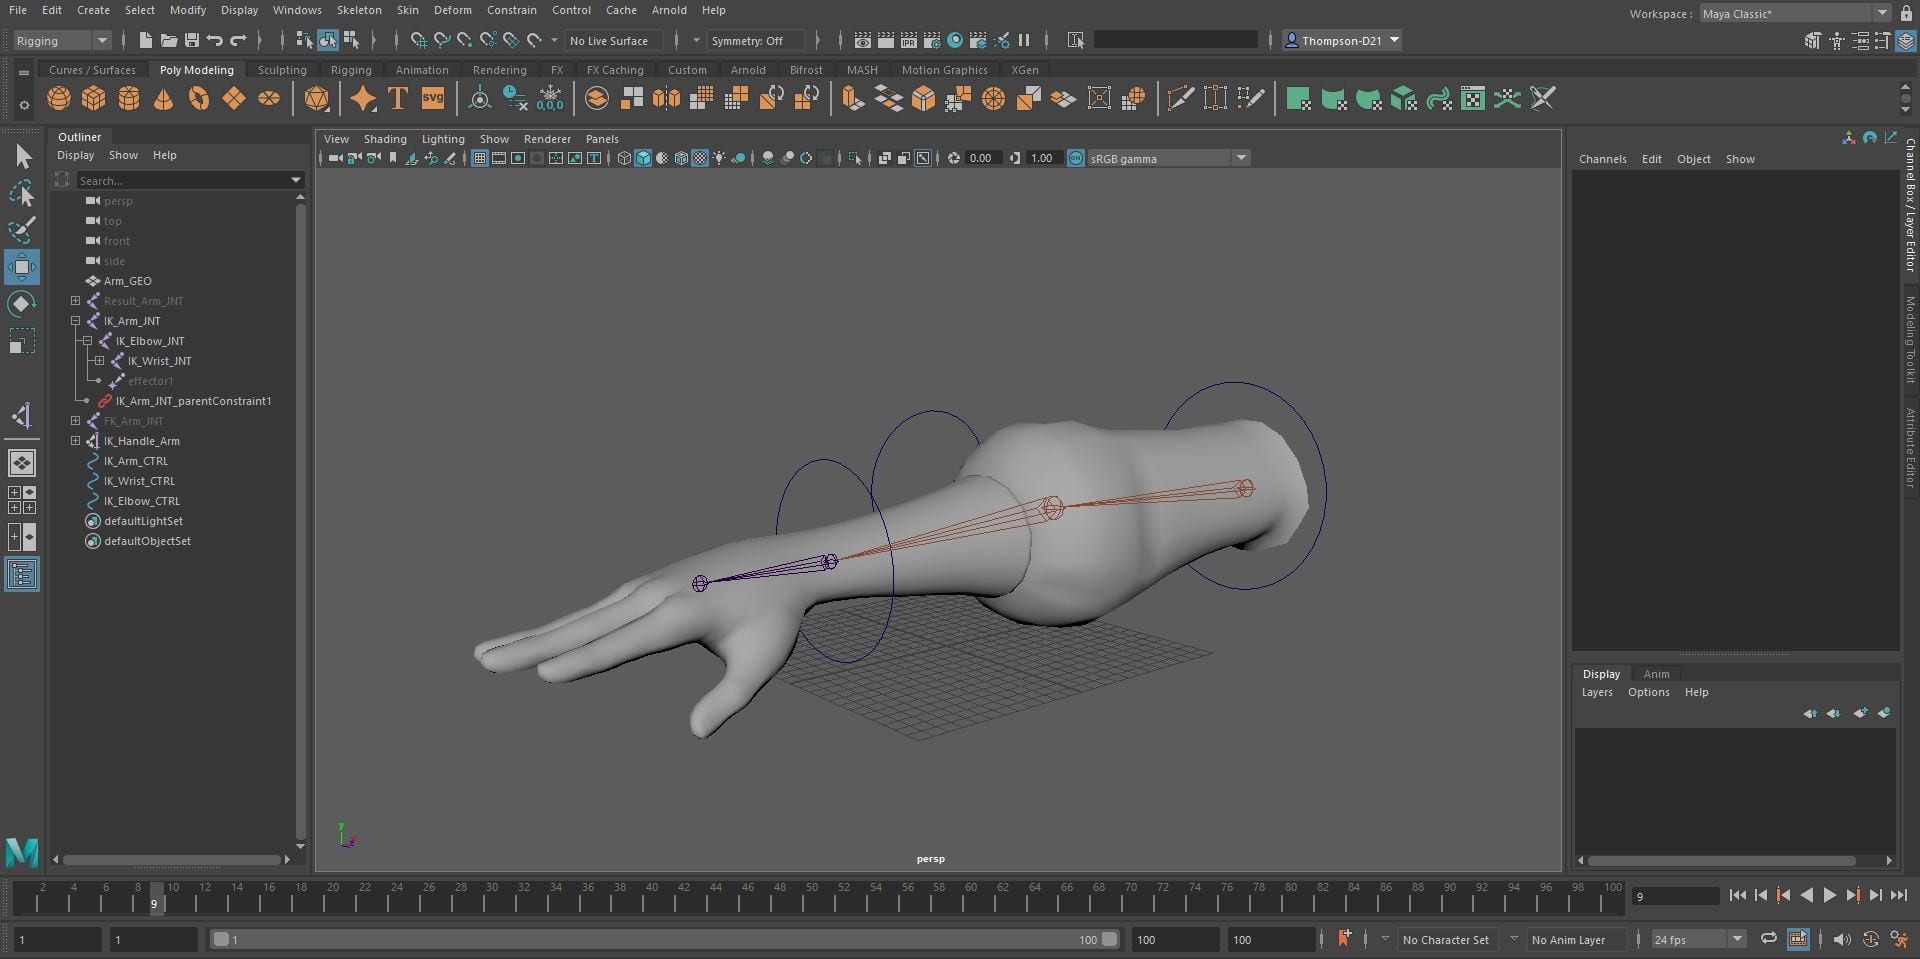
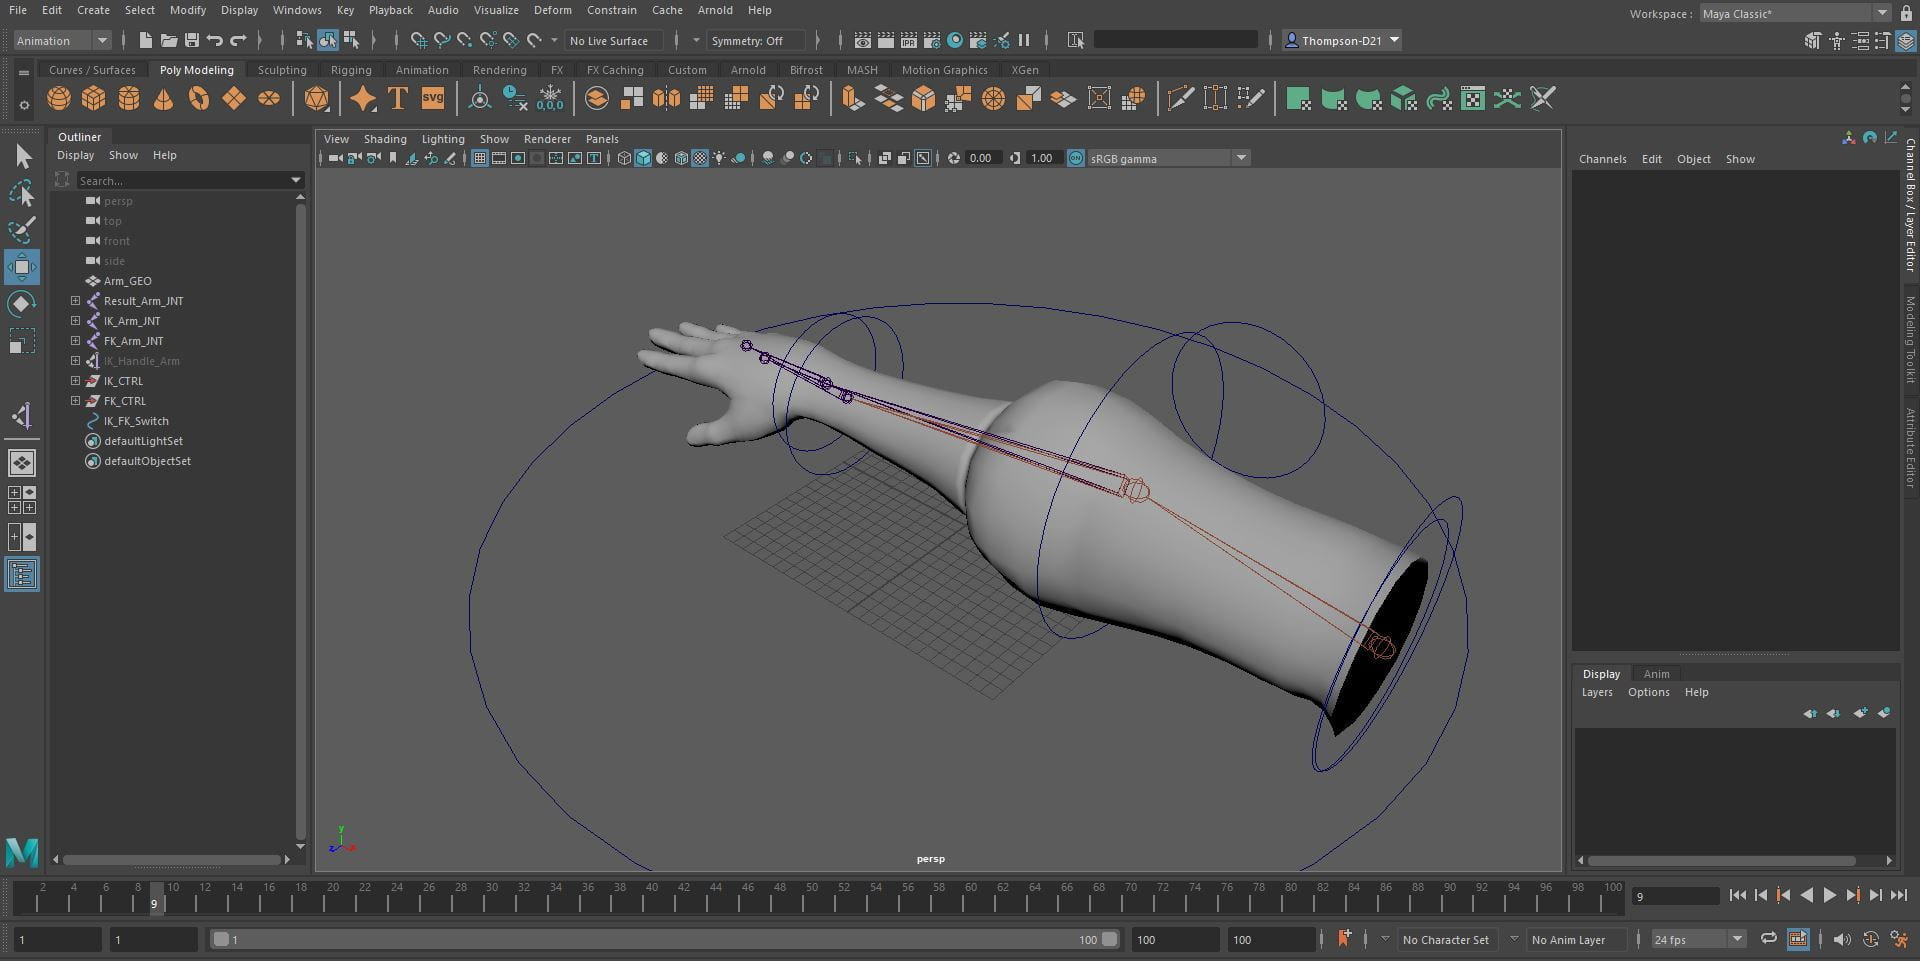
I somehow have messed up the joints in the arm as they do not line up, it still works, will try to be more careful next time.
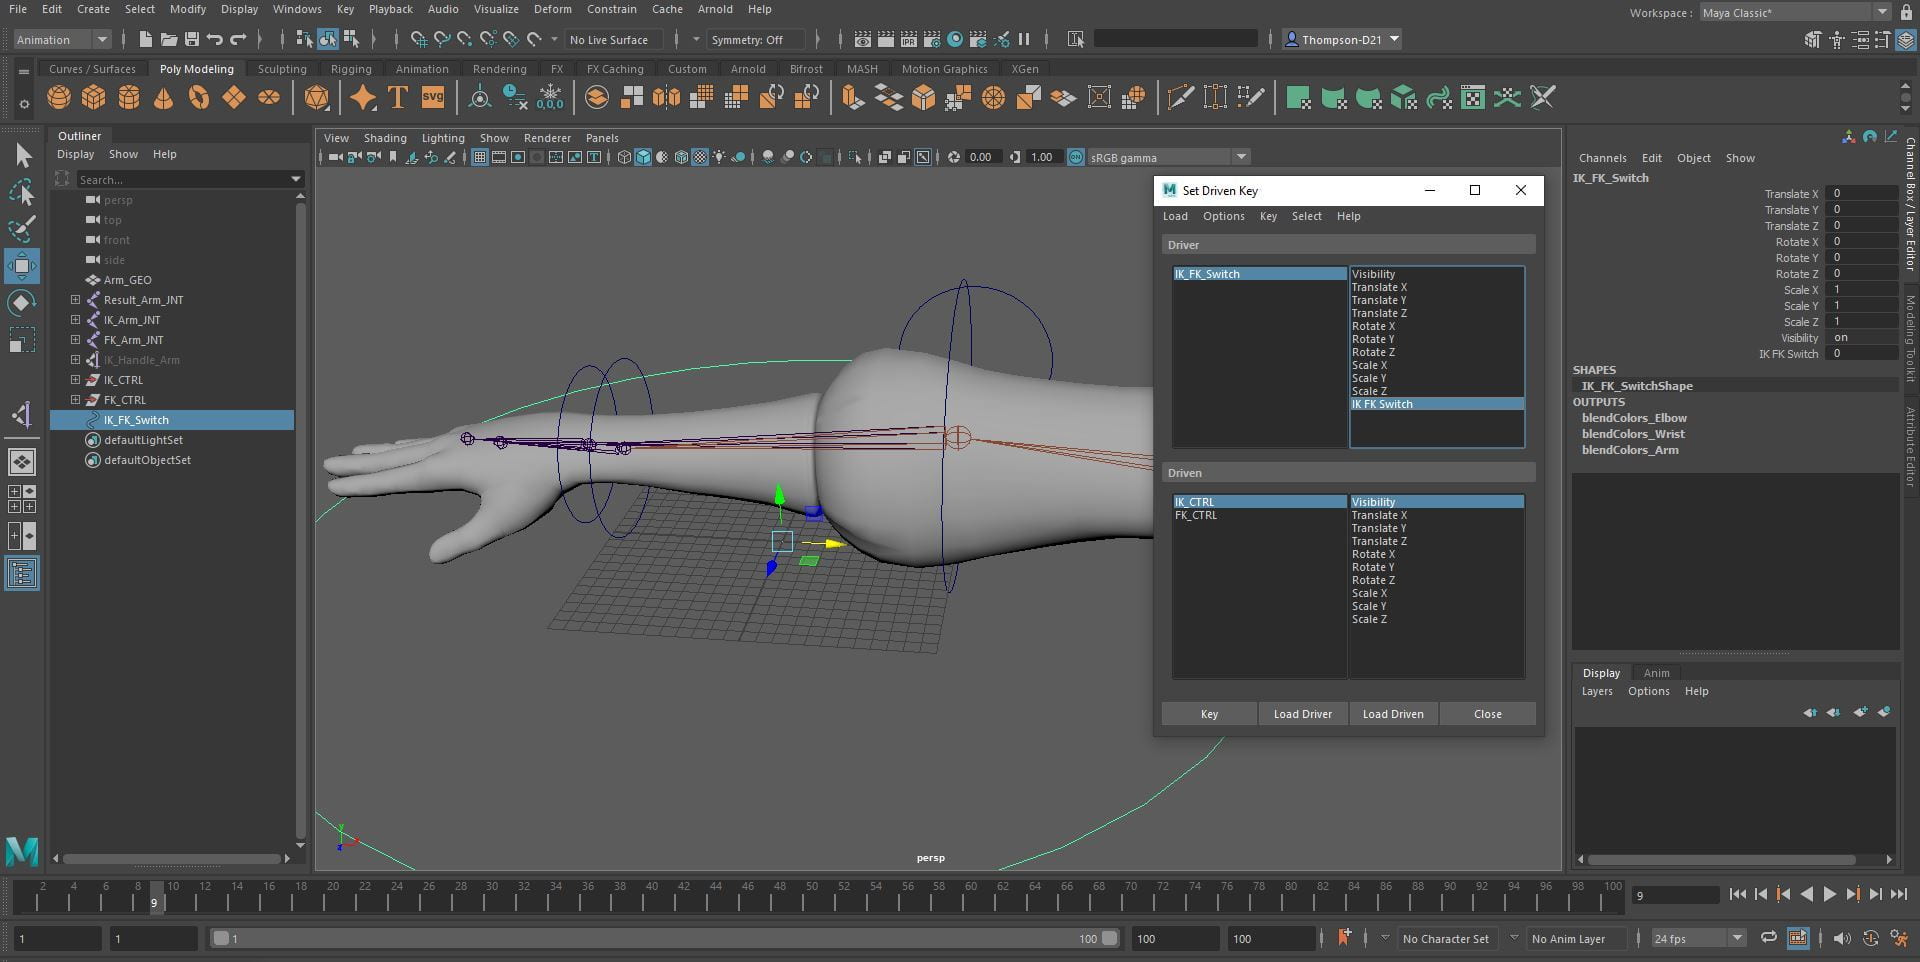
Load IK FK Switch control into the driver and load both the IK control and the FK control groups into the driven. For the IK key change the IK FK Switch in the channel box to 0 select the IK FK Switch in the driver, select the IK CTRL and visibility in the driven, change the IK FK Switch in the channel box to 0, click key. Change the IK FK Switch in the channel box to 10, select the IK FK Switch in the driver, select the IK CTRL and visibility in the driven, change the visibility in the channel box to 0, click key. For the FK key change the IK FK Switch in the channel box to 0, select the IK FK Switch in the driver, select the FK CTRL and visibility in the driven, change the visibility in the channel box to 0, click key. Change the IK FK Switch in the channel box to 10, select the IK FK Switch in the driver, select the FK CTRL and visibility in the driven, change the IK FK Switch in the channel box to 10, click key. To bind the mesh to the joints, change the menu to rigging, click the result arm joint then the arm model, click the skin menu and click bind skin. Set the mesh to a reference layer and hide the joints.

Overall, these exercises were very helpful however I still get a little confused as there was a lot to take in. I think I did well and will continue to practice to get a better understanding.