
Group Project

Concepting
At the beginning of this year, we were tasked with choosing a scene to try and create within unreal. The options were as follows.
1- Haunted Mansion
2- Dungeon
3- Tavern
4- Blacksmith
When presented with these options, our group decided to tackle a fairy world. As we thought the idea sounded the most interesting. We all contributed in the decision making/concepting process. Here’s some of the concept art we created.
Thomas Gilpin


Amber OHara


Jamie Stewart

Aobheann Conway


From these concepts we gathered that all of our initial ideas were pretty similar. This made the next few steps such as style choice, overall model and scene decisions. Much much easier, as we were all on the same page. Our group settled for a large tree, hollowed from the inside. Within the tree was a fairy civilization which spiralled upward, the civilization is magical, but has a human and grounded environment.
Inspirations were often sited to:
Little Nightmares –

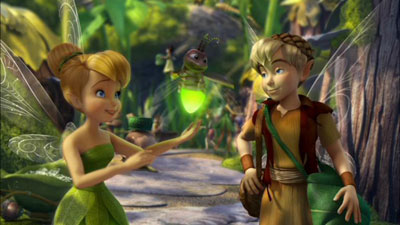
Tinker Bell and the great fairy rescue –
It Takes Two –
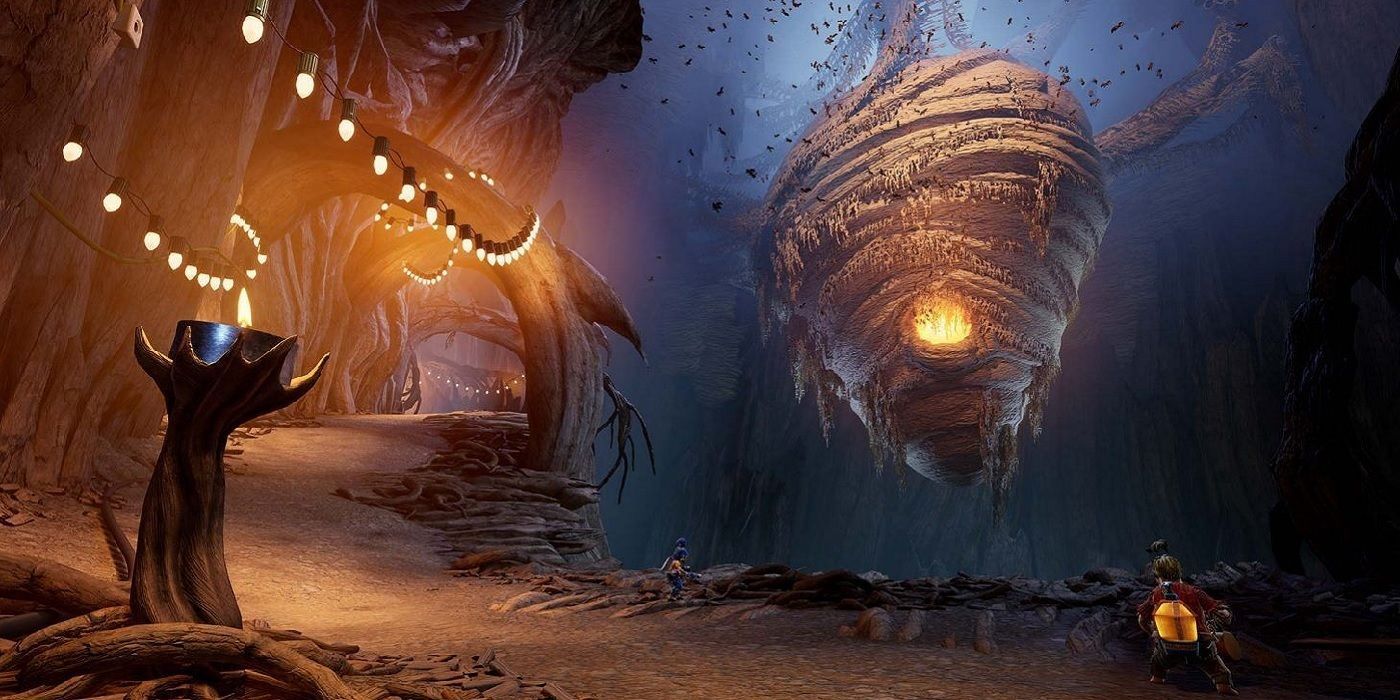
These references were a great starting point, as it gave us a clear understanding of the scale and the environment we would be creating.
Our group then assigned asset responsibilities. As follows:
Revised prop list:
Tree: Thomas Gilpin
(modular or sculpt?)
Trunk branches
leaf clusters
roots
Pond: Amber O’Hara
rocks
reeds
water
pond
lilypads
lotus
Fairy civilisation: Aoibheann Conway
mushroomhouses
garden bench
mini mushrooms
firefly jars
fencing/gate
stepping stones bridge(?)
Foliage: Lucy Greenhill
leaves
creeping thyme
moss
grass
flowers
Signs of life: Me
bottlecaps
mini boat for pond (optional)
toothpick weapons
Background: Jamie Stewart
trees
creepy eyes
Reflection: I unfortunately was not able to attend the lesson, and so was left a bit confused as to what my role consisted of at this point. I even made a Jar Model which was meant more for Fairy Civilization – Aoibheann Conway. Before realizing that my role consisted of toothpicks and toy boats. So I unfortunately wasn’t off to a great start in this regard. However I was happy with my role, and excited to get started.
Presentations:
In these presentations we were tasked with creating some concept art, highlighting what our mindset was, and what we planned to make for the project.
I was very set on focusing on smaller assets at this point, such as bottle caps, small scraps and general fun human trinkets. Such as Pencils etc. However after finishing the pencil, their grew speculation between group members as to whether or not other group members were continuing to progress with their assets. And as time grew on, each of the remaining members began to create various assets from various asset categories. Thomas – ‘Tree’ creating Fence and mirror – Fairy Civilization. Me – ‘Signs of life’ creating Mudhouses and Dirt Patches. Eventually the original asset distribution became pretty much unused. As without the original group members we now relied more on communication, and general consensus as to what was needed most when deciding what asset to create next.
Making The Assets:
How I made the assets from start to finish, also covering why I made them and what benefit each brought to the overall final UE 4 scene creation.
Jar

Maya:
To create the jar within Maya I utilised a Cylinder shape and used multicuts to shape it.
The main issue with creating the jar was creating and UVing the Metal handles. As they had to be symmetrical and UVing thin Curves is something I’m experienced in. However I am extremely happy with how this turned out.


Substance:
I had to follow a tutorial on making glass in substance for the texture process:
The rest was standard, and learning from this video was incredibly helpful an useful.
Unreal
When importing into unreal I had to continue following the steps of the guide. As well as texturing the rest of the model. Overall I am very happy with how this model turned out.
Explaining to group:
I decided to create a quick video explaining to my group members how to create the glass effect, to save them hopefully some time and make it easier to import:
https://ulster-my.sharepoint.com/:v:/g/personal/henderson-w2_ulster_ac_uk/EQiNrdL95jNEuyIJB2yadBsB9V1TNCcMlaSrcuXL8Qi1xw?e=7Q2FEL
Utilisation in UE:
My jars were utilised a lot in my scene, mostly to light the inside of the tree but also to create some visual interest points. I’m very happy with how my jar integrated with the scene.


Poles

Maya:
When creating the poles in Maya, I wanted to consider quality of life improvements for my team members importing my assets and textures. And since this was going to be a modular asset with 4 Different variants. I wanted to make the import and texturing process as easy as possible. So I decided that all four of the variants could utilise the same UVs. Therefore meaning in UE they only need to create the materials for one of the poles, and those single materials would work with all of them. Creating less confusion and wasting less time. I did this by creating variations that i could get away with without changing geometry. Shorter base pole, slanted string and lower top pole etc..
Utilisation in UE:
This quality of life change helped me a lot, as it allowed me to easily texture my models while also placing many variations of them within my scene. Which was an important thing to be able to do for this asset.
Explaining to group:
I Again Created a video to explain how these poles worked to my group:
https://ulster-my.sharepoint.com/:v:/g/personal/henderson-w2_ulster_ac_uk/EXqSnvMFYGlNiMl3On6MrtgBLsIurJOCXqMZUgxBVSzyZg?e=hrWsYN
Pencils

Maya:
A simple pencil model with UVs


Substance:
Due to the nature of how I textured the pencil model, I was able to easily change the colour of the pencil with each new texture.

Utilisation in UE:
The Pencils ended up being utilised a lot in my scene, mainly for apparent methods of traversal. I feel this asset allowed for more experimentive and fun creations within my scene, notably with the bridges and the pencils used to hold up jars.
Mudhouse

Maya:
Creating the Mudhouse in Maya was a challenge, due to it being such an organic shape. Its hard to create smooth edges, however I feel like I did a good enough job. UVing the model was also an insane challenge for me, but I believe the UVs look really great. I spent a long time on them and I’m proud of how I managed them.
I ran into an issue while exporting, where I forgot to UV the window. So I ended up creating a separate folder to export the UVs of the window separately.


Substance:
Making the rocky texture in Maya was fun, I had to utilise a lot of black masks with generators and paints. In order to get the exact rocky look that I wanted. I ended up making two different textures for the Mudhouse, both of which I’m proud of.
Explaining to group:
Video Explaining the complexities of the two Mudhouse models and textures: https://ulster-my.sharepoint.com/:v:/g/personal/henderson-w2_ulster_ac_uk/EZhIbnF-mGVMjRbk8c6xU18BDKJFboQM9m1l6RVqyZ9JCw?e=PmTzaC
Utilisation in UE
I used the mudhouses on the lower levels of the fairy tree, and I feel as if they were an important asset as they established a clear difference visually between the lower and upper levels of the tree. I am very happy with how they blended and integrated with my scene.
Dirt Patch

Maya:
This was again a very organic model, and so it had some challenges. It was also quite hard to UV somewhat. The main focus when creating this model was keeping in mind where it was being utilised, along the walls of the tree. And so I had to keep a distinctly flatter edge on one side.
Substance:
I again utilised a lot of black masks and generators. As well as fills, to create the look and texture that I felt I wanted for this model.
Utilisation in UE:
This became one of my most key used assets in my scene, as the entire floor of the spiral practically relied on this asset. I’m very proud of how it integrated and blended with the scene.
Quick Mention: Various group members supplied various helpful videos into the group chat. Such as Thomas who linked a video showcasing god ray effects. And Lucy who linked a video on creating fireflies. Both incredibly useful videos.
Making the Scene
Layout
When tackling my scene I wanted to utilise reference from the white deer scene in Snow White and The Huntsman to set up the overall template for my scene. As I felt this landscape had a really nice magical feel to it, while also keeping that natural and human feel our group was attempting to capture.
Snow White and The Hunts Man (2012)
I attempted to replicate the heavenly blooming effect that the background had, also copying how they had placed ferns on the horizon landscapes for perceived depth. I also positioned the tree similarly in the composition.


I however did update the blooming effects, and the camera angle is looking up from beneath the tree in my scene more, as I wanted the tree to appear as big as possible. Overall I feel utilising this scene as a reference allowed me to accurately capture the overall landscape I had in mind. Allowing me to visualise not only the pond beneath the tree, but also the tree itself, and how it was positioned in the scene.
I also experimented with add a vined version of the tree, however I ended up preferring the non-vined tree


After the overall sculpting of the landscape was complete. It was time to apply textures from the Environment pack provided with the landscaping demo. To add slight variation to the feel of the landscapes.
I started by creating and adjusting the material. Adding every texture I wanted to use.

At first unreal wouldn’t let me paint with more than 4 textures, but after some research I learned that enabling ‘Shared Wrap’ on every texture allowed me to paint utilising a wide array of various textures. Including the ‘Forest leaves’ texture. Which ended up being used a lot to mimic complex foliage.

Foliage/Downloadable Assets:
I utilised a lot of our own foliage assets. Lucy’s Grass, Flowers, Shrubs, Ivy Leaves and Pebbles, as well as Ambers Rocks. These all combined super well, creating great results.


However. When making the scene I also utilised some other assets. To make the background trees, variance in the grass/foliage, ground foliage, and a few rock assets. All of these assets came from the environment pack provided with the landscaping demo, which was provided in a lecture, they are not mine. And I simply used them to enhance my scene, and to create further foliage variation.


Asset Positioning
An original struggle I had when first beginning to place assets was how I was going to create the spiral upward. This was when I created the dirt patch in conjuncture with Thomas’s Mushroom Steps. I also added house and foliage for variance. As well as other things.
For one I figured that a fairy might balance across a pencil to get to a crevasse.

I then came up with the idea of using Thomas’s fence model and turning it sideways. Almost as if they were using it as a platform for pencils.

From there the experimentation began to include poles, hooks, pens and fences. Creating a pretty cool bridge. I believe little details like this allow the scene to feel more alive unique and interesting. And so they are worth taking time to make.

Jar and pole placement
The jars had to be spaced away from each other as to not look repetitive. While also accordingly lighting the scene. This was a fun challenge, and my aforementioned poles allowed the process of placing and organising these jars to be a lot less of a hassle.

Water Quick Fix:
After importing the water I found that the bright blue of it contrasted quite heavily with my scene. And so I decided to add a constant to the metallic value, creating a pretty good mimic of water.


Fake Lighting Through Window

I also added numerous spot lights to the hollow part of the tree to exaggerate the lighting more.
Rendering
Clicking play for first time, I found that all of my jars began to move aimlessly around the scene. There was seemingly no reason for this, as even after I had went through every jar disabling the physics and collision on all of them. The issue still persisted. I spent a long time looking online for solutions and attempting everything I could think of in unreal.
I then found the problem lied in how I had originally imported them. Discovering skeleton and physics assets. I deleted these assets and the problem went away. I unfortunately did not capture this however. (I was happy to see it gone, and in my joy I forgot to replicate and take pictures before saving.)
Camera Shots used:

When deciding my camera shots, I wanted to start from the inside and work my way up to slowly revealing the outdoor scene. I thought that the best way to do this was to work upward, with short shots that show the fairy trees innards. It was in beginning my shot composition that I figured to use the grass as a transition between shots. As I wanted the scene to feel immersive, keeping the cuts invisible, as this in my opinion allows the viewer to feel as if they are part of the world more. These short shots slowly head upward. Before finally culminating in one long shot back down the tree and through to the outside. Looking back I think this format worked well, as it gives opportunities to showcase the scene, while still maintaining a logic and not feeling to sporadic for the viewer.
Throughout these shots I also utilised changing the focus in certain moments. I wanted to mimic a real camera, and so when the camera passed by close objects, I would often switch the focus to that close object, and then allow time after passing that object before catching the focus up again. I feel like this effect added a lot to the cameras authenticity, and so better sold the grounded feel of the scenes presentation.
Reflection on final film:
Music Used:
I added a few swoosh sounds to my final film, as I thought they helped to exaggerate the camera motions a bit more, especially when passing close by to certain objects.
The music I feel helps to complement the overall presentation really well, especially with the rising crescendo as the trees scale gets revealed. I’m really happy with how this turned out, however if I was doing this again. I would probably try to work on compositions and framing ideas, and try to integrate them into my early development a little more. Since a scene that is made with camera shots as the focus, would probably have a lot more opportunities in terms of compositions. I would also focus on making it a little shorter, as 2 minutes runtime is quite a lot for this kind of a project. However I am really happy with my compositions non the less, and I feel as if I executed the original design quite well.
Final Fairy Realm Movie: