Animation strategies Body mechanics

Lip Sync


references


(audio from Sex education 4×06)


https://syncsketch.com/sketch/Mau70sSvvb5z/


I took two different videos and analysed the acting and movement using both as I saw fit. My main observations were a combination of extreme disgust and anger; I liked the first video, it leaned heavier into the disgust in some parts, even adding in some fake half-smiles.


I took pictures of a plush at a table to decide the staging of the scene, then got my mum to act out the first part so I could have a sitting reference, using the other videos for the rest. The whole scene is a combination of these images, videos, and my analysis, plus my own acting as I worked.


Development


Workflow:

  • find references for the emotions (along with using a mirror by my desk)
  • block out main body
  • block out face starting with chin
  • switch from constant to spline
  • fix glitches
  • add pauses and intensity back
  • lighting + details


I read through “The Animator’s Survival Kit”. Although I planned to do 3D a lot of concepts were still applicable.


This video was great for the technicalities of lip syncs and working out the specific mouth shapes and how they flowed into each other.


Although the focus of this module is on body mechanics, I wanted to push myself to create a mood and compelling ambience that supported the audio and emotion from the acting.


As it was the first day, I was just setting up the scene and prepping for the blockout. I ran into a lot of problems setting up the rig and working with the different versions of Blender, mainly missing controls, broken models, and more. I was only able to fix it by using this video, Blender 3.6 (which a lecturer okayed), and a couple of Blender support threads.


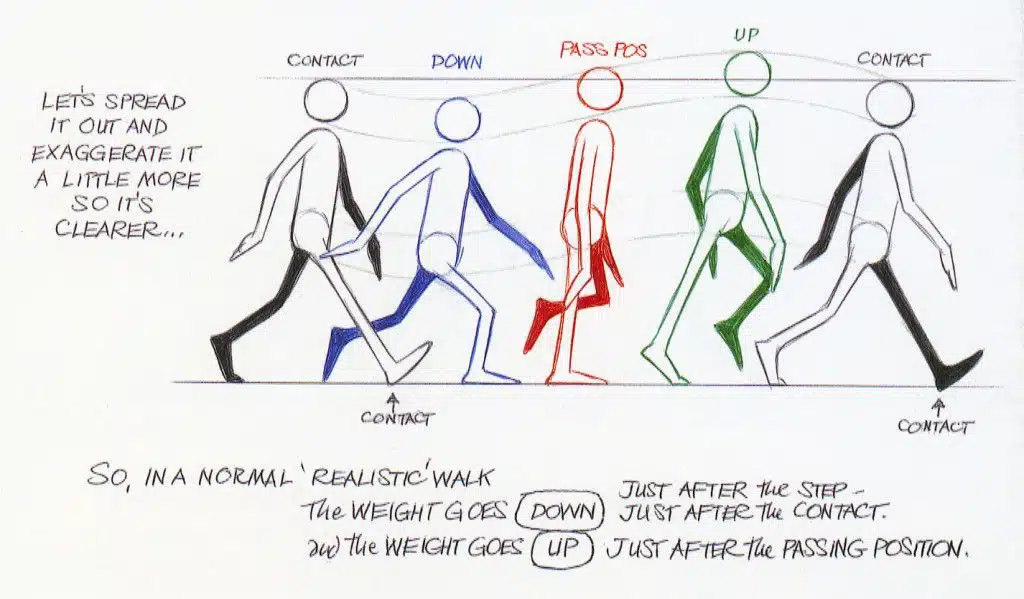
I looked up some videos to help me visualise the process better and have a better idea of the movement I’m working towards.


I tried to be very thoughtful with my blockout, taking into account posing, staging, and arcs. This did result in the head having too many keyframes at one point, as I wanted to mark the arc properly, but it just made it jumpy and awkward. This was something Rachel also pointed out and just advised deleting frames one by one and checking the change to see if it looked better. I really tried to make the blockout as good as possible, as my previous animation had been done directly on Benzeir, and they felt really overwhelming, and doing a blockout was not only recommended by the lecturers but also felt like a good way to stay organised and not get overwhelmed.


To make the blockout, I used my references and analysis but also my own intuition and a mirror, as there were some moments I saw potential to make better and more impactful than I had originally accounted for, for example, the bar stool falling as Rain stands up, Rain swinging her arm as she stands up, and the camera shake from the point.


I feel camera shake actually made a huge difference; I was quite insecure about this decision initially, as I find camera work really challenging, but after consulting with Rachel, I realised how simple it was to implement, and that small addition really improved the cinematography, which made me feel more confident about something that has previously been a huge struggle and also motivated me to improve the lighting, seeing how big a difference using good cinematography makes.


I felt the blockout was still lacking some emotion, so I looked back to the animators survival guide and found that I wasn’t utilising the eyes effectively, especially the upper eyelid, which was completely still; however, I was a little unsure if it looked like that because it was just a blockout, so I held off on making changes.


After switching to spline I realised the issue wasn’t fixed, and more problems arose from the switch to spline.


Because the glitching was so distracting, I decided to tackle that first. I fixed keyframes that went from positive to negative, which were the cause of the glitches, and I added supporting frames to bring back the strength from the blockout and convey that anger better. I also started animating the hair, which was challenging in its own way. I found myself overexaggerating it a lot, which distracted from the main animation; however, I wanted to have a lot of drag and follow-through to convey the speed and strength of her movement, which matches her anger. I should have found reference for this; however, I’ve had a lot of trouble in the past finding references for ponytails for some reason, and I wasn’t able to replicate that cartoony whip myself.


I added blinking mainly during the head turns and lowered the top eyelid and raise the lower one to create a squint to convey a feeling of pain.


I finally figured out how to render the video with audio; however, the audio didn’t sync up properly. I also added in the background at this point (previous steps’ renders were done after the background was finished). I used two lights: one blue one to the back right, which framed her in shadow to convey an underlying sense of sadness, and a softer yellow light at the front to light up the face better as it felt it was too dark and you couldn’t see her facial expression properly.


I finally got the audio synced up properly and added additional lighting to the bar to create three-point lighting, and the lighting didn’t feel dynamic and interesting enough, and the ambience wasn’t as effective as I wanted.


I chose to use 3-point lighting as it accentuates the height, width, and depth of the subject, making them stand out in the shot, and as in the previous lighting attempts, she blended into the background, or her facial expressions weren’t properly visible from the heavy shadows.


My fill light is the yellow soft lighting at the front, which helped with visibility; the key light is the strong blue lighting, and the backlight is the bar lighting, which gives Rain a soft rim light, making her stand out.


I tried to add the final part that got cut off but it messed up my timing so I decided to keep the previous version as my final.

Final Thoughts


Overall I think I improved a lot, especially in 3D; focusing on the blockout made the process a lot easier and better. But I’m especially proud of my improved cinematography; it’s my first time using 3-point lighting purposely and really paying attention to background and ambience to support the animation. I could’ve added more weight to the movements to better convey the anger, mainly in the hair, as looking back it feels a bit too smooth, which contrasts too much with the harsh motions of the arms. I’m glad I put in a lot more effort into my research and analysis, as it really paid off in both assignments and meant I didn’t waste any time and had fewer steps. I’m glad I took advice from the lecturers and implemented that into my work, though I’m hoping to have a little bit more confidence in my own decisions when my intuition tells me it’s the right choice, as it did with the camera.

Animation strategies Body mechanics

Weight Lift


I did research and compiled points to keep in mind while animating so I could better recreate the mechanics of movement. My class work getting deleted, so to support my work I did animation analysis and studies instead.


Notes from video:

  • Force: strength exerted on an object. The more force a person exerts on an object with less reaction the more heavy it will appear, If I want to make the weight believable I have to make the person struggle and exude a lot of force.
  • weight & balance
    • Pose- Poses are the main way to communicate weight. To make sure I did this properly I recorded myself and used many references and analysed and chose the best poses that conveyed the struggle best.
    • Centre of gravity: A weight supported by the centre of gravity of the person will always appear heavier.
  • Anticipation, arcs & follow-through: the heavier an object, the more build-up for the lift will be needed. I think this was the only point I struggled with as I there were some part my arcs were clear and there was nice secondary action but other areas were overlooked.


I liked the heavy weight in this animation and the use of the whole body to manage it. I also strongly believe that storytelling is an essential part of animation, so I try to include character and appeal in all my animations.


I added my own twist by making the person lift a fat cat. Despite this presenting a couple of challenges, overall I think it actually resulted in a stronger final piece with more technical skill, as I wouldn’t have considered some details if I had gone with a more basic approach.


Challenges:

  1. Because a cat is an organic weight, its shape changes and the weight shifts any time it’s moved. To create a convincing animation, the person’s handling of the mass had to mirror that, which meant a lot of movement and shifting weight from one side to another.
  2. Perspective: I opted for a simpler perspective to focus on the movement; however, that actually meant I had to do a lot of foreshortening, making perspective a challenge.


I showed Aodahn my progress for feedback, and the response was mixed but encouraging. The beginning worked, but as I suspected, the actual lift and walk backwards didn’t, it was awkward and relatively boring. Additionally, although I added the back steps to play with perspective and dimension to make the animation more visually intriguing, it actually made it harder to see the movement and cat, so the humor and appeal were lost.


The red drawings on the images above show the feedback given to me. There were 2 suggestions on how I could improve:

  1. Flipping it forward
  2. Swinging it sidewards.


I found it difficult to picture which would be most effective, so I recorded myself attempting both lifts. I used a couple of videos on lifting rocks so I could better replicate the weight of the cat and the struggle to lift it. I ended up going with the swinging sidewards, as it allowed me to explore more animation principles, mainly exaggeration, appeal, staging, and arcs.


  • exaggeration—although I could exaggerate a forward swing due to the angle, it wouldn’t look as good unless I pushed it into cartoony territory, which I don’t tend to like
  • Staging—this was the main factor in my decision, as the first option has the cat and lift happen in the same spot; the cat would end up blocking the person the whole time. The other option also does that somewhat but to a lesser extent.
  • Appeal—Although appeal is somewhat subjective, I felt the side swing was ridiculous but in a funny and impactful way, which made it more appealing.
  • Arcs—again, simply due to the staging, a forward swing makes it much more difficult to show the arcs in the lift.


https://syncsketch.com/sketch/NzhhYjVkZjQ5/


The SyncSketch link has the full video I used with the frame-by-frame analysis. These are a couple of standout frames that highlight my process.

  1. I started by finding the key poses and marking them on the top left with kp-; I also marked some big shapes I felt would be helpful.
  2. I then used a red pen to mark each change from the previous key pose; I looked for shifts in weight, elbows and knees moving in, the head coming down, etc.
  3. Analysed the bag and the straps; this was helpful for depicting the follow-through of the cat’s legs and tail.


This the most time-consuming step ; however, it made animating very simple. I didn’t have many steps in the animating phase, as this analysis blocked out my key poses and everything for me.


My analysis and research meant the animating stage was fast and simple. I followed my notes and completed the person exactly as intended. Although the drawing is rough, I also think this gif best highlights the subtle movements of the person. There was a little bit of a size loss as I was working intertagibly from pose to pose and straight ahead, but I managed to fix it later on.


I asked for feedback on it, there weren’t any major issues it just needed cleaner lines; however, as the other module’s hand-in was approaching, I was told to focus on that. I was really happy with this animation and the feedback was really encouraging, although even then I still felt there was room for improvment. Mainly the cat missing some follow-through, and some additional inbetweening at the start would polish it further, but on the other hand, I wasn’t sure I had time, so I focused on the cleanup as I was advised.


I cleaned up the line and added the cat; I personally prefer the rough lines, but it does make it harder to see the shapes. I tried to add more squash and stretch in this stage along with other principles of animation. I exaggerated the drag on the cat as it swings to play on the humor a little and also adjusted the person’s arms so they would fit around the huge cat, as I hadn’t accounted for its size in the original.


This is the final animation. I cleaned up overlapping lines and fixed some other issues. Although I’m very happy with the person’s movement and feel it convincingly shows weight, given a little more time, I would try to add a little more animation to the cat, as there are some parts where the body is completely stationary, which breaks the illusion of this organic dead weight whose weight is constantly shifting, making it impossible to lift.


I decided to make a couple changes last minute as they were really bothering me

  • added more movement to the cats tail and corrected some awkward movement
  • added squash and stretch to the head where it was previously still
  • edited the hands a little so they weren’t as jittery


Final thoughts


Overall, I think I was a lot more organised with in this assignment, and the research and analysis of references I made were invaluable. However, I didn’t like the line weight, which actually made me prefer the rough version to the clean one. I also realised that I found myself gravitating towards straight-ahead animation more than pose to pose; thankfully, because of my planning, it didn’t cause any major issue in this animation; however, it was a problem for the cat, which suffered a considerable loss in size throughout the animation.. I feel I was able to successfully convey the weight and struggle of managing an organic mass.

Animation strategies Portfolio

Animation strategies Portfolio


Basic Walk cycle


Run cycle


Personality walk cycle


Run and Jump


Animation Strategies Reflection

Animation Strategies Reflection


Tclass exercises were useful, although I didn’t use them as submissions, I referenced and used the skills I learnt from them. I learnt a lot from individual work too like ‘gun walk cycle’  which taught me how fast I was making my aniamtions, I kept this in mind for my submissions.

I enjoyed the creative freedom to choose what to animate. I chose characters I liked and movements/angles that looked fun and challenging. While this helped me push myself, I didn’t manage my time or complexity, and so overwhelmed myself with unrealistic standards.


Toon boom


I initially found Toon Boom annoying however, as I kept using it, I learned small tricks that made my work go a lot quicker. Understanding its tools and learning about the program really helped in making my animations, as I was already pressed for time; these tools were essential for me to finish on time.


Thought on the Animations


Basic walk-

  • The most polished of the 4
  • Successfully implemented multiple secondary actions
  • Overall very happy with the final result


Personality walk-

  • Technically challenging
  • I think it’s one of my most successful 3D animations
  • The secondary actions and facial expression added a lot of character
  • Very happy with the final result


Run-

  • needed to do more research to avoid wasting time
  • I wanted to add more secondary actions but I liked the hair a lot
  • The actual run I think is quite good
  • The volume on the upper body was very good


Jump-

  • The perspective was very challenging, the most difficult of the 4
  • I only added one secondary action (Hammer) which I’m disappointed about
  • I’m happy with the actual jump and that I was able to meet the challenge
  • Definitely ran out of time and should have organised myself better


Final thoughts


I can see where I could’ve improved—mainly the jump, which is lacking in comparison to the others, and the run having too few secondary actions—I’m still proud of the work I’ve accomplished, especially in 3D. While the basic walk cycle is my personal favourite, I feel that the process of choosing the right type of walk for 3D, capturing a really exaggerated walk without breaking the rig, and managing to reduce the popping was challenging and I managed to overcome every aspect.


I regret not doing something more fun with the run. Although I was able to animate a different hair texture and felt that the volume in the upper body was good, I believe I could’ve tried other skills.


I made a mistake by not doing more research into references, this was the main factor that hindered me throughout the module. I’m happy with most of my choices despite constantly doubting whether I was doing enough or if I was doing too much, I think my four animations showcase different skills I’ve developed in this course and demonstrate my ability to take on various challenges and deliver solid work.


Animation Strategies Run & Jump

Animation Strategies Run & Jump


*click on images to play gif*


I used the Richard Williams example in class for the jump however it was missing a couple key poses so I decided to avoid using it as a reference as I felt it would confuse me a bit especially knowing I already struggle with placing and spacing keyframes in the right place.


I found a good reference (https://www.youtube.com/watch?v=BI-CEQZ6jtE 0:03). However, the complexity of the angle was still quite challenging, especially since it doesn’t really show the key poses well, like the down pose right before the jump. Looking back, I should’ve tried another angle or created an additional animation showing it from the side so that those poses are clearer. Despite not showing the poses clearly I do think I still captured the general motion of the jump quite well.


I received a lot of feedback on this animation, which really helped me polish the movement. The main issues were:

  • feet sliding
  • More follow through at the end
  • The arm bending when it shouldn’t ruining the natural arc


Following Aodhan’s advice I changed the wall to a hole so that the anticipation poses were visible. I had to create the poses myself, as it wasn’t visible in the reference. I mostly just acted these out and searched other references to get an understanding of the weight distribution right before the jump.

I also attempted to add more follow through and some smear frames as I haven’t done that before, though my struggle with speed and spacing made the smear frames less effective and the follow through at the end could’ve been pushed further or had the figure brought back to resting position however the lack of time was really getting to me at this point.

I changed the sword in the reference to a hammer, as I didn’t have a lot of time to add clothing and secondary actions. I wanted to use a weapon that I could  bend to create more extreme poses. In this regard, I believe I was quite successful, as the hammer does convey a sense of weight. However, I feel I should have pushed this concept even further and worked with the angle to make it more visually interesting.

Although the perspective was the primary focus, I still wish I could have incorporated more secondary actions and refined the line work further. Given another chance, I would adopt a more stylised approach, as I don’t personally don’t like the appearance of realistic figures in animation.

Animation Strategies Run

Animation Strategies Run


*click on images to play gif*


I enjoyed challenging myself with the volume run for 2D, but became slightly obsessed with the idea of perspective and volume for my submission.

I went with 2D, even though I liked my 3D attempt as I was running out of time and naively thought I could create a better 2D run in less time. Possibly a mistake as I already had a very good start on the run and could’ve easily reused it to create an interesting run with some personality but because I wasn’t comfortable with 3D animation, I opted for 2D instead.


I did four attempts before just sticking to a side view run. The issue was my obsession with a perspective run, but I’m not good at perspective, and couldn’t find good references so everything looked forced and awkward.


I did curly hair since my other animations had straight hair. I wanted to try animating a bouncy movement instead of flowy. I looked at character designs for mechanics and boxers to try to create a small narrative with the character to add a bit more intrigue and visual appeal, but I struggled with incorporating secondary actions that I hadn’t attempted before.


It looks okay. I wasn’t sure what additional secondary action to add, I changed the trousers to overalls, which I liked, but I still feel like it’s missing something.

I think that the upper body is better than the lower body. I really like the volume, which was my goal with all the previous attempts. Although this one isn’t as exaggerated, I do think I was overall successful.

The feet lost their form at some points, I did try to keep the legs consistent by copy-pasting them and referencing the previous frames but I should’ve done a final pass to ensure the shape didn’t change over time. I noticed the hairline moves in one frame, I fixed it in the portfolio one.

Animation Strategies Personality Walk

Animation Strategies Personality Walk


*click on images to play gif*


Class exercise-

Although I liked the 2D, I wanted to do one 3D submission. I started becoming more comfortable with animating in 3D; however, I still struggled consistently with issues like knee popping. Like 2D, I also struggled with timing in 3D, which became a significant problem later on.


I attempted a drunk walk, which turned out to be much more challenging than I expected. The feet were sliding everywhere, making it unsuitable for a cycle. Rachel recommended choosing something simpler, so I tried a tango walk. However, the movement ended up being too subtle, with basically no arm movement. I felt that anyone who wasn’t somewhat familiar with dance wouldn’t be able to recognise what type of walk it was.


I restarted again and chose a horsewalk. This looked much better, with the help of Amy and Sasha, I was able to reach a point where the animation is recognisably a horsewalk and accurately captures the movement of the hips and upper body. However, there were still many issues:

  • legs popping
  • pause in the walk before it cycled- Honestly, I’m not sure how I fixed it, but as the leg popping was resolved, it naturally went away too.

It took a long time to figure out how to connect the arm to the hip using IK. I knew I had to use a constraint, but wasn’t sure which. I was able to figure it out by using the robot arms tutorial. I also made a simple change to her expression, which, although not necessary, I think adds a lot of character and elevates the effect of the personality walk.


After feedback, I fixed the popping on the right leg. However, I couldn’t replicate it on the left side, despite the keyframes being the same and the graph editor seemly being identical. Although some of the force from the previous version was lost, I’m happy with the movement, especially considering how the earlier version had so many pauses and awkward jumps.

The main change Rachel made was adjusting the position of my keyframes and fixing the spacing. As mentioned before, this is a weakness of mine, so it wasn’t surprising. However, I didn’t anticipate that fixing the timing would disrupt every single part of the animation except for one leg. I had to redo a lot of my work, but I was able to do it quickly by having both the old and new files open at the same time, copying the keyframes from the old file onto the new file in the right places while also limiting the number of frames to keep things organised.

I also feel very proud of the hair, as I managed to add drag while maintaining a smooth motion.


I added the background from the walk cycle I did over the summer, as it was quick to do and makes the animation look more polished. The popping of the leg was finally resolved; I found that the frames between the keyframes were showing different values, which resulted in two different leg movements despite having the same values for all their keyframes.

Overall, I’m really happy with my finished animation. I’m glad I made that final attempt to fix the left leg.

Animation Strategies Basic Walk

Animation strategies- Basic Walk


*click on images to play gif*


I attempted a walk cycle in 2D and 3D over summer.


I really like my 3D walk cycle, I think I did a good job of making the movements smooth and adding drag to the hands. On the other hand, the 2D walk cycle was more challenging. Finding references for the skirt and the hair was quite difficult. I relied on an animation of a horse’s tail (https://youtu.be/DMWDYN5i694 ), which conveyed the general idea, but didn’t match the speed and force of the rest of the body.

The skirt was incredibly difficult. I didn’t fully understand the timing or movement of the skirt.


I tried a more cartoony walk cycle, but since I’m not used to the no-screen tablets, it was impossible to keep the proportions consistent.


The knees didn’t follow a proper arc, which looked terrible. I like that I managed to recreate a Dr.Seuss like movement after fixing up the limbs however I don’t personally like making cartoony art and tend to lean more towards semi-realism which allows for exaggerated features and movement while still keeping a familiar, realistic aesthetic.


I attempted a realistic walk cycle to challenge myself, adding a bit of personality and an object. Having a reference made animating this much easier. I liked that it was at an angle, I tried this angel in a future attempt. Although I like the proportions more, I feel I stuck too closely to the reference, which limited my creativity and made the movement feel a bit forced and mechanical in some parts.


Looking back, I would try to exaggerate some of the poses by breaking the arm. I would also play with the speed a bit, as it feels too fast. I noticed this becoming a bit of a habit, so I kept it in mind when working on my actual submissions. I don’t naturally have an eye for tempo, and it seems I tend to make the animations too fast, which stands out, especially in walk cycles.


Characters in Frieren: Beyond Journey's End - Frieren and Her ...


I decided to do a semi-realistic walk, as I didn’t love the cartoony walk, but a fully realistic walk cycle felt restrictive. I chose a character I like -Frieren- which made me really motivated and resulted in my favourite of the four submissions.


Two Kinds of Walk Cycles - IdeaRocket


I used the Richard Williams walk cycle as a guide to the key poses, but I chose to create a less cartoony movement, so I didn’t exaggerate the down pose as much, and the movement of the arms isn’t as pronounced. From my past attempts, I had a good understanding of the challenges ahead, particularly that clothing was an area I needed to focus on as it previously took really long. When spacing out the keyframes, I added more space than usual to avoid making it too fast, like my previous attempts.


Having a good reference for the character made drawing the clothes pretty easy. Though animated clothes over the body, I cleaned up the movement underneath to fully understand where the body stopped, allowing me to calculate how much and long the secondary actions would drag behind.

The main challenge, as anticipated, was the skirt. Finding suitable references was nearly impossible; the only one  was of a preppy anime girl bouncing while walking on the spot. It wasn’t until I finished that I realised that due to the bounce it didn’t match the tempo or movement of my animation, resulting in an awkward flick. Fixing this was difficult, as I still couldn’t find a proper reference, I used the same poses but lessened the movements.


I like my end result. After speeding it up, I was told I didn’t need any in-betweens, though I added some for the earring. The earring was the first secondary action I created, and I made everything else follow the same speed and key poses as it to keep all the secondary actions consistent. I was told the hair was getting lost in the cape, so I adjusted the cape and movement to avoid some tangents.


I tried to fix the skirt’s movement by delaying the frames, I’m not sure if it made a difference, given more time I would look into animating fabric as this was definitely the most challenging part of this animation.