Category: Uncategorized

Paper Dress Challenge

For our first challenge in the TADF main workshop, we were placed into groups and had to create a dress made of paper materials such as tissue paper, soft card and sugar paper. I was grouped with Aoibheann and Ellé.

We decided to use paper tissue to create our dress and began to design 3 sketches each. The dress was going to be inspired by the Calla Lily flower with hints of blue to represent the water that the flower is often found by.

When working on the dress, Ellé and Aoibheann had decided on the colors for the tissue paper being used – yellow and blue with little hints of orange and white.

Ellé and I worked on the bodice of the dress.
Aoibheann and I worked on the trail of the skirt while Ellé created the paper cutout panel for the front of the dress.

The process:


The results:


I think the dress turned out beautiful and the overall process of making it was enjoyable. If I were to make any connection between this tissue paper dress and my work throughout its progress, I think the train skirt looks similar to the microorganism patterns, lines and shapes that I’ve been looking at.


TADF Main Workshop

After the paper dress challenge, I spent the next couple of weeks working on photoshop with the drawings from my sketchbook as well as creating some new styles of origami dresses.

I used the tools and techniques of photoshop taught in Workshop 2 to create these pieces.

The effects used for these images were;

  • Hue/Saturation
  • Vibrance
  • Brightness/Contrast
  • Curves
  • Stamp tool

My color palette for my work continued to be shades of pink and blue, however from these experiments, the colours began to slowly shift to what they ended up being.

New styles of origami dresses:

Textile, Art, Design and Fashion

Starting the TADF workshop, I chose two words; biometric and pink, to create a theme. Then I made a mood board with my color choices in order to begin experimenting in class.

TADF Prep


In my sketch book I placed my prep research, fabric swatches from I used within my experiments and embellishment challenge as well as my design process for the challenge, creating different styles for the collar and cuffs, then using procreate to finalize the design before attempting the challenge.

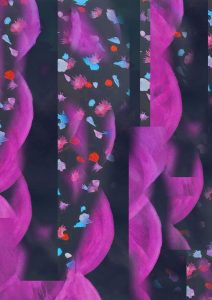
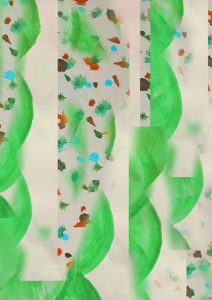
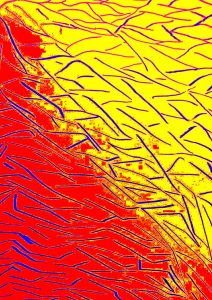
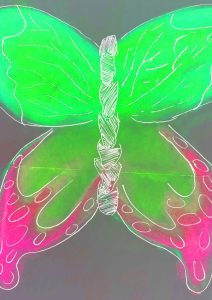
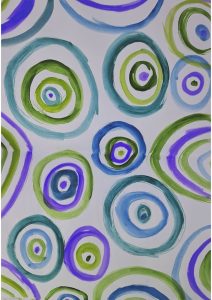
We worked in the Mac lab to create a digital image with different effects. This was more to experiment with the effects rather than using it to create a pattern. Learning the effects now allows me to be able to return to the Mac labs and create my own pattern at a later time.

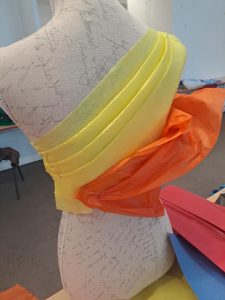
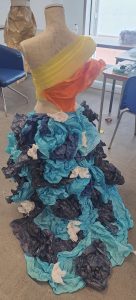
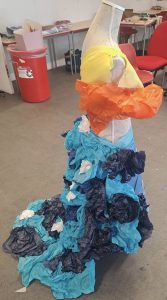
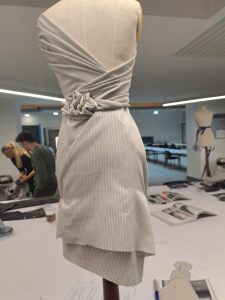
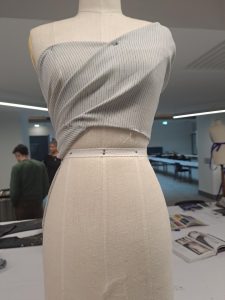
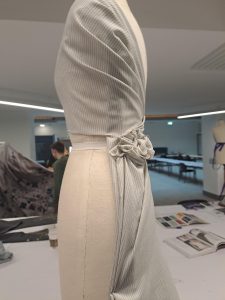
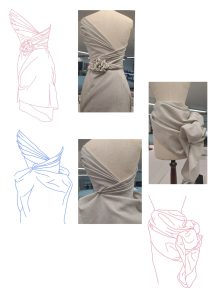
With the Dean and graduated students from the Fashion course, I learnt how to drape fabric. I then went into procreate and sketched the pieces I had created to give a designed feeling to the pieces.


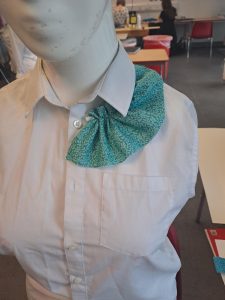
For the embellishment challenge, we had to create a collar and cuff using two or more techniques we learnt within the TADF workshops from semester 1 and 2. I decided to take a school shirt and crop it a little shorted, first folding the fabric on a mannequin beforehand to get idea of how short I wanted to cut it. Then I removed the pocket from the front to create more space for the front piece of the collar.


Then I used a draft fabric ruffle to place along the collar to decide how I’d like it. From the ideas sketched in my book, I used my final drawings to create the collar and cuffs. I decided to go for the big ruffles down the front for the collar along with a reverse appliqué technique around the neck, attaching the fabric to the original collar with a back stitch. I wanted to keep the original collar to help lengthen it as well as to add a bit of flat to boring white but still having it balanced. The fabric underneath for the reverse appliqué has my finger prints painted onto it to include my chosen them of biometrics.

For the cuffs, I decided to go for a detached looked with the cuffs flaring out in a pleated style, which means the cuffs sits snug to the wrist before fanning out around the hand. I used the same fabric for the cuffs as the front collar piece, the white accent fabric is recycled from the piece I cut off from the shirt and was attached by the couching technique. Then I adding button that allows the cuffs to be opened and closed.

The final design sketch

I pinned the fabric to ensure I was happy with the placement and overall look before sewing them on.

The final piece for the Embellishment challenge

The collar:

The cuffs:


The overall display of my work:

Throughout the workshop, I looked into the difference between a fashion designer, a textile designer and a textile artist.

Art Research


In five years, I will have hopefully finished my degree in fashion illustration and learnt many new skills to help accomplish future goals. I hope to be managing my current small business better along with working to be more involved in the fashion industry and gain experiences throughout the years.

Illustration

For the Illustration workshop, we had choose four compound words such as grandmother or sweet tooth, and draw quick thumbnails as our interpretation of each one.

I decided to use the compounds:

  • Daisywheel
  • Bluebird
  • Snowbird
  • Typewriter

The thumbnails did not have to be detailed or precise.

Once the thumbnails were finished, we then had to create further develop one of the words into more detailed illustration. I choose to complete the final sketch for Daisywheel as a digital drawing.

The Reactivity Series Is Turned Into A Board Game

In the Games Design workshop, we had to create a board game in groups. Since we had basically made a game using the periodic table, my group decided to use those ideas again and turn them into a board game.

The game is in the style of the popular board game Monopoly where the players have to collect all the elements of the periodic table. A smaller design of the periodic table is included within the game.

Victoria and Crow worked together to decide on the concept of the board game before figuring out the general mechanics as well as starting a few of the visuals that allowed Tabitha and I to created the physical game pieces.

The game manual was created by Victoria. The second picture is of the official manual that was handed in with the board game.

Inside the manual:

The character tokens as well as the chance cards were designed by Tabitha:

Cards known as the “Sparkle Cards” and the Atomic cards were created by Victoria:

Tokens for each of the elements were created by Victoria and these would be collected by the players during the game as a visual to what they have gained or lost throughout it. These would be similar to the money in Monopoly.

I drew the board for the game, using a basic version of the layout from Monopoly. Instead of street names being in the spaces, I used a handful of elements, using their symbol as the visual, along with placing spaces for Chance, Atomic and Sparkle cards for players to gain. There is also a few spaces that can effect the players such as losing an element or missing a go when landed on the space.

In the middle of the board, there are places for the cards to sit so that all players are able to reach them, as well as the original periodic table. I chose to include the table since the game is based off it and can help players to learn the proper elements while engaging in the game. The logo for the Reactivity Series was also included in the middle of the board.

Victoria had created a quick basic sketch of how the board game could potentially look like as a visual from me to further develop to create the physical pieces needed.

Crow helped color the pieces in to help create a bit of dimension so that the board game was not all black and white.

I created a smaller design for the period table that would be used by players during the game in order to keep the overall objective to collect all the elements simple. The elements on the board correspond to those in the smaller table, however have been kept as close to their original placement from the periodic table.

Once everything had been finalised and created, I placed all the elements together onto the board as if we were to play a game in order to give an overall visual of the Reactivity Series as a board game.

Welcome to your Blog!

This is the place for you to upload images and catalogue your progress. On the front page (where you are now), your posts will appear in chronological order, newest at the top, oldest at the bottom.


To help you and your lecturers navigate your posts, you need to assign to the right category to each new post (see the post below this one to learn how to create a new post).

The menu at the top of your blog lets you select a category and look at the posts in that category alone.


Adding a post to your Blog

To add a new post to your blog,

  1. Click + New in the menu:

  2. Choose Post in the dropdown menu:

  3. In the Add a New Post, enter your post title (1) and choose which category your post belongs to (2).

    Choosing the right category is extremely important. If you don’t choose the correct category for your post, your lecturer will assume you didn’t post any work.

  4. Now you can add an image and some text (if needed). Click Add Media. This opens a new screen. Here you can simply drag and drop your image(s).

  5. Make sure the right image is selected (blue tick), then click Insert into Post.
  6. You can check your post before publish it on your blog, by clicking Preview, and finally, you publish your post by clicking the blue Publish button. Only then will your post appear on your blog.