This module kind of scared me at the beginning, as I have no experience in working with 3D modelling programs, so needless to say, there was a big learning curve. I wasn’t able to be present physically for most lectures because of my household catching covid after the first week’s lecture. I’ve also been in the process of moving house after this, so it’s been a very stressful period of time for me overall.
I joined online when I could, and made sure to watch the recordings when I couldn’t. Despite not having enough time to complete all the extra tasks, I made sure to do as many as I could and I feel like my skill in Maya has definitely improved a lot since the beginning. I feel more confident navigating it and using shortcuts. UV mapping wasn’t as hard as I thought it was going to be, I actually surprised myself by getting the hang of it (in my opinion) pretty quickly.
I got pretty comfortable with Substance Painter quickly after going through all of the recorded videos about it, as they were very informative and easy to follow. Though I don’t understand the height map part fully.
The crystal needed to be held up by something, not just floating in the middle of the dreamcatcher so I modelled the ropes drawn into the design. Using the curves and loop process again.
Cards
I decided to change from the original design, as I felt the poker chip was a little out of place and needed something else to tie it in again, so I changed the dangling charms into cards!
Just cubes made thin and long and then bevelled at the edges.
Finished Model
UV Map
As far as I’m aware, UV maps are preferred to be all together in one square if it’s one asset or prop. So like a staff would be one, and a chair would be one. So a scene with lots of assets would have more squares used. So I put all my UV maps into one square. I could be completely wrong on this but it’s done now.
This video helped me understand what the issues with non-manifold geometry were, and what causes them, so I could fix them in my model as I couldn’t unwrap parts of my model due to this issue.
I decided to retry making the skull again and was much more satisfied with it this time. It wasn’t quite right yet though.
I moved the skull into place in the staff and proceeded to make changes to the shape to make sure it fit and looked better. I also decided to make the skull hollow, and have the eyes, nose thing and the crack in it show this. So I added thickness through extrusion.
I modelled the arrow to put through the skull with a cylinder for the arrow shaft, and then a cube for the arrowhead. The back of the arrow was made using the plane process again. I had originally tried to model it while angled and placed where I wanted it to be in the skull, but quickly realised that wasn’t working and redid it flat on the plane, and moved it to where I needed it afterwards.
The first thing I decided to try and model was the bandages wrapped around the middle of the staff, which I tried to do a few different ways before deciding to research different ways to do it.
I found a video that I liked the look of and thought it would work for the type of thing I was looking for. I knew I could manipulate it to look the way I wanted it to. This is the video;
I followed the process for the leather wraps shown in the video, to duplicate the faces of the staff handle and then move them to the shape I wanted, and then shrinkwrap them to the main model. Then extruding them, and moving the vertices to ensure they fit around the staff in the way I needed them to.
For the looser bandages, I took the duplicated faces from the other wraps before I had shrink-wrapped them, and extruded them without doing that. Then I used the edge and vertices tools to ensure they sat the way I needed them to.
Hanging String Parts
I used the EP curve tool again to create curves where I wanted the strings to be on the model and then used a sweep mesh. They ended up having a lot of subdivisions, but I wanted them to look like rope or string, so I needed the curve precision to be quite high.
Then I followed the same vague process I used for the bandage wraps, to make it look like the hanging ropes or strings were wrapped around the top of the staff, instead of just hanging there and coming out of the staff.
Dreamcatcher
I created a cylinder primitive and deleted the two end faces as they weren’t suitable for this shape. Then I extruded the shape and changed the thickness to get this shape. I also bevelled the edges, as nothing really has a sharp corner in reality.
I then made loops around the branch above the dreamcatcher too, as I really hate them looking like they’re coming out of nowhere. As well as adding little bits on the string, like a gem-shaped trinket and a bead.
Crystal in Dreamcatcher
There’s a crystal in the middle of the dreamcatcher in my design, so I decided to make that next. I found a tutorial showing how to make very stylised crystals and used the basic process from it.
The first attempt was too messed up, basically, every face was an n-gon and I couldn’t fix them with the multi-cut tool as it kept creating more on other faces when I added an edge. So I decided to redo it, but more carefully this time and with my new experience/knowledge.
It worked out a lot better
Poker Chip
Ah yes, the tiny bit of the original concept I had to keep for my sanity, a poker chip. I also used a cylinder, deleting the faces and bridging the edges. Then I used the multi-cut tool to create a bit around the edges. I selected the face loop and scaled it out to create a thicker part. Then I bevelled the edges.
Feathers
I made feathers using the same process as we were shown in the flower and flower pot recordings, by taking a plane, getting rid of the subdivisions and adding your own. Then use them to create the shape you want, and extruding it, adding thickness. I also added a part in the middle of the feathers to make it more realistic.
More Crystals
There are crystals kind of embedded in the staff at the bottom, so I followed the same process as making the other crystal to create more ones for here, not wanting them all to be carbon copies of each other.
I attempted to model the crow skull part of my staff, though I was getting really frustrated with it as I just couldn’t get it the way I wanted it to be. This was the first attempt at the skull, which I can not overstate how much I hated. It also didn’t look very great outside of smooth mesh preview mode. It was a smoothed cube with a lot of extrusions and moving faces around.
I decided to try again and mostly did this by using the cube primitive and extruding faces out to where I needed them to be, then moving the vertices around to form more complicated shapes, as well as using the multi-cut tool when needed.
I went a little overboard on the chamfer vertices option and when I took the model out of smooth preview mode it was absolutely terrible, there were faces that were on places they should not be. I realise now the mistakes I made with the vertices and chamfer tool, and feel like at least I learned something new.
Therefore I will not be using this model of the skull, and I will definitely be remaking it after I finish the rest of the staff.
Starting my Model and Studies Advice for 3D Literacy
During my studies advice on Wednesday with Mike, he went through how he would go about making the basics of my staff in very low detail, like the actual staff part and a basic skull, to show the techniques, like the curve tool and the extrude tool. This was helpful for building up the base part of the staff.
I used the EP curve tool to get a basic shape of my staff and then used a sweep mesh and used the taper graph to help add some more diversity and a little bit more of a warped look. To get the shape more detailed and exact, I used my reference art as an image plane and moved the edges and vertices around to get the exact shape I wanted. I also used the extrude tool on a face to get more edges, like the little ridges coming out of the basic staff shape.
For the branch coming off of the main question mark, scythe-like shape, I used the EP curve tool again, but selected a face and the curve and extruded it along the curve, then repeating this process with the extra small branches coming off the design.
General Studies Advice
I had made some progress on my staff model when I was doing the general studies advice with Henry, so I ended up showing him the parts I had done, although very little. He recommended removing some edges from certain areas, as they weren’t really needed, which you can see in these two screenshots. I can see why, I think I was going a little overboard with the edges at the beginning because I was still lacking in experience with topology, which I had never really thought about up until this point.
The Bottom Of the staff
I then started modelling the bottom part of the staff, which I did by filling the hole left by the sweep mesh there and then using the multi-cut tool to divide it into sections, ensuring they stayed polygons as well. Then I extruded the faces individually, moving them and continuing to extrude them to form the sort of shapes I was looking for in the branches coming off of the main body. 4
The bit underneath this was made from an EP curve as well, then joining the faces from the extruded branches to the multi-cut faces of the bottom part.
The target merge tools proved to be very useful here, for merging vertices and edges to ensure there were no random floating parts.
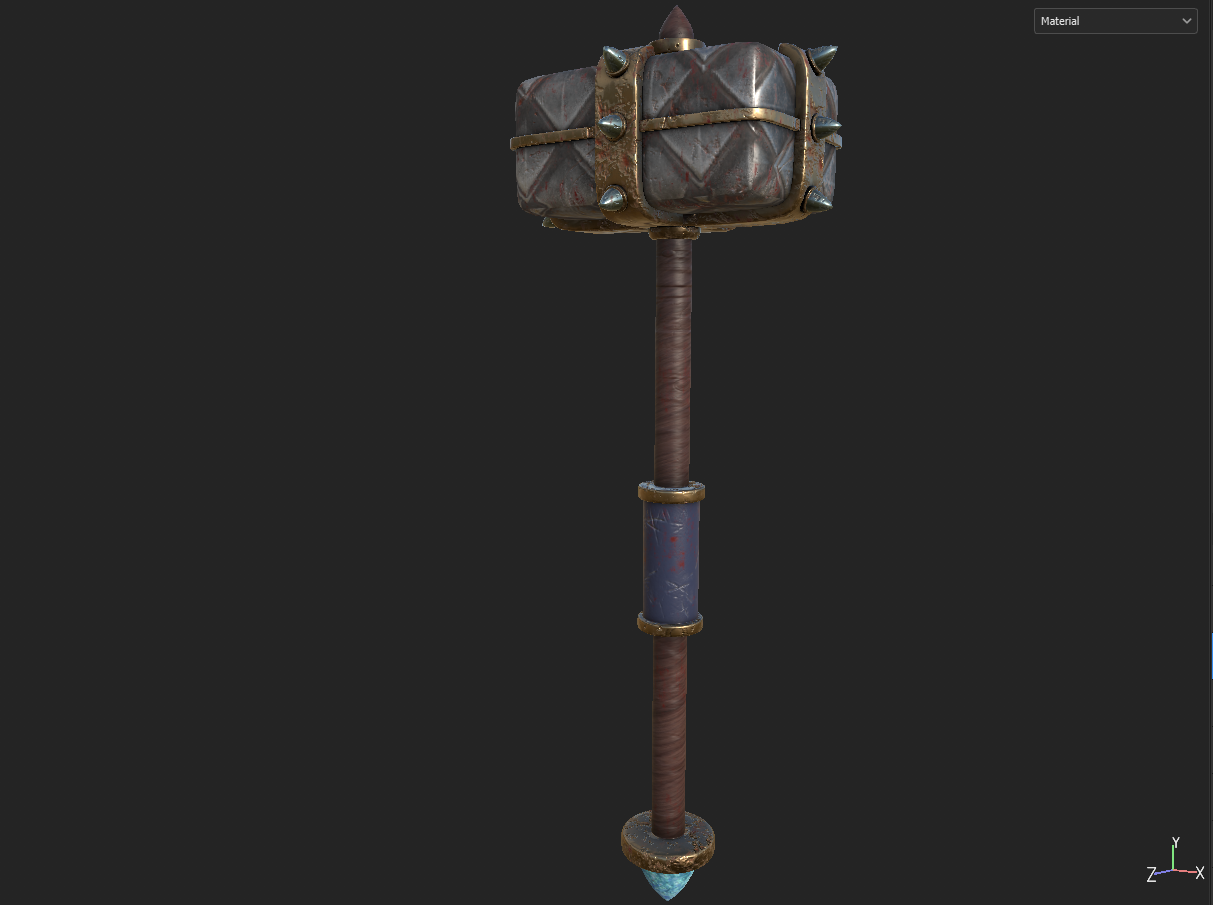
I tried the Substance painter task as well so that I would have some experience in using it before doing it on the final model. This is the hammer I textured in substance painter. I personally think it looks good, especially for a first try! 😀
I already had a group set up for this assignment sorted out, as I’d been asked over discord a few weeks prior if I’d like to work with some other people. My group includes Charley, Charlotte and Jack.
We used this time to come up with a plot and basic storyline, although no name for the short yet!
We ended up deciding on using mushrooms and other plants as the characters in our short, with the mushrooms being the main ‘good’ characters and using carnivorous/creepy plants as the ‘bad’ characters. We have; an Inky cap mushroom, a Fungi mushroom, a Venus Flytrap and a Snapdragon flower.
The basic storyline, which we ended up changing after more discussion over discord is that the mushrooms are entering a forest and encountering the creepy plants, therefore getting scared and running away. However, they realise that the other plants were actually just setting up a party for them.
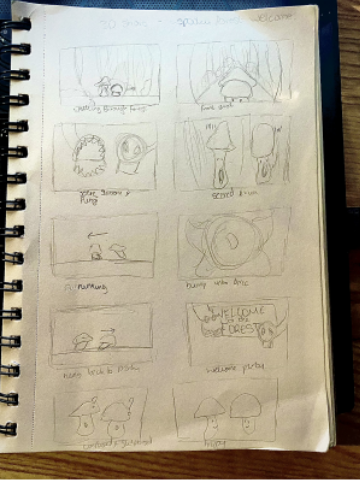
This was the basic storyboard Jack created for our short for us to continue to develop.
We were asked by Alec if Alexander could join our group as his last group weren’t communicating with him and he wanted to move groups. So after adding Alexander to our discord server, we arranged a discord call to figure out how to add Alexander into the storyline and get him a character. We settled on him being another of the ‘bad’ plants that could be used as a way of forcing the mushrooms to turn around and realise that it was a party. We looked at a bunch of different creepy plants and settled on a Dracula orchard.
We realised that the storyboard needed more camera angles after feedback from some of the lecturers, and Charlotte had drawn up a version with camera angles, also including Alexander’s character this time.
We then combined the two in another digital storyboard.
I was a part of the group that was tasked with analysing the Smash and Grab short film. This is my section of the presentation, although it was handed in the week after as I asked for an extension due to me testing positive for covid a few days before the deadline.
The rest of the group’s Presentation
My Notes
I thought I would include my original notes here, as some parts had to be cut out to try and make it a reasonable length that would’ve fit into the original presentation.
Despite me being behind and having time constraints, I knew I needed to get through the UV map tutorials and listen to the recorded lectures about it, as I had been off with covid that week so that I would actually be able to understand how to do it on my final model. So I completed the basic UV tasks with the recorded walkthroughs, which was very helpful for me to build an understanding of the process of UV mapping the 3D models, and to start thinking about what edges to cut when doing so for a clean look.
I definitely need to brush up on my understanding of photoshop, as despite having used it for education before, I couldn’t remember how the keyboard shortcuts and felt very slowed down by having to manually select everything.
Here are the finished versions. I honestly found it quite easy to understand the theory behind the UV unwrapping, although I’m worried that when it comes to UV mapping my final model it’s going to confuse me a lot more. Hopefully, that won’t be the case.