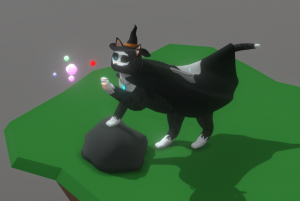
For our organic cute modelling assignment I had chosen to do a cat mage, just a simple combination of 2 things I like. I originally wanted to do something like a cross between Puss in boots and Yuumi, a magic cat standing on back legs but was stuck if I wanted to go for more realistic proportions or more cartoony with a small body, but ended up choosing more real ones and further down the line changed my mind to just do a normal like cat but with a magic-ish theme. Learning blenders sculpting tools took me a while, figuring out what tools work best at what strength and radius, I was planning to use the crease tool to create the slight bit between the paws bet it ended up creasing too much.
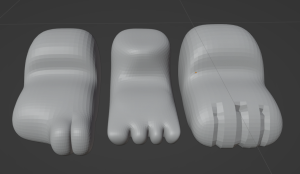
I tried 3 ways to get it the way i wanted, the right foot was trying with the crease tool but I couldn’t get it to go close to the shape that I wanted after a few attempts, the middle foot i tried making 4 faces and extruding them but they ended up being too far apart and when I scaled them they would end up too big and have hidden polys between them. I eventually figured out by making a few close cuts I could sink in the middle cut and it would create a small crease between them, this also made sure there wasn’t any hidden polygons between them and it looked the best I could get it so I was happy.
I found rigging the model to be easy enough, although when I had to rig my tail it kept controlling the whole rig itself


after I changed how I modelled my tail and it kept giving me the same problem, I don’t know how I fixed it eventually it had just worked for me.
Seeing that we couldn’t use fur I tried thinking of different ways to have a fur look on my cat, I had watched a few youtube tutorials and learned how to create a toon like texture on adobe substance designer although when put into substance painter it didn’t transfer over correctly and didn’t look as good


When I painted the texture on it appeared more flat and more clumped than what was seen in designer, I tried working around it and making it look better but I couldn’t get anything to look better than that. I had made the eyes in Photoshop as I wanted to texture them something more specific that substance painter wouldn’t let me do, I thought about doing my whole characters UV texture in Photoshop as well but I wasn’t sure how to make a good texture for the entire body so I had stuck with substance painter despite thinking the texture wasn’t the best I could do.
Overall I feel like I did good on my model for a first time trying to use blenders tools but I feel I lacked on the textures and my overall rigging, I wanted to do a different ending pose but I couldn’t get my bones to work with it, they would end up going into the ground or snapping. I think if I was to redo it I would probably try and go for the more cartoony proportions but still keep it on all fours. Although I did enjoy learning what blender has throughout the assignment, I rarely used blender but this time I got into it and was able to learn a handful of the tools it has although at the start it did feel a bit overwhelming with how much I was given to try with. I also learned a bit of adobe substance designer alongside it, it looked like the material making is similar to how blenders works so I hope it is transferable. I had also found plenty of tutorials on blender tools so I didn’t feel like I was lost with any of them although I still couldn’t find myself using a handful of the sculpting too and mostly use the same set of tools throughout. Some tutorials gave out tips for modelling better and some modifiers that saved me some time and effort. I also wanted to have a different setting for lighting for when uploading to sketch fab but I couldnt get them to look the same way I had them in blender so I changed where my lights were to a few glowing rock lights that weren’t as bright.