Acting for Animation: Animation Culture and Discourse

For my research assignment I decided to look at Genndy Tartakovsky’s Primal (2019) and how it’s such an effective piece of storytelling without using a single line of dialogue. My presentation will look at how Tartakovsky uses visual techniques to engage his audience emotionally, communicate the character’s thoughts and convey deeper themes. I broke down the techniques Tartakovsky uses into:

  • Colour.
  • Editing.
  • Cinematography.
  • Character Design.

In this blog post I’m going to show in detail the material I found to support my opinion.

Colour:

“We feel emotionally, through the use colour, what we’re suppose to feel for the character.”
– Daniella Strijileva, Production Designer at Pixar (2017)

We know the importance of colour in films, but it’s become such a natural staple of film making today that it’s easy to forget how much colour plays a key role in defining the mood of a scene and how specific colours can be used to evoke subtle emotional reactions from the audience. Numerous film makers use colour to enhance their storytelling, a perfect example is Pixar. They have a wonderful series on Khan Academy about their film making process and have several sections about how they use colour to enhance their narrative.

In the above video the art department clearly demonstrates how they use colour within a scene from their intro to “Up” (2009) to visually communicate subtle metaphors about a character’s emotional state, by framing the old man in shades of blue he appears more sad and lonely, whereas framing the old woman in warm colours like orange and yellow make her appear more positive and happier. Pixar use this approach to colour for great effect in their intro to Up, like Primal it’s an animated sequence devoid of dialogue that relies on visuals to tell a complex story about grief. The intro was singled out within numerous reviews;

“It’s one of the most extraordinary openings to a film, much less an animated film, ever to have been crafted.” (Sukhdev Sandhu, 2009)

“This movie is remarkable for a brilliant montage sequence at the very beginning… It is a masterclass in narrative exposition.” (Peter Bradshaw, 2009).
This is a key example of just how effective colours can be in manipulating the audience’s emotion.

I knew now how important the use of colour was in a story, next I wanted to explore why Tartakovsky chose his particular colours and explore further the psychology behind colour. Mary Risk (2020) from Studio Binder has a great e-book and video discussing the topic:

In the above video they discuss not just the use of colours but how the Hue, Saturation and Tone of a colour can change the emotional response it elicits from an audience. So a lighter pastel red can evoke feelings of love and tenderness while a darker more saturated red can evoke feelings of anger or danger. I found this interesting but not directly relevant to the point I was trying to make about Primal, I did however find more use in their e-book which details colour schemes, particularly the section about monochromatic and analogous colour palettes and transitional colours.

A monochromatic palette is harmonious and lulling, it can be used to help sink the audience into a complete world or the mood of the scene. An Analogous palette is kindred and due to it be mostly common in nature appears more natural and pleasing to our eyes. Transitional colours are used to show a shift in the narrative, either a change in the character or scene.

Lewis Bond (2015) on his channel The Cinema Cartography goes into detail about transitional colours and how it can be used not just to show a change in location but also a change in the character’s state of mind.

Bond uses the example of the colour scheme in ‘Blue is the Warmest Colour’ (2013) to show how transitional colours can be used to subtly communicate to the audience the characters emotional state. In the film, blue represents the main character’s freedom and expression so when we first see her love interest with blue hair it symbolises her emotional relationship with this character. From here the blue palette in the film becomes more intense and prominent, showing the character becoming consumed by love. Over time the blue remains as prominent but becomes more pale and faded showing how the love is fading but she’s still consumed by it. This is a fantastic example of how a change in colour can subtly convey to the audience a change the character’s emotional state.

Tartakovsky utilises all these techniques with the colour in Primal, especially transitional colours which he uses to guide the audience through the main character’s emotional journey. Each colour Tartakovsky uses in these scenes ties directly into the narration he’s is trying to tell and each colour chosen is used to amplify the emotion of the scene. It is worth noting here though, that the specific meaning of a colour can be subjective. Where red is traditionally the pigment of love, the director of ‘Blue is the Warmest Colour’ chose to represent love with the colour blue. Studio Binder offers a guide on some common interpretations of colours.

As you can see some colours, depending how they’re used can evoke almost contradictory emotional responses. This leaves a certain level of subjectivity to my presentation but I’m fortunate that the assignment requires me to argue my own opinion.

Below is a colour script I put together of the opening to Primal. What I felt was of particular note was how the colour scheme followed the gradient of the colour wheel, which I feel was done to allow a more gradual change between the emotions of each scene.

In the beginning of the episode we see the main character ‘Spear’ surrounded by green. This green is largely monochromatic and gives us a natural and peaceful feeling which continues for the next few shots until becoming more analogous with the introduction of blue, which gives us a sense of calm as we see Spear observing his home from afar, here everything is still as it should be in the character’s world. In the same scene however we also see Tartakovsky subtly introducing purple which in the next few scenes grows in intensity becoming more ominous. It’s in this same shot that Spear notices something is wrong with his family. The purple shifts, becoming even more intense as Spear runs to save them until the scene turns red, amplifying the violence and danger we feel as Spears family is murdered before his eyes. This red comes to symbolise Spear’s anger and pain when we see him wiping away the cave painting of his family.

From this scene the colours almost seem to move backwards through the colour wheel, becoming purple and ominous again as Spear climbs a cliff to commit suicide before he changes his mind and we switch to a deep blue, representing his depression. As the sun rises Spear experiences a vision of his family at peace in the afterlife and the colour scheme becomes bright yellow representing hope and rebirth. In the next shot Spear is lit by a warm orange giving us a sense of happiness as he comes to terms with his family’s death. The next shot in sequence brings us back to the green representing the return to norm.

Editing:

Editing is another important element of filmmaking. Depending what sequence of images you show the audience you can vastly change the narration you are telling. Showing images in chronological order to audience can cause them to form a relation between what’s shown on screen. Tartakovsky keeps his editing simple and makes extensive use of the eye line match to show us the internal thoughts of Spear and his wants.
As Kyle Deguzman defines in his 2021 article;

“Eyelines are determined by where an actor looks during a scene. They can help inform viewers of the scene’s geography, as well as conveying actors’ relationships and moods. Eyelines are also a powerful tool for telling a story through visuals and directing the eyes of the audience to portions of the frame.”

Studio Binder has another video on their YouTube which breaks down in more detail what an Eye line match is.

Tartakovsky first uses this technique in Primal to establish Spear’s goals and convey to us his relationship to his family. We first see Spear looking off screen at staring at a smoke plume on the horizon then cutting back to his smiling face. This establishes that whatever he’s looking at is what makes him happy, which is eventually revealed to be his family.

This technique is used again to show us his sadness and pain over the death of his family.

Then again to show us his anger at the T-rex that killed his family and his desire for revenge.

I decided in the end to cut editing from the main presentation to save time, an awful lot of it also crossed over with cinematogrpahy so I wasn’t missing much.

Cinematography:

The framing and composition of Primal is another tool Tartakovsky uses to tell his story. By carefully framing his characters Tartakvosky can convey symbolic relationships between them and convey deeper emotional meaning behind scenes.
The examples I will be focusing on will be his use of repeating compositions, extreme close ups and how characters are framed in relation to each other.

Extreme Close Up:

The extreme close as defined by SC Lannom;

An extreme close-up shot frames a subject very closely, often so much so that the outer portions of the subject are cut off by the edges of the frame. On an actor, this is commonly used to show specific portions of the body, like the face or hip, but it can go closer to show only an actor’s mouth, or even a single eye.”

and as Master Class explains this type of shot is “…an emotional moment that draws in the audience and portrays a character’s innermost feelings. This makes the viewer feel like they’re part of the action.

Studio Binder has a wonderful break down of the film Nightcrawler (2014) which explores how focusing on a character’s eyes helps you empathise with them.

Marcos Mateu-Mestre makes a similar statement in his composition and storyboarding book, Framed Ink:

So when Tartakovsky uses extreme close ups of Spear’s eyes it shows us what he’s thinking and his emotional state. (I get a little bit of overlap here from previous images I’ve used in editing, but such is the nature of filmmaking.)

Repeating Compositions:
The above image is also a great example of how Tartakovsky uses repeating composition to relate the similarities between the two main characters. The top half of the above image shows Spear watching in horror as his family is devoured by the evil T-Rex, the bottom half shows his similar reaction as Fang’s family is attacked by the same T-Rexes.

Tartakovsky uses a similar shot of Spear throwing his weapon in both sequences. This helps to tie the two characters together and convey Spear’s empathy with Fang.
Tartakovsky also uses this technique to also show to us how Spear has overcome the death of his family and returned to his normal day to day life. The shot on the left is from the opening of the episode and the shot on the right is after Spear has overcome his grief.

Framing Character’s Relationships:

How Tartakovsky frames his character’s gives us subtle implications of their relationships. When we’re first introduced to Spear and Fang. both are shown to be fishing but are placed on opposing sides of the screen. This shows the character’s are similar but but currently working in opposition to each other.

This carry’s over to when they first meet, they’re framed in direct opposition now, they’re almost portrayed as enemies.

Tartakovsky even uses the same framing technique to demonstrate Fang’s adversity to the evil T-Rex.

But what’s key about Spear and Fang’s relationship is that Tartakovsky uses framing to show us their arc. At the start their against each other but by end of the episode they’re framed in the same silhouette, in dead centre of the frame. They’ve literally crossed the screen to come together.

Character Design:

The shape design of the characters helps to tell us a story about them. Each design conveys to the audience the idea of who the character is, so when we first see them we instantly get an idea of what they’re about just through visuals. Tartakovsky makes great use of shape language within his character design.

Spear’s character design is blocky and square, which conveys to us feelings of strength, power and reliability. Even the shape of Spears silhouette as he moves helps give us an idea of who he is. He runs on all fours like an animal and when he jumps his body shape becomes like that of a primate.


His skull in profile even looks more like an ape that a human. This all helps give us the feeling that Spear is bestial and animalistic.

Fang on the other hand has a square and triangular silhouette. Suggesting power and speed. Her body is also covered in stripes like a tiger which suggests to us she is a predator.

If you look at her in comparison to the evil T-Rex it’s clear to see they have very similar silhouettes but Tartakovsky breaks up the design by including more triangles, this gives us the impression this dinosaur is more dangerous, violent and scary. They even include more triangles within his patterns, Fang’s stripes cross from one side of her body to the other but the evil T-Rex has his stripes end in points, appearing sharper and deadlier.

Even the palette shift to red makes us instantly feel like he’s more villainous and evil. To make the evil Mother T-Rex stand out as the “big bad” they simply gave her the biggest triangle shape and then covered it in even more triangles.


Animation JAM: Final Video

In conclusion: The final product is really just okay. It’s got some solid animations in it that I’m proud of, the cat’s eye squeeze, the rat scare and the cat grabbing the rat but the entire middle section with the cheese just falls flat. This is largely due to the scene being added during the middle of production and a failure on my side to properly plan the sequence before I started work on it.

Had I the time there’s a few chnages I would have liked to implement. After a discussion with my co-worker Henry he suggested that when he sees the cheese the rat should take a few steps foward and then when the cat appears he should begin to back away. I think this additional animation would have made a big difference in livening up the middle section.
I also feel like I could go back and tweak the cat’s outro a little more, give it a stronger feeling of the movement to the animation. Considering I’m still learning the ropes with 2D animation the final output is fine, there’s definite areas of improvement and it could do with some more work to get it perfect but there’s an clear progress of quality from my work earlier in the year so it’s mostly a success.

Animation JAM Production: Part 3

I was now entering into the home stretch of my animation. The only areas I had left were:

  • Cat grabbing the rat.
  • Cat eating rat.
  • Cat returning through portal.

This section also gave me a chance to experiment with a bit of smear animation since I’d been curious about implementing since I saw it in Wonderboy. I had a look at some stills from Looney Tunes and Sponegbob for reference.

The timing was a little slow with the first pass but I felt the actual smear itself didn’t look too bad.

I improved the timing so the smear had some actual speed to it. This was my first attempt at doing the grab. There was something stiff and un-natural with it looked currently so I went back and decided to start the movement from his shoulder instead of his elbow.

This looked worse, far, far worse. However I realised I was on the right track, the movement needed to start from his shoulder but it was angle itself that was off. The cat needed to swing his hand out and in for the grab to look more natural.  I was happy with the drawing of the rat being squeezed though so that didn’t change too much.

This looked so much better. I struggled for a good bit with getting the perspective on the arm right, eventually using my own hand as reference. I was happy with it at the time but looking it now the palm could probably curve in a little more at the section near the pinky finger. The smear looked well and I felt there was a nice quickness to the whole movement. I just needed to now clean up the animation and add the rat squeeze.

I was pretty happy with how this turned out, I really like the animation in that final grab. The squeeze is subtle but really helps sell the the feeling of the movement. I was initally concerned about how convincingly it would look with the two characters interacting since I’d never done it before but I’m happy with the final result.

The next stage was the rat being eaten and the cat being sucked back into the portal. I followed the original storyboard closely for these last two sections since it was pretty close to how I wanted the final animation to look, it just needed a little tweaking.

I liked the staging and anticipation of this first pass but felt the actual eating movement felt too fast. I decided to go back an add some ease in, ease out and a smear so I could get more ‘time’ out of the movement.

This looked a lot better. However in hindsight now I feel the change between the jaw open and the cheeks full is too extreme and could have benefited from an additional drawing before the full cheeks just to ease the animation in a little smoother.

The last step was sucking the cat back through the portal. I was happy with the drawings I had used for this section in my storyboard so I simply copied them for my key poses and added a few inbetweens.

I’m happy with the poses in this section but now I’m not sure about the timing, there maybe needs to be better anticipation to set the animation up more. Now it feels like it goes by just a bit too fast. However at the time I felt it would serve it’s purpose and I still needed to do all my blog work for the jam so I didn’t sweat the specifics.

Above is the finished uncoloured version of my JAM. Even though I hadn’t intended to colour the piece I realised I’d managed my time enough that I could get some colour in.

I liked how the colour looked, it certainly helped seperate the animation out from the background. I also had a go of working up the background into a more finished version.

I really didn’t like how the background looked once the two were put together. In fact I prefer the version of the animation with the rough background. I did the background in a bit of burnout just after finishing the animation and rushed through it. The line width needs admended, especially around the teleporter, it’s just too thick. The cables behind the cat are also extremely distracting and impede the clarity of the animations. Rather than complimenting the animation the background actively distracts from it, it’s a shambles. I’m not too surprised though, from the begining the background was always done as an after thought, the animation was my main focus but now it’s interfering with the final product.

So I’m going to scrap the background and submit the coloured animation with the rough background as my final piece. The background isn’t needed and is more a mess than a help.

UPDATE: Because I’m stubborn I took one last stab at the BG. I thinned the lines, added some foreground elements and changed the colour ro green. It was slightly rushed but it’s a definite improvement. I still think I’ll be submitting my BG-less animation as my final though.


Animation JAM: Production: Part 2

After taking on the feedback from Alec and Daryl I broke down the new elements I would need to animate:

  • Cheese teleporting.
  • Rat cheese reaction.
  • Teleport malfunction.
  • Rat react.

Since I would have electrical sparks for the teleporting and malfunction animation I was going to have do some research  into animating 2D lightning and explosion SFX. The Etherington Brother’s do a great series on how to think when your drawing and they had a post on their blog about lightning which I found incredibly helpful.

I followed a lot of these pointers when I was drawing my electrical effects, espeically the section about using squared off zig-zags do define the shape of my lightning and the section about drawing a guide when you create arcs. Since I had a good idea now on how to draw eletrical SFX I needed to figure out how to move it.

I found a page on the Sun & Moon studio site which included a fantastic guide to animating different kinds of lightning. I used a combination of their strike and pulasting examples to help guide me.

A tip on their page which I found really helpful was using a wave cycle during your eletrical arcs to give a sense the energy was traveling down the arc from point to point.

Another site I found was Flash FX Animation. While their page mostly focused on actual lightning bolts I found their break down of the lightning strike really useful, and his timeline breakdown helped me realise I needed to animate my SFX on ones to keep it organic and alive.

Unfortunately my finish export of the eletrical SFX didn’t have a BG set behind it for the full length of the animation so towards the end the BG suddenly cuts to black and we’re left with this:

Fortunately apart from the height of which the cheese originally appeared the eletrical SFX didn’t go through any changes so was able to re-export the SFX using my more recent animation file.

Once I had my cheese into done I moved onto the rats reaction. My original attempts of the reaction also lost their BG halfway so it’s impossible to make out what they looked like. This isn’t necessarily a bad thing as they looked absolutely terrible but I’ve decided to include one of the broken gifs as evidence.

You can’t really make it out but the rat blinks and opens it’s jaw drops in surprise. The timing for this was awful and the expression was awful. In hindisght this was likely because this section wasn’t part of my original storyboard and I didn’t design any expressions for it. Truthfully I should have taken the time out and experimented with some variations, instead of trying to push on through to the animation. Even just some sketches in a notebook would have made a difference but I had a lot more to animate and didn’t feel like losing the momentum I had picked up with the animation process. This is a mistake I won’t make again.

I decided to scrap the shock expression and go instead with a look of beguiled wonder. Since I had previously been visiting the Spongebob cartoon for earlier reference I choose to keep the style consistent and return to the show for my facial reference. I struggled for a long time getting the timing on the mouth right and looked at a couple of Sponegbob clips before finding the one blow; timetsape 5.40:

Once I had reference for his mouth I searched for reference I could use of his pupils dilating, I finally came across this clip from Adventure Time (2010) which I used a guide for my timing.

At the time of animating this I was content with the reaction and moved on, however looking at it now I see so many issues. I watched the Spongebob clip without sound and it’s only in hindsight now that I realised he isn’t actually mouthing ‘Woah’ but ‘super’ which might explain why the mouth movement looks so off on the rat, I also tried to copy the timing by watching the clip back frame by frame but I failed to watch it in realtime which I think is why the mouth timing seems strange. I did play around with the timing before settling on the current speed but I think now it still needs more tweaking.

The same can be said of the pupil dilate, there’s just something about it that feels so stiff and uniform. Now if I had the time I’d like to go back and take another stab at the rat’s reaction but at the time of animating it I was happy enough to move another the next section, which was the teleporter malfunctioning.

I returned to the reference I had gathered earlier for eletrical SFX and found some new reference for creating an explosion.

I also had a look at real mushroom cloud explosions but I eneded up not really using much real life reference since actual mushroom clouds move at a far difference pace due to the size of them. I did however use it to give me an idea of where the cloud tapers.

I was happy with the final outcome for the malfunction animation. The eletric is just three frames planned in reverse on ones. I like the little mushroom cloud explosion and how the cheese wobbles then breaks apart, howver I think it’s kinda hard to notice the explosion, it sort of disappears in the background and the viewers attention is fighting between it and the cheese but since it works to set up the cheese dissipating maybe it’s fine. Not all animations need to be the center of attention.

With the malfunction done the next step was the cat’s intro. This section I had a far clearer image in my head of how I wanted everything to move so creating it was actually a very straight foward process. I really wanted to capture that sense of a larger mass squeezing through a small enterance. I wanted the audience to feel the movement. This was tricky since I was trying to convey to the audience there was a lot of mass behind the portal without actually being able to show them. I had a look at reference from the Winnie the Pooh show (1988) and an latin american show called Pumpkinpuss and Mushmouse (1964).

The Winnie the Pooh clip turned out being the most help for timing and giving me an idea for how to work the mass. I ended up working the cat’s squeeze into two parts. The first part with his eye and the second being the cat’s face itself.

I’m mostly happy with how this turned out but I’m not quite sure about some parts. I really like the section with the eye, there’s a great sense of movement there but it sadly isn’t really carried over into the section with the cat, part of this I feel is down to the planning on the animation. To get a better sense of the cats face being squeezed through the hole the force of the movement should be coming from the centre of his face not his eye, I also think I would have benefitted from exagerating the final push more then have the cat bounce back into his neutral position.

The next stage was the rat’s screaming reaction to the cat. I had planned and prepared for this section as well so it was also pretty straight forward to work with. I still hadn’t quiet figured out yet how to animation so this process was mostly experimentation. I had a look at screaming reference from Courage the Cowardly Dog (1996) and some more Sponegbob.

https://www.youtube.com/watch?v=P0Z8ZPcuGeU&ab_channel=GFHype

The main area of movement I took away from these references was the mouth and tongue.

My first pass I thought was fine, but I wasn’t too sure about how the jaw moved. I decided in my next attempt to scale back the animation some more and just have his tongue move.

I liked how this looked, it gave more of an impression that there was a scream originality from inside his throat. However I felt like maybe I was pulling my punches here and could do more to sell the impression of the rat being afraid. I had another look at my reference and saw that they mostly featured the character ‘vibrating’ as they scream so I decided to stop being lazy and commit, which lead to this.

I was a lot more happy with this version, although watching the isolated animation now I still think I could have done a little bit more to make the shudder seem more alive, adding some bounce in the tail and ears I think would have been a nice touch. But as an end result it served it’s purpose in the grander scale of things.

Animation JAM: Production: Part 1

Now I had my pre production done I could start on the production side of things. I broke down what a list of what animation I needed.

  • Walk animation.
  • Rat: Idle to shock reaction.
  • Portal opening.
  • Cat appearing.
  • Cat Grab and Rat squeeze animation.
  • Cat eating animation.
  • Cat outro animation.

This was going to be the biggest solo animation I’d ever done before so this helped me compartmentalise what I was doing and break it down into sizable chunks.
I was confident with the walk animation since I had done one as part of my earlier excercises and had learned where I’d gone wrong before.

I still returned to Blair’s Animator’s Survival Kit (2001) for a point of reference before begining. I wanted to avoid following the Angry Animator’s walk cycle again and try to create a walk cycle that would be more unique to the rat.

Obviously the porportions of my rat were vastly different from Blair’s model but I was able to use his demostration as a guide when drawing out my key poses. I had originally toyed with the idea of trying a double bounce with the rat but as I researched further into it and saw it was used to convey a sense of confident pep I decided against it.

Not at all what I was after with the rat, so for now I just stuck with a basic walk cycle that I could change later.

I had a solid if somewhat stiff start with my first pass. I felt like I wasn’t getting a terrible amount of character through with his walk, he seemed to be walking with a purpose and I wasn’t getting any of his brainless persona. I had a look in the Survival Kit to see what Blair had to say. He mentioned how Art Babbitt would actually have Goofy’s feet turning the opposite way when he walked which was a nice idea but felt far too gloopy and too similar to the rubber hose style of animation that I was actually now trying to avoid repeating in my JAM.

I realised what had interested me about my earlier animation references was how compact and contained the characters body shape and silhouette were, obviously most of them were based on video game characters and had to remain inside a hit box so I didn’t want to copy that style exactly but I did want to keep a certain air of perky tightness with my animation.

But back to my main issue at hand, how to convey more character into the rat’s walk. I didn’t want to do the goofy walk so I deicded to hone in on the rat’s pudgy stomach.

From Blair’s advice I leaned the rat back, which instantly improved his walk.

Before I got any further in my walk animation I realised that since the rat was walking somewhere and was going to be interacting with a button I needed to at least get a rough layout of my background.

I pulled from the Post Human (2013) short for inspiration, it conatined a similar vibe of immoral experimentation in a large testing chamber that I wanted to replicate with my own animation.

I’ve included a screenshot in case you can’t get past YouTube’s age verification. Please excuse the gore.

I had really hated the teleporter design in my storyboard, I’d created it in a rush so I could focus on the storyboarding so when I had the chance I had a look at reference online to make a better one.

The underlying design appeared to be a circle platform with some modules sticking out either to the side or above. I wasn’t looking to break the mold with my own design, I really just needed something to sit behind my animation to give it a sense of space.

I was content enough with what I had here, big open test chamber and a teleporter. I included a load of wires to make the space seem less bare and to draw the viewers attention towards the teleporter platform. With my layout done I searched online for how to bring it into Harmony and create a panning effect. I found this tutorial which mentioned using pegs, the transform tool and keyframes to create a rudimentary pan.

I then imported my BG into Harmony and got this:

Once the BG pan was sorted I could return to my walk animation. I wanted to get a complete cycle of his walk before I added any secondary animations. I was also a bit unsure of how to stop a walk animation once I’d begun it. After speaking to Alec he said all I had to do was have the charcter do a smaller step before coming to a halt.

You can also see above the beginings of an eye blink. I remember being told before to make sure that your character blinks so they look alive and not just a static drawing, I also remember being told to have your characters blink before major movements. I instead choose to do the opposite since my rat had already done all his major movements and was now going to be standing still for the next section of the animation the blink would keep him looking alive and give me another opportunity to convey the rat’s brainlessness. I wanted him to have a slow delayed blink, something which would make him clueless and kinda brain dead. I looked at the goat king in Felix Colgrave’s Double King (2017) for reference. Timestamp: 1.42.

This was then my first pass at the eye blink.

I also attempted my first forey into smear animation with the arm pushing the button. Both looked awful. I wanted the button push to have a certain snappiness to it which didn’t work with the smear and the eye blink was just all wrong. I became interested in a section in Blair’s survival kit which mentions using overlapping forms to give the impression of more movement within an animation.

I decided to try this approach with the button push.

I was a lot happier now with both the button push and the eye blink. The overlap worked to give the me the snappiness I was looking for and I was able to fix the blink by correcting the timing and having the top eye lid come down slightly to meet the bottom eye lid to give a better sense of a blink.

With the start and finish of my walk cycle out of the way I moved onto secondary animations. Before I started on his stomach fat I decided to start by adding bounce to his ears, one becasue it was easier to do and two, the ears could then act as a guide for my timing when I started adding other secondary animations.

I was happy with the ears so moved onto the stomach. I found this gif online which I felt was a great example of a heavy set character walking,.

I noticed however that to replicate the waddle I would have to entirely redo my walk cycle and since I already had a lot more animation still to go I wasn’t keen on setting myself back that far. Instead I had a look again at how Blair had demonstrated using the stomach as a secondary action.


Above is my actual second pass and I really didn’t like how it looked. Obviously this is just a rough pass and isn’t synced properly but half way through I knew it wasn’t going to work, there was simply too much movement in the walk. Part of it might be because the stomach animation was too exaggerated but I still felt it just clashed with the ear bounce rather than complimented it. I was also intending to add a bounce onto the tail too so with the stomach included that would be three separate secondary animations on one walk animation. I’d made this overanimation mistake earlier with my walk cycle exercises so I wasn’t keen to repeat the same mistake twice. I decided to scrap the stomach bounce and focus on his ears and tails.

The first pass I did had his tail bouncing from the base which just looked cheap and wrong. I deicided to have a look at Brain from Pinky and the Brain since my rat had a similar tail shape.

I discovered they didn’t really put any movement into his tail. I knew I couldn’t get away with this on my animation so after a brainstorm and a chat with Sarah I decided to have his tail squash and stretch like an accordian as he walks.

This also felt like it was too overly animated and also didn’t really match the movement of his walk. Sarah had suggested I just animate the tip of the tail so I went back and gave that a go.

This version looked a lot better, it had just enough bounce that the tail didn’t look stiff anymore but was subtle enough that it wasn’t over animated.

After I showed my WIP in progress to my co-workers Alec and Daryl they commented that it was strange the rat was willingly opening the portal only for him to be killed by the cat. Originally the story was that he was an expendable lab rat being used by uncaring scientists in a test to see what was on the other side of the portal, of course all of this was backstory and wasn’t going to be explained in the animation. Truthfully I hadn’t put much thought into the narrative since it was only meant to be an animation exercise but I had to consider to how my audience would perceive what I was making.

Alec suggested I could improve the narrative by having the portal teleport in a block of cheese then malfunction and open a portal to the cat as an accident. They also suggested I include a sign in the background instructing the rat to push the button for cheese to give him some more motivation. I took on this feedback and decided to include it in the next stage of my animation.

Animation JAM: Pre Production: Storyboard

The next stage in my production was to start storyboarding. I’d storyboarded before using panels I’d drawn on Photoshop and wasn’t keen to try that pipeline again, instead I decided to download a trial of Storyboard Pro and give it a whirl. I knew from watching other people use the software that it’d allow me to work pose to pose easier. I’d never used storyboard Pro before but the layout was pretty straight forward and since I wasn’t going to be trying anything too technically advanced I made do with natural intuition and some starter tutorials.

Below is my pass at the storyboard:

This turned out better than I expected and the reaction from the class when I presented was positive. Undoubtly some of the timing will change. There’s a bit of overlap between when the cat emerges from the portal and the rat screaming. I’m not too sure about how the cat squeezes out of the portal, right now there isn’t a great sense of resistance but that’ll be an issue I solve when I start animating. All in all I think this gives me enough foundation to work with, now I just need to export it into Harmony and get to work.

Animation JAM: Pre Production: Cat Design

Along the way my idea for my Animation JAM changed slightly, instead of having a monsterous hand come out and grab the rat I decided to change it to the head of a monsterous cat which would grab the rat and eat him.

I didn’t spend as much time with this design as the rat mostly because I already had a strong idea of what I wanted the cat to look like so the design almost came to me instantly. I doodled a little sketch in my notebook based on some previous references from Tim Burton’s Alice in Wonderland (2010) and Behemoth’s Castle Crashers (2008).


Big eyes, big round head and lots of teeth.

His design didn’t change drastically once I brought it into photoshop. I only cleaned up the form slightly and brought his paws closer to the body to better match the idea that he would eb squeezing through the portal.
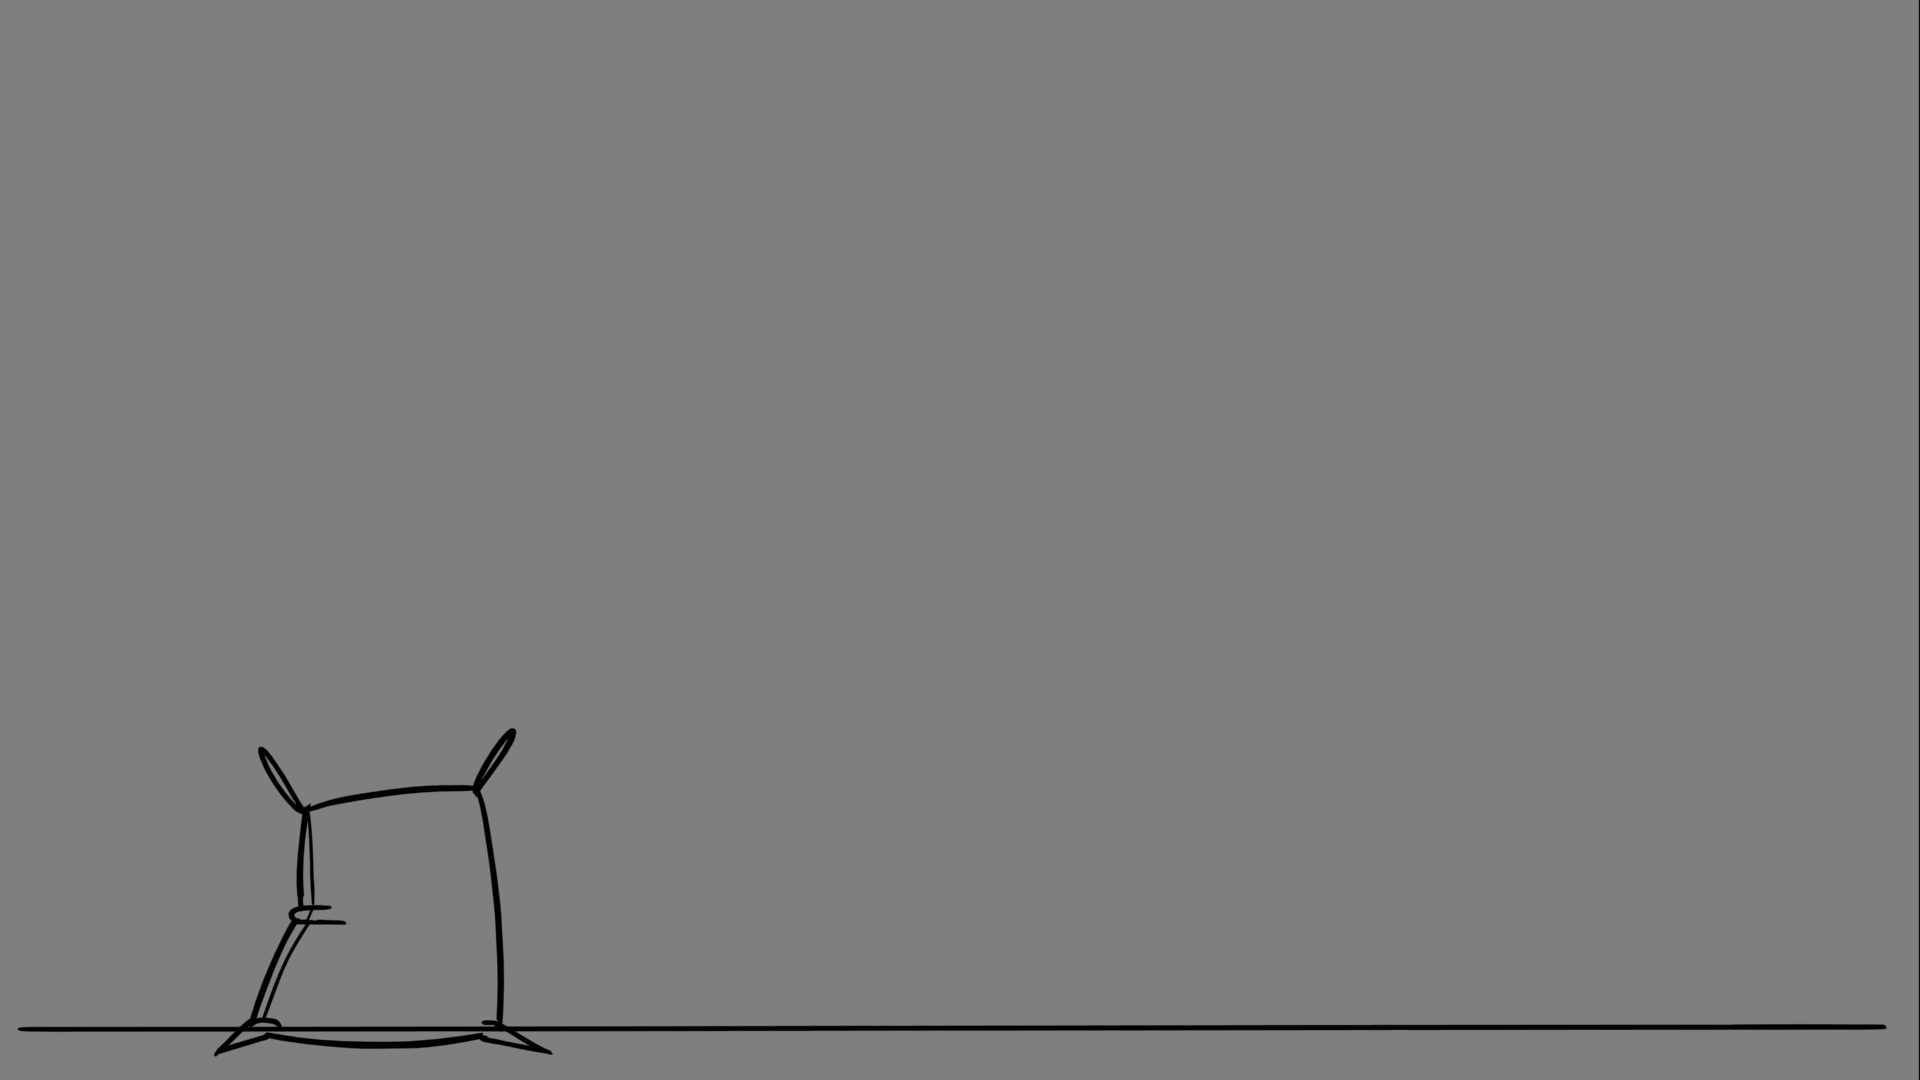
The next step was to take the cat into colour. I was never fully intending to colour my animation since it wasn’t a hand in requirement but if I had the time and energy I’d certainly give it a go.
For the colour palette I focused on a scheme that would invoke a weird and otherwordly feel.

I ended up liking number 3 the most. I felt the combination of the saturated green mixed with the dark pruple had a psychedelic and eldritch vibe that I felt would be perfect. I also feel I’ll make the portal green if I ever decide to colour the piece.

Animation JAM: Pre Production: Expression Sheet

With my rat design finalised I turned next to his expression sheet. I knew I only needed three main expressions beyond his neutral; fear, shock and squeezed.

I started researching expression sheets of various cartoons. I focused on shows that matched my art style and contained good reference of screaming characters.

Eventually I honed in on Spongebob Squarepants (1999), mostly because the style matched my rat design and mostly because I was able to find a surplus of reference from deviantart.

Before I began I also followed Stephen Silver’s advice on doing expression sheets, he reconmends taking a neautral expression of your character, turning down the opcacity and then drawing over it. This helps you keep the same head shape and gives you a guide to work off of.

I focused a lot on the shape of the mouth in regards to the rats silhouette and the slight variations in his eyes to convey different emotions. If he was sacred his eyes would become oval shaped, bulging out from the top to empathsis his fear. When he was being squeezed his eyes would become more circular to show the pressure he was experiencing. Again placement of his pupils would change his fear expression, closer together gave the impression he was looking at something directly while far apart gave the impression he was delirious with fear.

I liked how all these expressions turned out. I had a hell of a lot of fun designing them, especially when I started to push the expressions in the later sections and really exaggerate his mouth.

In the end I chose number 2 for my shocked. 5 for my fearful and 8 for my squeezed.

Animation JAM Pre Production: Initial Idea and Character Design

Our next coursework assignment was to use all the principles we had learned in the previous assignment and create a 10-15 second animation with the them of ‘WELCOME TO THE MULTIVERSE’.

I mulled over a variety of ideas for this before starting anything. As my industry experience was mostly in backgrounds I originally thought to focus on a simple looping animation with multiple changing backgrounds. This materialised as an idea about a boy scientist building a dimension hopper that was attached to his skateboard which he’d ride through several dimensions that would be represented by the changing backgrounds behind him.
The other idea was a guy waiting at traffic lights that exaggerated in his mind how long the wait was by imaging himself living numerous lifetimes. While this would also feature changing backgrounds but it would feature the main character changing with them, becoming an alternate version of himself each time. This idea didn’t see any visualisation but I did draw up several little sketches for the boy scientist idea below.


I didn’t really like any of the ideas I was coming up with for the boys design so I started playing around with the idea of making him an animal. I began by making him a gecko (see last image above) and then moved onto a fox and rat. I then experimented with maybe making the animation a He-Man spoof with a a super muscular man picking up a magic weapon and then being transformed into this nerdy weakling. I dropped this though as I felt this didn’t really represent the ‘multiverse’ theme very well.

As I mulled it over further I got a hit of inspiration from the rat design above. I decided my animation would feature a brainless cartoon lab rat sent in to activate a teleporter, from which then appears a giant monsterous hand which grabs him and pulls him in. Simple, straightforward but with enough potential for experimentation.

For the end of the first week on the assignment we had to present a short slide show detailing what the idea was going to be about, which you can find below:

https://docs.google.com/presentation/d/1hbElTapQTS5QLGNUcD3ift0QNqAWeCCDPNZuoTY7Cnc/edit?usp=sharing

Slides 4-5 show what I was looking at initially in regards to the visual design. I wanted a character that the had big head small body proportions with a graphic contempary art style. Bright colours and thick outlines.

In regards to how it would move I imagine it’ll look something like this Alien Homind trailer by The Behemoth (2020). Bright with slightly uneven thick lines and very obviously done digitally.

I also however found these in game animations for Wonder Boy: Dragon’s Trap created by Ben Fiquet (2017) which look fantastic. They’re a little more ‘traditional’ feeling that I’m intending to go for but I like the idea of experimenting with some smear animation if I can get an opportunity.


I came across these animations by BARRACREWDA (2021) and Ditte Wad, Vaibhav Keswani and Amanda J. Holm (2021) respectfully. The first by BARRACREWDA is what I imagine my final animation will actually look like in regards to a finished product since animation is a time consuming endeavor and colour isn’t required for the final hand-in.

https://www.instagram.com/p/CV50dCqKGVM/

I liked the looping aspect of Wad, Keswani and Holm’s animation which I think is something I’m going to try and replicate for my own. Idealy it’d create it as a loopable Instagram video but since the hand-in requirements specifically state 1920×1080 I’ll probably have to scrap that idea.

https://www.instagram.com/p/CVsV5iYKr83/

Now I had all my research gathered together I went back to my original lab rat design, which really didn’t read like a rat, especially in comparison with another rat doodle I did in the office. The design read too much like a fox or dog (not surprising since he was originally a fox) so I took what aspects I liked from my other rat design and started there.

If you’re ever going to do character design I highly reconmend Stephen Silver’s The Silver Way (2017). Silver was the character designer on Kim Possible and Danny Phantom and his book has wonderful pointers on how to approach character design. I followed a slight variation of what he discuss’ in his book. I knew my character was only ever going to be seen from one angle so I didn’t worry too much about his 3D form, in fact I actually steered into the flat 2D design.


To begin with Silver reconmends to start by drawing a dozen different rough thumbnails for the basic shapes of your character. Before I started my thumbanils though I gathered a few images of rats and tried to break down their silhouette down into recognisable and easily read shapes.

I looked at rats from different angles to give me more shapes to play around when I was designing.


I knew I wanted to keep close to the small body, big head proportions but I also knew the importance of experimenting with my designs so I pushed the design more between 8-9, which I unsurpsingly didn’t like. I tried to incoporate part of the rat’s back arch into the design but that ended up giving him a “Quasimodo” feel which I didn’t like, but since he was meant to be the first ‘explorer’ through an interdimensional portal I tried to mix the arch into his design as an air tank on some kind of space suit but the silhouette read too much like a dog.

Number 16 was close to being my favourite and I do actually like it as a design but there was something about number 6 which was closer to my original big head, small body proportion. Once I honed into on number 6 I then started doing thumbnails of variations based on that design.

Again, I knew my character was only going to be seen from one angle so I was free to really utilise basic shapes, I also knew this would help me a lot when I was actually animating the little guy.
In the end I choose number 23. It had the right proportions and shape design, plus I felt it was actual going to be practical in regards to what movements I had planned in the animation.

The next step Silver advises is to take your basic thumbnails and begin adding more detail, especially regarding the face.

Silver also reconmends having a strong idea of who your character is meant to be as your designing them. In the back of mind I always returned to the idea that this was meant to be a expendable brainless lab rat so I wanted to make sure his face conveyed that empty goofiness.

I knew a large part of the character’s brainlessness would be conveyed through the eyes. So my exploration of his face focused on variations between eye shapes, the distance of his eyes together and his the placement of his pupils. Characters with pupils closer to together appear more alert and focused but if you put them really close together it can make them look distracted or nose focused. Putting the pupils further apart makes a character look more ‘derpy’ or clueless. Lowered eye lids can also make a charcter look sleepy or dopey but if you’re not careful it’ll make them look confident or smug.

Eventually I settled on 8 and 9 which I singled out and experimented with further.

Here I was mostly playing around again with pupil and mouth placement. I knew in the animation the character would be required to scream and where his mouth opened could drastically effect his head shape. Since I was sticking to basic shapes for his design I decided to keep his mouth front facing rather than give myself extra hassle by placing it somewhere that would ‘break’ his silhouette. Eventually I settled on number 4, which I felt made him look subtly brainless but also had a bit of perky energy to him.


With 4 as my final design the next step was to take it into colours. I was originally inspired by the internet sci-fi horror forum SCP which uses death row inmates as expendable test subjects, so when I first started with colours I pictured him in an orange jumpsuit. When I showed it to people in the office though they found it confusing as to why he was in a prison jumpsuit, especially since the explanation wasn’t going to feature in the actual animation. I then started looking at the outfits of astronauts and test pilots. Eventually I decided on 4, a science blue with the classic lab rat white. I decided to off set the white by making his eyes and teeth a slight yellow rather than a purer white.

In conclusion I’m very happy with how this turned out. His design is bold, graphic and contains that big head, small body proportion that I was striving for from the begining. I also felt it would serve all my staging requirements I had in mind for the animation. The next step was to experiment with his expression sheets.

Week 5: Storyboards, Anticipation and Staging

For week 5 we focused on creating a a flour sack jump animation, this was the bases to teach us the fundamentals of storyboarding, anticipation and staging.

The first image that came to my head when I thought of doing the jump was a ballet ‘hop’, and not just one or them but two. A jump leading into a jump! I felt I would would have good live reference to pull from and it would be more interesting than the standard two legged hop you see in most student animation excercises.

I started by researching different types of ballet jumps. The hop I originally had in mind is called a sauté and while it is a movement that requires undeniable skill for a human to perform correctly, it isn’t quite as interesting for a flour sack. I eventually settled on combining a temps levé (a hop from one foot to the same foot) and a jeté (a jump or leap from one foot to the other).

I used the video below as reference:

From this I produced these storyboards:
They weren’t terrible, they showed obvious anticipation for the jump and the staging was clear. I however quickly feel out of love with them. I had attempted to combine different jump poses together into something that felt and moved unatural. The beauty with ballet poses also comes quite heavily from the positions of the arms, something which was hindered by the flour sack’s tiny exuses for appendages. Again I had to think about the constrains of the form I was working with and how best to utilise them. I remember earlier Sarah had compared the flour sack to a weird floppy ball and I decided to focus less on using human poses for the flour sack and think more cartoony and expressive with the flour sack.

I resolved to cut the animation back down to one jump and have the flour sack wind up like a spring as my anticipation and then release into a faux ballet leap.

I was a lot happier with this newer version, it was cleaner and more straight forward. When in doubt remember to K.I.S.S. Keep. It. Simple, stupid.
My feedback from Sarah was positive and she suggested I add another frame in the story board after the jump just to make it a little clearer what action he was doing.

With my new storyboard finalised I took it into Toon Boom and started animating.


The staging I felt was strong and the anticipation translated well into animation. I showed it to Sarah who gave me this feedback:


She suggested a ‘ta-da’ pose to give a nicer finish to the jump and pointed out that the rose dropping in overlapped with the sack animation so she suggested I withhold the rose toss for a few more frames. With this feedback I returned to my animation.

With the timing improved I started to refine the animation begining with the sack twist.

I struggled to find good animated reference for a twist animation. I was able to find this image from Nickolodean’s Spongebob Squarepants (1999) which gave me enough of an idea on where to start with the twist.

Spongebob’s form, while cartoony and stretchy didn’t quite match what I was trying to go for with the flour sack. After foolishly attemtping to act out the twist myself I eventually was able to use my hat of all things to give me a reference on how the flour sack, especially his bottom half should contort.

From here it was just about thinking of the mass and form of the sack. More loops made him taller and his mass on the top becomes smaller as his body contorts. I also played around with his momentum, slowing down his twist at the top and then unraveling quickly into the spin.


The next stage was to animate the twist. My first port of call for reference was Taz from Looney Tunes.

The newer versions of the spins appeared to be smear animations with the facial features and arms being smeared at the start of the spin until they devolve into smeared lines of colour.

This approach gives a stronger fluid spin and would have been my preferred approach but due to the lack of colour palette and facial features in the sack it would be impossible to produce a coherent smear.

The older taz spins were more based around numerous swift lines coalescing into a twister with identifying features like Taz’s eyes and legs appearing on random frames during the spin.

I briefly attempted this approach but once again the constraints of the sack hindered how much I was able to achieve artistically, without any readable features like eyes or limbs it was an incohesive mess. In the end I was only going to be able to utilise the swift line approach for the flour sack.

With the spin sorted the only part left was to clean up the lines and timing of the actual jump itself. I added a few frames to the top of the leap to help with the staging of the jump and slowed down the pacing of the descent to help with readability.

In conclusion I’m content with how this animation turned out. I’m proud of the twist before the jump, especially the slow down at the top of the twist but the rest of the animation is just fine, although the squash at the end of the jump could probably do with being more extreme. The animation’s not necessarily bad by any means but simply uninspiring and conventional. Of course this critique is however something of a conundrum, by trying to experiment and create something unique earlier I created a weaker animation with my first storyboard, it was only when I stripped it back to it’s fundamentals that I was actually able to create something of quality.