
The Beginning
When we got revealed this assignment I knew full well that I wanted to create a sword and shield for my project. At first I didn’t know what type of sword and shield I would want to make. I did think of a classical knight sword and shield, but it felt too basic. Then I thought of an Arabian Sword and Shield, however, i ended up making Roman sword and shield. So, with the idea in place, I began brainstorming ideas starting with a normal looking sword. For inspiration, I looked at the game called For Honor created by Ubisoft. One of the characters in the game called Centurion, has a lot of designs for the sword that I want to use for my inspiration for the sword. For the shield I just looked at a normal Roman shield.
Inspiration
https://www.rpnation.com/gallery/emperors-grace-gladius.33371/
https://www.rpnation.com/gallery/venomous-gaze-gladius.34898/

https://www.artstation.com/artwork/XXZen

https://www.pinterest.co.uk/pin/796996465283171733/

https://www.english-heritageshop.org.uk/collectables/roman-scutum-shield
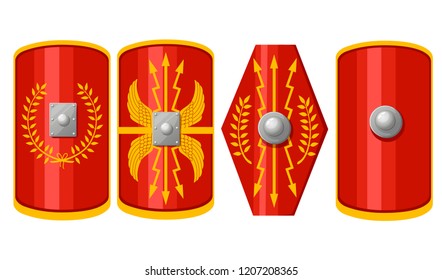
https://www.shutterstock.com/search/scutum
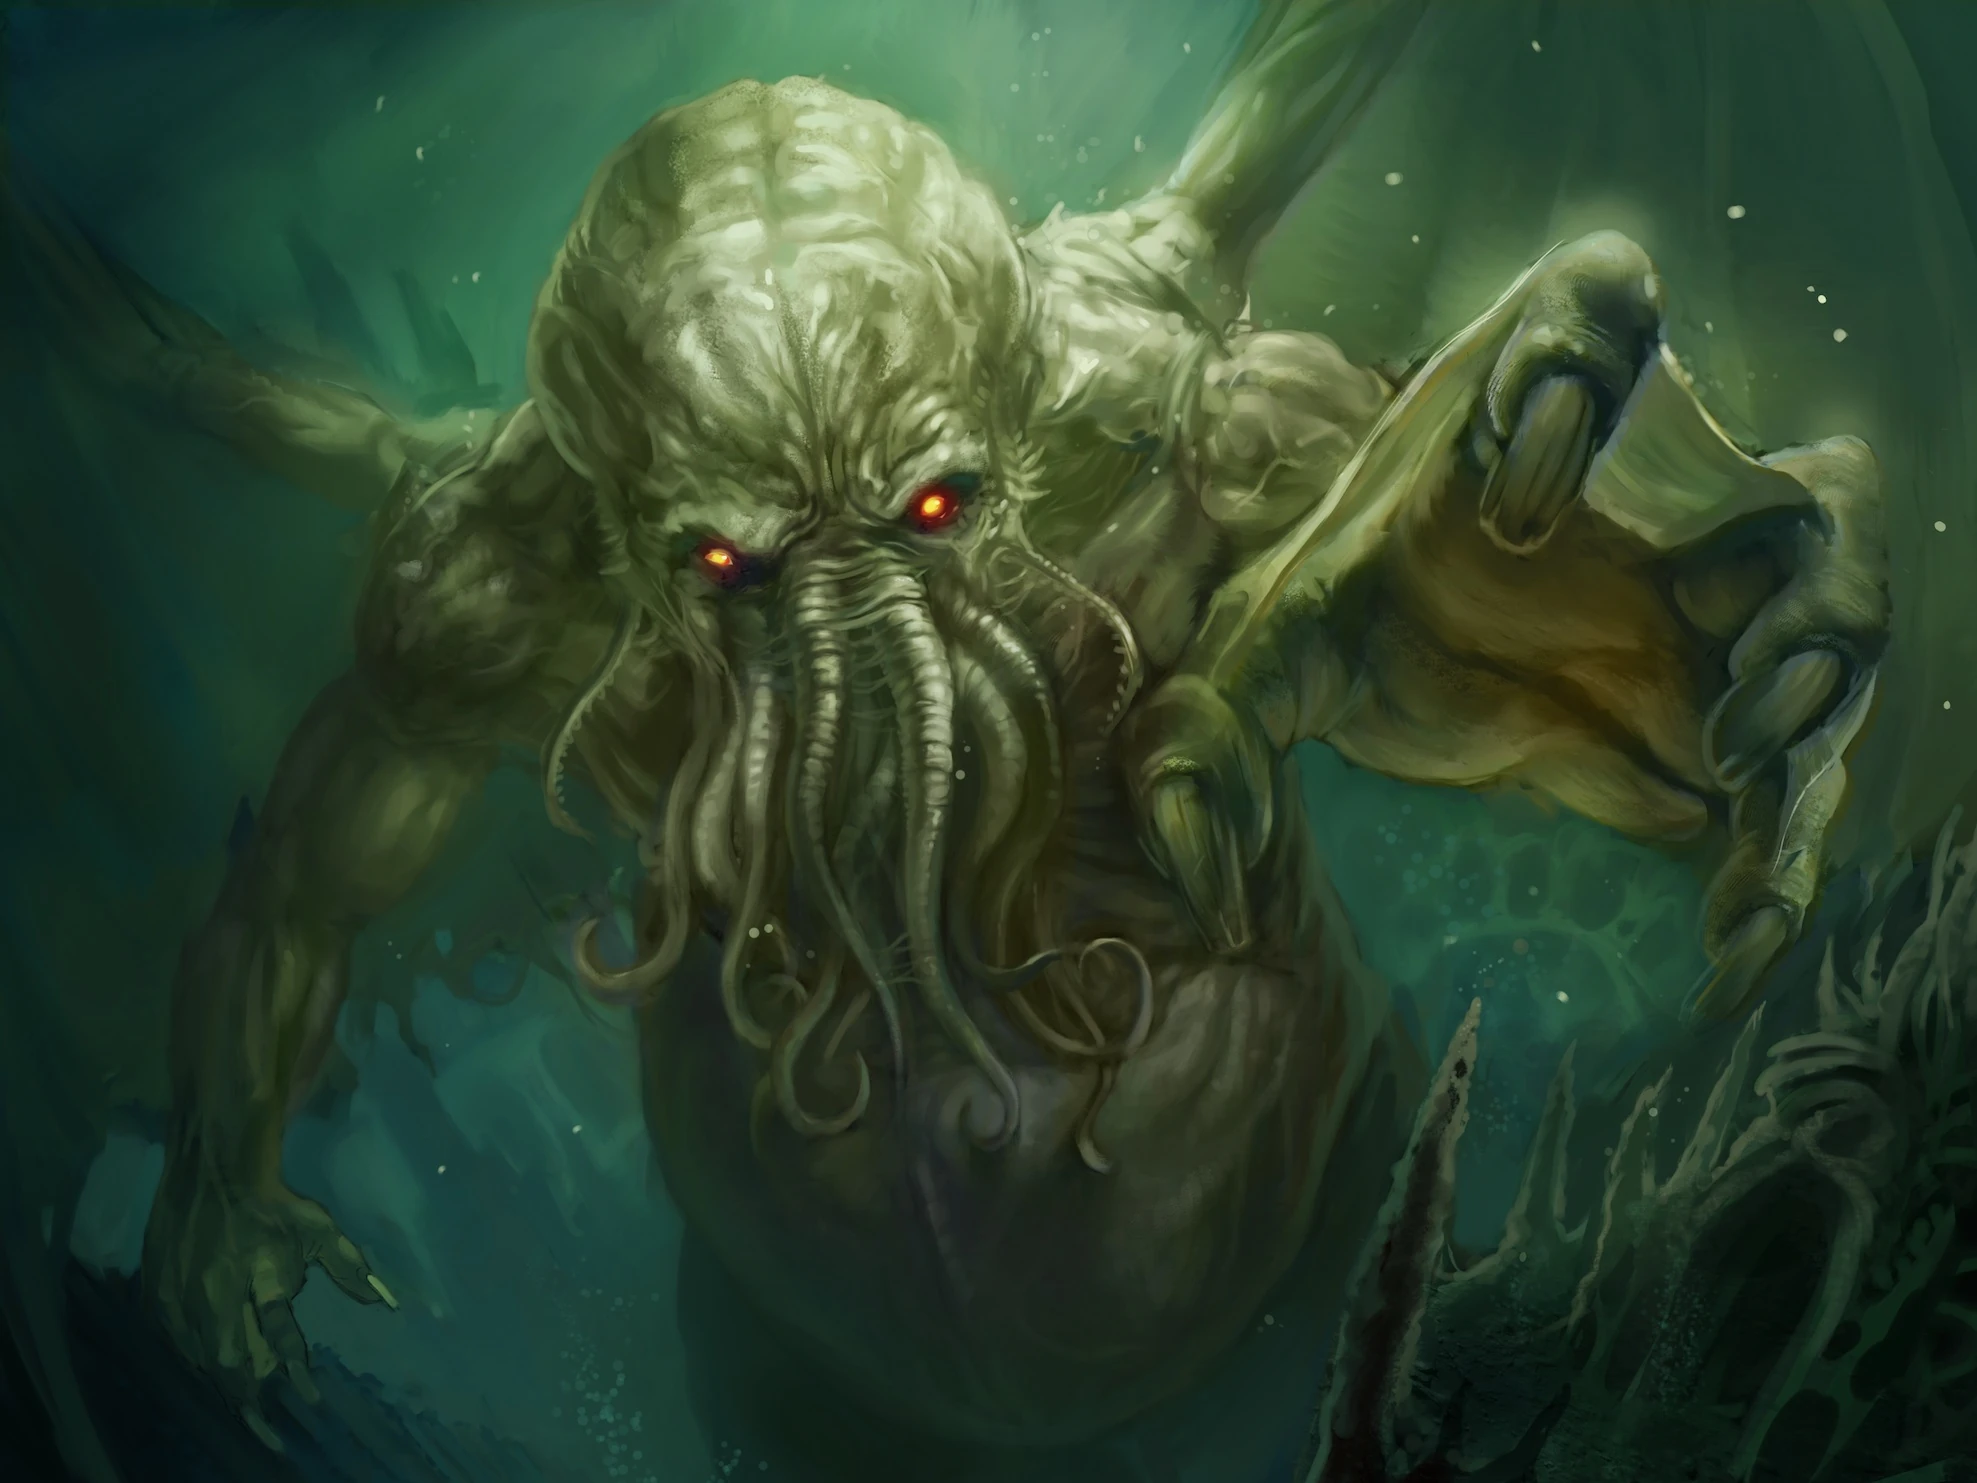
https://villains.fandom.com/wiki/Cthulhu_(Lovecraft)
This creepy Eye of Cthulhu resprite I made
byu/DefinityMod inTerraria
"In the middle of the woods there's a tree. A tree thats breathes and with eyes that see.
Its twisted bark like flesh and skin.
And sap like crimson blood."#inktoberday7 #drawtober2019 #Inktober2019 #trees #gnarled #day7 #drawtoberday7 #creepy #forest #art #artwork #exmor pic.twitter.com/GNchacUzGS— _Exm0r_ (@exm0r) October 7, 2019
Coming up with the idea
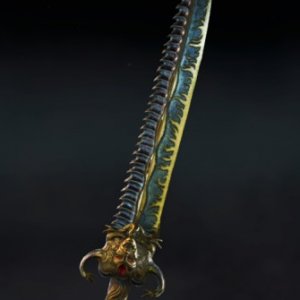
Now, that I got all the references I need, I began doodling ideas for the shield and sword on Clip Paint Stuido. At first I started very simple with designs similar to the real sword. Then I began delving into different style for the sword. For one of the sword I thought I would have a bird like aesthetic to the sword. However as I continued to doodle, one design stood above the rest. This design was the cthulhu one as I really digged how it looked and it creepy theme. Then I began working on the shield with the creepy theme in mind. I looked at things like cthulhu and creepy thing in general. Once I brainstormed some designs for the shield, I began finalizing the final look for both shield and sword by adding a lot more detail to it. Like the veins on the sword and shield merging with the steel. Afterwards these images are gonna be exported for it to be used in Maya.


Starting to Model
When opening Maya, I had to first set up the project folder to make it easier for me to sort out the object. Once it is done, the references are being put in Maya by the use of a plane with a lambert texture so I can see the ref and apply it as a texture by clicking onto the squared checker box and then selecting the file from the new window. This will allow me to have the reference up while I model.


Then I started working on the head by spawning a sphere to create the base for the head. I used the reference image to make sure that the head is accurate by prompting it in front of the page and by using the different camera perspective angles. Not only that, I began on working on the base of the shield by spawning a cube and using the resize tool by pressing R on the keyboard to make it in the form of a shield and then I positioned it close to the sphere. Lastly, I went on deformed with my shield selected, and went onto bend. This allows me to bend the object in anyway I wanted. To get the curve of the shield, I went onto the attributes tab on the right side of the screen with the object selected and used it’s slider to get the desired look of the shield.


For the tentacles, had to use a cylinder with a low division to them by going into the Attribute editor and changing how many divisions are on the shape. I also copied two extra cylinders with the exact same attributes just make different variants of the tentacle. So then I selected Create, Curve Tools and onto EP Curve Tools. With this I can create a guiding line for the cylinder that I will be extruding to create the tenatcle. Once the path was done, I selected the top face of the cylinder in Face mode by holding and releasing right click onto face and selecting the curve in Object mode while holding Shift. I afterward pressed Ctrl+E which put to Extrude Mode. Now I had a smaller panel which allowed me to control how many divisions the object will have by dragging left or right with the left click. Once done, I selected both of the objects and went onto Edit, History and delete so I am able to move the object around and do whatever I want with it without it distorting. Then repeated the process for the second and third cylinder. With all the variations done, they were moved to the head. Once there I copied them a few more times with variations in size.


Now that I got the structure of the model, now I went and started the sword model with a similar way of setting up the reference first. For the blade, I took a square and flattened it with the resize tool. Then I grab the cut tool holding shift and right click and releasing the buttons onto the cut tool logo. With it, I cut it in the shape of a blade and after the cut, I selected everything beside the blade and deleted it to get the shape by using face mode.


For the base of the sword, I used a sphere and resized to match the reference. Then I created the curves and cylinders for the sides of the object alongside extruding it and copying the same shape and placing them in the right spot. For the handle and the bottom part of the handle I used an elongated cylinder and a ball. Then the objects were combine along side the blade and handle. Lastly I wanted to make sure that the sword looked like it was actually held together by the handle. So, I spawned a cylinder, used the cut tool to make the shape and deleted the top of it and resized it to fit with the sword.


Online Meeting
On the 22nd of February, the class was able to have a one to one session with an 3D Modeler from the Animation Industry to give us tips on how to approach our project. So when I had him, the person explained that the idea was too ambitious and to complex due to me not having enough knowledge in 3D sculpting. He said for me to try it out and see if I can manage to make it. After that meeting, I messed around with the model. However, I didn’t liked how it looked and had to completely scrap the Cthulhu plan. While it was a bit sad to see it not work, I will approach this idea in the near future.

Back to the Drawing Board
So I had to bring this back to the drawing board and look at the options that I had left. In the end, I settled on this design as I thought it had a really nice charm while also feeling somewhat realistic. Now it was time to put this reference in Maya.


Starting to Model Again
For the handle, I spawned a sphere and cut the top and bottom side of the sphere and use the bridge tool to fill the negative space from the top of the screen. Then created a cylinder and stretched to create the handle while also expand the top of the cylinder using the vertex points and the resize tool. For the bottom of the handle, I used a cube and stretched the vertex point at the center of the cube to create a spike.


For the blade, I used a plane, use a cutting tool, delete the sections around the edges in the shape of the sword, create extra polygons using that same tool so when I am adding texture on the object it doesn’t lose details and also extruding it to give the object mass. Lastly I created the side accessories of the handle by using squished cubes to create the gold rims for where the rubies will be placed. For the rubies I did the same tactic but used vertex points to create the sharp look of the ruby.


For the shield, I had to use a cube and reshaped it to look like the base of the shield. Then I used the cut tool to mark the edge the shield and then selected the faces of the frame and used extrusion to give it depth. Afterwards I used the Bend option to give a curve to the shield. Then I summoned circle to create the front of the shield. Then I used the face mode cut the circle in half, selected the side edges and extruded them to make it look like it was forged onto the shield. To enhance this idea I used low poly cylinder to look like it was screwed onto the shield. For the back handle, a cube was spawned and had to use the resize tool to get it the right length of the handle. Then used a mixture of the cutting tool and extrude to make the rest of the handle. Lastly I summoned a sphere , made it smaller with the resize tool, but it at the back of the shield where the handle is, and use boolean to create a small in the shield.


Now, it was time to start working on the UV map of the object. Firstly I opened the UV Editor through the UV section at the top of the screen. This will open a window with the layout of all the faces of the object. Then I selected all of the UV and deleted them so I can rearrange the UV maps by selecting faces on the object and hit create on the UV tab to make the surface of the texture. When working onto the UV maps I also use tools like stitch and cut which can be found on the right side of the UV Editor window. The same process was made for the sword as well.


Once those UVs were put in place, I had to make sure that each of the objects had different materials placed on them before being prepared to export them into Substance Painter. The reason being that it would help me organize the painting layers automatically and make no mess when trying to paint on it. Went onto, File and Export which brought up a window where I can save my file. The file type I saved it as was FBX. Before putting it in the software, I wanted to test sketchfab to see if there were any mistakes or issues with the objects. It ended up looking good. So I press forward.
Work in Progress Model
Paint Time
Once the program opened, I went onto File and New. This prompted a window where I put my model alongside the preferences that I needed to put in for the model. When the settings were right, I pressed create. From here the process beings to feel similar to Photoshop in the sense of how you draw on something. The second image was a test where I brought together the two models and to see what would happen. However for some reason both would have a problem and had to separate them and re put them in substance painter.


Now that the textures are done, I Exported them through file and export texture, which prompted a new window that allowed me to save it in the proper location and also to choose the file type. After making adjustments to it, I exported the model and submitted it to the website and corrected any mistakes in the texturing before uploading it.

Here is the final result:
Overall
I am genuinely pleased with how it turned out even if it meant that I had scrap the old idea. What I really love about this model is the pattern on the shield alongside the metal texture and the tiny scrapes that are on the model. What i didn’t like about my model was the sword as I felt like I could have added something extra to the model. I really enjoyed this exercise and I would love to return to this exercise again some time soon. If I ever get to do this again I would try to make the model look interesting with the original while also managing my time properly to get the task done. Also feel much more confident in using Maya than I was before as back when I started this I had little to no knowledge on how to model and it was quite a daunting task at first before doing this. Now I am much more confident in my skills.
